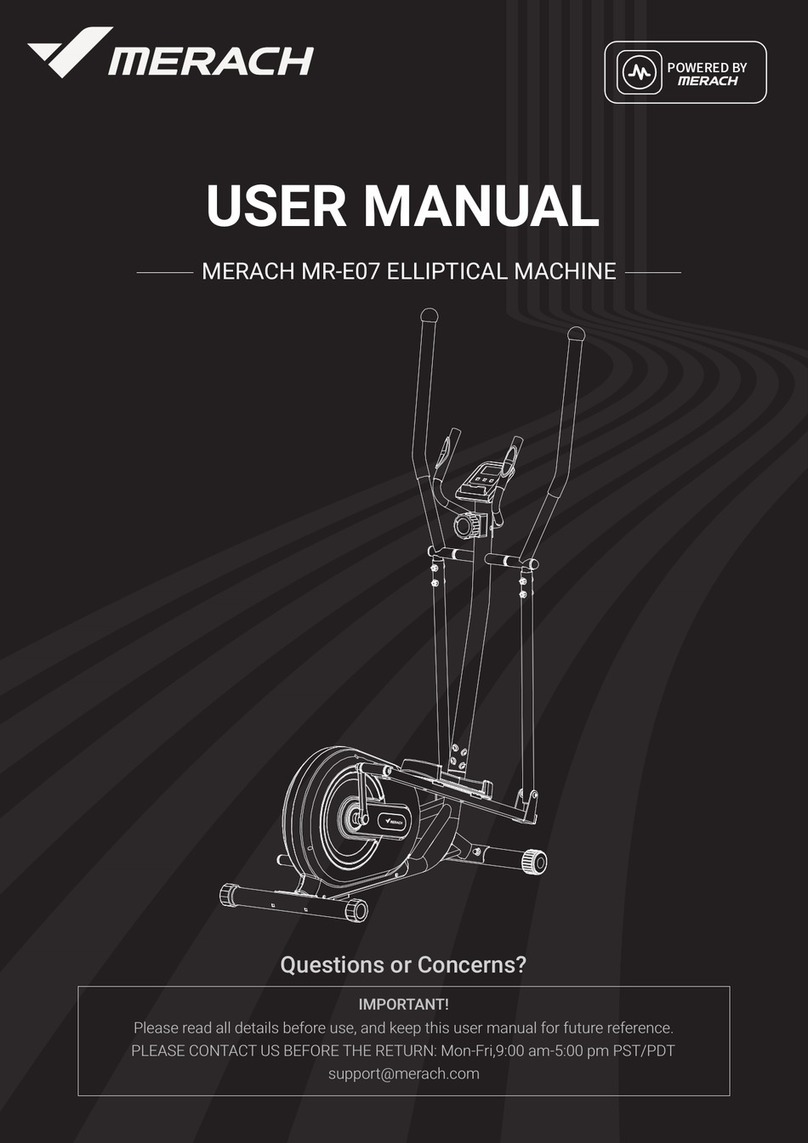
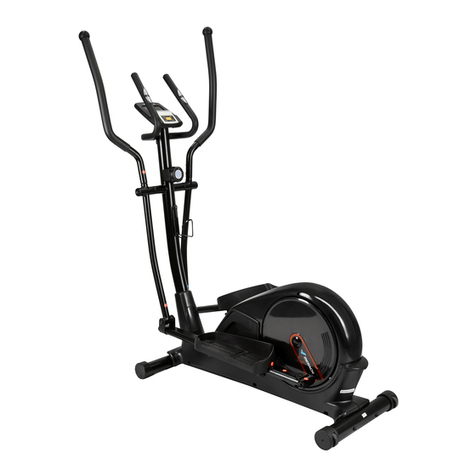
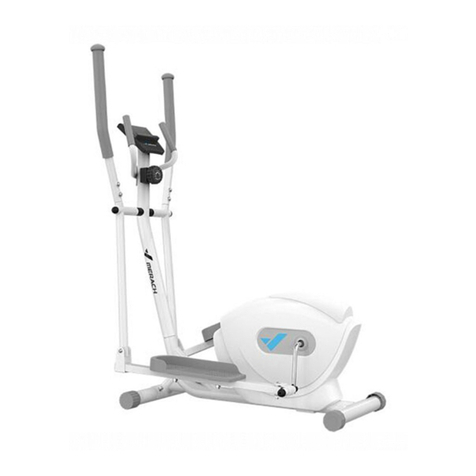
Merach MR-526D User manual

MR-526D
ELLIPTICAL TRAINER
INSTRUCTION MANUAL
Mail:service@merach.com
Web: www.merach.com
Manufacturer: Zhejiang Yulu E-commerce Co., Ltd.
Address: 298 Weiye Road, Binjiang District, Hang-
zhou, Zhejiang Province, China

MR-526D Elliptical Trainer
Instruction Manual

Exploded Drawing

NO Product Name Specification
Material Qty
1 meter 1
2 handle pulse sensor 2
3 Handle Bar
Φ25 weldment 1
4 Self-tapping screws
M4.5*25 6
5 Half round end cap
Φ25 PP 2
6 Foam
Φ25*3T*500mm HDR 2
7 End cap
Φ50*32 PP 2
8 Foam
Φ32*3t*57OMM HDR 2
9R left arm
Φ32 1
9L right arm
Φ32 1
10 Coated Allen Bolt
M8*20 6
11 Spring washer
Φ8 10
12 flat Washer
Φ8*Φ36*3 2
13 Nylon bushing
Φ18.8*Φ38 PA+MnS2 4
14 Arc washer
Φ8*Φ19*1.5T 12
15 Umbrella head hexagon screw
M8*20 10
16 Washer
Φ19.5*Φ38*0.5 2
17 Big umbrella head screw
M5*12 4
18 wire plug
Φ12 Hardness 55-60 degrees PVC 1
19 Nylon bushing A
Φ19*38 PA+MnS2 2
20 Heartbeat wire
650MM 2
21 axle
Φ18.8*354.2MM 45# 1
22 Umbrella head hexagon bolt
M10*78 2
23 Tube Spacer
Φ14*59 2
24 Bushing
Φ32*14 PA+MnS2 4
25L left swing bar weldment
Φ32*580MM weldment 1
25R right swing bar weldment
Φ32*580MM weldment 1
26 flat Washer
Φ10*Φ19*2 2
27 nylon nut
M10 lower swing tube 2
28 Bottle holder
TC-F01 pp 1
29 Big flat head screw
M5*15 2
30 Upper Support
Φ60*1.5T*985 weldment 1
31 middle wire
1050mm 1
32 bottom wire
850MM 1
33 Oval plug
30*60 PP 2
34L left pedal bar
30*60*780MM weldment 1
34R right pedal bar
30*60*780MM weldment 1
35 Carriage bolt
M6*50 4
36L left pedal PP 1
36R right pedal PP 1
37 flat Washer
Φ6*Φ14*2 4
38 Spring washer
Φ6 4
39 Small knob
M6 internal teeth ABS 4
40 flat Washer
Φ8*Φ24*2 2
41 Plastic Bearing
Φ16.3*22.4 PA+MnS2 4
42 Umbrella head hexagon bolt
M8*50 2
43 bushing
Φ11.5*Φ8*15 4
44L
left cardan joint weldment 1
44R
right cardan joint weldment 1
45 flat Washer
Φ8*Φ16*1.5 2
46 nylon nut
M8 2
47 nylon nut
M10*1.25 1
48 Arc Washer
Φ17.5*Φ22*0.5 1
49 fly wheel
Φ250*34 1
50 Bearing
6000-2RS 2
MR-526D Spare Parts List

51 Nut
M10*1.2 2
52 Hexagon nut
M10*1.25 1
53 Fly Wheel Alex
M10*1.25*115MM 1
54 Chain adjustable set 2
55 Plastic Cover PP 1
56 Sensor wire
350MM length 1
57 Washer
Φ17*Φ22*2 2
58 C shape Clip
Φ15 (axle Φ17) 1
59 DC wire
400MM length
60 Main frame welding weldment 1
61 C shape Clip
Φ10 3
62 Belt Wheel
Φ37*20.5L 1
63 axle
Φ10*42mm 1
64 Magnet
40*25*10MM S/N 10
65 Nut
M6 2
66 Screw
Φ6*80 1
67 rope
580MM 1
68 Washer
Φ8*Φ16*1.5 1
69 Washer
Φ6*Φ14*1.5 3
70 nylon nut
M6 1
71 Spring
Φ1*Φ12 *60 1
72 Magnet set weldment 1
73 axle
Φ12*33.2 1
74 Spring Washer
Φ6 2
75 Umbrella head hexagon screw
M6*15 2
76 Coated flange nut
M10*1.25 2
77 Crank weldment 2
78 Self-tapping Screw
M4.5*15 8
79 Bearing
6003 2RS 2
80 Washer
Φ17*Φ22*1 1
81 Wave Washer
Φ17.5*22*0.5 1
82 Belt Wheel
Φ260*17.1 holes 4 holes Aluminum plate 1
83 Belt
460J6 1
84 Arbor
Φ17*134mm weldment 1
85 Hexagonal screw
M8*12 4
86 Front Stabilizer Cap
Φ60 ABS 2
87 Front Stabilizer
Φ60*380MML 1
88 Rear Stabilizer Cap
Φ60 twelve corners ABS 2
89 Rear Stabilizer
Φ60*485MML 1
90 Carriage Bolt
M8*70 4
91 Crank Cap PVC 2
92 Round Cover HIPS 2
93L left chain cover HIPS 1
93R right chain cover HIPS 1
94 Drill screw
M5*20 9
95 Sealing ring
Φ60 1
96 Front Plastic Cover HIPS 1
97 Self-tapping Screw
M4.5*25 6
98 Adapter 1
99 Allen key wrench
5mm 2
100 Combination Wrench
10.14. 17.19 1

90
89
87
88
60
STEP 1
1. Fix the rear stabilizer caps(88) On the rear stabilizer (89 )
2. Fasten front stabilizer (87) with 2 carriage bolts (90) from
the underside of stabilizer.
3. Fasten rear stabilizer (89) with 2 carriage bolts (90) from
the underside of stabilizer.

32
96
31
30
60
STEP 2
1. Connect lower wire (32) and upper wire(31), make sure
there is no looseness
2. Put upper support (30) into main frame (60) through
plastic cover (96).

60
R(Right)
60
L(Left)
STEP 3
1. Lock the left cardan joint(44) on the left pedal axle (77)
with hexagon socket screws (10), spring washers (11) and
washers (40) , tighten it with an Allen key (99).
2. The Installation method on the right is the same as that
on the left.(Note : use the right cardan joint)

STEP 4
1. Fasten lower swing bars (25R/25L) with axle (21) from
upper support (30) and secure it with Washer(12), Spring
washer (11), and Allen bolt (10) tightly.
2. The Installation method on the right is the same as that
on the left.

14
15
STEP 5
1. Fasten upper swing bars (9R/9L) with lower swing bars
(25R/25L) and secure them with washer (14) and Allen bolt
(15).
2. Lock the pedal bar(34L) in the left cardan joint(44) with
bolt (42), washers (45) and nylon nut(46) , tighten it with an
Allen key (99).
3. The Installation method on the right is the same as that
on the left.

STEP 6
1. Fasten right pedal (36R) with carriage bolts (35) from the
right pedal bar (34R) and secure it with washer (37), spring
washer (38) and knob (39) tightly. Do the same for the left
pedal.

STEP 7
1. Put upper support (30) into main frame (60) through
plastic cover (96). And secure them with spring washer(11)
& curved washers (14)&allen bolts (15) tightly.Fix plastic
cover tightly with main frame (50).

STEP 8
1. Fasten the Bottle Cage (28) to Upper Support(30)and
secure it with 2 Screw(29).
2. Fasten handle bar (3) with Allen bolts (10) and washers
(14) from upper Support(30).
3. Remove the fixing screw (17) on the back of the meter(1) in
advance, Connect hand pulse wire (20) and meter wire (31)
with meter (1).
4. Fix meter (1) into the bracket of upper support with 4
screws(17).
Now, your machine is ready to use.

STEP 9
1. Find the adapter (98), plug in power supply from the back
of the elliptical machine and it can be used after power on.

Electronic Displayer Instructions
Fuction
1. Program: 21 in total
Remarks:
(1) The WATT window of the instrument without WATT function is not displayed.
(2) The displayer without WATT function has only 20 programs and no watt control program.
A: 1 manual program(Figure 1)
Figure 1
Figure 2 Figure 3
Figure 4 Figure 5
Figure 6 Figure 7
B: 10 automatic programs P1~P10 (Figure 2~Figure 11)

Figure 8 Figure 9
Figure 10
Figure 12
Figure 11
Figure 13 Figure 14
Figure 15 Figure 16
P1: ROLLING P2: VALLEY P3: FATBURN P4: RAMP P5: MOUNTAIN
P6: INTERVAL P7: CARDIO P8: ENDURANCE P9: SLOPE P10: RALLY
D: 4 heart rate control programs (Figure 13~Figure 16)
55%H.R, 75%H.R, 90%H.R and TARGET H
C: 1 WATT control program (Figure 12) (if this function is available)

E: 4 user-defined programs CUSTOM1~CUSTOM4 (Figure 17~Figure 20)
F:1 fat measurement program FAT (Figure 21)
2. The user's gender, height, weight, and age can be memorized after power off.
3. Use dot matrix characters to display main information.
4. Simulate ECG to display heart rate information.
5. SPEED (RPM), TIME, DIST, CAL, WATT (if any), heart rate PULSE, load value LEVEL are
displayed simultaneously in different areas.
6. The displayer shuts down automatically if there is no button operation for 4 minutes at
that time no speed signal and heart rate signal. But the current display state information
is saved, and the load is reset to the minimum. Operate any key or input speed signal, the
displayer will start automatically.
Button
1. ENTER key :
In the stop (STOP display) state, press the ENTER key to enter the function program and
set the function value. The selected window will be flashing.
Figure 17 Figure 18
Figure 19
Figure 21
Figure 22 Figure 23
Figure 20

A. When selecting the function program, press the ENTER key to confirm the program you
want to exercise.
B. When setting the function value, press the ENTER key to confirm the set value.
1. In the running (START display) state, press the ENTER key to select the speed window
display speed or RPM or automatic switching. In any state, keep pressing the ENTER key
for 2 seconds to reset the displayer to the initial state.
2. START/STOP button :
Press the START/STOP key to start the program, enter the running (START display) state or
stop the program and return to the stop (STOP display) state. In any state, keep pressing
the START/STOP button for 2 seconds to reset the displayer to the initial state.
3. UP adjustment key:
In the stop (STOP display) state, when the character window is flashing, press the UP key
(or clockwise rotation) to select the program upward; when the parameter window is
flashing, press the UP key (or clockwise rotation) to adjust the parameter upwards.
In the state of running (START display), press the UP key (or clockwise rotation) to adjust
the load upwards and increase the training resistance.
4. DOWN adjustment key:
In the stop (STOP display) state, when the character window is flashing, press the DOWN
key (or counterclockwise rotation) to select the program downward; when the parameter
window is flashing, press the DOWN key (or counterclockwise rotation) to adjust the
parameter downward.
In the state of running (START display), press the DOWN key (or counterclockwise
rotation) to adjust the load downward and reduce the training resistance.
5. Heart rate recovery button RECOVERY:
When the heart rate is displayed, press the RECOVERY button to perform the heart rate
recovery test.
During the heart rate recovery test, press the RECOVERY button to exit the heart rate
recovery test.
6. Reset button RESET (if there is this button):
When setting a value, press the RESET key to reset the currently set value to zero.
In any state, press the RESET button for 2 seconds to restart the displayer.
Remarks:
1. The table pressing button with touch button function is actually touching the button,
and the UP/DOWN button is actually touching or rotating or sliding fingers to realize the
button function.
2. Whether to use the button method or the touch button rotation method depends on
different models.
3. Please press your fingers on the marked area to prevent accidentally touching other
buttons.
Operation
1. Connect the power of the displayer
Plug one end of the power adapter into the AC power socket, and plug the other end of
the output into the power interface of the displayer. At this time, the displayer emits a
“BEEP” sound for 1 second and the full display enters the initial state of the displayer.
(Figure 24)
2. Age setting (if this function is available)
When the LCD displays the AGE after the displayer is powered on, it indicates that the
user's age needs to be set first.
A. Press the ENTER key to enter the age setting. Press the UP and DOWN keys to enter the
MANUAL program.

B. The age value flashes, press UP, DOWN (or rotate or slide) to set the age of the user,
press ENTER to confirm, then press UP, DOWN to enter the MANUAL program (Figure 25)
Note: When the age setting is wrong, the heart rate percentage indicated will be wrong
either, so you need to set an accurate age.
3. Program selection and value setting
MANUAL program and pre-set program P1~P10 operation
A. Press the UP and DOWN keys to select the program you want to exercise. (Figure 26)
B. Press ENTER to confirm the selected program and enter the time window setting state.
C. The time reading flashes, press the UP and DOWN keys (or rotate) to set the desired
exercise time, and then press the ENTER key to confirm. (Figure 27)
D. The reading of the distance flashes, press the UP and DOWN keys (or rotate) to set the
desired distance value, and then press the ENTER key to confirm. (Figure 28)
E. The calorie reading flashes, press the UP and DOWN buttons (or rotate) to set the
energy you want to exercise, and then press the ENTER button to confirm. (Figure 29)
F. Press the START/STOP key to start exercise. (Figure 30)
Figure 24
Figure 26
Figure 25
Figure 27 Figure 28
Figure 29 Figure 30

Watt control program WATT (if this function is available)
A. Press the UP and DOWN keys (or rotate) to select the watt control program WATT
B. Press the ENTER key to confirm the selection of the Watt control program and enter the
time window setting state.
C. The time reading flashes, press the UP and DOWN keys (or rotate) to set the desired
exercise time, and then press the ENTER key to confirm.
D. The reading of the distance flashes, press the UP and DOWN keys (or rotate) to set the
desired distance value, and then press the ENTER key to confirm.
E. The calorie reading flashes, press the UP and DOWN keys (or rotate) to set the energy you
want to exercise, and then press ENTER to confirm.
F. The watt reading flashes, press the UP and DOWN keys (or rotate) to set the watt value,
and then press the ENTER key to confirm. (Figure 31)
G. Press START/STOP to start exercise
Remarks: Watt is determined by torque and RPM. Different loads and different RPM
calculate different watt values. In the watt control program, watt is a constant quantity.
That is, if you step on fast, the load value will decrease; otherwise, the load value will
increase. In short, it will make you exercise at the same watt value.
Heart rate control program: 55% H.R, 75% H.R and 90% H.R
People of different ages have different maximum heart rates. This type of program uses
55%, 75% and 90% of the maximum heart rate to control exercises.
A. Press the UP and DOWN keys (or rotate) to select a heart rate control program.
B. Press the ENTER key to select a heart rate control program and enter the time window
setting state.
C. The time reading flashes, press the UP and DOWN keys (or rotate) to set the desired
exercise time, and then press the ENTER key to confirm the set value.
D. The reading of the distance flashes, press the UP and DOWN keys (or rotate) to set the
distance value you want to move, and then press the ENTER key to confirm
E. The calorie reading flashes, press the UP and DOWN buttons (or rotate) to set the energy
you want to exercise, and then press the ENTER button to confirm.
F. The age reading flashes, press the UP and DOWN keys (or rotate) to set the age of the
user, and then press the ENTER key to confirm (as shown in Figure 32)
G. The target heart rate control program prompt flashes, and the target heart rate
corresponding to the user's age is displayed in the heart rate window.
H. Press the START/STOP button to start exercise.
Figure 31 Figure 32
Table of contents
Other Merach Elliptical Trainer manuals
Popular Elliptical Trainer manuals by other brands

Horizon Fitness
Horizon Fitness Andes 101 owner's guide

Spirit
Spirit Spirit SPT0005 owner's manual

Vision Fitness
Vision Fitness X1400 owner's guide

York Fitness
York Fitness York 2100 Exercises & instruction manual

Skandika Fitness
Skandika Fitness ARES Assembly instructions and user guide
Insportline
Insportline IN 5559 user manual
Reebok
Reebok RBEL73580 user manual
NordicTrack
NordicTrack NTEL7506.0 user manual
Vision Fitness
Vision Fitness S70-02 Service manual
Image
Image 7.8 Elliptical Manuel de l'utilisateur

Octane Fitness
Octane Fitness CROSS CiRCUIT PRO KIT Assembly and operation instructions
Spirit
Spirit Empire SPT0045 owner's manual
