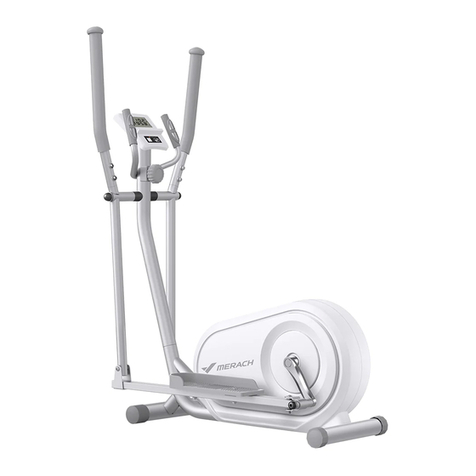
Merach MR-E07 User manual

USER MANUAL
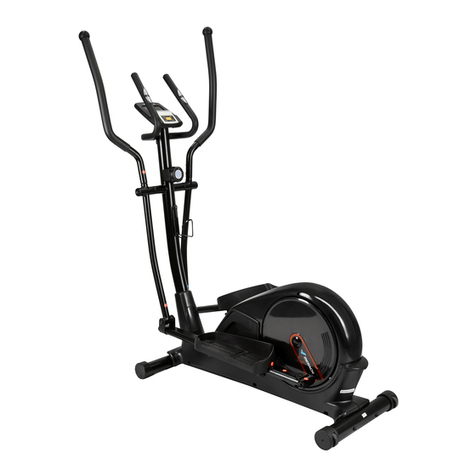
MERACH MR-E07 ELLIPTICAL MACHINE
Questions or Concerns?
IMPORTANT!
Please read all details before use, and keep this user manual for future reference.
PLEASE CONTACT US BEFORE THE RETURN: Mon-Fri,9:00 am-5:00 pm PST/PDT
POWEREDBY

WHO
WE ARE
Our customers aren’t just important; their health, fitness, and pure enjoyment for live
is at the core of everything we do at MERACH. From innovative fitness research and
cutting-edge product development, to our exceptional purchasing & after-sales service,
we are our customers’ life-long partner in crafting a better fitness future.
Through quality fat-burning & muscle-building fitness equipment such as our quality
rowing machines and exercise bikes, plus our innovative MERACH APP, and digital
courses, we give the opportunity and support to all to pursue their health and fitness
goals and discover a new way of healthy living.
Welcome to MERACH

This device contains a radio transmitter module with type approval
code FCC ID ENTIFIER: 2A6QWMR-BLE001.
Please read the entire manual carefully
before installing and using the machine,
and save for further use.
Contents
Contents
Safety Instructions·························································01
Specifications·······························································03
Packing List·································································04
Parts Tool List ······························································05
Assembly Instructions····················································06
Product Usage Instructions·············································13
Insturctions for the Monitor··············································15
MERACH APP Setup·····················································17
KINOMAP APP Setup····················································18
Warm-up·····································································19
Troubleshooting····························································20
Warranty Information······················································21

01
Please keep this manual in a safe place for future reference.
It is very important to read the entire manual thoroughly before installing and using
the machine. Safe and effective training can only be achieved if the machine is
properly assembled, properly maintained and used. Make sure all users are familiar
with all warnings and precautions of this machine.
Please consult your physician to determine if you have any medical or physical
conditions that could put your health and safety at risk or prevent you from using
the equipment properly. Your physician's advice is essential if you are taking
medication that affects your heart rate, blood pressure, or cholesterol level.
Please always pay attention to your body signals, improper use of the machine may
affect your health. If you experience any symptoms (including headache, chest pain,
irregular heartbeat, shortness of breath, dizziness, or any discomfort), stop
exercising immediately and consult your physician, get the permission before
training again.
Always keep children and pets away from the machine. The machine is for adult use
only.
Please use this machine on stable and horizontal ground level, and put a protective
layer onthe floor or carpet to prevent a floor from damaging. Make sure the distance
between the machine and each obstacle is at least 1.6 ft (0.5m).
Please check all screws and nuts are properly tightened before using the machine.
The safe use of the machine can only be guaranteed if the regular maintenance and
repairs of undertaken, and worn out and broken parts are changed.
Please follow the instructions in this manual to use this machine. Please stop using
and operating immediately when you find any defective parts or hear any abnormal
sound.Make sure all issues are resolved before using it again.
Please wear sports clothes, sports shoes, or other proper clothes. Loose-fitting
clothing is not recommended, as loose clothing may get caught in the machine,
hindering operation and possibly causing an injury.
This machine is only for home use. The Maximum user weight is 265 lbs.
Safety Instructions

This machine is not for professional medical treatment.
This product is only for family use.
The overall performance of the machine and all moving parts must be checked
regularly to ensure the safety of the machine.
If the moving parts are damaged, please do not use the machine until the parts
are repaired.
Keep the children away from the machine. The equipment is not for children to use
or play with. They can injure themselves accidentally.
When using the machine, please put the pedal to the lowest position for easy to
get on the machine.
Care & Maintenance
Do not store the machine in a place exposed to direct sunlight, wind and rain,
or with high humidity. If needed, please pack the machine to keep children away
from touching or playing with it.
Please check if there’s rust or cracks after long-term storage.
Please understand that for the consumable parts, the wear and tear may also occur
even with proper maintenance.
For long-term use of this machine, please wipe the dust regularly. Do not water it
directly, or wipe with gasoline, abrasive powder, etc. Otherwise, it might cause
cracks on the parts or main body, electric shock or fire. Please use Dilute neutral
detergent for maintenance.
Before starting any training, please consult your physician,
especially for those who are over 35 years old or with
pre-existing health conditions. Please read all
instructions before using the machine.
Safety Instructions
02

Specifications
03
Mode:
Name:
Recommend Max Weight:
Net Weight:
Product Dimensions:
MR-E07
MERACH Magnetic Elliptical Machine
265 lbs
59.08 lbs
43.9*22.24*61.42 inch

Check if all parts and accessories are in the package.
Packing List
#33MainFrameX1
#35A Front Foot Tube X 1 #35B Rear Foot Tube X 1
#15 Long Axis X 1
#12 Handlebar Post X 1
#38L Left Pedal X 1
#38RRightPedalX1
#41L Left Foot Pedal
Connecting Tube X 1
#41R Right Foot Pedal
Connecting Tube X 1
#16L Left Handrail X 1
#16R Right Handrail X 1
#5 Middle Handrail X 1 #1 Monitor X 1 AA battery X 2
#90 Bottle Cage X 1 Screw Kit X 1 User Manual X 1
USER MANUAL
MERACH MR-E07 ELLIPTICAL MACHINE
Questions or Concerns?
IMPORTANT!
Please read all details before use, and keep this user manual for future reference.
PLEASE CONTACT US BEFORE THE RETURN: Mon-Fri,9:00 am-5:00 pm PST/PDT
POWEREDBY
04
#92PedalBackingPlatex4

Check if all bolts and tools are in the package.
Parts Tool List
Step1 Step2
Step4
Step5
Step7Step6
Step3
#36 Square Neck Bolt M8*62*60 X 4
#6 Flat Washer d8*Φ20*1.5 X 4
#23 Cap Nut M8*S13 X 4
#A Multi-function Cross Wrench
S13-14-15 X 1
#7 Hexagon Socket Pan Head Bolt
M8*15*56 X 6
#6 Flat Washer d8*Φ20*1.5 X 4
#20 Spring Washer D8 X 6
#B Allen Key S6*30*80 X 1
#37 Small Hexagon Head Bolt
M10*45*15 X 4
#43 Nylon Nut M10*S17 X 4
#92 Pedal Backing Plate X 4
#24 Square Neck Bolt M8*42*15 X 4
#6 Flat Washer d8*Φ20*1.5 X 4
#39 Nylon Nut M8*S13 X 4
#A Multi-function Cross Wrench
S13-14-15 X 1
#14 Wave Washer d20*Φ26*0.3 X 2
#93 Plastic Flat Washer d16*Φ25*1.0 x2
#20 Sparing Washer D8 X 2
#21 Outer Hexagon Bolt M8*20*S14 X 2
#22 Spherical Nut Cap S13 X 2
#45L Left Pedal Screw Bolt X 1
#45R Right Pedal Screw Bolt X 1
#46 Wave Washer d16*Φ26*0.3 X 2
#49 Flat Washer d16*Φ26*0.3 X 2
#50L Left Nylon Nut X 1
#50R Right Nylon Nut X 1
#A Multi-function Cross Wrench
S13-14-15 X 1
#C Allen Key S8*30*80 X 1
#D Open Spanner S17-19 X 1
#7 Hexagon Socket Head Screws
M8*15*56 X 2
#6 Wave Washer d8*Φ20*1.5 X 2
#B Allen Key S6*30*80 X 1
#2 Cross Recess Head Screw
M5*10 X 2
#91 Cross Recessed Pan Head
Tapping Screws S
#A Multi-function Cross Wrench
S13-14-15 X 1
05
#D Open Spanner S17-19 X 1
#19 Flat Washer d8.5*Φ28*2.0 ×2

A. Use the Square Neck Bolt(#36), Flat Washer(#6) and Cap Nut(#23) to fix the Front Foot
Tube(#35A) and Rear Foot Tube(#35B) on the Main Frame(#33) by the Multi-function Cross
Wrench(#A) as shown below.
Step 1: Install the Foot Tubes
Assembly Instructions
06

A. Connect the Trunk link(#10) of Monitor to the Induction Wire(#31), and then join the Resistance
Knob(#11) and Wire(#32) as shown in figure.
B. Install the Handlebar Post(#12) into the Main Frame(33), align the hole of bolts.
C. Use the Hexagon Socket Pan Head Bolt(#7), Spring Washer(#20) and Flat Washer(#6) to
tighten the Handlebar Post(#12) on the Main Frame(#33) by Allen Key(#B).
Step 2: Fix the Handlebar Post
07
Assembly Instructions

A. Assemble the Left Pedal(#38L) and the Pedal Backing Plate(#92) onto the Left Foot Pedal
Connecting Tube(#41L) with the Small Hexagon Head Bolt(#37) and Nylon Nut(#43).
B. Assemble the Right Pedal(#38R) and the Pedal Backing Plate(#92) onto the Right Foot Pedal
Connecting Tube(#41R) with the Small Hexagon Head Bolt(#37) and Nylon Nut(#43).
Step 3: Assemble the Pedals on the Foot Pedal Connecting Tube
08
Assembly Instructions

A. Insert the Left Handrail(#16L) into the Left Rocker(#25L), align the hole of bolts.
B. Use the Multi-function Cross Wrench(#A) to tighten the Left Handrail(#16L) with the Square
Neck Bolt(#24),Flat Washer(#6) and Nylon Nut(#39).
C. Insert the Right Handrail(#16R) into the Right Rocker(#25R), align the hole of bolts.
D. Use the Multi-function Cross Wrench(#A) to tighten the Right Handrail(#16R) with the Square
Neck Bolt(#24), Flat Washer(#6) and Nylon Nut(#39).
Step 4: Install the Handrails
09
Assembly Instructions

Step 5: Connect the Foot Pedal Connecting Tube to the Main Frame
A. Remove the pre-assembled Wave Washer(#14), Flat Washer(#19), Sparing Washer(#20) and
Outer Hexagon Bolt(#21) from the Long Axis(#15).
B. Insert the Long Axis(#15) into the Handlebar Post(#12) horizontally, and then assemble the
Wave Washer(#14), Left Handrail(#16L) and Right Handrail(#16R) on the Long Axis(#15)
separately.
C. Use the Multi-function Cross Wrench(#A) to tighten the Handrails onto the Handlebar
Post(#12) with Flat Washer(#19), Sparing Washer(#20), Outer Hexagon Bolt(#21), and
finally close the Spherical Nut Cap(#22).
D. Use the Allen Key(#C) and Open Spanner(#D) to install the Left Foot Pedal Connecting
Tube(#41L) to the Left Crank(#79L) with the Left Pedal Screw Bolt(#45L), Wave Washer(#46),
Flat Washer(#49) and Plastic Flat Washer(#93). Meanwhile, screw up the Left Pedal Screw
Bolt(#45L) to the Left Crank(#79L) with hand, and then tighten it with Left Nylon Nut(#50L) as
show in Figure 1.
E. Install the Right Foot Pedal Connecting Tube(#41R) onto the Right Crank(#79R) in the same
way.
Note: The pedal bolt has right and left side.
Right "R" : Screw it in clockwise.
Left "L": Screw it in counter clockwise.
Turn the Left/Right Crank(#79L/R) to choose
an optimal angle to screw into the bolt easy.
10
Assembly Instructions

Step 6: Install the Middle Handrail
A. Remove the pre-assembled Stopper(#52) from the wire hole of Handlebar Post(#12).
B. Put the Heart Rate Wires(#51) of the Middle Handrail(#5) through the wire hole of Handlebar
Post(#12), and draw it from the plate of the monitor.
C. Tighten the Middle Handrail(#5) onto the Handlebar Post(#12) with the Hexagon Socket Pan
Head Bolt(#7), Arc Washer(#6) by the Allen Key(#B).
D. Put the Stopper(#52) in it.
11
Assembly Instructions

Step 7: Install the Monitor and Bottle Cage
A. Screw the pre-assembled Cross Recess Head Screw(#2) off from the Monitor(#1) by the
Multi-function Cross Wrench(#A).
B. Screw the pre-assembled Cross Recessed Pan Head Tapping Screws(#91) off from the
Handlebar Post(#12).
C. Connect the Wires of Monitor(#1) with the Trunks lines(10) and Heart Rate Wires(#51),
and then tighten the Monitor(#1) with the Cross Recess Head Screw(#2) by the Multi-function
Cross Wrench(#A).
D. Tighten the Bottle Cage(#90) onto the Handlebar Post(#12) with the Cross Recessed Pan
Head Tapping Screws(#91) by the Multi-function Cross Wrench(#A).
12
Assembly Instructions

Resistance Adjustment Instruction
Rear Foot Tube Adjustment Instruction
Please adjust the Twelve Eccentric Foot Sleeve(#29)
on the Rear Foot Tube(#35B) as needed to make the
machine stable without shaking.
Product Usage Instructions
Rotate the Resistance Adjusting Knob(#11) with the arrow aligned with the gear digit as shown.
Rotate clockwise to increase resistance and counterclockwise to decrease resistance(1-16).
13

Machine Movement Instructions
Batteries Installation Instructions
Remove the back cover by hand (Figure A), then prepare the batteries (Figure B), then install
two batteries, install the back cover (Figure C), and the battery assembly is completed (Figure D).
Product Usage Instructions
Drag back and forth by grasping the Left and Right Handlerail(#16L/R) with your hand and the
Front Foot Tube(#34) touching the ground.
Figure A Figure B Figure C Figure D
PLEASE NOTE: The device is equipped with two trial AA batteries that have passed MSDS
certification. These batteries may not provide the same life as standard batteries. In order
to ensure a functioning, please replace them in time.
14

Instructions for the Monitor
FUNCTION AND OPERATIONS:
FUNCTIONAL BUTTONS:
MODE - Press to select function.Long press to reset time/distance/calorie.
SET - To set the values of time/distance/calories and pulse when not in scan mode.
RESET - Press to reset time/distance/calories and pulse.
1. SCAN:
Press “MODE” button until “SCAN” appears, the monitor will switch the display
every 6 seconds in the following order :Time/speed/distance/ODO/calorie/pulse .
2. TIME:
(1)Count the total time from exercise start to end.
(2)Press “MODE” button until“TIME” appears, press“SET” button to set exercise time.
When the“SET” is zero, the monitor will stop 1 second after the start of the time.
3. SPEED: Display current speed.
4. DIST:
(1)Count the distance from exercise start to end.
(2)Press “MODE” button until “DIST” appears, press “SET” button to set exercise distance.
When the“SET” is zero, the monitor will stop about 1 second after the start of the time.
5.ODO:
The total distance which this function is refers to from battery capacity period runs.
6.CALORIES:
(1)Count the total calories from exercise start to end.
(2)Press “MODE” button until “CAL” appears, press “SET” button to set exercise calories.
When the “SET” is zero, the monitor will stop about 1 second after the start of the time.
15

Instructions for the Monitor
FUNCTION
AutoScan
Time
CurrentSpeed
TripDistance
TotalDistance
(ODO)
Calories
PulseRate
BatteryType
OperatingTemperature
StorageTemperature
Switchdataevery5seconds
0:00-99:59
Maximumspeed999.9km/h
0.00〜9999( ML)KM
0.0〜9999( ML)KM
0.0〜9999Kcal
40〜240BPM
2pcsAAAorUM-4batteries
0℃〜+40℃
-10℃〜+60℃
MONITORMANUAL
Note:
1. If the display is faint or shows no figures ,please replace the batteries.
2. The monitor will automatically shut off if there is no signal received after 4 minutes .
3. The monitor will turn on automatically after restarting the exercise or pressing the
button.
4. The monitor will automatically start calculating when you start to exercise and will
stop calculating when you stop exercising for 4 seconds .
7. PULSE RATE:
(1) Press MODE button until “PULSE” appears. Before measuring your pulse rate,
please place your palms of your hands on both of your contact pads and the monitor
will show your current heart beat rate in beats per minute (BPM) on the LCD after
6~7 seconds.
Remark: During the process of pulse measurement, because of the contact jamming,
the measurement value may be higher than the virtual pulse rate during the first 2~3
seconds, then will return to normal level. The measurement value can not be
regarded as the basis of medical treatment.
(2)Press“MODE”button until“pulse”appears, press“SET”button to set exercise
calories. When the“SET”is zero, the computer will stop about 1 seconds after the
start of the time.
16

MERACH APP Setup
Download and Use of MERACH
1.TodownloadtheMERACHapp,scantheQRcodeorsearch"MERACH"intheApple
AppStore®orGooglePlayStore.
Ourcustomercangeta180-dayMERACHmembership.Pleasecontactusthrough
support@merach.comafterreceivingtheproducttogetanexclusiveredemption
code.PleaseincludeyourorderIDandMERACHappUsername.
*
2.OpentheMERACHapp.LogInorSignUp.
3.Followthein-appinstructionstosetupyourdevice.
MERACH APP Download APP Connection Guide
Note:
1.UsingtheMERACHappallowsyoutogetfreeworkoutcoursesandaccessadditional
functionsandfeatures.
2.CoachingcoursesareonlyavailableinEnglish.
USINGYOURELLIPTICALMACHINE
17
Table of contents
Other Merach Elliptical Trainer manuals
Popular Elliptical Trainer manuals by other brands

Horizon Fitness
Horizon Fitness Andes 101 owner's guide

Spirit
Spirit Spirit SPT0005 owner's manual

Vision Fitness
Vision Fitness X1400 owner's guide

York Fitness
York Fitness York 2100 Exercises & instruction manual

Skandika Fitness
Skandika Fitness ARES Assembly instructions and user guide
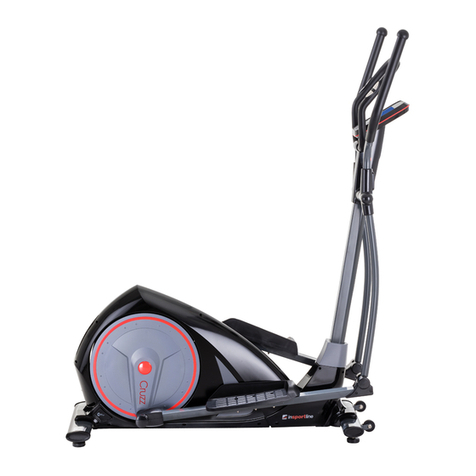
Insportline
Insportline IN 5559 user manual
Reebok
Reebok RBEL73580 user manual
NordicTrack
NordicTrack NTEL7506.0 user manual
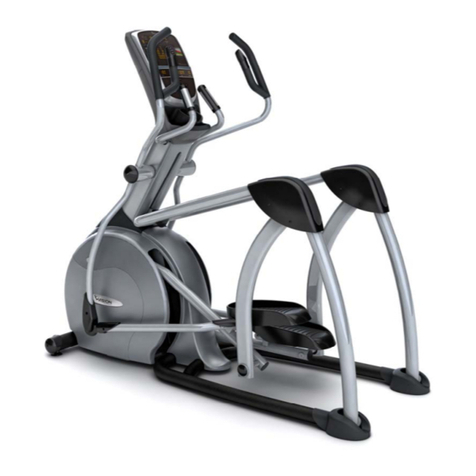
Vision Fitness
Vision Fitness S70-02 Service manual
Image
Image 7.8 Elliptical Manuel de l'utilisateur

Octane Fitness
Octane Fitness CROSS CiRCUIT PRO KIT Assembly and operation instructions
Spirit
Spirit Empire SPT0045 owner's manual
