Mercusys MW300RE User manual

RE
1910080032
REV 1.0.0
Easy Wi-
Fi Extension
Flexible Placement
MW300RE
300 Mbps Wi-Fi Range Extender
1910080032 REV1.0.0

COPYRIGHT & TRADEMARKS
Specifications are subject to change without notice.
is a registered trademark of MERCUSYS TECHNOLOGIES CO., LTD.
Other brands and product names are trademarks or registered trademarks
of their respective holders.
No part of the specifications may be reproduced in any form or by any
means or used to make any derivative such as translation, transformation,
or adaptation without permission from MERCUSYS TECHNOLOGIES CO.,
LIMITED. Copyright © 2016 MERCUSYS TECHNOLOGIES CO., LIMITED.
All rights reserved.
http://www.mercusys.com

CE Mark Warning
This is a class B product. In a domestic environment, this product may cause
radio interference, in which case the user may be required to take adequate
measures.
RF Exposure Information
This device meets the EU requirements (1999/5/EC Article 3.1a) on the
limitation of exposure of the general public to electromagnetic fields by way
of health protection.
The device complies with RF specifications when the device used at 20 cm
from your body.
Продукт сертифіковано згідно с правилами системи УкрСЕПРО на
відповідність вимогам нормативних документів та вимогам, що
передбачені чинними законодавчими актами України.
Safety Information
●When product has power button, the power button is one of the way to
shut off the product; when there is no power button, the only way to
completely shut off power is to disconnect the product or the power
adapter from the power source.
●Don’t disassemble the product, or make repairs yourself. You run the
risk of electric shock and voiding the limited warranty. If you need
service, please contact us.
●Avoid water and wet locations.
Explanation of the symbols on the product label
Symbol Explanation
Class IIequipment
AC voltage
Indoor use only

RECYCLING
This product bears the selective sorting symbol for Waste
electrical and electronicequipment (WEEE). This means that this
product must be handled pursuant to European directive
2012/19/EU in order to be recycled or dismantled to minimize its
impacton the environment.
User has the choice to give his product to a competent recycling
organization or to the retailer when he buys a new electrical or
electronic equipment.

MERCUSYS TECHNOLOGIES CO., LTD.
MERCUSYS TECHNOLOGIES CO., LTD.
3rd Floor, Building R1-B, No. 23, Gaoxin 4th Road, South Hi-Tech Park, Nanshan, Shenzhen, P.R.China
DECLARATION OF CONFORMITY
For the following equipment:
Product Description: 300Mbps Wi-Fi Range Extender
Model No.: MW300RE
Trademark: MERCUSYS
We declare under our own responsibility that the above products satisfy all
the technical regulations applicable to the product within the scope of
Council Directives:
Directive 1999/5/EC, Directive 2014/30/EU, Directive 2014/35/EU, Directive
2011/65/EU, Directive 2009/125/EC
The above product is in conformity with the following standards or other
normative documents
EN 300328 V1.9.1
EN 301489-1 V1.9.2 & EN 301489-17 V2.2.1
EN 55022: 2010+AC: 2011
EN 55024: 2010
EN 60950-1: 2006 + A11: 2009 + A1: 2010 + A12: 2011 +A2: 2013
EN 50385: 2002
EN 50581: 2012
(EC) No 278/2009
(EC) No 1275/2008
(EU) No 801/2013
The product carries the CE Mark:
Person responsible for marking this declaration:
Huang Jing
Regulatory Compliance Manager
Date of issue: 2016-08-12

Introduction ................................................................................1
Appearance........................................................................... 1
LED Explanation................................................................. 1
Button Explanation ............................................................. 2
Position the Extender............................................................. 2
Connect the Extender to the Internet.....................................3
Before You Begin................................................................... 3
Basic Requirements............................................................... 4
Quick Setup........................................................................... 4
Using Your Web Browser (Mobile UI) ................................. 4
Using Your Web Browser (PC UI)....................................... 6
Using WPS (Wi-Fi Protected Setup)................................... 8
Manage the Extended Network and Security Settings .......9
Wireless MAC Filtering........................................................... 9
Wireless Advanced.............................................................. 10
Profile .................................................................................. 11
To add a new profile......................................................... 11
To connect to a host network ........................................... 11
To manage an existing profile .......................................... 11
Change the Extender’s IP Address ...................................... 12
DHCP Server....................................................................... 12
DHCP Settings................................................................. 12
DHCP Client List .............................................................. 13
Manage the Extender.............................................................14
Firmware Upgrade............................................................... 14
Factory Defaults .................................................................. 15
Backup & Restore................................................................ 15
Reboot................................................................................. 16
Login Password................................................................... 16
System Log ......................................................................... 16
Appendix..................................................................................19
Factory Defaults .................................................................. 19
FAQ (Frequently Asked Questions) ..................................... 20
Contents

Introduction 1
Introduction
This chapter covers the following topics:
Appearance
Position the Extender
Appearance
LED Explanation
Name Status Indication
Signal
Blinking red
The extender is connecting to the router.
Solid red The extender is not connected to the router.
Solid green
The extender is connected to the router, and is in
a good location.
Solid orange
The extender is connected to the router, but is too
close to or far away from the router.
1

Introduction 2
Button Explanation
The buttons are located on the bottom panel.
WPS Button: If your wireless router supports WPS or QSS function, you can
press the WPS or QSS button on your router and then pressthe WPS button
on your extender to establish a secure connection between the wireless
router and the extender.
Reset Button: This button is used to restore the extender to its factory
default settings.
To reset the extender:
With the extender powered on, use a pin to press and hold the Reset button
for more than 5 seconds until the Signal LED starts blinking quickly, then
release the button and wait the extender to reboot to its factory default
settings.
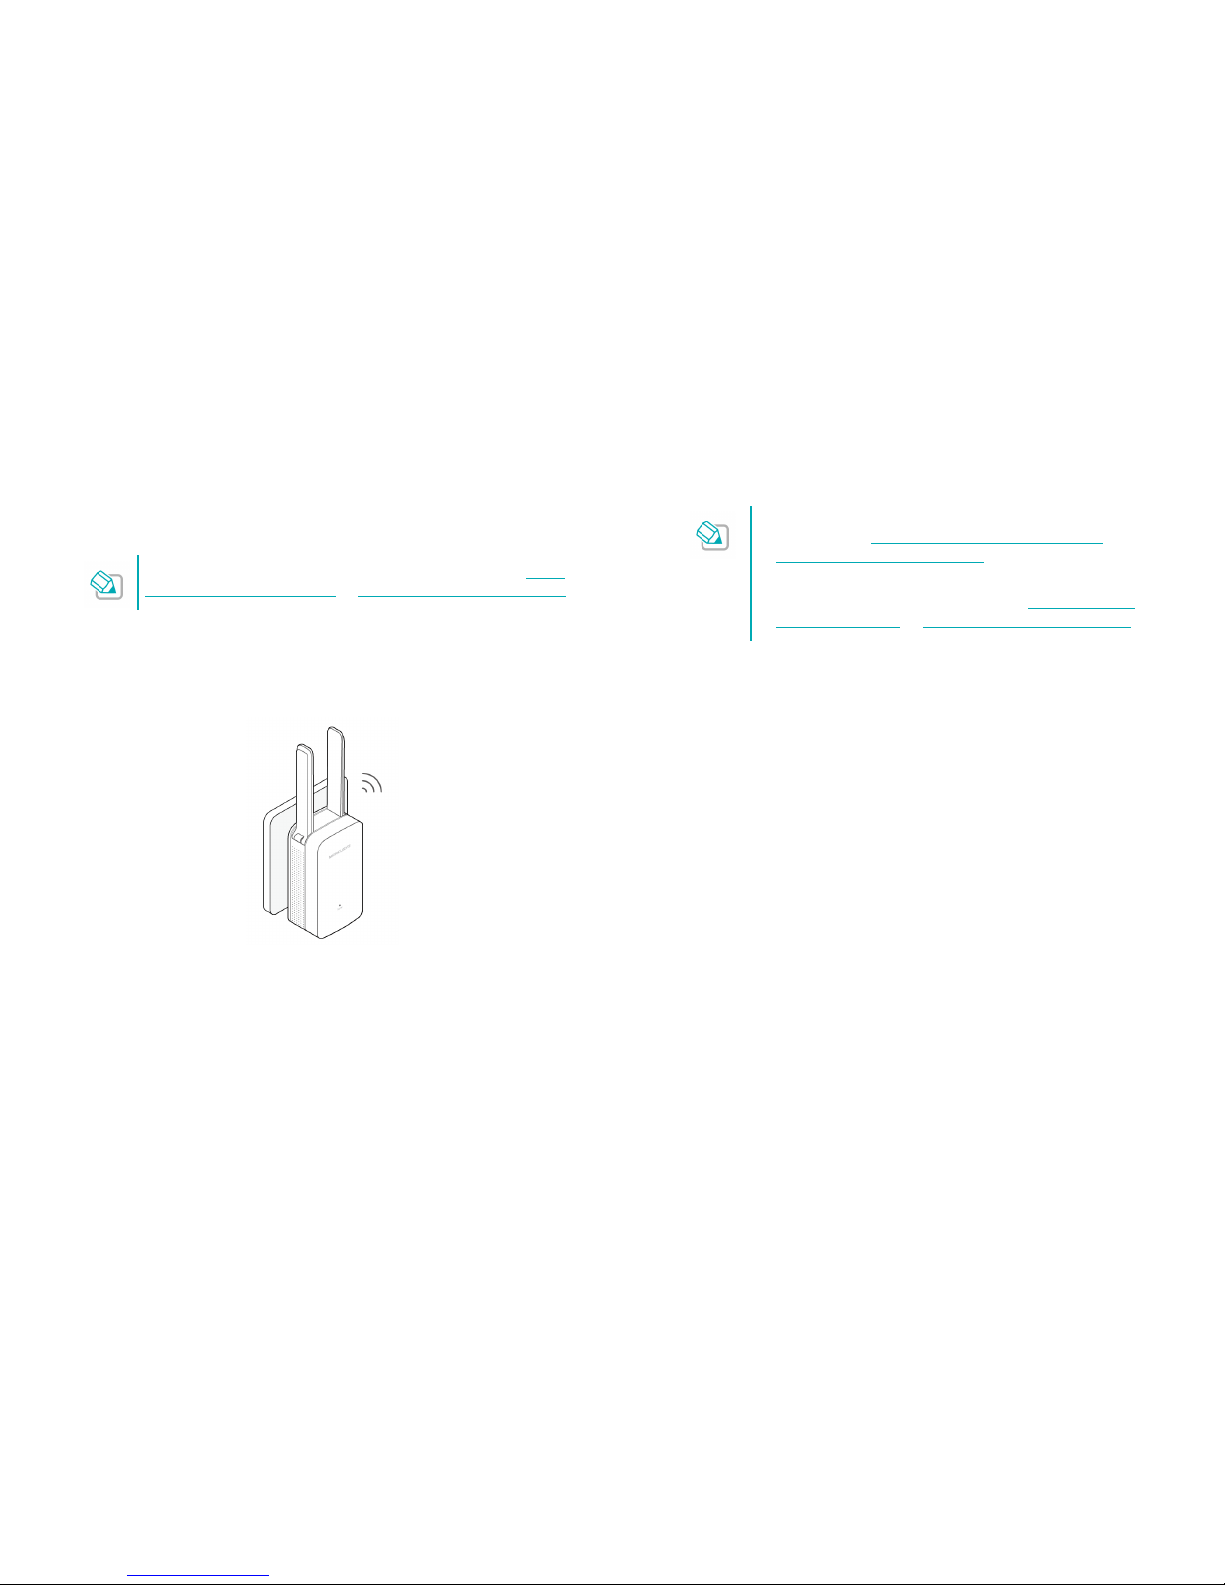
Position the Extender
For safety and best performance, we suggest that you position the extender
vertically as shown below.

Connect the Extender to the Internet 3
Connect the Extender
to the Internet
This chapter covers the following topics:
Before You Begin
Basic Requirements
Quick Setup
Before You Begin
Please read this guide carefully before installing and using the range extender.
The operating range of your wireless network may vary significantly depending
on the physical position of the wireless devices. Obstructions, such as metal
appliances and walls, may weaken signals by getting in the way of your
network’s radio waves.
In order to optimize the performance of the extender, please follow the
instructions below (please make sure the extender is always within the wireless
coverage of the wireless router).
●Half-wayBetween- Generally, the ideal location for the range extender is
half-way between the wireless router and the wireless client. If the
wireless signal is not satisfactory, you may place the extender closer to
the wireless router.
●Less Obstructions - Limitobstructions between the extender and wireless
router. It’s better to locate the extender in a spacious place, such as near
the corridors.
●No Interference - Choose a location away from Bluetooth devices and
other household electronics, such as cordless phone, microwave, and baby
monitor, etc., to minimize signal interference.
2

Connect the Extender to the Internet 4
Basic Requirements
Place your extender in a well-ventilated place far from direct sunlight,
any heater or heating vent.
Leave at least 2 inches (5cm) space around the device for heat
dissipation.
Turn off your extender and unplug the power adapter in a lighting storm
to avoid damage.
Operating temperature of the extender should be 0℃~40 ℃(32℉
~104℉).
Operating humidity of the extender should be 10%~90%RH (Non-
condensing).
Quick Setup
Using Your Web Browser (Mobile UI)
1Power On
Plug the extender into a power outlet near your router, and the Signal LED
turns solid red.
2Configure
1) Connect your smart device to the extender’s wireless network
MERCUSYS_RE_XXXX.
The default SSID (network name) can be found on the
product label at the back of the extender.
2) Launch a web browser and type mwlogin.net in the address bar.
Create a login password, then tap Log in.

Connect the Extender to the Internet 5
3) Select your host network (the router’s network) and enter the password
when prompted. Here we use MERCUSYS_1234 for demonstration.
4) When your extender is connected to your router successfully, you will
see the management page and the Signal LED on your extender turns
solid green or orange.
3Relocate
Plug the extender into a power outlet about halfway between your router
(Host Network) and the Wi-Fi “dead” zone. The location you choose must
be within the range of your existing host network.
Wait until the Signal LED is lit and solid green. If it is orange, relocate the
extender closer to or farther away from the router to achieve a better
signal quality.
Enjoy!
The extender uses the same wireless network name (SSID) and password as
your host network.
If you want to change the extended network name, go to
Settings > Extended Network Name to modify the name.
If you want to extend another network, tap Wireless Scanner,
and follow the onscreen instructions to complete the setup.

Connect the Extender to the Internet 6
Using Your Web Browser (PC UI)
1Power On
Plug the extender into a power outlet near your router, and the Signal LED
turns solid red.
2Configure
1) Connect your wireless device to the extender’s wireless network
MERCUSYS_RE_XXXX.
The default SSID (network name) can be found on the
product label at the back of the extender.
2) Launch a web browser and type http://mwlogin.net in the address bar.
Create a login password, then click Log in.
3) Click Next to start Quick Setup.

Connect the Extender to the Internet 7
4) Click Scan and select your host network (the router’s network), and
enter the password when prompted. Then click Ne xt.
By default, the extended network uses the same SSID
(network name) as the host network. You can change
SSID according to your need on this page.
5) Click Reboot to make the settings effective.
Relocate
Plug the extender into a power outlet about halfway between your router
(Host Network) and the Wi-Fi dead zone. The location you choose must
be within the range of your existing host network.
Wait until the Signal LED is lit and solid green. If it is orange, relocate the
extender closer to or farther away from the router to achieve a better
signal quality.
Enjoy!
The extended network use the same Wi-Fi password as your main network, but
may have different wireless network name if you customize the SSID during the
configuration.
If you want to change the extended network name, go to
Wireless > Wireless Settings to modify the name.
If you want to extend another network, go to Wireless >
Wireless Settings, click Scan,and follow the onscreen
instructions to complete the setup.
Connect the Extender to the Internet 8
Using WPS (Wi-Fi Protected Setup)
Your router should support WPS. Otherwise, please refer to Using
Your Web Browser (Mobile UI)or Using Your Web Browser (PC UI)
1Power On
Plug the extender into a power outlet near your router, and the Signal LED
turns solid red.
2Connect
1) Press the WPS button on your router.
2) Within two minutes, press the WPS button on your extender. The Signal
LED should change from flashing to a solid state, indicating a
successful WPS connection.
If the Signal LED does not change from flashing to solid,
please refer to Using Your Web Browser (Mobile UI) or
Using Your Web Browser (PC UI).
Some ISP gateways disable the WPS function by default.
If the WPS method fails, please refer to Using Your Web
Browser (Mobile UI)or Using Your Web Browser (PC UI).
3Relocate
Plug the extender into a power outlet about halfway between your router
(Host Network) and the Wi-Fi dead zone. The location you choose must
be within the range of your existing host network
Wait until the Signal LED is lit and solid green. If it is orange, relocate the
extender closer to or farther away from the router to achieve a better
signal quality.
Enjoy!
The extender uses the same wireless network name (SSID) and password as
your host network.
Manage the Extended Network and Security Settings 9
Manage the Extended
Network and Security
Settings
This chapter covers the following topics on the PC int e rface:
Wireless MAC Filtering
Wireless Advanced
Profile
Change the Extender’s IP Address
DHCP Server
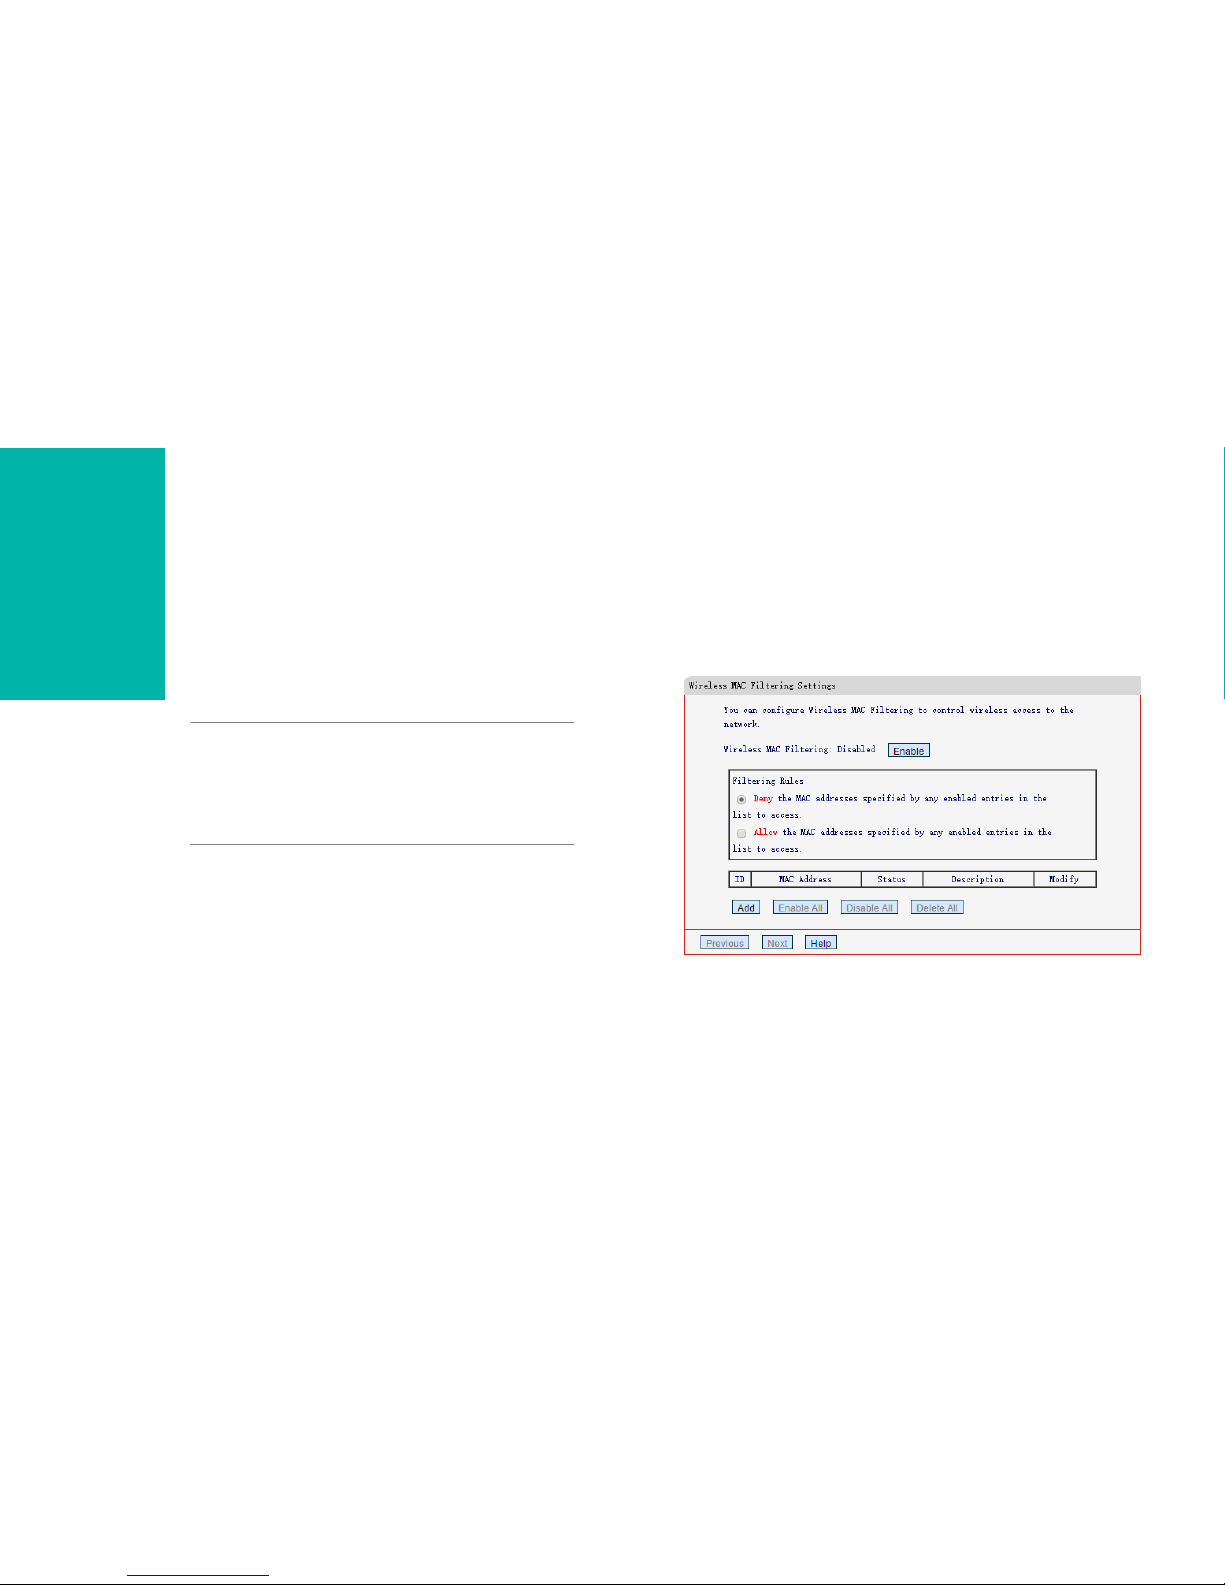
Wireless MAC Filtering
Wireless MAC Filtering allows you to control the wireless devices accessing the
network based on the devices' MAC addresses.
1) Launch a web browser and type in http://mwlogin.net, then go to
Wireless > Wireless M AC Filtering webpage.
2) Select a Filtering Rule.
3

Manage the Extended Network and Security Settings 10
3) Click Ad d and configure a MAC filtering entry as shown in the figure
below, then click Sav e.
M AC Ad d r e s s : Enter an MAC address in the format of XX-XX-XX-XX-
XX-XX (X is any hexadecimal digit).
Description: Enter a simple description for the wireless device.
Status:Select Enabled or Disabled for this entry from the drop-down
list.
4) Click Enable to enable the Wireless MAC Filtering feature.
Wireless Advanced
On the Wireless Advanced page, you can configure the advanced settings of
your wireless network.
1) Launch a web browser and type in http://mwlogin.net, then go to
Wireless > Wireless Advanced webpage.
2) Configure the settings according to your needs, then click Save.
Format - The wireless packet address format supported by the AP
you will connect to. The default settings is Auto-Detect. It is
recommended to keep it as default.
Transmit Power - You can specify the transmit power of router.
Select High, Middle or Low according to your needs. The default and
recommended setting is High.
Beacon Interval - Enter a value between 40-1000 milliseconds for
Beacon Interval here. The beacons are the packets sent by the router
to synchronize a wireless network. Beacon Interval value determines
the time interval of the beacons. The default value is 100.
Enable WMM - WMM function can guarantee that the packets with
high- priority messages will be transmitted preferentially. It is
recommended to enable WMM.
Enable Short GI - With Short GI enabled, the device can work at a

Manage the Extended Network and Security Settings 11
higher transfer rate. It is recommended to enable Short GI.
AP Isolation - AP Isolation feature that allows you to confine and
restrict all wireless devices on your network from interacting with each
other, but still able to access the Internet. AP isolation is disabled by
default.
Profile
Profile is used to manage the information of connected host APs. You can add,
delete, edit the profiles or connect to a host AP.
To add a new profile
1) Launch a web browser and type in http://mwlogin.net, then go to Profile
webpage.
2) Click Ad d , and complete the settings as shown below, and click Save.
Exte nded SSID - Enter the extended network name.
Host AP SSID - Enter the host network name.
Ho s t AP M AC Ad d r e s s - Enter The MAC address of the host AP.
Security – Select the security type of the host AP.
To connect to a host network
If you want to connect to a host network that is listed in the profile screen, just
find the profile and then click Connect.
To manage an existing profile
If you want to change the settings of an existing profile, find the profile and
click Edit, then you can edit the settings of this profile.
If you want to delete a profile that you no longer use, find the profile and click
Delete.

Manage the Extended Network and Security Settings 12
Change the Extender’s IP
Address
By default, the extender is set to obtain an IP address automatically from the
front router. If you want to use a specific IP address appropriate to your network
demand, please refer to the steps below.
We do NOT recommend you change the IP address unless you
are quite sure about the IP setting for special network demand,
random changes may lead to Internet disconnection.
1) Launch a web browser and type in http://mwlogin.net, then go to
Network > Network Settings webpage.
2) Select Static IP, then enter the IP address manually, then click Sav e .
IP Address: Enter the IP address in dotted-decimal notation
(192.168.1.253 by default).
Subnet Mask: Select a subnet mask that determines the size of the
network (255.255.255.0 by default).
DHCP Server
DHCP stands for Dynamic Host Configuration Protocol. The DHCP Server will
automatically assign dynamic IP addresses to the devices on the network. This
protocol simplifies network management and allows new wireless devices to be
set to IP addresses automatically.
To use the DHCP server function of the device, you should
configure all computers in the LAN as "Obtain an IP Address
automatically" mode.
DHCP Settings
By default, the DHCP Server is Auto, the extender automatically detects to find
the devices enabling the DHCP Server. If the DHCP Server of the device is
enabled, the extender’s DHCP Server is disabled. Otherwise, the extender’s
DHCP Server is enabled. The default is Auto.
When the DHCP Server is On, please make sure that the Start and End IP
Address, Gateway for the DHCP server and LAN IP address are in the same
segment as the router. Otherwise, the extender cannot access the Internet.
1) Launch a web browser and type in http://mwlogin.net, then go to DHCP
Server > DHCP Settings webpage.
2) Configure it as shown in the figure bleow, then click Save.

Manage the Extended Network and Security Settings 13
DHCP Server – Select Off, On or Auto. The default settings is Auto.
Start IP Addre ss/End IP Address
:
Enter a range of IP address that
can be leased to the clients. By default, the starting IP address is
192.168.0.100 and the ending IP address is 192.168.0.199.
Gateway (Optional): Enter the LAN IP address of your host network.
Default Domain (Optional): Enter the domain name of your network.
Primary DNS (Optional): Enter the DNS IP address provided by
your ISP.
Secondary DNS (Optional): Enter the second DNS IP address
provided by your ISP.
DHCP Client List
The DHCP Client List displays the Client Name, MAC Address, Assigned IP
and Lease Time for each DHCP Client attached to the device.
1) Launch a web browser and type in http://mwlogin.net, then log in to
DHCP Server> DHCP Clie nt List webpage.
2) You can view the information of the DHCP clients connected to the
extender in the list.
Clie nt Name: The name of the DHCP client.
M AC Ad d r e s s : The MAC address of the DHCP client.
Assigned IP Address: The IP address that is allocated to the client
by the DHCP server.
Lease Time: The time duration that the IP address is leased to the
DHCP client.
Click Refreshto refresh the DHCP Client List.

Manage the Extender 14
Manage the Extender
This chapter covers the following topics on the PC inte r face:
Firmware Upgrade
Factory Defaults
Backup & Restore
Reboot
Login Password
Syste m Log
Firmware Upgrade
1) On your PC, Launch a web browser and type in http://mwlogin.net,
then go to System Tools > Firmware Upgrade webpage.
2) You can view the current firmware version and the hardware version. Find
the latest firmware of your extender from the product’s Support page at
www.mercusys.com. Then download the latest firmware upgrade file to
your computer.
3) Click Browse … to locate and select the downloaded file.
4) Click Upgrade. The upgrade takes a few minutes to complete and the
extender will automatically reboot itself when finished.
Please DO NOT power off the extender during the upgrade
process.
4
Other manuals for MW300RE
3
Table of contents
Other Mercusys Extender manuals

Mercusys
Mercusys Range Extender User manual

Mercusys
Mercusys ME10 User manual

Mercusys
Mercusys ME30 Product information sheet

Mercusys
Mercusys ME60X User manual

Mercusys
Mercusys MP510 User manual

Mercusys
Mercusys MP510 KIT User manual

Mercusys
Mercusys ME50G User manual

Mercusys
Mercusys ME70X User manual

Mercusys
Mercusys ME30 User manual

Mercusys
Mercusys MW300RE User manual


