manuals.online logo
Brands
  1. Home
  2. •
  3. Brands
  4. •
  5. MERIT INDUSTRIES
  6. •
  7. Arcade Game Machine
  8. •
  9. MERIT INDUSTRIES Megatouch 7 Encore Edition User manual

MERIT INDUSTRIES Megatouch 7 Encore Edition User manual

merit industries, inc. PM0273-02
Visit the Merit Industries, Inc. Web Site
http://www.meritind.com
COPYRIGHT © 2000 MERIT INDUSTRIES, INC.
1
MEGA
T
OUCH
™ 7 ENCORE EDITION KIT PM0273-02
Megatouch™ 7 Encore Edition
CONTENTS:
NOTE: IN ORDER TO INSTALL THIS KIT,
YOU MUST BE AT THE SUPER IV LEVEL
(PG9255-41) OR HIGHER. IN ORDER TO
DETERMINE WHAT LEVEL OF SOFT-
WAREYOURGAMEISCURRENTLYRUN-
NING, LOOK AT THE EPROM AT U38.
REFER TO FIGURE 1 FOR LOCATION.
1. Turn off the game and disconnect it
from its power source.
NOTE: BEFORE HANDLING THE CRT-260
BOARD OR THE EPROMS, GROUND YOUR-
SELF TO REMOVE ANY STATIC CHARGE
THAT MAY BE ON YOUR BODY.
2. Locate and gain access to the CRT-
260 PC board (if unsure where to lo-
cate your CRT-260 board, see your
game manual).
3. Removetheexistingprogramchipsfrom
U32, U36, U37 and U38 from the CRT-
260 board. Also, remove the security
key from U5. (To remove the existing
key, you may need to cut away sili-
cone sealant holding the key in place.)
Be extremely careful not to dam-
age the board. SeeFigure1 for loca-
tions.
Installing the EPROMS
QTY PART NUMBER DESCRIPTION
1SA3012 MEGA 7 U37 (4 MEG)
1SA3014 MEGA 7 U32 (8 MEG)
1SA3014 MEGA 7 U38 (8 MEG)
1SA3045-02 USA, MEGA 7 KEY
1GL3100-07 ENCORE EDITION DECAL, R, CTOP
1GL3100-08 ENCORE EDITION DECAL, L, CTOP
1PM8928-27 ENCORE EDITION SIGN
1GL2401-12 ENCORE EDITION MARQUEE
2HW8023-01 13/16" W T-MOULDING
4. Install the new EPROMS at U32, U37
and U38 and the new security key at
U5.
NOTE: WHEN INSTALLING EPROMS, BE
CAREFUL TO OBSERVE THE ORIENTATION
OF THE NOTCHES.
AVOID WALKING AROUND WITH THE
CHIPS IN YOUR HAND AFTER YOU HAVE
REMOVED THEM FROM THE BOX. THIS
COULD CAUSE STATIC TO BUILD UP.
5. Put the CRT-260 board back into place
and close all doors.
6. Plugthegame in and turn on thepower.
7. Perform a "2-Button Clear," by turning
on the game while simultaneously
pressing both the SETUP and CALI-
BRATE buttons (located behind the
cashbox).
8. Confirm that the checksum is as fol-
lows:
U32 = C193
U37 = 0E87
U38 = 8B6F
9. If one of the checksum numbers is in-
correct, check to make sure that the
EPROM is seated properly.
COPYRIGHT © 2000 MERIT INDUSTRIES, INC.
FIGURE 1 - LOCATION OF EPROMS AND SECURITY KEY
PM0273-02
MEGA
T
OUCH
™ 7 ENCORE EDITION KIT 2
3
MEGA
T
OUCH
™ 7 ENCORE EDITION KIT PM0273-02
COPYRIGHT © 2000 MERIT INDUSTRIES, INC.
1. Turn off the game and disconnect it
from its power source.
2. Unlockandremovethe coin mech from
the game.
3. Unlock and open the rear door.
4. Disconnect the ground braid and the
cleardrainagetubing from the hood as-
sembly. See Figure 2.
5. Remove the thumbscrews and wash-
ers securing the lid, push the lid for-
ward, and remove it from the game.
See Figure 2.
6. Locate the seam on the T-moulding as
shown in Figure 2.
7. Using a screwdriver, carefully pry the
T-moulding away from the wood side
panel working around until entire T-
mouldingisremoved. Repeat the same
step for the other side of the game.
8. Install the provided T-moulding. Use a
rubbermallet to gently insertthe T sec-
tion of the moulding into the wood side
panel. (Make sure that the T-moulding
seam is towards the bottom edge of
the side panel.) You will need to make
reliefcutswheretheT-mouldingbends
around the game (see Figure 3). Re-
peat the same step for the other side
of the game.
NOTE: BE EXTREMELY CAREFUL WHEN
INSTALLING THE T-MOULDING. THE
GAME MUST BE TURNED OFF AND THE
LIDMUSTBEREMOVEDFROMTHEGAME
BEFORE USING THE RUBBER MALLET TO
INSERT THE T-MOULDING INTO THE SIDE
PANEL.
9. Replace the lid and reconnect the
ground strap and clear drainage tub-
ing.
10. Secure the lid to the game using the 2
thumbscrews and washers.
11. Put the coin mech back into the game
and lock it.
12. Close and lock the rear door.
13. Once the new T-moulding is in place,
remove the existing side decals. (Re-
move any remaining adhesive residue
with an adhesive remover.)
NOTE: Make sure not to get any adhe-
sive removing solvents or solutions
on the touchscreen, as they may dam-
age the touchscreen.
14. When you are finished removing any
excess adhesive from the game, wipe
the surfaces with alcohol solvent. The
surfaces must be clean and free from
dirtfor the new decalsto adhere prop-
erly.
15. Partially peel the backing from the top
edgeof the provided decal. Centerthe
decal on the side of the game and ap-
ply the decal. There is a half inch ex-
cess around the entire decal to allow
for slight error. Cut away the excess
decal using the gap between the T-
moulding and the wood sides as a
guide. Repeat the same step for the
other side of the game.
16. Pluginthe game and turn on thepower.
Installing the T-Molding and
Side Decals
COPYRIGHT © 2000 MERIT INDUSTRIES, INC.
FIGURE 2 - HOOD ASSEMBLY
T-MOULDING PULLED AWAY FROM GAME
FIGURE 3 - SIDE VIEW OF T-MOULDING IN ROUTER HOLE
T-MOULDING WITH RELIEF CUT
PM0273-02
MEGA
T
OUCH
™ 7 ENCORE EDITION KIT 4
THUMBSCREWS
SECURING HOOD
TO MAIN CHASSIS
CLEAR DRAINAGE
TUBING
GROUND BRAID
ATTACHED TO REAR
DOOR
SEAM OF T-MOULDING
ROUTER HOLE
AROUND WOOD
SIDE PANEL
RELIEF CUT
NEEDED FOR
CORNERS
SIDE VIEW OF
T-MOLDING
T-MOLDING
(HW8023-01)
NOTES:
__________________________________________________________
___________________________________________________
_____________________________________________________
__________________________________________________
__________________________________________________
_____________________________________________________
_______________________________________________________
______________________________________________________
____________________________________________________
____________________________________________________
______________________________________________________
_________________________________________________________
________________________________________________________
________________________________________________________
________________________________________________________
________________________________________________________
______________________________________________________
_________________________________________________________

Other MERIT INDUSTRIES Arcade Game Machine manuals
MERIT INDUSTRIES FORCE Upright User manual

MERIT INDUSTRIES

MERIT INDUSTRIES FORCE Upright User manual

MERIT INDUSTRIES MEGATOUCH MONEY SHOOT Operating instructions

MERIT INDUSTRIES

MERIT INDUSTRIES MEGATOUCH MONEY SHOOT Operating instructions

MERIT INDUSTRIES Megatouch Combo Jukebox User manual

MERIT INDUSTRIES

MERIT INDUSTRIES Megatouch Combo Jukebox User manual

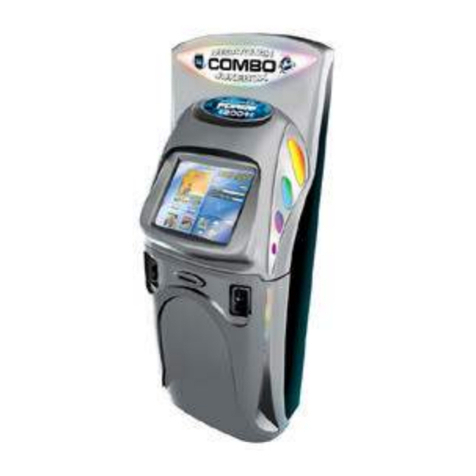
MERIT INDUSTRIES Megatouch Full MAXX User manual
MERIT INDUSTRIES

MERIT INDUSTRIES Megatouch Full MAXX User manual

MERIT INDUSTRIES Megatouch Force Radion 2003 User manual
MERIT INDUSTRIES

MERIT INDUSTRIES Megatouch Force Radion 2003 User manual

MERIT INDUSTRIES Scorpion 9000 User manual

MERIT INDUSTRIES

MERIT INDUSTRIES Scorpion 9000 User manual

MERIT INDUSTRIES Megatouch FORCE 2002 Use and care manual

MERIT INDUSTRIES

MERIT INDUSTRIES Megatouch FORCE 2002 Use and care manual

MERIT INDUSTRIES Megatouch SLIM MAXX User manual
MERIT INDUSTRIES

MERIT INDUSTRIES Megatouch SLIM MAXX User manual

Popular Arcade Game Machine manuals by other brands
Merit The Vibe Removal/Installation Instructions

Merit

Merit The Vibe Removal/Installation Instructions

Icegame DODGEBALL Diagnostics and Troubleshooting Guide

Icegame

Icegame DODGEBALL Diagnostics and Troubleshooting Guide

jakar BOXER SURPRISE Operator's manual

jakar

jakar BOXER SURPRISE Operator's manual

Bay-Tek SKEE BALL MARQUEE Service manual

Bay-Tek

Bay-Tek SKEE BALL MARQUEE Service manual

Incredible Technologies GT Home Edition Configuration guide

Incredible Technologies

Incredible Technologies GT Home Edition Configuration guide

Sega AV F-ZERO AX owner's manual

Sega

Sega AV F-ZERO AX owner's manual

Adrenaline Amusements Hungry Hungry Hippos HIP-54-4001 Operation & service manual

Adrenaline Amusements

Adrenaline Amusements Hungry Hungry Hippos HIP-54-4001 Operation & service manual

IGT Crystal Slant Cabinet manual

IGT

IGT Crystal Slant Cabinet manual

Fusion Shuffle Master Auto Roulette Getting started

Fusion

Fusion Shuffle Master Auto Roulette Getting started

Tornado Fire Blasta installation manual

Tornado

Tornado Fire Blasta installation manual

Innovative Concepts in Entertainment Wacky Ducks Owner's and service manual

Innovative Concepts in Entertainment

Innovative Concepts in Entertainment Wacky Ducks Owner's and service manual

Bay-Tek Big Bass Wheel Service manual

Bay-Tek

Bay-Tek Big Bass Wheel Service manual

Raw Thrills Jurassic Park Arcade Operator's manual

Raw Thrills

Raw Thrills Jurassic Park Arcade Operator's manual

Ice Harpoon Lagoon Marquee install guide

Ice

Ice Harpoon Lagoon Marquee install guide

Raw Thrills Fast and Furious Arcade Operator's manual

Raw Thrills

Raw Thrills Fast and Furious Arcade Operator's manual

BMI Gaming SideShow 1889 Installation and Maintenance

BMI Gaming

BMI Gaming SideShow 1889 Installation and Maintenance

MD SPORTS DH18408 Assembly instructions

MD SPORTS

MD SPORTS DH18408 Assembly instructions

PlayMechanix Minecraft Dungeons Arcade Setup and Operaton Service Manual

PlayMechanix

PlayMechanix Minecraft Dungeons Arcade Setup and Operaton Service Manual

manuals.online logo
manuals.online logoBrands
  • About & Mission
  • Contact us
  • Privacy Policy
  • Terms and Conditions

Copyright 2025 Manuals.Online. All Rights Reserved.