Mestra R-100136 User manual

R-100136
ES ........ BAÑO DE LIMPIEZA POR ULTRASONIDOS............ 3
EN........ ULTRASONIC CLEANER ............................................... 8
MESTRA®
TALLERES MESTRAITUA S.L.
Txori-Erri Etorbidea, 60
Tel. + 34944530388 - Fax +34 944711725
48150 SONDIKA - BILBAO - ESPAÑA
Rev. 10/07/15

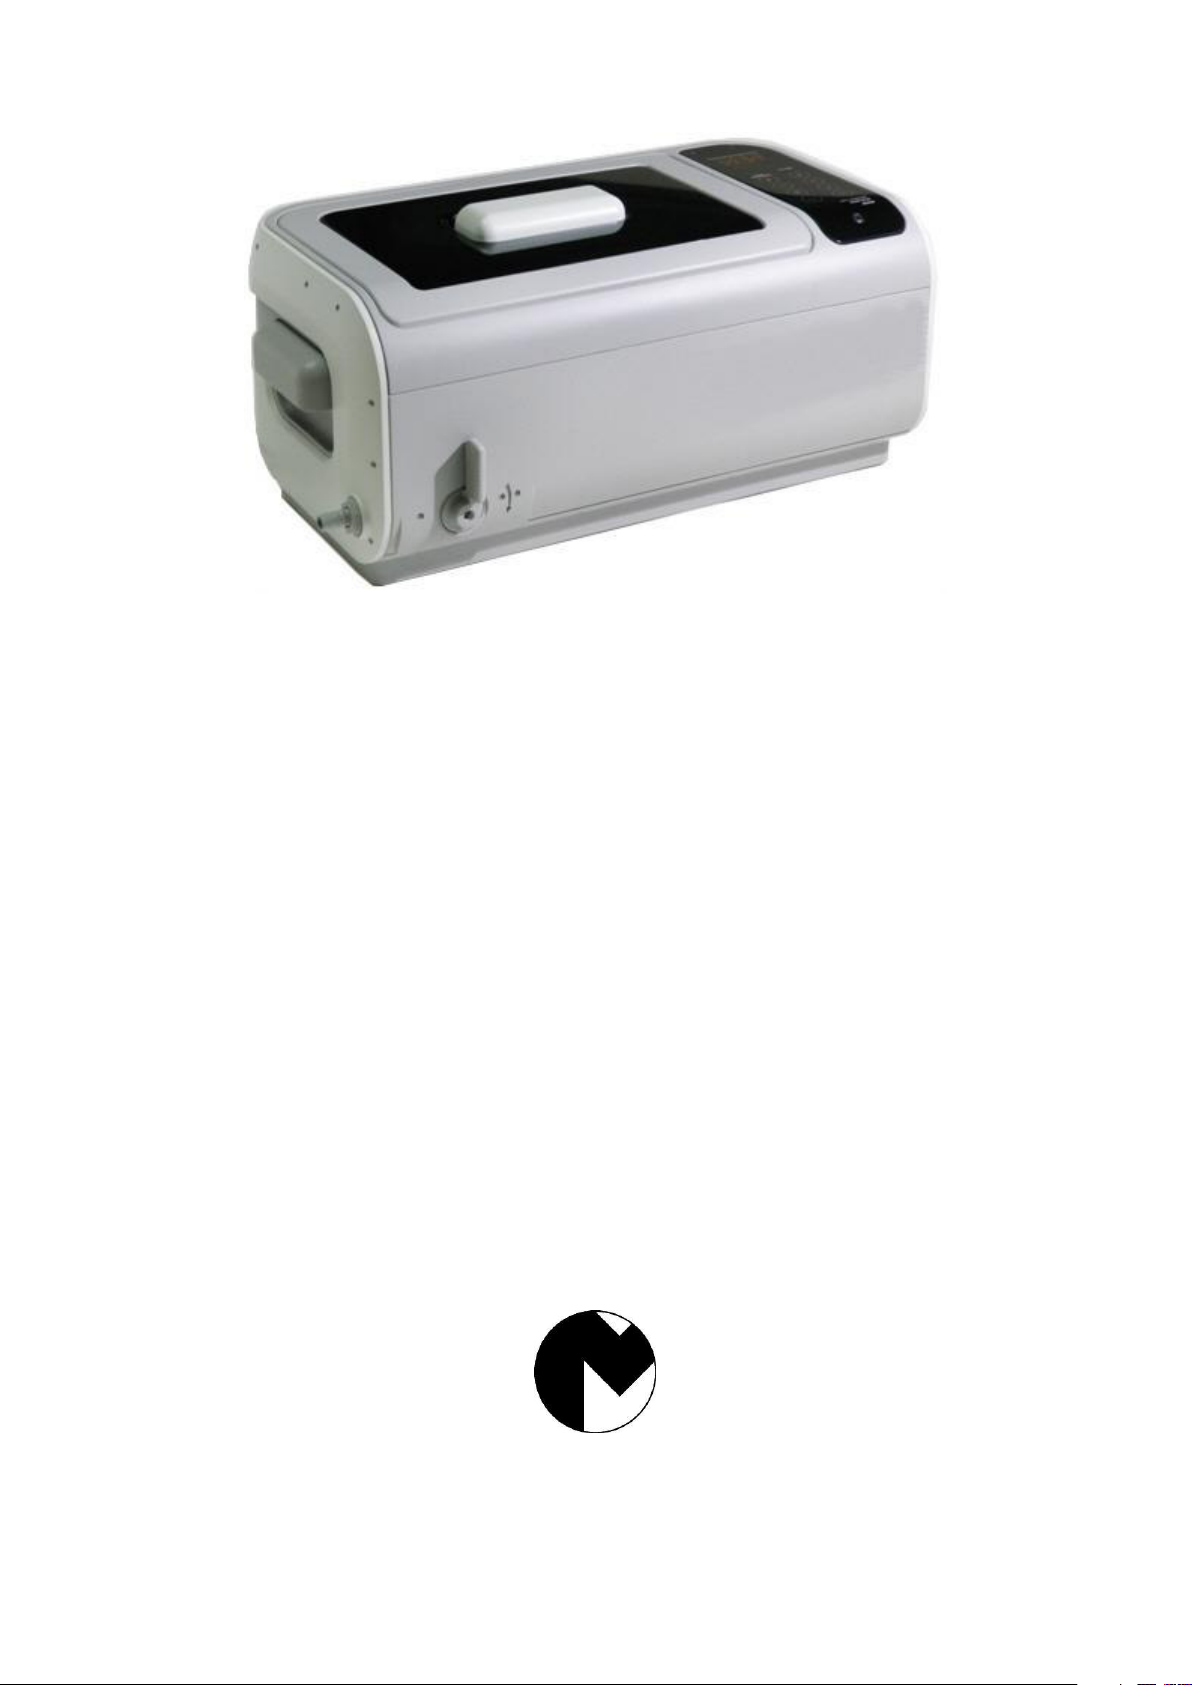
A. Tapa superior / Top cover
B. Cuba de acero inox. / Stainless steel tank
C. Carcasa / Housing
D. Tubo drenaje / Drainage pipe fitting
E. Válvula drenaje / Drainage valve handle
F. Panel de control / Control panel
G. Asas / Handles
H. Interruptor general / Power switch
I. Toma de corriente / Power socket
J. Soporte tapa / Cover holder
K. Cestillo plástico / Plastic basket
L. Cable / Power cord
M. Manguera / Hose
K L
M

3
ES
El R-100136 es un práctico baño de limpieza por ultrasonidos especialmente diseñado para una amplia
variedad de aplicaciones. Para conseguir unas óptimas prestaciones del aparato y asegurar al mismo tiempo
una larga vida útil, le recomendamos que lea con detenimiento las siguientes instrucciones de uso:
INSTALACIÓN
▪Desembale cuidadosamente el aparato. En el interior encontrarán los siguientes accesorios:
-1 manguera de drenaje (M).
-1 cable de conexión (L).
-1 cestillo de plástico (K).
▪Elija para el emplazamiento del aparato una superficie rígida, plana y alejada de fuentes de calor o
vibraciones.
▪Conecte la manguera de drenaje (M) en el tubo (D) por el que podrá vaciar el agua del aparato.
▪Conecte el cable (L) al enchufe del aparato y el otro extremo a una toma de corriente de 230 V, 50/60 Hz
provista de toma de tierra.
▪Abra la tapa (A), coloque los productos ordenadamente en el cestillo (K) e introduzca el cestillo en la cuba
(B). Para evitar arañazos y el roce de unos artículos con otros, no los apile.
▪Añada el agua o solución limpiadora en la cuba de acero inoxidable El líquido debe cubrir la superficie de
los productos, pero siempre entre las marcas min. y max.
▪El aparato se encuentra listo para funcionar.
PANEL DE CONTROL
1.
Tiempo de trabajo
Cuenta atrás desde que se inicia la limpieza
2. Termómetro multiestado:
Verde Temperatura del agua entre 0 y 30 % de la temperatura de consigna.
Naranja Temperatura del agua entre 30 y 60 % de la temperatura de consigna.
Rojo Temperatura del agua entre 60 y 90 % de la temperatura de consigna.
Rojo parpadeando Temperatura cerca de alcanzar la temperatura de consigna.
Todo encendido Se ha alcanzado la temperatura de consigna (90-100 %)
3.
Temperatura de consigna
Se pueden seleccionar 5 temperaturas de consigna. Pulse la tecla para seleccionar la
temperatura en la siguiente secuencia:
4.
Indicador ºC o ºF
5.
Luz de aviso de protección de sobrecalentamiento
Si el aparato está trabajando inadecuadamente o ha estado funcionando durante un tiempo
excesivo, la luz roja de aviso se iluminará, indicando que ha actuado la protección de
sobrecalentamiento. El aparato no podrá usarse durante 15-20 minutos. Entonces la luz se
apagará y podrá volver a utilizarse el aparato.
6.
Calentamiento
Pulse la tecla dos veces. El icono se iluminará, indicando que el calentamiento está activo.
Vuelva a pulsar la tecla dos veces para desactivar el calentamiento.
7.
Limpieza normal
Iluminado: está actuando la limpieza normal.
Para prevenir un encendido accidental del calentador, hay pulsar la tecla dos veces en 6 segundos para
encenderlo o apagarlo.

8. Tecla On/Off :
Después de encender el aparato, el display muestra cuál es el tiempo seleccionado
y la unidad está lista para trabajar. Pulse la tecla dos veces y comenzará la
limpieza. La limpieza se detendrá cuando el tiempo llegue a . Para detener el
aparato antes de que se agote el tiempo, pulse la tecla dos veces.
9. Tecla de selección rápida de tiempo
Pulse la tecla . El dispay marcará . Cada vez que pulse la tecla, se incrementarán 5 minutos.
USO DEL APARATO
Quite la tapa y apóyela verticalmente en su soporte. Coloque los objetos en
la cesta y meta la cesta en la cuba. Añada líquido entre el nivel MIN y MAX
y por encima de los objetos a limpiar.
Si el aparato se queda sin agua, la energía de los ultrasonidos no se
absorberá. Este modelo tiene mucha potencia. En 15 segundos puede
dañarse el aparato o reducirse severamente su vida útil.
Conecte el cable y encienda el interruptor (I). El display mostrará ,
que es el tiempo más común. Si necesita ajustar el tiempo, pulse las teclas
y . El tiempo puede ajustarse entre 1 y 30 minutos. Tiempos de
limpieza comunes son 5, 10 o 15 minutos.
Tiempos de limpieza prolongados pueden causar:
a. Aflojamiento de tornillos (si los hubiera).
b. Aumentos de poros preexistentes.
c. Pérdida de capas protectoras que ya estaban separadas.
Pulse la tecla dos veces para comenzar la limpieza.
Se oirá un zumbido, indicando que la limpieza está en marcha. Cerrando la
tapa se reducirá el nivel de ruido.
El display digital irá descontando el tiempo de limpieza restante. Cuando
llegue a se detendrá la limpieza.
Para detener la limpieza en cualquier momento, pulse la tecla dos
veces.
El aparato está diseñado con protección de sobrecalentamiento para evitar
un uso excesivo. Cuando la luz de aviso esté encendida, el aparato no
funcionará aunque lo intente. El aparato esperará unos 20 minutos y podrá
volver a funcionar cuando se apague la luz de aviso.

5
Cuando se necesite calentamiento, pulse la tecla para seleccionar una de
las 5 temperaturas preestablecidas. Pulse la tecla dos veces.El piloto
se iluminará, indicando que el calentamiento está activo. El display
mostrará la temperatura real del agua. Cuando la temperatura del agua
alcance la consigna, se atenuará, indicando que el calentamiento se ha
detenido.
Para asegurar la seguridad, el aparato está diseñado con doble protección.
El calentamiento se apagará automáticamente si ha estado funcionando
durante 50 minutos.
Cuando no se aprecie suciedad en el humo, la limpieza está hecha. Si se
requiere una limpieza adicional vuelva a seleccionar el tiempo y repita los
pasos anteriores.
Cuando la limpieza esté completa, desenchufe el cable, abra la tapa y retire
la cesta con los objetos. Conecte la manguera al tubo de drenaje. Abra la
válvula de drenaje para extraer el agua sucia. Limpie la cuba y séquela.
Cierre la válvula de drenaje.
MANTENIMIENTO Y LIMPIEZA
Para asegurar un óptimo rendimiento y una máxima fiabilidad del aparato le recomendamos:
No encienda el aparato sin agua en la cuba.
A pesar de que el aparato está diseñado con múltiples protecciones, si se mantiene
encendido durante más de 30 segundos puede dañarse el aparato o reducirse
severamente su vida útil.
No utilice el aparato durante un tiempo excesivo o continuamente.
El aparato está diseñado con protección de sobrecalentamiento. Si ha estado
funcionando durante 45 minutos, es recomendable dejarlo descansar unos 20 minutos
para prolongar su vida útil.
No deje agua en la cuba durante mucho tiempo.
Después del trabajo, abra la válvula de drenaje para extraer el agua sucia. Limpie la
cuba y séquela. Cierre la válvula de drenaje.
No derrame agua sobre la carcasa
Procure no mojar en exceso el teclado del aparato.
Use una toalla para secar la cuba y la carcasa.
No exponga el aparato a la luz solar directa durante mucho tiempo.
Mantener en lugar seco, fresco y ventilado.

▪Seque la cuba y el aparato con una toalla seca. No lave completamente el aparato con agua para evitar
cortocircuitos.
▪No cargue excesivamente la cuba del aparato con objetos a limpiar. Esta circunstancia, además de reducir
la eficacia del baño puede resultar perjudicial para el aparato.
▪Procure no introducir en la cuba objetos excesivamente pesados o de grandes dimensiones.
▪Deben emplearse productos químicos de limpieza que sean compatibles con los elementos y piezas a
tratar. Evite los disolventes corrosivos.
▪Cuando tenga que limpiar objetos por primera vez —especialmente cuando estos sean de gran valor—es
conveniente realizar antes una prueba con una sola pieza. Solicite información sobre la solución
limpiadora más recomendable al fabricante de las piezas.
▪Después de utilizar el baño limpie la cuba y la carcasa exterior con un paño húmedo. Para realizar esta
operación desenchúfelo previamente de la red.
PRECAUCIONES
IMPORTANTE- La tensión de alimentación de los transductores de ultrasonidos alcanza varios
cientos de voltios. Por este motivo es muy importante que respete las siguientes Normas de
Seguridad:
1) No abra la tapa del aparato con el cable de alimentación enchufado a la red.
2) Evite en lo posible derramar agua u otros líquidos conductores sobre la carcasa del aparato.
3) Enchufe siempre el aparato a tomas de corriente dotadas de toma de tierra.
Conecte el aparato a una toma de corriente de 230 V, 50 Hz provista de toma de tierra.
No utilice disolventes inflamables como solución limpiadora.
Mantenga la unidad desenchufada antes de llenarla. No llenar de agua por encima de la línea max. No
ponga en marcha el aparato con niveles de líquido en la cuba inferiores a la marca min.
No permita que niños o personal no especializado manipulen el aparato.
No sumerja el aparato en ningún líquido para proceder a su limpieza.
La limpieza por ultrasonidos no está indicada para perlas orgánicas.
No abra el aparato cuando se encuentra conectado a la red.
La tapa del aparato pude encontrarse caliente después de un ciclo. Por este motivo, retírela con
precaución.
Cuando no conozca exactamente los efectos de la solución limpiadora sobre el objeto que desea limpiar,
procure hacer una prueba con una sola pieza antes de seguir con las demás.
No trate de retirar ningún tornillo o panel. No hay componentes que el usuario deba manipular.
Para reducir el riesgo de electrocución, no tocar nunca el cable ni el enchufe con las manos húmedas.
No poner nunca en funcionamiento la unidad cuando el cable o el enchufe estén dañados. Si no funciona
correctamente, está dañada o se ha caído al agua, devuelvan la unidad al servicio técnico para que la
examinen y reparen.
En caso de que el aparato haya caído dentro del agua no lo toque, desenchúfelo inmediatamente.
Utilizar la máquina de forma adecuada como se indica en el manual de instrucciones. No utilizar
accesorios no recomendados por el fabricante.
El aparato nunca deberá quedar desatendido mientras esté enchufado.
No utilice el aparato cerca de fuentes de calor como radiadores.
Coloque el aparato en una superficie seca y nivelada.
SOLUCIONES LIMPIADORAS
Las soluciones limpiadoras se pueden clasificar en dos grandes grupos: las que tienen por base agua a la que
se mezcla un compuesto detergente; y los disolventes.
El medio de limpieza más común suele ser agua, puesto que tiene una aceptable capacidad para disolver
sustancias inorgánicas. Sin embargo, se encuentra muy limitada a la hora de disolver sustancias orgánicas.
Para este tipo de compuestos el agua actúa como un buen medio de dispersión de partículas de suciedad y
un buen soporte para detergentes específicos disolventes de sustancias orgánicas.
En la mayoría de los casos puede utilizarse como solución limpiadora una mezcla de agua con un lavavajillas
doméstico. No obstante, cuando la cantidad o naturaleza de la suciedad presenta resistencia a este tipo de
soluciones limpiadoras, es preciso emplear disolventes específicos especialmente formulados para su uso
con baños de ultrasonidos. En ningún caso deben emplearse disolventes inflamables o que no sean
respetuosos con el medio ambiente.

7
PROCESO DE ELIMINACIÓN DE LA SUCIEDAD
Se generan multitud de
pequeñas burbujas por la
acción del ultrasonidos.
La burbujas implosionan
constantemente por la acción
del ultrasonidos para impactar
contra la superficie del objeto.
El impacto desintegra la suciedad
en gránulos y la separa de la
superficie del objeto. Los gránulos
pasan al agua.
CARACTERÍSTICAS TÉCNICAS
Tensión de alimentación:
230 V, 50 Hz
Potencia:
300 W
Frecuencia:
35 kHz
Dimensiones exteriores:
515 x 305 x 240 mm
Dimensiones de la cuba:
323 x 205 x 99 mm
Capacidad de la cuba:
6 L
min: 3.35 L / max: 5 L
Longitud max. objeto:
340 mm
Material de la cuba:
Acero inoxidable
Temporizador:
1 - 30 minutos
Peso:
7.5 kg

EN
R-100136 is a practical Ultrasonic Bath specially designed for a wide range of applications. For a long working
life and an optimum performance, we recommend you to read carefully the following instructions:
INSTALLATION
▪Carefully unpack the Ultrasonic Bath. Inside you will find the following accessories:
-1 draining hose (M).
-1 power cord (L).
-1 plastic basket (K).
▪Choose a flat and firm surface far from heat or vibration sources.
▪Connect the hose (M) to the drainage pipe (D).
▪Connect the power cord (L) to the socket of the unit (J) and to a 230 V, 50 Hz earthed power source.
▪Open the lid (A), place the products in the basket (K) in line and then put the basket inside the tank (B).
▪In order to prevent scratches and friction of the products, do not pile them up.
▪Pour water into the stainless steel tank. The water should cover the products but within the min. and max.
marks.
▪The machine is ready for operation.
CONTROL PANEL
10.
Timer
The timer counts down since the cleaning starts.
11. State thermometer:
Green Water temperature between 0 and 30 % of the set temperature.
Orange Water temperature between 30 and 60 % of the set temperature.
Red Water temperature between 60 and 90 % of the set temperature.
Red blinking Temperature is near to set temperature.
All lighting Set temperature reached (90-100 %).
12.
Set temperature
5 temperatures can be selected. Press the key to select the temperature from the following
secuence:
13.
ºC / ºF indicator
14.
Overheat protection icon
If the appliance is working improperly or has been operating for an excessive period of time, the
red warning light will illuminate, indicating that the overheating protection has operated. The
device can not be used for 15-20 minutes. Then the light will turn off and the device can be used
again.
15.
Heating
Press the key twice. Icon will light, meaning that heating is active. Press again the key
twice to put heating off.
16.
Normal cleaning
When lighing: normal heating is acting.
To prevent accidental ignition of the heater, press the key twice in 6 seconds to turn it on or off.

9
17. On/Off :
After turning on the device, the display shows the selected time and the unit is ready
to work. Press the key twice and the cleaning will begin. Cleaning will stop when
the time arrives. To stop the device before time runs out, press the key twice.
18. Quick time selection key
Press the key . The display will score . Each time you press the key, it will increase by 5
minutes.
OPERATION
Remove the lid and hold it in the support. put the items in the basket. Then
put them in the cleaning tank. Add water or a cleaning solution to a level
between min. and max. and above the area to be cleaned. In order to
prevent scratches and friction of the products, do not pile them up
If the device runs out of water, the energy of the ultrasound will not be
absorbed. This model has a lot of power. In 15 seconds the device can be
damaged or its life can be severely reduced.
Connect the power cord and turn the switch on (I). The display will show
, This is the most commonly used time. If the time needs to be
adjusted, press If the time needs to be adjusted, press Time button and
buttons and . The time can be set between 1 to 30 minutes. Common
cleaning time are 5, 10 or 15 minutes. Prolonged cleaning time may result
in:
d. Loosening of the screws if used.
e. Increasing the pre-existing cracks.
f. Peeling of coating which was already separated.
Press button twice to start cleaning.
During cleaning, buzzing sound can be Heard from the cleaning tank,
indicating the cleaning is underway. Closing the lid will reduce the noise.
LED display will count down to show the remaining cleaning time. When it
displays , the cleaning is done. To stop cleaning at any time, press
button twice.
The unit is designed with overheating protection to avoid damage caused by
extended and continuous operation. When the light is on, the unit will
not turn on even it is forced to. The unit will idle for about 20 minutes. Then
can be restarted after the green light comes on.

When the heater is needed, press twice. flashes, indicating the heater
is turned on. El display mostrará la temperatura real del agua. When water
temperature reaches the set, will decrease, indicating heating stop.
To ensure safety, the unit is designed with dual protections. The heater will
be turned off automatically if it has been running for 45 minutes.
When there is no dirt in the smoke, cleaning is done. If additional cleaning is
required, select the time again and repeat the previous steps.
When cleaning is completed, turn off the switch, remove the lid and retrieve
the items. Pour water out through the draining valve. Clean and dry the
tank. Close the draining valve.
CARE AND MAINTENANCE
To ensure optimum performance and maximum reliability of the device, we recommend:
Do not turn the unit without water in the tank.
Even though the unit is designed with multiple protections, if it is turned on for over 30
seconds without water in the tank, it may damage the unit or severely reduce the life of
the unit.
Do not turn the unit for extended time or continuously.
The unit is designed with overheat protection. If the unit has been running for 45
minutes, it is recommended to stop the unit for about 20 minutes to prolong the life of
the unit.
Do not keep water in the cleaning tank for a long time.
After cleaning is completed, open the drain valve to extract dirty water. Clean and dry
the tank. Close the draining valve.
Do not spray water over the housing.
Take care not to wet the keyboard.
Use a towel to wipe the tank and the housing.
Do not expose the unit under direct sunshine for a long time.
Keep the unit in a dry, cool and ventilated area.

11
▪Dry the tank and unit with a towel. Do not wash the unit completely with water to prevent the risk of shock.
▪Do not load the tank excessively; it could reduce the efficacy of the bath and damage the unit.
▪Do not put very heavy or large objects in the bottom of the tank.
▪Use chemical cleaning products compatible with the objects to be treated. Avoid corrosive solvents.
▪When items (especially valuable items) are being cleaned for the first time, carry out a trial run first with
just one item. Ask the manufacturer what cleaning solution is recommended.
▪After using the unit, clean the tank and the external body with a damp cloth. Always unplug the unit before
cleaning it.
PRECAUTIONS
IMPORTANT- The input voltage of the Ultrasonic Bath transducers can reach hundreds of
volts. Therefore, it is very important to observe the following Safety Regulations:
1) Do not open the lid when the power cord is connected to the power supply.
2) Do not spill water or any other conducting fluid over the unit’s housing.
3) Always connect the unit to grounded power outlets.
Connect the unit to a grounded 230 V, 50/60 Hz power outlet.
Do not use inflammable solvents as cleaning solutions.
Keep the unit unplugged before filling it. Do not fill the tank above the max. mark. Do not start up the unit
when the water level is below the min. mark.
Do not allow children or unskilled people to handle the unit.
Never submerge the unit in any liquid to clean it.
Ultrasonic cleaning is not suitable for organic pearls.
Do not open the unit while it is connected to the power supply.
The machine lid may be hot after a cycle. Proceed with caution when removing it.
If you are not sure of the effects of the cleaning solution on a given type of item, carry out a previous test
with a single item.
Do not attempt to remove any screw or panel. The user does not need to manipulate anything inside.
To prevent electric shock, never touch the power cord or socket with wet hands.
Never operate the unit if the plug or the power cord is damaged. If the unit does not work properly, is
damaged or has fallen into the water, refer it to a technical service for examination and repair.
Do not touch the unit if it has fallen into the water. Unplug it immediately.
Use the unit properly according to the user's guide. Do not use accessories not recommended by the
manufacturer.
The unit should never be left unattended when it is plugged.
Do not operate the unit next to heat sources such as radiators.
Install the unit on a dry and flat surface.
CLEANING SOLUTIONS
Cleaning solutions can be classified into two types: those with water as the basic element and cleaning
solution, and solvents.
The most common cleaning method is with water, as it has an acceptable capacity to dissolve inorganic
substances. However, it is extremely limited in dissolving organic substances. For this type of compound,
water is a good medium for the dispersion of waste particles, and a good support for specific detergents which
dissolve organic substances.
In most cases a mixture of water and domestic washing up liquid can be used as a cleaning solution.
Nevertheless, when the quantity or nature of dirt is resistant to this type of cleaning solutions, specific solvents
for ultrasonic baths have to be used. Under no circumstances should inflammable solvents or
environmentally unfriendly products be used.
PRINCIPLES OF ULTRASONC CLEANING

Millions of tiny air bubbles are
generated within liquid by
high frequency vibration.
The air bubbles burst when in
contact with object.
The impact dislodges the debris to
achieve the cleaning effect.
TECHNICAL SPECIFICATIONS
Power supply:
230 V, 50 Hz
Power:
300 W
Frequency:
35 kHz
Outside dimensions:
515 x 305 x 240 mm
Tank dimensions:
323 x 205 x 99 mm
Tank capacity:
6 L
min: 3.35 L / max: 5 L
Max. item length:
340 mm
Tank material:
Stainless steel
Timer:
1 - 30 minutes
Weight:
7.5 kg
Table of contents
Languages:
Other Mestra Ultrasonic Jewelry Cleaner manuals