3. Packliste Liste de colisage Lista di
imballaggio Packing
List
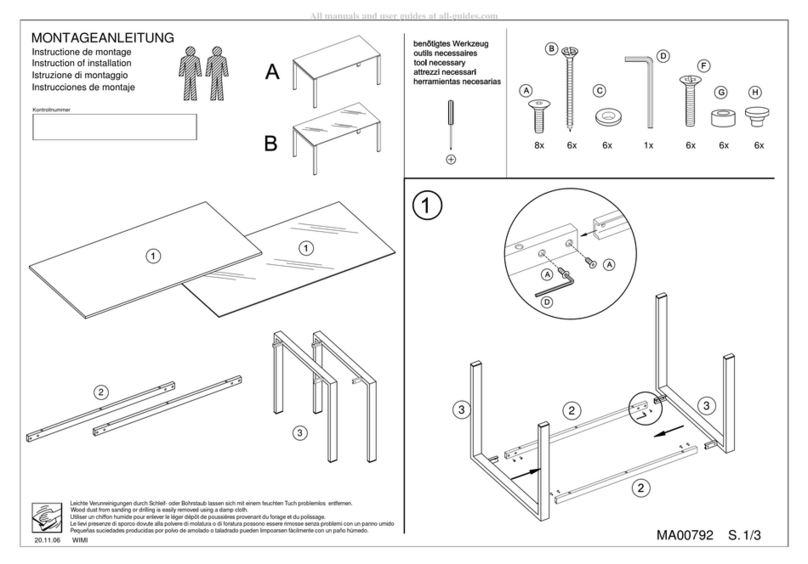
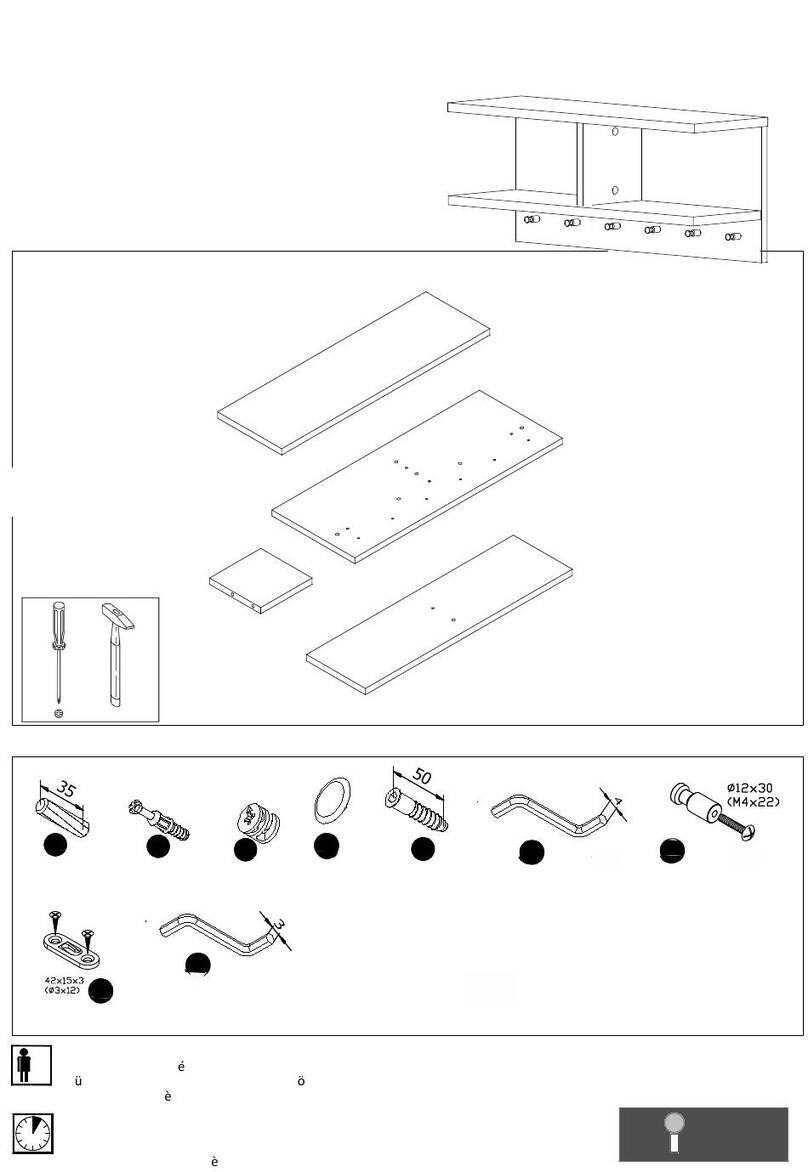
Übersicht Gestell
A
B
2 Stützen
1 Längsträger
Vue d’ensemble des
pièces
2 soutien
1 longeron
Panoramica dei pezzi
2 supporti
1 longherone
2 supports
C1 longitudinal member
Overview parts
I
2 Holzschrauben
schwarz Ø 4x25mm
2 vis à bois
noir Ø 4x25mm
2 viti per legno
nere Ø 4x25mm
2 wood screws
black Ø 4x25mm
RESTEN VOR INBETRIEBNAHME
Beachten Sie, dass Alle Kabel so platziert sind, dass sie nicht die
Kabel beschädigen.
screws.
Schrauben Motorhaus und Aussenrohr
Nach längerer Inbetriebnahme sind alle Schrauben nachzuziehen!
Schrauben Motorhaus /Aussenrohr, M6x16mm
Schrauben Kufen, M10x16mm
Schrauben Tischplatte, Ø5x20mm
Schrauben Handset, Ø4x25mm
Bedienpanel panneau de com-
mande
pannello di controllo control panel
Kontrollbox Boîtier de commande Scatola di controllo Control box
G
D
RESTEN VOR INBETRIEBNAHME
Beachten Sie, dass Alle Kabel so platziert sind, dass sie nicht die
Kabel beschädigen.
screws.
Schrauben Motorhaus und Aussenrohr
Nach längerer Inbetriebnahme sind alle Schrauben nachzuziehen!
Schrauben Motorhaus /Aussenrohr, M6x16mm
Schrauben Kufen, M10x16mm
Schrauben Tischplatte, Ø5x20mm
Schrauben Handset, Ø4x25mm
Control box/ handset pcs
Control box 1
Handset, 1800 mm cable 1
AC cable, 2000 mm 1
Screws pcs
Screw for rubber grip, M6 x 16 mm, 14 mm head 4
Screw for outer pipe, M6 x 16 mm, 14 mm head 4
Screw for feet, M10 x 16 mm 8
Tailstock for con. pipe, M10 x 20 mm 8
Screw for desktop, Ø5 x 16 mm 14
Screw for handset, Ø4 x 25 mm 2
All screws:
Maximum 10 Nm.
Make sure all screws including tailstock are tightened, also after a period of use!
TIGHTENING TORQUE
Tailstock:
Make sure all screws including tailstock
are tightened, also after a period of use!
RESET THE DESK BEFORE USE
Pressboth buttonsatthesametimefor3seconds.
Continuepressing thebuttonsuntilboth columns areinlowest
position. When finish reset, thecontrol box makes a soundand
the buttons can be released. Now the system is operational.
4 Schrauben
M10x12mm
4 vis M10x12mm 4 viti M10x12mm 4 screws M10x12mm
9 Holzschrauben
silber Ø 5x16mm
9 vis à bois
argent Ø 5x16mm
9 viti per legno
argento Ø 5x16mm
9 wood screws
silver Ø 5x16mm
Control box/ handset pcs
Control box 1
Handset, 1800 mm cable 1
AC cable, 2000 mm 1
Screws pcs
Screw for rubber grip, M6 x 16 mm, 14 mm head 4
Screw for outer pipe, M6 x 16 mm, 14 mm head 4
Screw for feet, M10 x 16 mm 8
Tailstock for con. pipe, M10 x 20 mm 8
Screw for desktop, Ø5 x 16 mm 14
Screw for handset, Ø4 x 25 mm 2
All screws:
Maximum 10 Nm.
Make sure all screws including tailstock are tightened, also after a period of use!
TIGHTENING TORQUE
Tailstock:
Make sure all screws including tailstock
are tightened, also after a period of use!
RESET THE DESK BEFORE USE
Pressboth buttonsatthesametimefor3seconds.
Continuepressing thebuttonsuntilbothcolumns arein lowest
position. When finish reset, the control box makes asoundand
the buttons can be released. Now the system is operational.
E
F
H
Control box/ handset pcs
Control box 1
Handset, 1800 mm cable 1
AC cable, 2000 mm 1
Screws pcs
Screw for rubber grip, M6 x 16 mm, 14 mm head 4
Screw for outer pipe, M6 x 16 mm, 14 mm head 4
Screw for feet, M10 x 16 mm 8
Tailstock for con. pipe, M10 x 20 mm 8
Screw for desktop, Ø5 x 16 mm 14
Screw for handset, Ø4 x 25 mm 2
All screws:
Maximum 10 Nm.
Make sure all screws including tailstock are tightened, also after a period of use!
TIGHTENING TORQUE
Tailstock:
Make sure all screws including tailstock
are tightened, also after a period of use!
RESET THE DESK BEFORE USE
Pressboth buttonsatthesametimefor3seconds.
Continuepressing thebuttonsuntilboth columns areinlowest
position. When finish reset, thecontrol box makes a soundand
the buttons can be released. Now the system is operational.
4 Schrauben
M6x16mm
4 vis M6x16mm 4 viti M6x16mm 4 screws M6x16mm
2 Klemmen 2 pinces 2 morsetti 2 clamps
2 Tischplattenhalter 2 supports de table 2 supporti da tavolo 2 table top holders
[email protected] | www.adjustme.eu | © 11/2020 by ADJUSTME | All rights reserved | A part of Group 1 ADJUSTME 23 Wall – TL13S ASSEMBLY MANUAL
Step 3
Step 1
PACKING LIST
Frame pcs
Column, 500 mm cable 2
Endpipe 2
Outer Pipe 1160/1360 mm 1
Rubber washer 7
Control box/ handset pcs
Control Box 1
Handset, 1500 mm cable 1
AC cable, 2000 mm 1
Screws pcs
Screw for motorhouse/outer pipe, M6x16 mm 4
Screw for table top, Ø5x20 mm 9
Screw for handset, Ø4x25 mm 2
Screw for endpipe, M6*8 mm
Attachable bracket pcs
Screw for attachable bracket, M6 x 20 mm 2
Cable tie 2
Foot cap 2
Screw for foot cap, M10x25 mm 8
Shoes 2
Connection beam 2
Wall bracket 2
Screw for connection beam, M10x12 mm 4
Step 2
RESET THE DESK BEFORE USE
Press both buttons at the same time for 3 seconds. Continue pressing the buttons
until both columns are in lowest position. Keep pressing the buttons until control box makes
1 beep. When control box makes 1 beep, it is confirmed that reset has been completed and
buttons can be released. Now the desk is operational.
Make sure all screws including tailstock are tightened, also after a period of use!
WARNING Carefully arrange all the cables not to be damaged by tabletop screws.
TIGHTENING TORQUE
Tailstock Maximum 6Nm
Screw for motor house, outer pipe, feet and tabletop Maximum 10Nm
Screw for handset <6Nm
Make sure all screws including tailstock are tightened, also after a period of use!
2 Verbindungsstücke 2 connecteurs 2 connettori 2 connectors
[email protected] | www.adjustme.eu | © 11/2020 by ADJUSTME | All rights reserved | A part of Group 1 ADJUSTME 23 Wall – TL13S ASSEMBLY MANUAL
Step 3
Step 1
PACKING LIST
Frame pcs
Column, 500 mm cable 2
Endpipe 2
Outer Pipe 1160/1360 mm 1
Rubber washer 7
Control box/ handset pcs
Control Box 1
Handset, 1500 mm cable 1
AC cable, 2000 mm 1
Screws pcs
Screw for motorhouse/outer pipe, M6x16 mm 4
Screw for table top, Ø5x20 mm 9
Screw for handset, Ø4x25 mm 2
Screw for endpipe, M6*8 mm
Attachable bracket pcs
Screw for attachable bracket, M6 x 20 mm 2
Cable tie 2
Foot cap 2
Screw for foot cap, M10x25 mm 8
Shoes 2
Connection beam 2
Wall bracket 2
Screw for connection beam, M10x12 mm 4
Step 2
RESET THE DESK BEFORE USE
Press both buttons at the same time for 3 seconds. Continue pressing the buttons
until both columns are in lowest position. Keep pressing the buttons until control box makes
1 beep. When control box makes 1 beep, it is confirmed that reset has been completed and
buttons can be released. Now the desk is operational.
Make sure all screws including tailstock are tightened, also after a period of use!
WARNING Carefully arrange all the cables not to be damaged by tabletop screws.
TIGHTENING TORQUE
Tailstock Maximum 6Nm
Screw for motor house, outer pipe, feet and tabletop Maximum 10Nm
Screw for handset <6Nm
Make sure all screws including tailstock are tightened, also after a period of use!
2 Fussstücke 2 pièces de pied 2 pezzi di piede 2 foot pieces
[email protected] | www.adjustme.eu | © 11/2020 by ADJUSTME | All rights reserved | A part of Group 1 ADJUSTME 23 Wall – TL13S ASSEMBLY MANUAL
Step 3
Step 1
PACKING LIST
Frame pcs
Column, 500 mm cable 2
Endpipe 2
Outer Pipe 1160/1360 mm 1
Rubber washer 7
Control box/ handset pcs
Control Box 1
Handset, 1500 mm cable 1
AC cable, 2000 mm 1
Screws pcs
Screw for motorhouse/outer pipe, M6x16 mm 4
Screw for table top, Ø5x20 mm 9
Screw for handset, Ø4x25 mm 2
Screw for endpipe, M6*8 mm
Attachable bracket pcs
Screw for attachable bracket, M6 x 20 mm 2
Cable tie 2
Foot cap 2
Screw for foot cap, M10x25 mm 8
Shoes 2
Connection beam 2
Wall bracket 2
Screw for connection beam, M10x12 mm 4
Step 2
RESET THE DESK BEFORE USE
Press both buttons at the same time for 3 seconds. Continue pressing the buttons
until both columns are in lowest position. Keep pressing the buttons until control box makes
1 beep. When control box makes 1 beep, it is confirmed that reset has been completed and
buttons can be released. Now the desk is operational.
Make sure all screws including tailstock are tightened, also after a period of use!
WARNING Carefully arrange all the cables not to be damaged by tabletop screws.
TIGHTENING TORQUE
Tailstock Maximum 6Nm
Screw for motor house, outer pipe, feet and tabletop Maximum 10Nm
Screw for handset <6Nm
Make sure all screws including tailstock are tightened, also after a period of use!
2 Wandhalterungen 2 supports muraux 2 supporti a parete 2 wall mounts
[email protected] | www.adjustme.eu | © 11/2020 by ADJUSTME | All rights reserved | A part of Group 1 ADJUSTME 23 Wall – TL13S ASSEMBLY MANUAL
Step 3
Step 1
PACKING LIST
Frame pcs
Column, 500 mm cable 2
Endpipe 2
Outer Pipe 1160/1360 mm 1
Rubber washer 7
Control box/ handset pcs
Control Box 1
Handset, 1500 mm cable 1
AC cable, 2000 mm 1
Screws pcs
Screw for motorhouse/outer pipe, M6x16 mm 4
Screw for table top, Ø5x20 mm 9
Screw for handset, Ø4x25 mm 2
Screw for endpipe, M6*8 mm
Attachable bracket pcs
Screw for attachable bracket, M6 x 20 mm 2
Cable tie 2
Foot cap 2
Screw for foot cap, M10x25 mm 8
Shoes 2
Connection beam 2
Wall bracket 2
Screw for connection beam, M10x12 mm 4
Step 2
RESET THE DESK BEFORE USE
Press both buttons at the same time for 3 seconds. Continue pressing the buttons
until both columns are in lowest position. Keep pressing the buttons until control box makes
1 beep. When control box makes 1 beep, it is confirmed that reset has been completed and
buttons can be released. Now the desk is operational.
Make sure all screws including tailstock are tightened, also after a period of use!
WARNING Carefully arrange all the cables not to be damaged by tabletop screws.
TIGHTENING TORQUE
Tailstock Maximum 6Nm
Screw for motor house, outer pipe, feet and tabletop Maximum 10Nm
Screw for handset <6Nm
Make sure all screws including tailstock are tightened, also after a period of use!
Control box/ handset pcs
Control box 1
Handset, 1800 mm cable 1
AC cable, 2000 mm 1
Screws pcs
Screw for rubber grip, M6 x 16 mm, 14 mm head 4
Screw for outer pipe, M6 x 16 mm, 14 mm head 4
Screw for feet, M10 x 16 mm 8
Tailstock for con. pipe, M10 x 20 mm 8
Screw for desktop, Ø5 x 16 mm 14
Screw for handset, Ø4 x 25 mm 2
All screws:
Maximum 10 Nm.
Make sure all screws including tailstock are tightened, also after a period of use!
TIGHTENING TORQUE
Tailstock:
Make sure all screws including tailstock
are tightened, also after a period of use!
RESET THE DESK BEFORE USE
Pressboth buttonsatthesametimefor3seconds.
Continuepressing thebuttonsuntilboth columns areinlowest
position. When finish reset, thecontrol box makes a soundand
the buttons can be released. Now the system is operational.
4 Schrauben
M6x8mm
4 vis M6x8mm 4 viti M6x8mm 4 screws M6x8mm
Control box/ handset pcs
Control box 1
Handset, 1800 mm cable 1
AC cable, 2000 mm 1
Screws pcs
Screw for rubber grip, M6 x 16 mm, 14 mm head 4
Screw for outer pipe, M6 x 16 mm, 14 mm head 4
Screw for feet, M10 x 16 mm 8
Tailstock for con. pipe, M10 x 20 mm 8
Screw for desktop, Ø5 x 16 mm 14
Screw for handset, Ø4 x 25 mm 2
All screws:
Maximum 10 Nm.
Make sure all screws including tailstock are tightened, also after a period of use!
TIGHTENING TORQUE
Tailstock:
Make sure all screws including tailstock
are tightened, also after a period of use!
RESET THE DESK BEFORE USE
Pressboth buttonsatthesametimefor3seconds.
Continuepressing thebuttonsuntilboth columns areinlowest
position. When finish reset, thecontrol box makes a soundand
the buttons can be released. Now the system is operational.
8 Schrauben
M10x25mm
8 vis M10x25mm 8 viti M10x25mm 8 screws M10x25mm
Control box/ handset pcs
Control box 1
Handset, 1800 mm cable 1
AC cable, 2000 mm 1
Screws pcs
Screw for rubber grip, M6 x 16 mm, 14 mm head 4
Screw for outer pipe, M6 x 16 mm, 14 mm head 4
Screw for feet, M10 x 16 mm 8
Tailstock for con. pipe, M10 x 20 mm 8
Screw for desktop, Ø5 x 16 mm 14
Screw for handset, Ø4 x 25 mm 2
All screws:
Maximum 10 Nm.
Make sure all screws including tailstock are tightened, also after a period of use!
TIGHTENING TORQUE
Tailstock:
Make sure all screws including tailstock
are tightened, also after a period of use!
RESET THE DESK BEFORE USE
Pressboth buttonsatthesametimefor3seconds.
Continuepressing thebuttonsuntilboth columns areinlowest
position. When finish reset, thecontrol box makes a soundand
the buttons can be released. Now the system is operational.
4 Schrauben
M10x12mm
4 vis M10x12mm 4 viti M10x12mm 4 screws M10x12mm
J
K
L
M
N
O
P
7/77/16
