manuals.online logo
Brands
  1. Home
  2. •
  3. Brands
  4. •
  5. MicroBoards Technology
  6. •
  7. Printer
  8. •
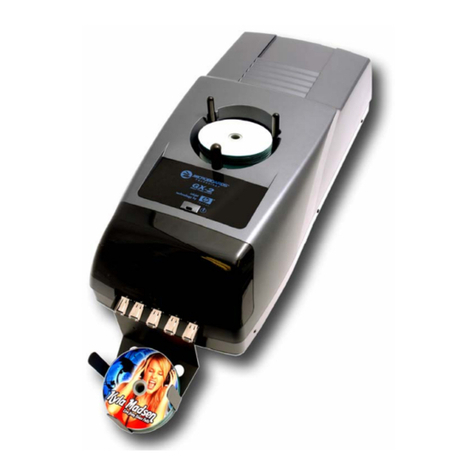
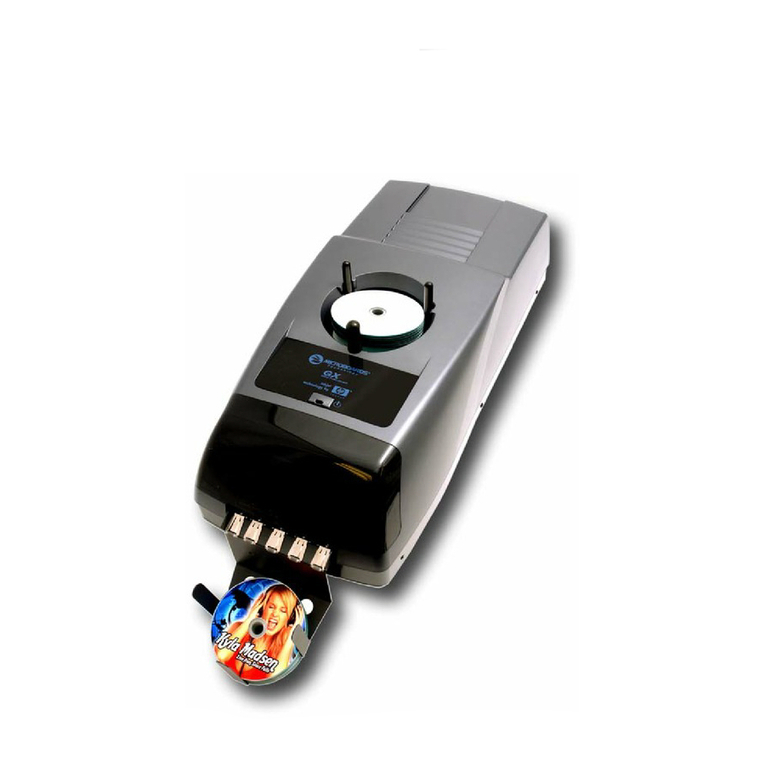
  9. MicroBoards Technology GX Disc Printer User manual

MicroBoards Technology GX Disc Printer User manual

Quick Reference Guide
for Windows 7, Vista, and XP
PleasevisitourTechnicalSupportwebsiteatwww.microboards.com/support
For a more in-depth look at the installation process, please refer
to the Installation section of the User’s Manual.
Be sure your computer meets the Minimum System
Requirements as stated in the User’s Manual and that
you have read these instructions and the Manual prior
to contacting Microboards Technical Support with
installation or configuration questions!
GX Auto Printer Installation:
1. Unpack the GX Auto Printer and place it in the
selectedworkspace. Thisspaceshouldhaveenough
vertical space to allow for easy loading of media into
theinput hopper .
2. Insertthe GXAutoPrinter Installationdisk into the CD/DVD ROM driveonyour
computer. Theinstallershouldopenautomatically.
If the installer does not automatically open, click the Start button and select
Runfrom the Startmenu. Clickthe Browsebutton and gototheCD/DVD drive,
highlight Setup.exe, click the Open button, then click OK.
Please follow all directions on each window before clicking the Next button.
GXAuto Printer Installation
3. Youwillfirstbeguidedthroughthehardwaresetup. Pleasefollow alldirections
on each window before clicking the Next button.
During the Installation process, you may see windows appear that refer to
the drivers not being verified by the operating system. Should any of these
windowsappear, click the option to installthe driver software.
If you do not install the driver software, your hardware
willnot run successfully!
4. Afterthe physical hardware setupiscomplete,youwill be instructed toconnect
the GXAuto Printer to the computer. Once this occurs, Windows will find your
newhardware and run through the driver installation process.
Youmayseeanindicationthatahardwaredevicewas not completely installed.
This is not unusual; the hardware installation will complete after the PC is
rebooted. Continuethroughthe Installertothe last window.
5. Rebooting your PC is required before attempting to run your GX Disc
Printer! Click the Finish button to do so.
Do NOT connect your GX Auto Printer to your
computer until you are told to do so!!
COLOR INK CARTRIDGE CAN BE USED!
As is true with all printers, the quality of ink cartridge and the quality of the ink
within the cartridge will affect your output. To ensure quality results, the GXAuto
Printer will not operate with any other color ink cartridge in place.
The use of refilled ink cartridges will void your warranty!
ONLY MICROBOARDS GX-300HC
Inorder to guarantee quality resultsfrom the GXAuto Printer,
Printernot responding 1. Turnonpowerto Printer(frontpanel). Firmly press
thepower button and wait several seconds for the
printerpowerLED to come on
2. Ink cartridge must be installed before turning on
theGXAutoPrinter.
3. Ifthe LED on the powerbuttonisblinkingRedwith
a cartridge installed, you may not have the ink
cartridgeinstalledcorrectly. TurntheGXoff,remove
thecartridge and reseat. Turn power back on.
Hardwarenotinstallingon
PC 1. Turn on power to GXAuto Printer (back panel)
2. ReseatUSBconnection
3. InstallationCD in drive?
Installation Troubleshooting Guide:
The Microboards Printer Toolbox Installation
The Microboards Toolbox is installed silently during the GX Disc Printer
installation. Thisapplicationis used for general maintenance functions.
After the installation completes, the Toolbox will start up. You will see an icon
appear in the tool tray in the lower right corner of your Windows desktop. To
access the Toolbox, double-click the icon circled below.
TheToolboxwillalsoautomaticallystartupafter
rebootingthePC.
Installation of the GX Auto Printer is complete. The printer will need
to be aligned prior to printing disks. Please see the other side of this
guide or refer to the User’s Manual for information on the alignment
process.

Quick Reference Guide
for Windows 7, Vista, and XP
Rev 10.03.26 PleasevisitourTechnicalSupportwebsiteatwww.microboards.com/support
GXAuto PrinterAlignment
Your GX Auto Printer has been factory aligned to .1mm
precision. Thevalues provided with the GXAuto Printer,
located on the back of the unit below the power plug,
are the offset values to be used in the Printing
Preferences.
To set these values, please follow the steps listed
below:
1. Access the Printing Preferences for the
MicroboardsGSeries. Howthis isdone willdepend
ontheOperatingSystem and the currently selected
Start Menu layout.
Windows 7: Select Devices and Printers from the Start button.
Windows Vista: Select the Control Panel from the Start button. Once the
Control Panel opens, select Printer from the Hardware and Sound section.
Windows XP, Classic Start Menu layout: Youwill need to go to the Settings
selection, then to the Printers and Faxes from the Start button.
Windows XP, Start Menu layout: Select Printers and Faxes from the
Windows Start button.
2. Right click on the icon for the Microboards G Series and select Printing
Preferences…
3. On the Print Quality tab, select Photo for the Paper Type and Best for the
Print Quality.
Photo Best should always be selected when aligning the printer, in order to
insure the greatest accuracy during the alignment process. Other settings
may not result in the best alignment.
4. Select the Alignment tab. The .1mm Resolution setting must be selected
beforesettingalignmentvalues(seebelow). SettheTop andLeft Sidealignment
valuestothose required for image alignment.
These settings will change the size of the top and left margins, respectively.
Decreasing the values will move the image up or to the left, increasing will
adjust down or to the right.
5. Clickthe Apply button to save thechanges,foundonthe bottom of thePrinting
Preferenceswindow.
6. Start theSureThingapplication. Select apre-designedfull-coverage SureThing
disc image.
Place an blank disc in the input hopper and print the disc. Remember, Photo
Bestmode should always be usedwhen aligning the printer forthe highest
accuracy.
7. Checktheprinted disc. Ifthesettings arecorrect,the imageshouldbe centered
on the disc. If not, repeat steps 4 through 7, changing the Top and Left Side
amounts, using the graphic guide to the right of the alignment settings as a
referencetohow the values should be changed.
8. Fine tuning may be required for different brands and can be done within the
printing application to avoid altering these global alignment values set in the
PrinterProperties.
For further details on the alignment process, please refer to the
section on Alignment in the GX Auto Printer User’s Manual.
GXAuto Printer Configuration
COLOR INK CARTRIDGE CAN BE USED!
As is true with all printers, the quality of ink cartridge and the quality of the ink
within the cartridge will affect your output. To ensure quality results, the GXAuto
Printer will not operate with any other color ink cartridge in place.
The use of refilled ink cartridges will void your warranty!
ONLY MICROBOARDS GX-300HC
Inorder to guarantee quality resultsfrom theGXAuto Printer,
G Series Toolbox
Double-click the icon for the Microboards Toolbox that was placed on your PC’s
desktopduringtheinstallationprocess. TheTest and Clean disc functions require
blankmedia be loaded before thebuttonsare clicked.
Clicking the Test Disc
button prints out a test
pattern to verify the
printerisfunctioning.
The Exercise Belt
utility should be run if
the printer has been
idle for an extended
periodoftime,and can
berun multiple times if
necessary. The belts
will run at high speed
for a period of time to
reconditionthe belts. It
is not necessary to
loadany media for this
utility.
Clicking the Clean
Discbutton printsouta
heavyink-usagepattern
toclearanycloggedink
nozzles.
Be sure your computer meets the Minimum System Requirements as stated
in the User’s Manual and that you have read these instructions and the
Manual prior to contacting Microboards Technical Support with installation
or configuration questions!

Other manuals for GX Disc Printer

7

Other MicroBoards Technology Printer manuals

MicroBoards Technology MX-1 User manual

MicroBoards Technology

MicroBoards Technology MX-1 User manual

MicroBoards Technology PrintFactory PF-3 User manual

MicroBoards Technology

MicroBoards Technology PrintFactory PF-3 User manual

MicroBoards Technology G3 Auto Printer User manual

MicroBoards Technology

MicroBoards Technology G3 Auto Printer User manual

MicroBoards Technology PF3-1000 User manual

MicroBoards Technology

MicroBoards Technology PF3-1000 User manual

MicroBoards Technology PX2-1000 User manual

MicroBoards Technology

MicroBoards Technology PX2-1000 User manual

MicroBoards Technology GX Disc Printer User manual

MicroBoards Technology

MicroBoards Technology GX Disc Printer User manual

MicroBoards Technology GX Disc Printer User manual

MicroBoards Technology

MicroBoards Technology GX Disc Printer User manual

MicroBoards Technology GX-2 User manual

MicroBoards Technology

MicroBoards Technology GX-2 User manual

MicroBoards Technology Print Factory User manual

MicroBoards Technology

MicroBoards Technology Print Factory User manual

MicroBoards Technology G4 User manual

MicroBoards Technology

MicroBoards Technology G4 User manual

MicroBoards Technology GX Auto Printer User manual

MicroBoards Technology

MicroBoards Technology GX Auto Printer User manual

MicroBoards Technology G4 User manual

MicroBoards Technology

MicroBoards Technology G4 User manual

MicroBoards Technology PrintFactory PF-3 User manual

MicroBoards Technology

MicroBoards Technology PrintFactory PF-3 User manual

MicroBoards Technology GX Disc Printer User manual

MicroBoards Technology

MicroBoards Technology GX Disc Printer User manual

MicroBoards Technology G3 Auto Printer User manual

MicroBoards Technology

MicroBoards Technology G3 Auto Printer User manual

MicroBoards Technology GX Disc Printer User manual

MicroBoards Technology

MicroBoards Technology GX Disc Printer User manual

MicroBoards Technology GX Disc Printer User manual

MicroBoards Technology

MicroBoards Technology GX Disc Printer User manual

MicroBoards Technology CD Disc-to-Disc Office Copier II User manual

MicroBoards Technology

MicroBoards Technology CD Disc-to-Disc Office Copier II User manual

MicroBoards Technology GX Disc Printer User manual

MicroBoards Technology

MicroBoards Technology GX Disc Printer User manual

MicroBoards Technology PF3-1000 User manual

MicroBoards Technology

MicroBoards Technology PF3-1000 User manual

Popular Printer manuals by other brands

Brother HL-2400C Series Service manual

Brother

Brother HL-2400C Series Service manual

Oki C5100n user guide

Oki

Oki C5100n user guide

Fujitsu DL7400 user manual

Fujitsu

Fujitsu DL7400 user manual

HPRT PPTII-A Programming manual

HPRT

HPRT PPTII-A Programming manual

FujiFilm 3000 user guide

FujiFilm

FujiFilm 3000 user guide

Konica Minolta Magicolor 2490 MF Parts guide

Konica Minolta

Konica Minolta Magicolor 2490 MF Parts guide

Ricoh SH-P1 M020 Field service manual

Ricoh

Ricoh SH-P1 M020 Field service manual

Intermec PB50 user guide

Intermec

Intermec PB50 user guide

Canon BJC 6000 - Color Inkjet Printer Service manual

Canon

Canon BJC 6000 - Color Inkjet Printer Service manual

Canon i70 Series quick start guide

Canon

Canon i70 Series quick start guide

Canon advanced anywhere print user guide

Canon

Canon advanced anywhere print user guide

Epson SC-p400 series user guide

Epson

Epson SC-p400 series user guide

Lexmark E 330 brochure

Lexmark

Lexmark E 330 brochure

Ricoh Aficio AP400 operating instructions

Ricoh

Ricoh Aficio AP400 operating instructions

Fujitsu FTP-621CDL003 Specification sheet

Fujitsu

Fujitsu FTP-621CDL003 Specification sheet

FARGO electronics PERSONA C30 user manual

FARGO electronics

FARGO electronics PERSONA C30 user manual

TRANSFER CRAFTS HP1515 quick start guide

TRANSFER CRAFTS

TRANSFER CRAFTS HP1515 quick start guide

Astro Machine ASTROJET 2650P Operator's manual

Astro Machine

Astro Machine ASTROJET 2650P Operator's manual

manuals.online logo
manuals.online logoBrands
  • About & Mission
  • Contact us
  • Privacy Policy
  • Terms and Conditions

Copyright 2025 Manuals.Online. All Rights Reserved.