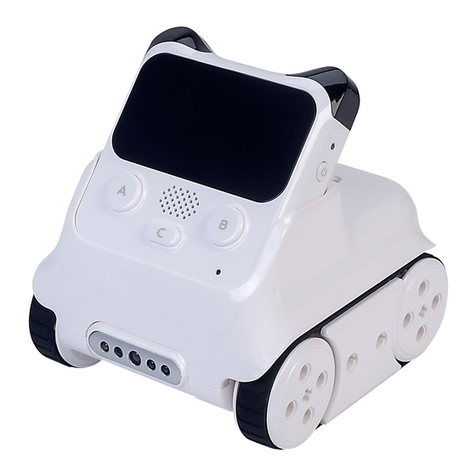
Microbric Edison V3 User manual

Getting started with Edison V3
2
Welcome!..................................................................................................................3
Let’s get started ......................................................................................................3
Look at the Edison V3 box for instructions and a barcode to kickstart your first
adventure................................................................................................................3
Getting to know Edison...........................................................................................3
Edison V3’s buttons ............................................................................................3
Edison V3’s sensors and outputs............................................................................4
..............................................................................................................4
..............................................................................................................4
Charging Edison V3................................................................................................6
Using a USB-A power source..............................................................................6
Using EdCharger.................................................................................................6
Programming Edison V3 using barcodes................................................................7
Programming Edison V3 in the EdBlocks language ...............................................7
EdBlocks for Windows, Chromebook, Mac, Linux, and Android .........................8
EdBlocks for iPad................................................................................................9
EdBlocks Resources...........................................................................................9
Programming Edison V3 in the EdScratch language............................................10
EdScratch Resources .......................................................................................11
Programming Edison V3 in the EdPy language....................................................11
Troubleshooting....................................................................................................13
Check the browser............................................................................................13
Check the connectivity status............................................................................13
iPad screen flasher not downloading ................................................................14
No USB-A port ..................................................................................................14
Drive troubleshooting........................................................................................14
Line tracking troubleshooting ............................................................................14
Obstacle detection troubleshooting...................................................................14
Checklist: setting up for success with your Edison robot .................................16
Edison basics .......................................................................................................16
Sensors and programs .........................................................................................16
Document number: 3.2.2.31.1

Getting started with Edison V3
3
Thank you! We're thrilled that you've selected Edison V3 for your class—an excellent
choice, if we do say so ourselves!
This guide is a swift introduction to get you up and running with programming your
Edison V3 robot.
Each Edison robot is packaged in a
small orange box. Unroll the cardboard
inside to take out Edison.
Edison V3 is designed to work with
LEGO bricks on four sides. It features
removable wheels and a skid, enabling
projects involving multiple Edison robots
or using the robot's motors for other
creations.
To power up Edison V3, press the triangle button. This action triggers a chirping
sound, and the red LED lights will begin flashing.
Look at the Edison V3 box for instructions and a barcode to kickstart your first
adventure.
Edison V3’s top has a key pad which includes three buttons. The shape of the
buttons and the number of presses will determine Edison’s behavior.
Play button (triangle button)
•1 press = turn on (when off)
•1 press = run program
Record button (round button)
•1 press = download program via screen flasher
•3 presses = scan barcode
Stop button (square button)
•1 press = stop program
•press 3 seconds = turn off

Getting started with Edison V3
4
Obstacle Detection: Edison V3 utilizes two infrared (IR) LEDs placed at its front left
and right, along with an IR receiver module. This receiver not only detects obstacles
but also functions as the core for IR data communications and remote-control
reception.
Remote Control: Thanks to the IR receiver module, Edison V3 can learn and
interpret IR codes from the EdRemote remote control and most standard TV remote
controls.
Infrared Data Communications: Through the IR receiver module, Edison can
communicate with other Edison robots.
Line Tracker: This system involves a red LED and a phototransistor, which together
act as the line tracking sensor. They not only follow lines but also decode special
barcodes, triggering pre-installed programs.
Light Sensors: Positioned at the front left and right sides, two phototransistors help
Edison sense changes in light.
Sound Sensor: Edison is equipped with a cool sound sensor called a piezo
transducer. It not only acts as a speaker to play sounds but can also pick up sounds
like claps.
Drive: Edison moves using a differential two-wheel drive system powered by its 3-
volt motors on the right and left sides. These motors come with wheel encoders,
providing precise movement resolution.
Infrared Data Communications: Two IR LEDs, used for obstacle detection, also
serve as components for Edison's IR data communications.
Sound: The same piezo transducer that functions as a speaker and detects claps
also manages Edison's sound outputs.
You can find more information about the Edison robot’s inputs, outputs, and sensors
at https://meetedison.com/edison-robots-sensors/

Getting started with Edison V3
5
Power saving mode
Please note: Edison V3 will turn off
automatically if not used after five
minutes however you can also power
down by pressing and holding the
square button for 3 seconds.
Left infrared LED
Right infrared LED
Left red LED
Right red LED
Left light sensor
Right light sensor
Infrared
receiver module
Processor
Left motor
Right motor
Serial number
and QR code
Keypad
Piezo transducer
(speaker/clap sensor)
Removable skid
Line tracking sensor
USB-A cable
Right wheel with
wheel encoder
Left wheel with
wheel encoder
EdCharger
charge contact
Rechargeable battery
(inside)
EdCharger
charge contact

Getting started with Edison V3
6
To power up Edison V3, you can use a
USB-A power source like a computer's
USB-A port, a USB-A wall adapter, or a
USB-A power bank.
Once you have selected your power
source, connect Edison's USB cable to
the USB-A port on that source.
During charging, both LED lights on Edison V3 will flash simultaneously. When
Edison is fully charged, the lights will stop flashing and remain on steadily.
It takes approximately 4 to 5 hours to charge Edison's battery to full capacity.
Once charging is finished, unplug Edison's USB cable from the device or power
source. Neatly fold the USB cable and tuck it into the USB cable compartment.
To use EdCharger:
1. Connect the EdCharger's
USB cable to a USB-A power
source, such as a computer's
USB-A port, a USB wall
adapter (minimum 1 amp/5
watts), or a power bank.
2. Position Edison V3 inside the
charger, ensuring the clear
top faces the EdCharger
markings on its front.
3. While charging, both LED lights on Edison V3 will flash simultaneously. Once the
battery is fully charged, the lights will cease flashing and remain lit.
4. Additionally, the EdCharger can serve as a storage unit for your Edison robots. It
automatically oversees the charging process, ensuring Edison V3 is always
prepared for action.
Image above shows the underside of Edison V3.0.

Getting started with Edison V3
7
Edison comes with several pre-set programs already loaded into the robot’s memory.
These programs are activated when Edison scans one of the pre-set barcodes. The
barcodes tell Edison to run the correct program when the triangle button is pressed.
The information about barcodes and barcodes is available at
https://meetedison.com/barcodes/. There is also a free-to-download activity book
called Barcodes and Edison available at https://meetedison.com/activity-
books/barcodes-and-edison/
There are six pre-set barcode programs that you can use with Edison:
•Clap controlled driving –Make Edison turn or drive by clapping your hands.
•Avoid obstacles –Activate Edison’s obstacle detection beam, enabling Edison
to detect and avoid certain obstacles.
•Follow a torch –Activate Edison’s visible light sensors and use them to control
Edison’s driving behaviour towards the brightest light source.
•Line tracking –Activate Edison’s reflected light line-tracking sensor and use it to
control Edison’s driving behaviour to follow the edge of a black line.
•Bounce in borders –Activate Edison’s reflected light line-tracking sensor and
use it to control Edison’s driving behaviour to stay within a black border.
•Sumo wrestle –Activate this barcode in two or more Edison robots and put them
into a black border. Watch them wrestle it out by detecting each other and
charging forward at full speed!
There are two other types of barcodes used for specific purposes with Edison:
•EdRemote and TV/DVD remote control barcodes –Program Edison to respond to
a range of commands using an EdRemote or your TV or DVD remote.
•Calibration barcodes –Used to perform specific maintenance on your Edison
robot.
Tips for using barcodes:
•Make sure the removable skid is in Edison. When the skid is out,
Edison sits with the line sensor right on the ground, and cannot
properly detect the barcodes.
•Never use shiny paper or glossy laminate on pages with Edison’s
barcodes. Only use low-shine paper and matte-finish laminate.
•Avoid running Edison over barcodes in very bright light, such as
sunlight, as this can interfere with the robot’s ability to scan the
barcodes correctly.

Getting started with Edison V3
8
EdBlocks is a super easy-to-use, fully graphical robot programming language. Using
a drag-and-drop block-based system, EdBlocks is intuitive and fun, making it perfect
for beginners, including younger users. You can dive in without any prior coding
knowledge and start exploring programming effortlessly.
The EdBlocks programming language app is at this URL:
https://www.edblocksapp.com/
Running a test program is a great way to get started using EdBlocks. Follow these
steps to test EdBlocks on your computer:
1. Open the EdBlocks app at https://www.edblocksapp.com/ using one of the
following browsers Chrome, Edge, or Opera.
2. When EdBlocks opens click ‘Menu’ and select ‘Load Demos.’ Select the program
called ‘Test_Program’ which will load in the programming environment.
3. Plug the Edison V3 robot’s USB cable in to the computer’s USB-A port.
4. From the Edblocks app, press the ‘Program’ button (top right corner).
5. A popup window will appear asking to connect to Edison V3. Select ‘Edison V3 –
Paired’ and click ‘connect’.
6. The program will download to Edison V3 and you will hear the ‘success’ sound
(the same tune Edison plays when you turn Edison on).
7. Disconnect Edison from the USB port and press the triangle button on Edison to
run the program.

Getting started with Edison V3
9
If you are using an iPad to program your Edison, follow these steps to test EdBlocks
on your iPad:
1. Open the Edblocks app at edblocksapp.com using one of the following browsers
Chrome, Edge, or Opera.
2. When EdBlocks opens, you will see the programming environment. Click ‘Menu’
and select ‘Load Demos.’ Select the program called ‘Test_Program’ which will
load in the programming environment.
3. Press the ‘Program’ button in the app (top right corner) and the screen flasher
download box appears.
4. Place your Edison V3 over the outline and press Edison V3’s round button one
time, both LEDs will come on.
5. Press ‘download program’ in the download box, and the program will start
downloading to Edison V3.
6. When the program has downloaded to Edison V3 you will hear the ‘success’
sound (the same tune Edison plays when you turn Edison on).
7. Press the triangle button on Edison to run the program.
•EdBlocks programming language app - https://www.edblocksapp.com/
•Getting started with EdBlocks video - https://meetedison.com/robot-programming-
software/edblocks/#edblocksvideo
•Teacher’s guide to EdBlocks lesson activities and student worksheets -
https://meetedison.com/content/EdBlocks-teachers-guide-complete.pdf
•Student worksheet set: 23 lesson activity worksheets -
https://meetedison.com/content/EdBlocks-lesson-activities-complete-set.pdf
•Block guide - https://meetedison.com/content/EdBlocks-block-guide.pdf

Getting started with Edison V3
10
EdScratch is a vertical block-based programming language for the Edison robot
based on Scratch. EdScratch combines the ease of drag-and-drop programming with
powerful functionality and flexibility.
The EdScratch programming language app is at this URL:
https://www.edscratchapp.com/
Running a test program is a great way to get started using EdScratch. Follow these
steps to test EdScratch on your computer:
1. Open the EdScratch app at edscratchapp.com using one of the following
browsers Chrome, Edge, or Opera.
2. When EdScratch opens click ‘Menu’ and select ‘Load Demos.’ Select the
program called ‘Test_Program’ which will load in the programming environment.
3. Plug the Edison V3 robot’s USB cable in to the computer’s USB-A port.
4. From the EdScratch app, press the ‘Program’ button (top right corner).
5. A popup window will appear asking to connect to Edison V3. Select ‘Edison V3 –
Paired’ and click ‘connect’.
6. The program will download to Edison V3 and you will hear the ‘success’ sound
(the same tune Edison plays when you turn Edison on).
7. Disconnect Edison from the USB port and press the triangle button on Edison to
run the program.

Getting started with Edison V3
11
If you are using an iPad to program your Edison, follow these steps to test EdScratch
on your iPad:
1. Open the EdScratch app at edscratchapp.com using one of the following
browsers Chrome, Edge, or Opera.
2. When EdScratch opens, you will see the programming environment. Click ‘Menu’
and select ‘Load Demos.’ Select the program called ‘Test_Program’ which will
load in the programming environment.
3. Press the ‘Program’ button in the app (top right corner) and the screen flasher
download box appears.
4. Place your Edison V3 over the outline and press Edison V3’s round button one
time, both LEDs will come on.
5. Press ‘download program’ in the download box, and the program will start
downloading to Edison V3.
6. When the program has downloaded to Edison V3 you will hear the ‘success’
sound (the same tune Edison plays when you turn Edison on).
7. Press the triangle button on Edison to run the program.
•Teacher’s guide to EdScratch -
https://meetedison.com/content/EdScratch/EdScratch-teachers-guide.pdf
•Student worksheet set: 98 activities with 25 test space activity sheets -
https://meetedison.com/content/EdScratch/EdScratch-student-lesson-
activities.pdf
•Let’s explore EdScratch video -https://meetedison.com/robot-programming-
software/edscratch/#lets-explore-edscratch
•EdScratch tutorial videos (set of 5) - https://meetedison.com/robot-programming-
software/edscratch/#edscratch-tutorial-videos
EdScratch is developed by Microbric Pty Ltd using open source software created and maintained by the Scratch
Foundation. The Scratch Foundation does not sponsor, endorse, or authorize this content. See scratch.mit.edu for
more information.

Getting started with Edison V3
12
EdPy is a highly adaptable text-based programming language inspired by Python, a
widely popular and user-friendly programming language known for its readability.
With EdPy, students can have fun exploring text-based programming while seeing
their code bring their Edison robot to life. It is an exciting way for students to learn
the fundamentals of a real programming language and take their robotics and coding
skills to the next level.
The Edpy programming language app is at this URL: https://www.edpyapp.com/
•EdPy programming language app - http://www.edpyapp.com/
•Teacher’s guide to EdPy student worksheets and lesson plans -
https://meetedison.com/content/EdPy-teachers-guide-complete.pdf
•Student worksheet set: 38 worksheets with 9 activity sheets -
https://meetedison.com/content/EdPy-student-worksheets-complete.pdf
•EdPy documentation help text offline guide -
https://meetedison.com/content/EdPy-app-documentation-guide.pdf
•EdPy tutorial videos (set of 10) - https://meetedison.com/robot-programming-
software/edpy/#edpyvideoall

Getting started with Edison V3
13
While Edison robots are designed to be user-friendly and intuitive straight out of the
box, occasional issues, common to any computing device, may arise. Explore these
troubleshooting tips to swiftly resolve any queries you might encounter.
Checking that Edison’s USB cable is pushed all the way into your device’s USB-A
port. Then, check that the browser you are using to program Edison is Use Google
Chrome, Microsoft Edge or Opera.
If this error is visible ‘There seems to be a network issue accessing the compiler’
message after pressing the ‘Program’ button in the app, or if the program failed to
download successfully, you will need to check the app’s connectivity status.
The app need to access the compiler. The compiler is what converts the programs
you see on the screen into a format that can be sent to the Edison robot inside the
app.
To check your connection and thus
ensuring that the app can access the
compiler, open ‘Menu’ in the upper left-
hand corner and select ‘Help’. This will
open a pop-up which includes the
option to ‘Run the connection checker’.
Click this button to check your
connection.
If the connection test result shows ‘NO
SERVER FOUND’ then you may be behind a firewall, which is blocking access to the
compiler.
To fix the problem, contact your network administrator and ask that them to unblock
ports 80, 8080, 443 and 8443 and white list these addresses:
•https://www.edscratchapp.com
•https://www.edblocksapp.com
•https://www.edpyapp.com
•https://api.edisonrobotics.net
•52.8.213.196
•13.210.175.93
•52.52.42.133

Getting started with Edison V3
14
The iPad screen flasher download uses the iPad’s screen to flash the program’s
code to the line tracking sensor. A few things can affect how well this works.
•Ambient Light –Move away from any bright direct and indirect sunlight.
•Screen brightness setting –experiment with different brightness levels between
50% and 100%
•Age of iPad –Older iPads have slower screens. Set the speed setting to ‘reliable’
If your computer only has USB-C ports you will need a USB-C to USB-A adaptor.
On occasion, you may need to straighten the drive of your Edison robot. If you are
having trouble with how Edison is driving, such as the robot is not driving straight,
you will need to perform a drive calibration on the robot.
Full instructions and the resources you need for your version robot can be found at
https://meetedison.com/edison-robot-support/drive-calibration/
If you are having trouble with a line tracking program, check the following:
•Only use non-glossy paper and, if laminating the paper, only use a matte-finish
laminate.
•Edison will be best able to follow a line if that line is a very dark colour (such as
black), approximately 1.5cm (0.6 inches) wide and found on a white background.
•Always start the robot on the white background, never on the line itself.
•Avoid running line tracking programs in very bright light, such as sunlight, as this
can negatively affect the program.
•Double-check your program to ensure you have the line tracking sensor turned
on.
If you are having trouble with an obstacle detection program, check the following:
•Ensure that your Edison robot’s obstacle detection is properly calibrated using
the barcode and instructions available at https://meetedison.com/obstacle-
detection-calibration/.
•Edison will be best able to detect obstacles which are opaque but not too dark
(e.g. not black) and at least as tall as Edison.
•Avoid running obstacle detection programs in very bright light, such as sunlight,
as this can negatively affect the program.

Getting started with Edison V3
15
•All of the Edison programming languages except for EdBlocks and the barcodes
require the obstacle detection sensor to be turned on to work. Double-check your
program to ensure you have the obstacle detection sensor turned on.
Still not working?
You can find more troubleshooting ideas on our website at
https://meetedison.com/edison-robot-support/trouble-shooting/ or you can
contact us for support at https://meetedison.com/edison-robot-support/contact-us/
Our team of friendly Technical Support Officers will do their best to help you out!

Getting started with Edison V3
16
These critical steps and quick references will help you to set up your Edison robot for
success every time!
Paper: Do not use glossy paper and only ever use matte-finish
lamination. This is especially important for barcodes and line tracking.
Avoid sunlight: Sunlight confuses Edison’s sensors. Avoid using the
robot in bright, direct sunlight.
Barcodes: Print barcodes on non-glossy paper and only use a matte-
finish lamination if laminating.
Make sure Edison’s skid is in before reading barcodes.
Line tracking programs: Always start Edison on the white surface,
never on the black surface.
Detecting lines: Use dark (e.g. black) lines approximately 1.5cm (0.6
inches) wide on a white background.
Obstacle detection calibration: Adjust Edison’s obstacle detection
with the obstacle detection barcode. See
https://meetedison.com/obstacle-detection-calibration/ for detailed
instructions.
Detecting obstacles: Choose obstacles that are opaque but not too
dark (e.g. not black) and at least as tall as Edison.
Driving straight: If Edison is not driving straight, try the drive
calibration barcode here: https://meetedison.com/edison-robot-
support/drive-calibration/
Document number: 3.2.2.10.3 Rev 3
Table of contents
Other Microbric Robotics manuals

