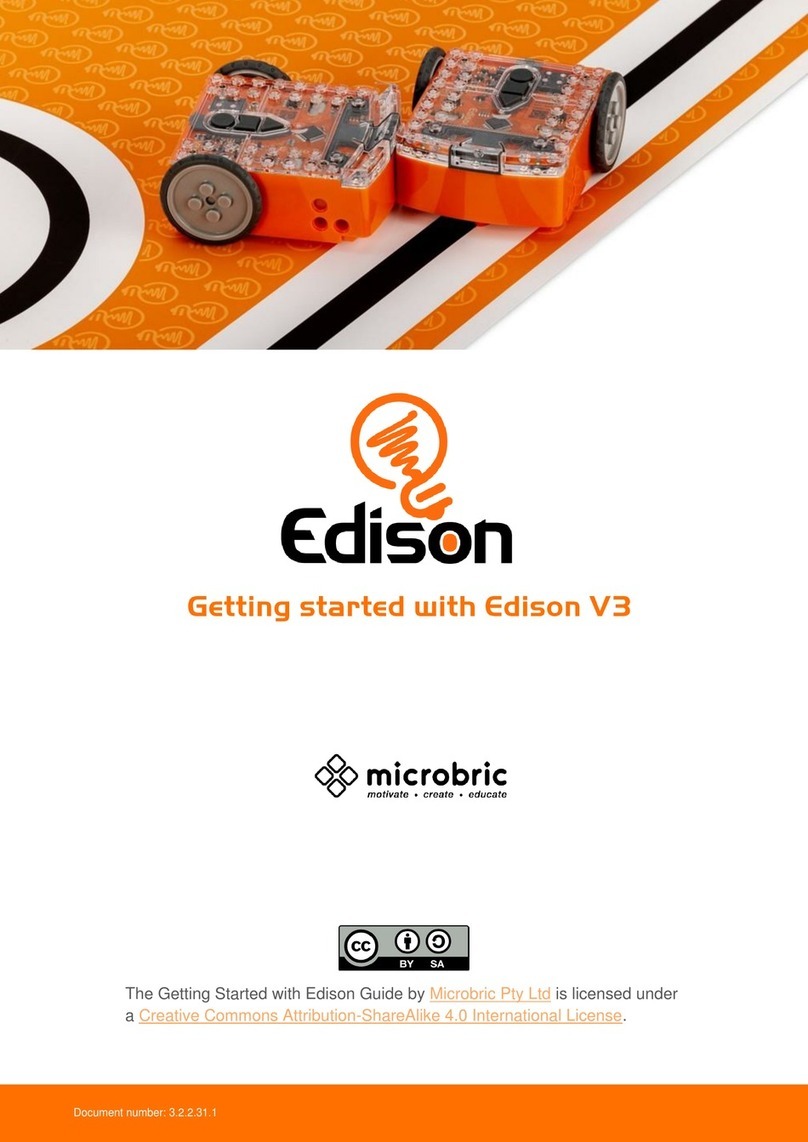
Microbric Edison User manual

EdBook 1 –Barcodes and Edison Rev 2.0
meetedison.com page 2
Contents
Introduction ............................................................................................3
Getting started........................................................................................4
EdVenture 1 –Clap controlled driving....................................................6
EdVenture 2 –Avoid obstacles..............................................................7
EdVenture 3 –Follow a torch.................................................................8
EdVenture 4 –Line tracking...................................................................9
EdVenture 5 –Bounce in borders ........................................................11
EdVenture 6 –Sumo wrestle................................................................12
EdVenture 7 –Remote control driving..................................................13
Calibrate obstacle detection.................................................................15
What’s next? ........................................................................................16

EdBook 1 –Barcodes and Edison Rev 2.0
meetedison.com page 3
Introduction
Edison is your new robot buddy who will teach you about electronics, programming and
robotics in a fun, hands-on way.
Edison is equipped with all the sensors, outputs and motors needed to introduce you to the
amazing world of robotics.
That’s great, but what is robotics? Well, that’s
not an easy question to answer. Edison’s
creator, Brenton O’Brien says that “a robot is
a machine that can behave autonomously.”
This means that a robot can ‘think’in a way.
A robot can make decisions on its own and
act on those decisions. Many other people
have different definitions, but we like this one
as it’s nice, simple and applies to what you’re
about to learn.
Robotics wouldn’t be possible without electronics. Your Edison robot has its own
electronics which you can see through the transparent top. There are resistors, capacitors,
transistors, motors and more. The most important electronic part is Edison’s
microcontroller.
The microcontroller is like Edison’s brain. It’s where all
the robot’s ‘thinking’ happens. Edison’s microcontroller is
very similar to the processor chip inside a computer, only
much smaller. Just like a processor chip in a computer,
Edison’s microcontroller contains programs. These
programs are what allow Edison to ‘think’ and make
decisions.
Edison comes with pre-loaded programs that are activated by driving the robot over
special barcodes. Here is a sample barcode that activates Edison’s line tracking program.
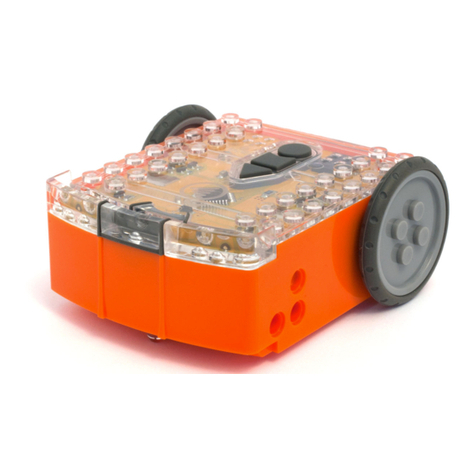
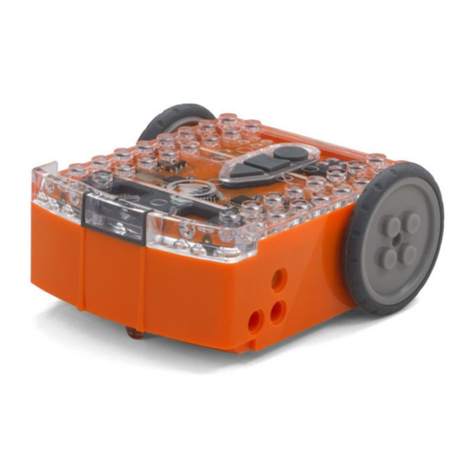
This is the Edison robot
Edison’s microcontroller
A barcode that activates Edison’s line tracking program

EdBook 1 –Barcodes and Edison Rev 2.0
meetedison.com page 4
Getting started
Let’s get Edison ready to go!
First, open the battery compartment
and remove the EdComm
programming cable. Next, insert 4
‘AAA’ batteries. Refer to the image and
be sure that the batteries are in the
correct way. Clip the battery cover
back on.
Turn Edison on by sliding the power
switch to the ‘on’position. Edison
will make a chirping beep, and the
robot’s red LED lights will start
flashing when the robot is powered
on.
Edison is ready to go!
Ensure the batteries are in the right way
Push the switch towards the ‘on’ symbol

EdBook 1 –Barcodes and Edison Rev 2.0
meetedison.com page 5
Get to know Edison
To use your Edison, you’re going to need to know where all of the robot’s sensors are and
what the three buttons do. Have a look at the images below. You may need to come back
and have another look as you go through the EdVentures in this book.
Flip Edison over and look at the bottom of
the robot. This is where Edison’s power
switch and line tracking sensor are
located.
There is one more part that came with
Edison: the EdComm cable. The EdComm
cable is used to download programs to
Edison. It connects into the headphone
socket on your computer or tablet.
Buzzer/clap detector
Record (round) button
Stop (square) button
Play (triangle) button
Left light sensor
Left infrared LED
Left red LED
Right light sensor
Right infrared LED
This is the top of the Edison robot
Right red LED
Play (triangle) button –Press to start a program
Stop (square) button –Press to stop a program
Record (round) button –1 press = download a program from a programming app
3 presses = read a barcode
Line tracking sensor
Power switch
This is the bottom of the Edison robot
EdComm programming cable
You won’t need the EdComm cable to use
the barcodes, but keep in some place safe!
You will need this programming cable when
you use Edison with the programming apps.

EdBook 1 –Barcodes and Edison Rev 2.0
meetedison.com page 6
EdVenture 1 –Clap controlled driving
Edison is equipped with a sound sensor and can detect loud sounds, like clapping.
This barcode activates Edison’s ‘Clap controlled driving’ program. The program ‘listens’for
a loud sound, like a clap. When Edison detects a loud sound, the robot responds by
turning to the right. If the robot detects two claps, it will drive forward, then stop.
Read the barcode
1. Place Edison above the arrow on the right side, facing the barcode
2. Press the record (round) button 3 times
3. Wait while Edison drives forward and scans the barcode
What to do
To run the program, place Edison down on
a flat surface and press the play (triangle)
button.
Now, with your hands close to Edison, clap
your hands one time. The robot will turn
right. Now clap your hands twice. Edison
will drive forward about 30cm.
Next, try tapping Edison with your finger,
first one time, then two times.
EdFact
Sound sensors just like the one in your Edison are used in modern cars to detect when the
engine fires each cylinder. This information is fed to the car’s computer to ensure that the
firing is occurring at just the right time. If the engine is firing too late, it can cause damage
to the engine. Ensuring that the firing is happening at just the right time also ensures the
most economical fuel consumption.
Barcode - Clap controlled driving

EdBook 1 –Barcodes and Edison Rev 2.0
meetedison.com page 7
EdVenture 2 –Avoid obstacles
Edison can ‘see’invisible light, called infrared light, and use it to detect obstacles.
This barcode activates Edison’s ‘Avoid obstacles’ program. This program drives Edison
forward. Then, when an obstacle is detected, the robot reverses and then turns on the spot
away from the obstacle. Then Edison will continue to drive forward.
Read the barcode
1. Place Edison above the arrow on the right side, facing the barcode
2. Press the record (round) button 3 times
3. Wait while Edison drives forward and scans the barcode
What to do
Assemble some objects to be obstacles for
Edison to avoid. The obstacles need to be at
least the same height as Edison
(3.5cm/1.5in) and opaque (not see-through)
but not too dark (not black).
To run the program, press the play (triangle)
button. Watch Edison approach an obstacle,
then turn away to avoid colliding with it.
Next, why not build a maze and see if Edison
can escape from it?
EdFact
Edison’s obstacle detection system uses infrared (or ‘IR’) light, which is invisible to us
because it has a longer wavelength than the human eye can see. Your remote control
uses this same IR light to tell the TV to change the channel!
Edison emits IR from two light emitting diodes (LEDs), one on the left and one on the right.
In between the two LEDs is an IR sensor. The sensor detects when IR is reflected from an
obstacle. If the IR is reflected from the left LED, then the obstacle is on the left. If the IR is
reflected from the right LED, then the obstacle is on the right.
Is Edison not behaving? Does the robot bump into obstacles or turn when the object is still really far away?
Go to page 15 to see how to calibrate the obstacle detection system.
Barcode –Avoid obstacles

EdBook 1 –Barcodes and Edison Rev 2.0
meetedison.com page 8
EdVenture 3 –Follow a torch
Edison loves light! When you run this program, the robot will drive towards the brightest
light source …even if that means falling off the table. Look out, Edison!
This barcode activates Edison’s ‘Follow a torch’program. (In American English, a torch is
known as a flashlight.) The program uses Edison’s light sensors and motors to make the
robot follow the brightest source of light it can detect.
Read the barcode
1. Place Edison above the arrow on the right side, facing the barcode
2. Press the record (round) button 3 times
3. Wait while Edison drives forward and scans the barcode
What to do
You will need a torch/flashlight and a flat
surface away from any other really bright
sources of light, such as sunlight.
To run the program, press the play
(triangle) button and aim your torch at
Edison. Once the robot ‘sees’ the bright
source of light, it will drive towards it.
You can control how Edison drives by
moving the torch. Does this behaviour
remind you of anything?
EdFact
This is one of Edison’s most interesting programs because it mimics the behaviour we see
in some flying insect. Have you ever seen moths on a hot summer night swarming around
a bright light? This type of behaviour is called ‘phototropism’ and is also found in plants
that grow towards the sun.
This program is also very interesting because Edison is behaving autonomously. This
means that Edison is ‘thinking’ and responding to changes in the environment without any
help. Does Edison’s ability to behave autonomously mean that Edison is alive?
Barcode –Follow a torch

EdBook 1 –Barcodes and Edison Rev 2.0
meetedison.com page 9
EdVenture 4 –Line tracking
Line tracking is a very popular robotics activity because it’s fun to watch the robot go
around and around a track. How does it work? Is it magic? Is it magnetic?
This barcode activates Edison’s ‘Line tracking’ program. The program uses Edison’s line
tracking sensor and motors to follow the edge of a black line.
Read the barcode
1. Place Edison above the arrow on the right side, facing the barcode
2. Press the record (round) button 3 times
3. Wait while Edison drives forward and scans the barcode
What to do
The first thing you need is a line. You can
print the small track on the next page, print
the large A1 (84cm x 59cm) EdMat from
meetedison.com/edmat/ or make your own
line using black electrical tape on a white
table (the line must be 1.5cm/0.6in thick).
To run the program, place Edison to one
side of your line. Make sure that the line
tracking sensor is on white. Don’t place the
sensor directly on the line. Then, press the
play (triangle) button and watch Edison find and follow the line.
EdFact
Edison’s line tracking sensor is made up of two parts: a red LED light and a light sensor.
The red LED shines light beneath the robot. The light sensor then measures the amount of
light that is reflected back. If the surface is white, it reflects lots of light, and the light sensor
gets a high light reading. If the surface is black, it does not reflect much light, and the light
sensor gets a low light reading.
When Edison runs the ‘Line tracking’ program, the robot is in a constant state of
dissatisfaction. When Edison is off the line, it turns right to get on the line. But when
Edison is on the line, it turns left to get off the line. This results in Edison ‘waddling’on the
edge of the line.
Barcode –Line tracking

EdBook 1 –Barcodes and Edison Rev 2.0
meetedison.com page 11
EdVenture 5 –Bounce in borders
Ever heard of Dromophobia? Well, it’s a fear of crossing the street, and we’re going to give
a version of it to Edison! Cue evil laugh…Muwhahaha!!!
This barcode activates Edison’s ‘Bounce in borders’program. The program uses Edison’s
line tracking sensor and motors to stop the robot from crossing a black line.
Read the barcode
1. Place Edison above the arrow on the right side, facing the barcode
2. Press the record (round) button 3 times
3. Wait while Edison drives forward and scans the barcode
What to do
The first thing you need is a shape with a dark
border. You can print the small track on the last
page, print the large A1 (84cm x 59cm) EdMat
from meetedison.com/edmat/ or make your
own shape using black electrical tape on a
white table (the line must be 1.5cm/0.6in thick).
To run the program, place Edison inside the
borders. Make sure that the line tracking
sensor is on white. Don’t place the sensor
directly on the line. Then, press the play (triangle) button. Edison will drive forward until
the line tracking sensor detects the line, then reverse back, turn, and continue driving.
EdFact
The ‘Line tracking’and ‘Bounce in borders’programs
are fun, but there’s a serious use for them too.
Warehouses that use robots to move items around
use lines or markers on the ground to guide the
robots to their destination. These robots in Amazon’s
warehouse are using barcode markings on the floor
to navigate.
Barcode –Bounce in borders

EdBook 1 –Barcodes and Edison Rev 2.0
meetedison.com page 12
EdVenture 6 –Sumo wrestle
Bring on the robot wars!
This barcode activates Edison’s ‘Sumo wrestle’program. The program brings together the
‘Bounce in borders’program to keep the robot in the ring plus a version of obstacle
detection to locate and attack the opponent.
Read the barcode
1. Place Edison above the arrow on the right side, facing the barcode
2. Press the record (round) button 3 times
3. Wait while Edison drives forward and scans the barcode
What to do
Print the large A1 (84cm x 59cm) EdMat from
meetedison.com/edmat/ or create your own
sumo wrestle ring using black electrical tape on
a white surface. The ring should be at least
40cm (16in) in diameter.
Place at least two Edison robots inside the ring
and press play on both at the same time.
Each Edison will slowly drive forward, staying
inside the ring and ‘looking’ for the opponent. If
a robot detects an opponent, that Edison will charge forward at full speed until it detects
the edge of the ring. The robot then reverses back victorious and continues to look for
another opponent.
Battles don’t always go to plan, however. There are so many variables, such as the angle
of the opponent, the proximity of the edge of the ring and just plain bad luck! Keep up the
good fight, Edison!
Barcode –Sumo wrestle

EdBook 1 –Barcodes and Edison Rev 2.0
meetedison.com page 13
EdVenture 7 –Remote control driving
So you really want to control your Edison!? Here’s your chance to control Edison like a
remote control car. And you can do it with your TV remote control!
These barcodes allow Edison to learn commands from your TV or DVD remote control.
Read the barcode
1. Place Edison above the arrow on the right side, facing the barcode
2. Press the record (round) button 3 times
3. Wait while Edison drives forward and scans the barcode
4. Press a button on your TV/DVD remote that you want to match to that barcode’s action
Barcode –IR learn drive forward
Barcode –IR learn drive backward
Barcode –IR learn spin left
Barcode –IR learn spin right

EdBook 1 –Barcodes and Edison Rev 2.0
meetedison.com page 14
What to do
Teach Edison each barcode one by one. Use buttons on your
remote control that align with the action Edison will perform. For
example, use an ‘up’ arrow (like ‘volume up’) for ‘drive forward’. You
can make changes whenever you want by rescanning the barcode
and pairing a different button, so play around with which buttons suit
you the best.
Now go driving!
Edison is compatible with around 75% of TV and DVD remote
controls. If one of your remotes doesn’t happen to work, try another
one. If none of your remotes work, then you can purchase an
inexpensive ‘universal remote’ and set it to be a Sony DVD remote
control, which works well with Edison.
Barcode –IR learn turn left
Barcode –IR learn turn right
Barcode –IR learn play beep
Barcode –IR learn play tune

EdBook 1 –Barcodes and Edison Rev 2.0
meetedison.com page 15
Calibrate obstacle detection
You can regulate the sensitivity of Edison’s obstacle detection system. By making the
obstacle detections system more sensitive, Edison can detect obstacles further away. By
making the system less sensitive, Edison will only detect very close obstacles. Follow the
instructions on this sheet to adjust your Edison’s obstacle detection system.
Read the barcode
1. Place Edison above the arrow on the right side, facing the barcode
2. Press the record (round) button 3 times
3. Wait while Edison drives forward and scans the barcode
Set maximum sensitivity
After scanning the barcode, set Edison down on a table or desk and remove any obstacles
in front of Edison. Then press the play (triangle) button. Edison is now in calibration mode.
The left sensitivity is calibrated first.
1. Repeatedly press the play (triangle) button, which increases sensitivity, until the red
LED on the left is flickering.
2. Repeatedly press the record (round) button, which decreases the sensitivity, until
the LED completely stops flickering.
3. Press the stop (square) button to switch over to calibrate the right side.
4. Repeatedly press the play (triangle) button until the right red LED is flickering.
5. Repeatedly press the record (round) button until the LED completely stops
flickering.
6. Press the stop button to complete the calibration.
Custom sensitivity
It is possible to set the distance that obstacles are detected. To do this, scan the ‘calibrate
obstacle detection’ barcode, place an obstacle in front of Edison at the distance you want
Edison to detect obstacles, press the play button and then repeat steps 1 through 6 to set
the sensitivity.
Barcode –Calibrate obstacle detection

EdBook 1 –Barcodes and Edison Rev 2.0
meetedison.com page 16
What’s next?
Now that you’ve learned all about Edison’s abilities, sensors and controls, you are ready to
move on to programming! Go to www.meetedison.com to see the different coding
languages you can use with your Edison robot.
EdBlocks
EdBlocks is a drag-and-drop, fully graphical
horizontal programming language for the
Edison robot. EdBlocks is a perfect
introduction to programming and a fun way
to start your coding journey.
EdScratch
EdScratch is a vertical block-based
programming language for the Edison robot
based on Scratch. EdScratch combines the
ease of drag-and-drop programming with
powerful functionality and flexibility.
EdPy
EdPy is a python-like text-based
programming language for the Edison robot.
EdPy lets you unlock even more of Edison's
abilities while learning text-based
programming.
Don’t forget!
You can also download the free EdMat activity
mat in colour or black and white. The EdMat is
A1 size (59cm x 84cm) and can be printed at
your local print shop for a small fee.
Download from: meetedison.com/edmat/
Other manuals for Edison
1
Table of contents
Other Microbric Robotics manuals


