MicroCal VP-ITC User manual

Table Of Contents
General .............................................................................................................................................i
How To Use This Manual ............................................................................................................................i
How to Get Help From MicroCal............................................................................................................... ii
Section 1: VP-ITC System Introduction......................................................................................1
1.1 VP ITC – The Basics.............................................................................................................................2
1.2 Data Acquisition and Instrument Control..............................................................................................3
1.3 Suitable Laboratory Environment .........................................................................................................4
1.4 VP-ITC Parts and Accessories ..............................................................................................................5
1.5 Setting Up the VP-ITC Instrument........................................................................................................7
1.6 Pipette Assembly...................................................................................................................................9
1.7 The ThermoVac...................................................................................................................................11
Section 2: VPViewer and Origin Software................................................................................14
2.1 VPViewer and Origin Software Overview ..........................................................................................15
2.2 Powering Up the VP-ITC Instrument ..................................................................................................15
2.3 VPViewer Main Window ....................................................................................................................17
2.4 ITC Controls Window .........................................................................................................................21
2.5 Thermostat/Calibration Window .........................................................................................................26
2.6 Setup/Maintenance Window................................................................................................................27
2.7 Constants Window...............................................................................................................................30
2.8 Real Time Data Display in Origin.......................................................................................................31
2.9 ITC Cell Status ....................................................................................................................................33
Section 3: Running an ITC Experiment....................................................................................35
3.1 Designing ITC Experiments ................................................................................................................36
3.2 Using the ThermoVac to Degas Samples ............................................................................................40
3.3 Cell Loading........................................................................................................................................41
3.4 Loading the Auto-Pipette.....................................................................................................................42
3.5 Choosing The Run Parameters ............................................................................................................45
3.6 Carrying Out Experimental Runs ........................................................................................................46
3.7 Using the ThermoVac for Cleaning the ITC Sample Cell...................................................................47
3.8 Cleaning Syringes................................................................................................................................49
Section 4: Experimental Tutorials .............................................................................................50
4.1 Water-Water Baselines........................................................................................................................51
4.2 Methanol Tutorial................................................................................................................................60
4.3 Rnase-2’CMP Experiment Tutorial.....................................................................................................63
Section 5: Instrument Maintenance............................................................................................64
5.1 Cleaning The Cells and Pipette ...........................................................................................................65
5.2 Replacing Pipette Plunger Tips ...........................................................................................................68
5.3 Y-axis Calibration ...............................................................................................................................72
5.4 Replacing Injection Syringes & Height Adjustment ...........................................................................74
Section 6: Tips and Troubleshooting .........................................................................................76
6.1 User Tips and FAQs ............................................................................................................................77
6.2 Troubleshooting...................................................................................................................................78
6.3 A Note About Buffers .........................................................................................................................79
6.4 Selecting the Proper Stirring Rate .......................................................................................................79
6.5 Estimation of Required Concentrations...............................................................................................80
Section 7: Additional Features ....................................................................................................81
7.1 Extended Data Display ........................................................................................................................82
.......................................................................................................................827.2 Customizing VPViewer
MAU130030 Rev. A 12/3/02

VP-ITC MicroCalorimeter User’s Manual
(This page was intentionally left blank)

Section 1: VP-ITC – General Information
General
How To Use This Manual
This manual describes the VP-ITC; its setup, operation and maintenance.
Once the instrument is setup (as described in Section 1), a new user may wish to go directly to
Section 4 and run through the experimental tutorials for a “hands on” approach to learning about
the instrument and software. The user should then refer back to sections 2 and 3 for detailed
descriptions toward a better understanding of the intricacies of the instrument. Section 5 contains
important information for maintaining the instrument performance. Section 6 provides tips for
optimizing the performance and troubleshooting techniques for commonly encountered problems.
Section 7 provides description of some more advanced features.
Much of this manual provides descriptions of the VP-ITC instrument and software. Bullets or
step numbers are typically used when the user is requested to perform an operation.
•Indicates a step to perform an operation
1. Steps are numbered when the sequence of operations is critical.
i

VP-ITC MicroCalorimeter User’s Manual
How to Get Help From MicroCal
The service department at MicroCal, LLC is available to help you during normal business hours, Monday
through Friday from 8:00 AM to 5:00 PM (EST). Service personnel may be contacted by e-mail, phone or
fax, with the preference being by phone or e-mail. When e-mailing MicroCal for technical assistance, if
possible, please attach a recent data file(s) (*.itc, raw ITC data files) that demonstrate the problem. Also,
please include with the correspondence, all details that may be relevant to the problem. In instances where
the problem or question relates to post run data analysis, it is best to attach the raw data file (*.ITC) and the
Origin document (*.opj) generated during data analysis.
There are 2 general categories of problems associated with the VP-ITC and its operation. The most
extreme category is when a system is simply not working, at all. Problems that prevent users from
operating the VP-ITC require immediate consultation with a MicroCal technician. Customers
should not attempt to repair the VP-ITC hardware or software unless instructed to do so by a
MicroCal service representative.
The second, and less extreme general category of problems is when a VP-ITC instrument is functioning,
but is not operating within its normal performance specifications. Large baseline drifting, non-repeatable
control peaks (Water/Water) and/or an increase in short term noise level are all examples of performance
problems, typically correctable by the operator. For performance issues such as these it is recommended
that customers carry out the following minimum diagnostic steps prior to contacting MicroCal for service:
1.) Thoroughly clean the cells. Do not assume they are clean. As a minimum, use the provided
Cell Cleaning Apparatus to pass 500 ml of a 10-25% ammoniated detergent in water solution,
followed by 500 ml of cold water rinse, through the sample cell. Discretion may call for a
more rigorous cleaning procedure as described herein.
2.) Refill both the reference and sample cells with filtered, degassed water. Fill a thoroughly
cleaned syringe with water and/or use a different syringe.
3.) Go to the Setup/Maintenance window within VPViewer 2000 (as described, starting on page
27) and activate the extended data mode. (While in extended data mode, ITC data files will
contain all available information produced by the VP-ITC and often times is helpful in
diagnosis of problems).
4.) Carry out a minimum of 25, 10µL injections of water into water
5.) Consult the troubleshooting section of this manual.
If, after completion of the 5 steps listed above, the ITC performance is not corrected, contact the MicroCal
service department for help. The water run, in extended data mode, should be provided to the MicroCal
service technician for evaluation. The service department with comments and recommendations will then
contact customers.
MicroCal, LLC Contact Information:
Primary Contact Phone 413-586-7720
Toll Free Phone Number 800-633-3115
Facsimile 413-586-0149
Web Site: www.MicroCalorimetry.com
ii

Section 1: VP-ITC – General Information
Symbols
Symbols used in this manual
!Warns the user of possible damage to the unit, draws attention to the risk of injury or
contains safety notes and warnings.
Symbols used on the VP-ITC instrument
Caution: Read the instruction manual before operating
Instrument (supply) ON
Instrument (supply) OFF
Protective Earth (Ground) Terminal
Origin® is a registered trademark of Origin Lab, Northampton, MA
VPis a registered trademark of MicroCal, LLC, Northampton, MA
MicroCalis a registered trademark of MicroCal, LLC, Northampton, MA
Windows™ is a registered trademark of Microsoft Corporation
iii

VP-ITC MicroCalorimeter User’s Manual
Operators Safety
!The points below are intended to enhance your safety awareness and to draw your attention to risks
which only you, the operator, can prevent. MicroCal has set high standards for ourselves in
developing and constructing the VP-ITC. Each unit constructed is fully tested to operational and
safety standards. It should be noted that no amount of design or constructed safeguards can anticipate
or prevent improper handling. It is intended that this instrument be operated only by responsible
people trained in basic laboratory protocol in procedures and safety techniques. This product is
intended to operate from a power source that does not apply more than 260 V rms between the
supply conductors or between either supply conductor and ground. A protective ground
connection, by way of the grounding conductor in the power cord, is essential for safe operation
!To avoid any hazard, use only a fuse of the correct type, voltage rating and current rating as
specified on the back of the VP-ITC. This is a 1 Amp 250 Volt Time-lag (Time Delay) fuse.
!Repairs, alterations or modifications must only be carried out by specialist personnel. The
MicroCal Service Department will be happy to serve you for any repair work or operational
questions.
!This device is not designed to the Medical Devices Directive 93/42/EEC and should not be used
for medical purposes and/or in the diagnosis of patients.
!When using volatile or hazardous solutions in the cells, the operator should always follow proper
laboratory procedures in handling (e.g. wear safety glasses and protective clothing) and
disposing of such materials and allow the internal cells to cool down to room temperature before
removing any solutions from the cells.
!All solutions in the cells must be cooled down below 50 ºC before removing from the cells to
prevent the glass syringes from breaking due to the hot liquids.
Product Safety
We have used all means to design and produce the VP-ITC to prevent any damage to the instrument during
normal usage. The instrument is solidly built using the latest in micro-technology in its components and
design, but of course, this cannot prevent damage due to physical mistreatment. The attentiveness of the
operator to the identification of materials which could corrode the Hastelloy® Alloy C-276 cells, the
prevention of freezing solutions in the cells and the responsible handling and usage of the instrument
should ensure a long service life for the VP-ITC.
!The VP-ITC cells are constructed out of Hastelloy®C-276. Hastelloy is extremely resistant to
corrosion by strong bases, but strong acids should be avoided. Please refer to the accompanying
booklet “Hastelloy®Alloy C-276” for further information.
!The freezing of solutions in filled cells will cause irreparable damage to the cells due to the
expansion of the solution in the cells.
!When moving the VP-ITC the instrument should always be in its normal operating or its vertical
position. The instrument should never be moved in a sideways position, due to the nature of the
crystal detectors used for the instruments thermal sensing, which are strong in a compression
mode but weak when subjected to shear stresses.
iv

Section 1: VP-ITC – General Information
Instrument Specifications
Model or Type : VP-ITC
Performance Specifications (2 second filter)
Noise Level (3 minute RMS windows averaged over 1 hour) : 1 nanocal/sec (4 nanowatts)
Baseline Constancy (average one hour time intervals: 310 rpm stirring) : ±5 nanocal/sec (±20 nanowatts)
Minimum Response Time : 15 seconds
Operating Temperature Range : 2°to 80°C
Physical Specifications
Cell Material : Hastelloy® Alloy C-276
Dimensions (L x W x H in cm) : 45 x 20 x 18
Weight (approximate) : 9 kg
v

VP-ITC MicroCalorimeter User’s Manual
Safety Specifications
Instrument Specifications (excluding Controller)
Electrical Specifications
Electrical Ratings:
Voltage : 240 Volts
Frequency : 50 Hz
Current (maximum) : 1.0 Amp
Fuses (2) : Primary=1.0 A, 250 V, Time Delay
Output : Secondary/Data Connection only
Protective Earth Terminals : Internal/external marked
Mode of Operation : Continuous
Classification : Class I
Atmospheric Specifications
Operating:
Temperature : 10°to 40°C
Humidity : 0 to 75% RH noncondensing
Atmospheric Pressure : 700 HPa to 1060 HPa
Storage: (in original shipping containers with no liquid in cells)
Temperature : -40°to +70°C (no liquid in cells)
Humidity : 10% to 90%
Atmospheric Pressure : 500 HPa to 1060 HPa
vi

Section 1: VP-ITC – General Information
Cleaning the VP-ITC Instrument Case
Always shut down the computer controller and VP-ITC instrument and disconnect the mains power supply
cord before cleaning the case. To clean the instrument case, use a damp, lint-free cloth. Avoid abrasives or
solvents that can permanently damage the finish. With the damp cloth, gently wipe the external surfaces of
the instrument.
vii

VP-ITC MicroCalorimeter User’s Manual
European Users: CE Mark
Microcal VP-ITC calorimeters carry the CE marking which confirms that they meet the applicable
European Community Technical Directives. We declare that we have followed the provisions of EMC
Directive 89/336/EEC (Electromagnetic Compatibility) and Low Voltage Directive 72/23/EEC (Electrical
Safety). The following tests were carried out:
Directive Generic Standard Referenced standard
89/336/EEC (EMC) EN 55011, Group 1, Class B, 1991
EN 50082-1 (Immunity) EN 61000-4-2:1995
EN 61000-4-3:1995
EN 61000-4-4:1995
72/23/EEC (LVD) EN 61010-1:1993, EN 61010-1:1993/A2:1995
Please refer to the manuals which came with the computer controller for information relating to the CE
mark for this unit.
viii

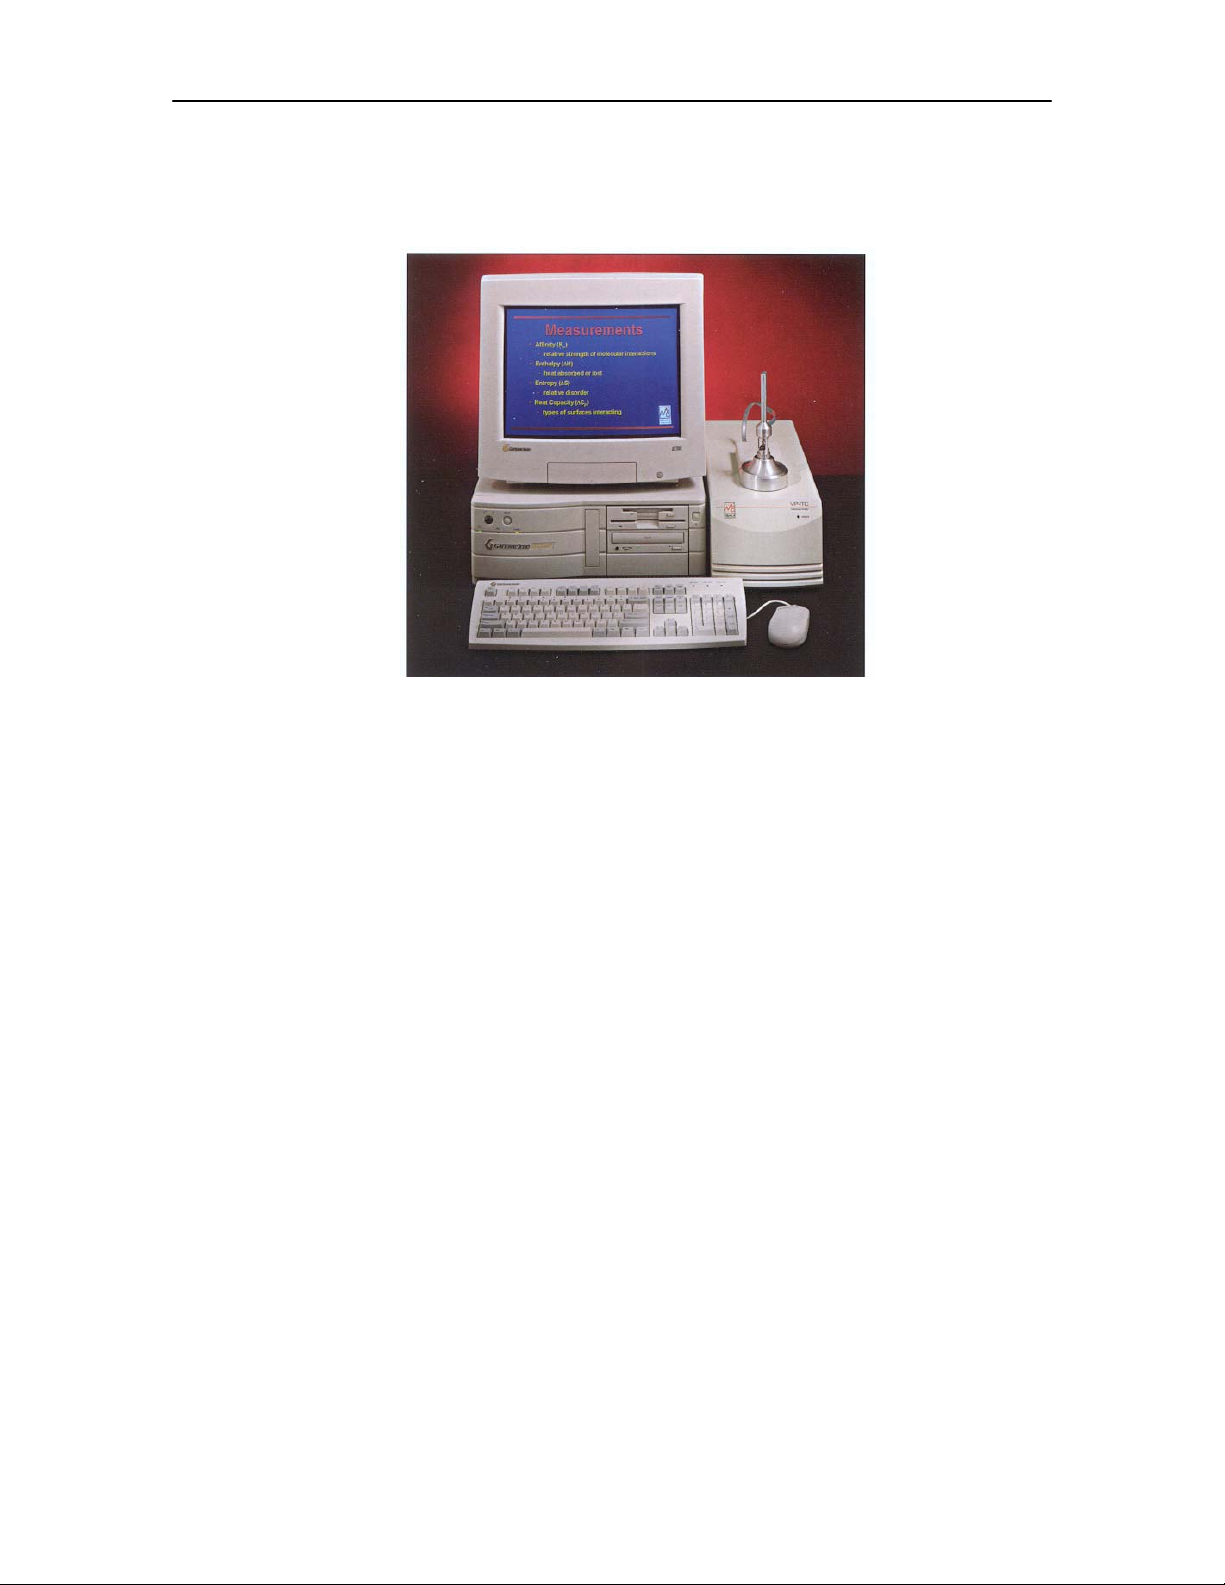
Section 1: VP-ITC System Introduction
Section 1: VP-ITC System Introduction
This section starts by providing some basic information about the VP-ITC and the computer
controller. Then it provides instructions for setting up the VP-ITC instrument and accessories. It
ends by providing information about the ThermoVac instrument.
This section is arranged as follows:
Section 1: VP-ITC System Introduction......................................................................................1
1.1 VP ITC – The Basics.............................................................................................................................2
1.2 Data Acquisition and Instrument Control..............................................................................................3
1.3 Suitable Laboratory Environment .........................................................................................................4
1.4 VP-ITC Parts and Accessories ..............................................................................................................5
1.5 Setting Up the VP-ITC Instrument........................................................................................................7
1.6 Pipette Assembly...................................................................................................................................9
1.7 The ThermoVac...................................................................................................................................11
1

VP-ITC MicroCalorimeter User’s Manual
1.1 VP ITC – The Basics
The VP-ITC Unit directly measures heat evolved or absorbed in liquid samples as a result of
mixing precise amounts of reactants. A spinning syringe is utilized for injecting and subsequent
mixing of reactants. Spin rates are user selectable.
The normal operating range is 2°C to 80°C.
Wetted cell surfaces are Hastelloy® Alloy C
276.
Sample and reference cells are accessible for
filling and cleaning through the top of the
unit. The sample cell is on the right as one
faces the front of the unit.
A pair of identical coin shaped cells is
enclosed in an adiabatic Outer Shield
(Jacket). Access stems travel from the top
exterior of the instrument to the cells. Both
the coin shaped cells and the access stems are
totally filled with liquid during operation.
This requires approximately 1.8 ml. per cell
even though the working volume of the cell is
only 1.4 ml
Temperature differences between the
reference cell and the sample cell are
measured, calibrated to power units and
displayed to the user as well as saved to disk.
The data channel is referred to as the DP
signal, or the differential power between the
reference cell and the sample cell. This signal
is sometimes referred to as the “feedback”
power used to maintain temperature
equilibrium. Calibration of this signal is obtained electrically by administering a known quantity
of power through a resistive heater element located on the cell.
The syringe containing a “ligand” is titrated (injected) into the cell containing a solution of the
“macromolecule”. An injection which results in the evolution of heat (exothermic) within the
sample cell causes a negative change in the DP power since the heat evolved chemically provides
heat that the DP feedback is no longer required to provide. The opposite is true for endothermic
reactions. Since the DP has units of power, the time integral of the peak yields a measurement of
thermal energy, ∆H. This heat is released or absorbed in direct proportion to the amount of
binding that occurs. When the macromolecule in the cell becomes saturated with added ligand,
the heat signal diminishes until only the background heat of dilution is observed.
With the VP-ITC system the entire experiment takes place under computer control. The user
inputs the experimental parameters (temperature, number of injections, injection volumes) and
the computer carries out the experiment. Origin software is then used to analyze the ITC data
using fitting models to calculate reaction stoichiometry (n), binding constant (Kb), enthalpy (∆H)
and entropy (∆S).
2
Section 1: VP-ITC System Introduction
1.2 Data Acquisition and Instrument Control
The VP-ITC is operated by two computer interface boards and a serial interface that reside inside
the Computer Controller. The boards are pre-configured and calibrated at MicroCal, and need no
adjustments by the user.
Data acquisition is accomplished through a 16-bit A/D (analog to digital) converter board. There
are five differential inputs to the A/D, consisting of the DP or differential power between the
reference and sample cells, the Jacket Temperature, the DeltaT (temperature difference between
the cells and the adiabatic jacket), Shield Temperature (the outer shield temperature), and the
ATP channel (heat sink information). The default A/D inputs range from –1.25 volts to +1.25
volts for all input channels but can be changed through VPViewer. Additional available input
ranges are +/- 2.5 and +/- 5 volts.
ITC instrument control is accomplished through the second interface board, a 16 bit D/A (digital
to analog) converter board. Programmed by the VPViewer software, this board will regulate the
temperature of the VP-ITC, equilibrate the ITC in preparation for a titration run, and carry out the
ITC experiment.
The VP ITC injection system mounts on top of the cell unit and is controlled by VPViewer
through a standard RS-232 serial interface in the Computer Controller
Although other Windows’ programs can be used while the VP-ITC is running without affecting
the data acquisition or calorimeter control, it should be realized that there are real time operations
taking place during an experiment, and that performing CPU intensive tasks while an experiment
is in progress can ‘glitch’ the ITC baseline. Users are encouraged to avoid large file copying to
disk drives, large print jobs and recursive control loops while the VP-ITC is in the midst of an
injection run. Users can carry out routine data analysis while the VP-ITC is running.
3

VP-ITC MicroCalorimeter User’s Manual
1.3 Suitable Laboratory Environment
The VP-ITC with Computer Controller requires about 1 meter of normal bench space (ca. 70 cm
wide). The ThermoVac degassing station will require another 25 cm of bench space. This
location should be away from strong drafts, room temperature fluctuations, intense sunlight,
vibrations and strong electrical or magnetic fields (as may be produced by an NMR, microwave
oven, large motors or refrigeration units). In addition the mains power source (110 to 240 VAC)
should be properly grounded and free from voltage fluctuations, harmonic distortions, power dips
and spikes.
Although, the power filtering in the VP-ITC instrument is adequate for most laboratory
environments, some disturbances may affect the performance of the instrument and it may be
necessary to install a power conditioner. Since power source problems can be manifested in
many different ways, it is not possible to recommend a power conditioner for all situations. It is
recommended that you test a power conditioner, at your location, before you purchase it. If you
believe you are experiencing power source related problems, please contact a MicroCal engineer.
It is emphasized that room temperature fluctuations due to the cycling on/off of heating and
cooling systems, strong air currents, sunlight directly on the instrument and through space
electromagnetic waves may cause subtle performance problems.
4

Section 1: VP-ITC System Introduction
1.4 VP-ITC Parts and Accessories
In addition to the VP-ITC instrument, Computer Controller and connecting cables, there are
various accessories shipped with the VP-ITC for its normal operation. The parts and accessories
may include, but are not limited to the items listed below and on the next page. A list of the
actual parts and accessories shipped with your order will be listed in the documentation included
with your shipment.
Part Number QTY Description
ASS130010 1
VP-ITC Cell
ASS130140 1
Pipette Stand
ASS130150 1
Injector/Stirrer Base (mounted on top of ITC cell unit)
INT100010 1 Computer Controller
(call for part number) 1 Printer (optional)
SOF100040 1
VPViewer software
SOF100025 1
Origin software
ASS100030 1
Main cable
ASS130070 1
Serial Cable with two 9 pin (RS232) adapters
(call for part number) 1 A.C. Mains Power Cord
SYN161714 2
Hamilton 2.5ml filling syringes
NDL130020 1
18 guage, 8.5” long needle with Plastic syringe
ASS130090 1
Cleaning Device
ASS130120 1
Adapter (for Cleaning Device)
ASS130330 1
Shipping Cap
TRY100010 1
Accessory Tray
MAU130010 1
ITC Data Analysis in Origin Manual
MAU130020 1
Hastelloy Information Booklet
MAU130030 1
VP-ITC User’s Manual (this manual)
5

VP-ITC MicroCalorimeter User’s Manual
VP-ITC Accessories in Wooden Box (KIT130010)
Icon Part Number QTY Description
TIP130020 3
Plunger Tips for Injection Syringe
ASS130360 1
250 µL Tip Sizer (Glass Bore with Green Cap)
BRU130010 1
Large Tube brush
ASS130170 1
Reference Plug Assembly
DRI130010 1
Hex driver (050”) for syringe clamps
DRI130020 1
Hex driver (7/64") for injector stand
ASS130210 1
Plastic Syringe Assembly (3cc) with tubing
ASS130230 1
Tube holder (white) for pipette stand
MSP13057 1
Plunger Tip Pusher tool
MSP13056 1
Plunger Tip Puller tool
MSP13058 1
Guide sleeve
MSP13043 1
Threaded Cap
FUS100010 2
Fuses (1A/250V, 5x20mm Slo-Blo Fuse)
WIR90006 1
.013 Cleaning wire injection syringe
ORG00005V
ORG00011V
ORG00016V
1 Jar WITH 10 OF EACH OF:
005 O-Ring for Cleaning Device
011 O'Ring for Adapter & Syringe Holder
016 O'Ring for Syringe Holder
PGR130010 1
250 ul Plunger (for Cleaning Injection Syringe)
ASS130160 1
Pipette Injector
ASS130200 1
Syringe Holder (metal - pipette base)
MSP13028 1
Syringe clamp for bottom of Injection syringe
SYA13022 3
Injection syringes
6

Section 1: VP-ITC System Introduction
1.5 Setting Up the VP-ITC Instrument
All VP-ITC and Computer Controller connections and setup must be done with the units
turned off and unplugged to avoid damage.
Components Required for Assembly
Computer Controller with CPU, Monitor, Keyboard, Mouse, Power Cord, (Printer is optional)
VP-ITC Instrument with flat Main Cable, Serial Cable with Adapters, Power Cord
(Please Note: The Pipette Assembly is described is section 1.6).
Setup the Computer Controller
•Set up the Computer Controller following the instructions that came with the computer. It is
advisable to ensure the computer is working properly before proceeding.
Connect the Flat Main Cable
One end of the Flat Main Cable has a 37 pin male connector (labeled ‘Cell’) that attaches to the
rear of the VP-ITC cell. The other end of the cable has two 37 pin male that attach to the rear of
the computer. The connector labeled ‘J1’ is for the D/A (digital to analog) I/O (input-output)
computer board. The connector labeled ‘J2’ is for the A/D (analog to digital) I/O board.
(Note: The J2 connector cable will be slightly shorter than the J1 connector cable. Also, the 37
pin plugs are wider on one side than the other to allow the cable to fit in one direction only. If a
contortion of the cable appears necessary to accommodate the appropriate connections contact
MicroCal for assistance.)
•Connect each of the two Flat Main Cable connectors (labeled J1 & J2) to their appropriate 37
pin female connector at the rear of the host Computer Controller. (The connectors at the rear
of the Computer Controller will also be labeled J1 and J2.)
•Connect the main cable end labeled ‘CELL’ to the cell connector, located at the back of the
VP-ITC instrument (labeled 4, on the next page).
Connect the Serial Cable with Adapters
The serial cable consists of a phone type cable with two 9 pin serial adapters; one adapter is
labeled ‘PC’ while the other is labeled ‘CELL’. The end labeled ‘PC’ is to be attached to the
serial port (Com 1 or Com A) of the Computer Controller at J3. The end labeled ‘CELL’ is to be
attached to the back of the VP-ITC. (Note: Failure to connect the labeled serial connectors
correctly will prevent the VP-ITC injection system from operating properly.)
•Connect the end of the serial cable with the adapter labeled ‘PC’ to the Computer Controller
at the connector labeled J3.
•Connect the other end of the serial cable, with the adapter labeled ‘CELL’ to the back of the
VP-ITC (labeled 6, on the next page).
Connect the Mains Power Cord
•Connect the power cord to the inlet power receptacle located on the back of the VP-ITC.
Connect the power plug only to a mains power supply receptacle with a 3 wire, protective
7

VP-ITC MicroCalorimeter User’s Manual
earth ground, plug. Please Note: It is strongly recommended that the VP-ITC be provided a
dedicated AC power line with no other equipment being powered on that line. (see page 4 for
more information about selecting a location for the instrument)
VP-ITC Cell Back View
8

Section 1: VP-ITC System Introduction
1.6 Pipette Assembly
The pipette assembly consists of the injection syringe with pre-mounted top syringe clamp, a
bottom syringe clamp, the syringe holder and the pipette injector.
!Caution: At all times when handling the injection syringe you want to use care to
prevent the long needle from any action that may cause it to bend. If the long needle is
bent far enough it will become a permanent bend that will make the syringe unusable
for any experiments.
!Caution: Never attempt to couple/decouple the pipette from the syringe assembly unless
the pipette plunger is in the open port position (all the way up). Failure to follow this
recommendation may result in a bend in the pipette screw. Even a slight bend will
result in improper operation of the pipette.
To assemble the pipette, please do the following (please refer to diagrams on next page):
The height must be adjusted for any syringe that was not part of the original shipment of your
VP-ITC instrument. Please refer to Section 5.4 Replacing Injection Syringes & Height
Adjustment (page 74) for instruction on adjusting the height of the syringe.
•Insert an injection syringe into the syringe holder till the top syringe clamp is firmly seated
against the top of the syringe holder. (see diagram next page)
•Insert the bottom syringe clamp over the syringe needle onto the glass part of the syringe.
9

VP-ITC MicroCalorimeter User’s Manual
•Make sure the top syringe clamp is still seated against the top of the syringe holder, hold the
bottom syringe clamp tightly against the bottom of the syringe holder and gently tighten the
set screw using the accessory 0.050” Ball Point Hex Driver.
!Use care not to over tighten the set screw, as too much pressure will cause the glass to
break. You want to tighten the screw just enough to prevent the bottom syringe clamp
from moving freely.
•Insert the syringe holder into the pipette holder (attached to the
side of the VP-ITC).
•Bring the pipette injector directly above the syringe holder, start
bringing the injector down while observing the plunger tip of the
pipette injector to insure that it is being inserted into the hole in
the glass barrel of the injector syringe, then mate the screws of the
pipette injector to the locking collar of the syringe holder
•With your fingers, turn the locking collar until it is fully tightened
on the pipette injector.
When the locking collar is fully tightened there should be only a
couple threads of the pipette injector viewable.
•Plug the connector of the pipette into the back of the pipette
controller to complete the pipette assembly.
10
Table of contents
Popular Laboratory Equipment manuals by other brands


Agilent Technologies
Agilent Technologies InfinityLab LC Series installation manual

Micromeritics
Micromeritics SediGraph III 5120 Installation Instructions and Checklist

socorex
socorex ACURA 815 operating instructions

Applied Biosystems
Applied Biosystems 7500 Getting started

Integra
Integra VIAFLO ASSIST 4500 operating instructions

Elitech
Elitech FreezePoint 6000 Series user manual


