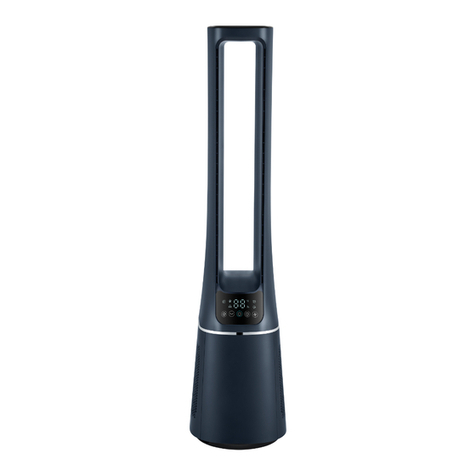
Midea MSF15AH6LB User manual

MSF15AH6LB
USER MANUAL
Warning notices: Before using this product,please read this manual carefully and keep it for future reference.
The design and specifications are subject to change without prior notice for product improvement.
Consult with your dealer or manufacturer for details.
The diagram above is just for reference. Pleasetake the appearance of the actual product as the standard.
3 IN 1 FAN+HEATER+AIR PURIFIER

THANK YOU LETTER
Thank you for choosing Midea! Before using your new Midea product, please read
this manual thoroughly to ensure that you know how to operate the features and
functions that your new appliance offers in a safe way.
CONTENTS
01
0
02
1
05
06
07
09
1 5
1 4
1 6
1 2
THANK YOU LETTER
SAFETY INSTRUCTIONS
SPECIFICATIONS
PRODUCT OVERVIEW
PRODUCT INSTALLATION
OPERATION INSTRUCTIONS
CLEANING AND MAINTENANCE
TROUBLESHOOTING
TRADEMARKS, COPYRIGHTS AND LEGAL STATEMENT
DATA PROTECTION NOTICE
EN

02
Danger
This symbol indicates that there are dangers to the life and health of
persons due to extremely flammable gas.
Warning of electrical voltage
This symbol indicates that there is a danger to life and health of
persons due to voltage.
Warning
The signal word indicates a hazard with a medium level of risk which, if
not avoided, may result in death or serious injury.
Caution
The signal word indicates a hazard with a low degree of risk which, if
not avoided, may result in minor or moderate injury.
Attention
The signal word indicates important information (e.g. damage to
property), but not danger.
Observe instructions
This symbol indicates that a service technician should only operate and
maintain this appliance in accordance with the operating instructions.
The following safety guidelines are intended to prevent unforeseen risks or damage from
unsafe or incorrect operation of the appliance. Please check the packaging and appliance
on arrival to make sure everything is intact to ensure safe operation. If you find any
damage, please contact the retailer or dealer. Please note modifications or alterations to
the appliance are not allowed for your safety concern. Unintended use may cause
hazards and loss of warranty claims.
Read these operating instructions carefully and attentively before using/commissioning the
unit and keep them intheimmediate vicinity of theinstallation site or unit for later use!
Intended Use
Explanation of Symbols
SAFETY INSTRUCTIONS
EN

03
READ AND SAVE THESE INSTRUCTIONS
IMPORTANT INSTRUCTIONS
When using electrical appliances, basic precautions
should always be followed to reduce the risk of fire,
electric shock, injury to persons, and hyperthermia,
including the following:
Read all instructions before using this heater.
CAUTION
●
●
●
●
●
●
●
●
This heater is hot when in use. To avoid burns, do not let
bare skin touch hot surfaces. If provided, use handles
when moving this heater. Keep combustible materials,
such as furniture, pillows, bedding, papers, clothes, and
curtains at least 3 feet (0.9 m) from the front of the
heater and keep them away from the sides and rear.
Extreme caution is necessary when any heater is used
by or near children or invalids and whenever the heater
is left operating and unattended.
Always unplug heater when not in use.
Do not operate any heater with a damaged cord or plug
or after the heater malfunctions, has been dropped or
damaged in any manner. Discard heater, or return to
authorized service facility for examination and/or repair.
Do not use outdoors.
This heater is not intended for use in bathrooms, laundry
areas and similar indoor locations. Never locate heater
where it may fall into a bathtub or other water container.
Do not run cord under carpeting. Do not cover cord with
throw rugs, runners, or similar coverings. Do not route
cord under furniture or appliances. Arrange cord away
from traffic area and where it will not be tripped over.
WARNING
EN
04
●
●
●
●
●
●
●
●
To disconnect heater, turn controls to off, then remove
plug from outlet.
Do not insert or allow foreign objects to enter any venti-
lation or exhaust opening as this may cause an electric
shock or fire, or damage the heater.
To prevent a possible fire, do not block air intakes or
exhaust in any manner. Do not use on soft surfaces, like a
bed, where openings may become blocked.
A heater has hot and arcing or sparking parts inside. Do
not use it in areas where
gasoline, paint, or flammable liquids are used or stored.
Use this heater only as described in this manual. Any
other use not recommended by the manufacturer may
cause fire, electric shock, or injury to persons.
Always plug heaters directly into a wall outlet/receptacle.
Never use with an extension cord or relocatable power
tap (outlet/power strip).
Hyperthermia can result in death. Symptoms of
hyperthermia include high body temperature, headache,
nausea, vomiting, tiredness, dizziness, fainting, and rapid
pulse. If you begin to experience symptoms related to
hyperthermia, turn off the heater and seek medical
attention.
To avoid excessive room temperatures which can cause
hyperthermia: DO NOT leave product running
unattended in a confined space around infants, or
individuals with reduced physical, sensory, or mental
capabilities.
SAVE THESE INSTRUCTIONS
WARNING
EN

05
SPECIFICATIONS
MSF15AH6LBProduct Model
Voltage
Frequency
Fan Power
120V~
60Hz
Heater Power 1500W
Noise ≤62dB
40W
EN

PRODUCT OVERVIEW
06
Part Name
Part List
NOTE
All the pictures in this manual are for explanation purpose only. Any discrepancy between
the real object and the illustration in the drawing shall defer to the real product.
Remote Controller ×1 Manual ×1 HEPA Filter x2
Control Panel
Display Panel
Air Outlet
Heater (red)/Fan (blue)
Mode indicator light
Base
Air Inlet Grille
Pre-filter
Hepa Filter
EN

07
PRODUCT INSTALLATION
Installation Procedures
1 Remove the air inlet grille.
3 Remove the protective film of the
filter.
2 Take out the pre-filter.
Press the raised part on both sides to
pull it outwards, and take out the
pre-filter.
4 Install the HEPA filter.
6 Install the air inlet grille.
Align the upper two snap fit joints and
press them tightly together to fasten,
then press the two sides together at the
bottom, slowly and gently snap fit the
air inlet grille into place.
5 Install the pre-filter.
Align the slot position at the bottom,
and snap fit the upper U-Shaped joint to
install.
Snap fit
position
Snap fit
release
EN

08
7 Plug power supply.
• It is recommended to clean the pre-filter every two weeks and replace the pre-filter
every six months (The cleaning and replacement cycle can be adjusted according to
the use environment).
EN

Function descriptionICON
• Touch to enter Startup/Standby, the appliance startup or stop.
• Touch to set cool wind speed and desired timer.
• Touch to set the desired oscillation angel of 30°,55°, or 0°(Stop
oscillation)
• Touch to turn on/off the ambient light.
• Touch to set the cool wind mode. Touch this button to switch the
wind mode among Normal wind (12 speeds settings, lights up),
Sleep wind ( 3 speed settings, lights up), and Natural wind (3
speed settings, light up) .
• Schedule to stop working automatically in the power-on state, and
schedule to start working automatically in the standby state;
• Touch and press +/- to set the timer in one hour intervals up to 12
hours (the display cycles among 0-1-2-...-12-0h); 0h means the set
timer is canceled.
//
• Touch to enter Auto wind mode, and the wind power is
automatically adjusted according to changes in ambient temperature.
09
OPERATION INSTRUCTIONS
Panel Control & Display
Control Panel Display Panel
OSC
COOL/MODE
TIMER
LIGHT
AUTO
EN

• Touch to active heating mode, touch +/- to set target temperature.
“--” indicates target temperature is not set. If the target temperature is
set and the appliance does not reach the set temperature, the
appliance will continue to work until the actual temperature exceeds
the set temperature, and then, the machine will stop. The icon on
the display flashes for 15 seconds and then stays on.
• In the natural wind mode, this indicator light turns on.
• You can switch the wind speed between 1 - 2 - 3 speeds by touching
the speed button.
• When this indicator light stays on, it serves as a reminder to replace
the filter.
• The indicator light turns on indicating that the power plug is
plugged in.
10
Function descriptionICON
WARM
EN

11
Remote Control
Batteries Warning As Below
NOTE
Use manganese or alkaline batteries of type “AAA”. DO NOT use rechargeable batteries.
• The remote control should be normally used within 16 ft (5m) of the front of the
product and 30 degrees of the deviation angle.
• The battery contains many heavy metals, acids and bases, etc., which may threaten
human’s health. Waste batteries should be recycled separately.
Additional Features and Maintenance
• Forced shutdown
Please note that as a safety measure, the fan will automatically shut down after 15
hours of continuous operation if no additional actions or operations are performed.
This ensures the unit's optimal performance and prevents any potential overheating or
damage.
• Intelligent memory
When the fan is turned off or powered off, it will run in the same state before turning
off or power off when the power is powered on again (the timing function is not
memorized).
• Screen-off function
The screen display will automatically shut-off after 30 seconds if no additional actions
or operations are performed. To turn on the screen you can touch any button other
than ON/OFF to restore the display.
NOTE: When the screen is off, touching the ON/OFF button will turn the appliance off.
Startup/Standby
Warm mode
Press "+,-" to set the wind
speed or set timer
TIMER
Desired oscillation
angel setting
Wind mode
AAA Battery. 1.5V
Battery
Do not dispose of batteries in fire, batteries may explode or leak.
Do not mix old and new batteries.
Do not mix alkaline, standard (carbon-zinc) or rechargeable (nickel-cadmium)
batteries.
Non-rechargeable batteries are not to be recharged.
Batteries are to be inserted with the correct polarity.
Exhausted batteries are to be removed from the product.
The batteries must be removed from the remote controller before it is scrapped and
that they are disposed of safely.
●
●
●
●
●
●
●
EN

CLEANING AND MAINTENANCE
12
1. Before cleaning and assembling, appliance must be unplugged.
2. To ensure adequate air circulation to the motor, keep vents at the rear of the motor
free of dust. Do not disassemble the appliance to remove dust.
3. Please clean external parts using a soft clean cloth moistened with a mild detergent.
thoroughly remove soap film with dry cloth.
4. Do not use any abrasive detergent or solvents to avoid scratching the surface.
Do not use any of the following as a cleaner: gasoline, thinner.
5. Do not allow water or any other liquid into the motor housing or interior parts.
It is recommended that the appliance be cleaned at least one time during the operating
season in order to provide the optimum level of performance. ALWAYS TURN THE
POWER SWITCH OFF AND UNPLUG THE APPLIANCE BEFORE CLEANING. Be sure to
save the box for storage. If the appliance is broken or damaged, do not try to fix it by
yourself. Refer it to an authorized service representative if service is needed.
Filter Replacement
2 When the indicator light for filter
replacement is on, it serves as a
reminder to replace the filter. Failure
to do so will result in the indicator
light remaining illuminated when the
appliance is powered on.
1 Filter model:FQ150CJ-2
(including 2 pieces).
4 Press and hold the button for 3
seconds to turn o the indicator light
for filter replacement.
3 Replace with a new filter.
EN

13
Pre-Filter Cleaning
2 Take out the filter.
1 Unplug the power cord.
4 Reinstall the pre-filter in reverse order
and then plug-in the power supply.
3 Remove the dust with vacuum cleaner.
EN

TROUBLESHOOTING
14
The appliances may encounters some errors and malfunctions, the following tables
contain possible causes and notes for resolving an error or malfunction.
Solution
Cause SolutionProblem
The power cable is not
plugged in or has poor contact.
Make sure the plug is properly
inserted into the socket.
The power on/off button is not
activated.
Press the power on/off button
to turn on the appliance.
The battery is out of power. Replace with new battery.
●
●
●
The remote is being used more
than 16 ft (5m) away from the
appliance.
●
The unit does
• The machine stops when the temperature exceeds the threshold of the thermal cut- off,
you should manually unplug the appliance, and then insert it into the receptacle again
when the appliance is cooled.
• When you are not using the appliance, store it in a cool, dry place with ambient
conditions and no dust, to avoid clogging the filters.
not work properly
after assembled
The remote does
not work Use the remote closer to the
appliance and make sure it is
pointing directly at the display
panel.
EN

15
logo, word marks, trade name, trade dress and all versions there of are
trademarks, copyrights and other intellectual property rights, and all goodwill derived
valuable assets of Midea Group and/or its affiliates (“Midea”), to which Midea owns
from using any part of an Midea trademark. Use of Midea trademark for commercial
purposes without the prior written consent of Midea may constitute trademark
infringement or unfair competition in violation of relevant laws.
This manual is created by Midea and Midea reserves all copyrights thereof. No entity or
individual may use, duplicate, modify, distribute in whole or in part this manual, or
bundle or sell with other products without the prior written consent of Midea.
All the described functions and instructions were up to date at the time of printing this
manual. However, the actual product may vary due to improved functions and designs.
TRADEMARKS, COPYRIGHTS
AND LEGAL STATEMENT
EN

16
DATA PROTECTION NOTICE
For the provision of the services agreed with the customer,
we agree to comply without restriction with all stipulations of applicable data protection
law, in line with agreed countries within which services to the customer will be delivered,
as well as, where applicable, the EU General Data Protection Regulation (GDPR).
Generally, our data processing is to fulfil our obligation under contract with you and for
product safety reasons, to safeguard your rights in connection with warranty and
product registration questions. In some cases, but only if appropriate data protection is
ensured, personal data might be transferred to recipients located outside of the
European Economic Area.
Further information is provided by request. You can contact our Data Protection
your personal data being processed for marketing purposes, please contact us via
[email protected]. To find further information, please follow the QR Code.
EN

CONTENIDO
AGRADECIMIENTOS
¡Gracias por elegir Midea! Antes de utilizar su nuevo dispositivo Midea, lea
atentamente este manual para asegurarse de que sabe cómo manejar las
características y funciones que le ofrece su nuevo electrodoméstico de forma
segura.
---------------------------------------------------------------
-------------------------------------
---------------------------------------------------------------
-----------------------------------------
-----------------------------------------
-----------------------
-------------------------------------------
------------------------------------------------
-----------------
01
0
02
1
06
07
08
AGRADECIMIENTOS
INSTRUCCIONES DE SEGURIDAD
ESPECIFICACIONES
DESCRIPCIÓN DEL PRODUCTO
INSTALACIÓN DEL PRODUCTO
INSTRUCCIONES DE FUNCIONAMIENTO
LIMPIEZA Y MANTENIMIENTO
MARCAS, DERECHOS DE AUTOR Y DECLARACIÓN LEGAL
AVISO SOBRE LA PROTECCIÓN DE DATOS 17
16
13
SOLUCIÓN DE PROBLEMAS 15
10
ES

02
Peligro
Advertencia de tensión eléctrica
Advertencia
Precaución
Atención
Respetar las instrucciones
Uso Adecuado
Simbología
INSTRUCCIONES DE SEGURIDAD
Las siguientes directrices de seguridad tienen por objeto evitar riesgos imprevistos o
daños derivados de un funcionamiento inseguro o incorrecto del dispositivo.
Compruebe el embalaje y el aparato a su llegada para asegurarse de que todo está
intacto para garantizar un funcionamiento seguro. Si encuentra algún daño, póngase en
contacto con el vendedor o distribuidor. Por favor, tenga en cuenta que las
modificaciones o alteraciones en el aparato no están permitidas por su seguridad.
El uso inadecuado puede causar peligros y la pérdida de los derechos de garantía.
ES
Lea atentamente este manual de instrucciones antes de utilizar/poner en marcha el
dispositivo y guárdelo en las inmediaciones del lugar de instalación o del dispositivo
para su uso posterior.
Este símbolo indica que existe peligro para la vida y la salud de las personas
debido a la existencia de gas extremadamente inflammable.
Este símbolo indica que existe un peligro para la vida y la salud de las personas
debido a la tensión
Este símbolo representa un peligro con un nivel de riesgo medio que, si no se
evita, puede provocar la muerte o lesiones graves.
Este símbolo indica un peligro con un grado de riesgo bajo que, si no se evita,
puede provocar lesiones leves o moderadas.
Este símbolo indica información importante (por ejemplo, daños materiales), pero
no peligro.
Este símbolo indica que un técnico de servicio sólo debe operar y mantener este
aparato de acuerdo con las instrucciones de funcionamiento.

03
PRECAUCIÓN
LEA Y CONSERVE ESTAS
INSTRUCCIONES
INSTRUCCIONES IMPORTANTES
Cuando se utilicen aparatos eléctricos, deben seguirse
siempre las precauciones básicas para reducir el riesgo de
incendio, electrocución y lesiones a las personas o
hipertermia, incluyendo las siguientes:
•Lea todas las instrucciones antes de utilizar el calefactor.
• Este calefactor se calienta cuando está en uso. Para
evitar quemaduras, no deje que la piel desnuda toque la
superficie caliente. Si el aparato está provisto de asas,
utilícelas siempre para desplazar el calefactor. Mantenga
los materiales combustibles como muebles, almohadas,
ropa de cama, papeles, ropa y cortinas a una distancia
mínima de 0,9 m (3 pies) de la parte delantera del
calefactor y manténgalos alejados de los laterales y la
parte trasera.
• Es necesario extremar las precauciones cuando cualquier
calefactor sea utilizado por o cerca de niños o inválidos y
siempre que el aparato se deje en funcionamiento y sin
vigilancia.
• Siempre desconecte el dispositivo si no está en uso.
• No haga funcionar ningún calefactor con un cable o
enchufe dañado o después de que el aparato funcione
mal, se haya caído o dañado de alguna manera. Deseche
el calefactor o devuélvalo a un servicio técnico
autorizado para que lo examinen, lo ajusten eléctrica o
mecánicamente o lo reparen.
• No use el aparato al aire libre.
ADVERTENCIA
ES
Table of contents
Other Midea Air Cleaner manuals

Midea
Midea KJ350G-S1 User manual

Midea
Midea AMS150-PB User manual

Midea
Midea US-KJ200G-D41 User manual

Midea
Midea MP3.360 User manual

Midea
Midea KJ500G-TA32 User manual

Midea
Midea KJ500G-TB32 User manual

Midea
Midea MBF2733PC User manual

Midea
Midea MAP-28BD User manual

Midea
Midea FBS15023R User manual

Midea
Midea FP-71APA040WETH-W User manual