45
Installation before useInstallation before use
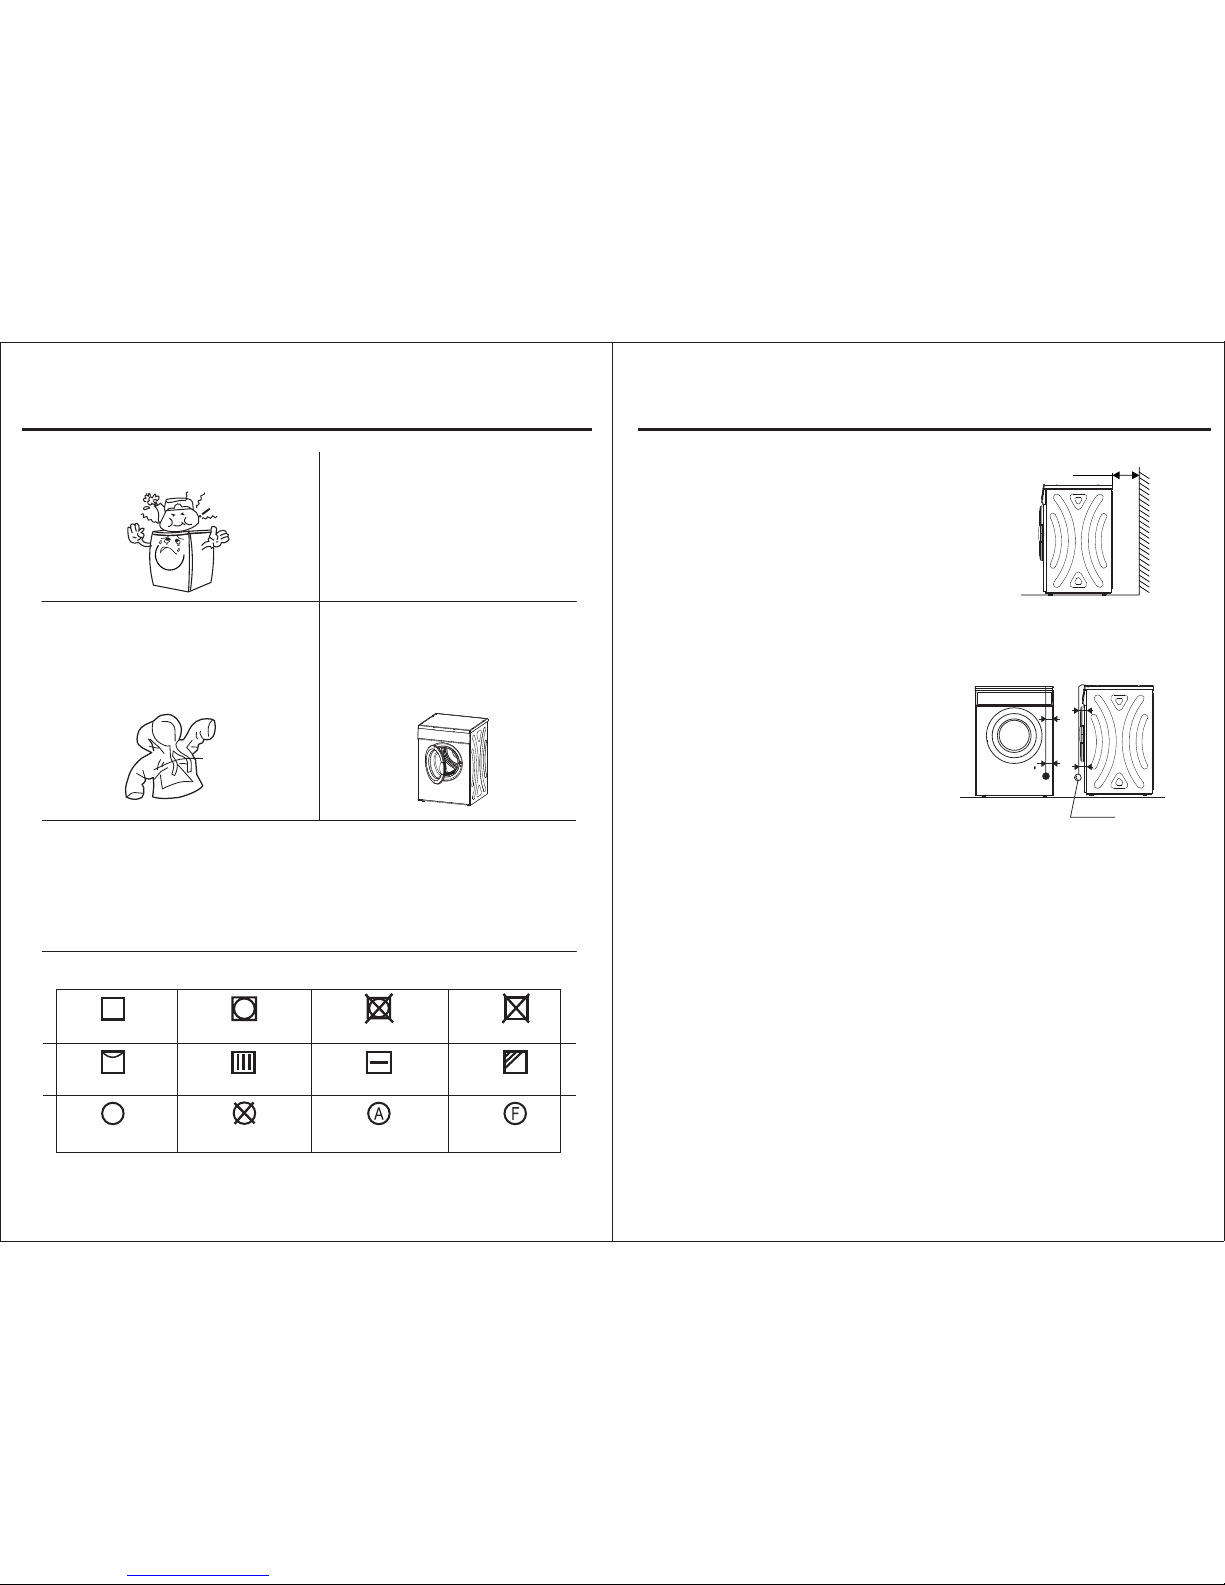
Step 2: Precautions
Install or store where it will not be exposed to
temperatures below freezing or exposed to
water or weather, which could cause permanent
damage and invalidate the warranty.
Keep area around the exhaust opening and
adjacent surrounding areas free from the
accumulation of lint, dust and dirt. An obstructed
port might reduce the airflow.
Thoroughly spin the laundry in washing machine.
High spin speed can reduce the drying time and
save energy consumption.
Make sure combustible sprayer will not be
close to dryer when it is working, and once
the gas leaks, do not touch plug or start/pause
on it.
Do not wash or dry articles that have been
cleaned in, washed in, soaked in or spotted with
combustible or explosive substances ( such as
wax, oil, paint, gasoline, degreasers, dry-cleaning
solvents, kerosene, etc.).
Never attempt to operate this appliance if it is
damaged, malfunctioning, partially disassembled,
or has missing or broken parts, including
a damaged cord or plug.
Do not allow children on or in the appliance. Close
supervision of children is necessary when the
appliance is used near children.
Please do not use the machine when your foot
or hand with water.
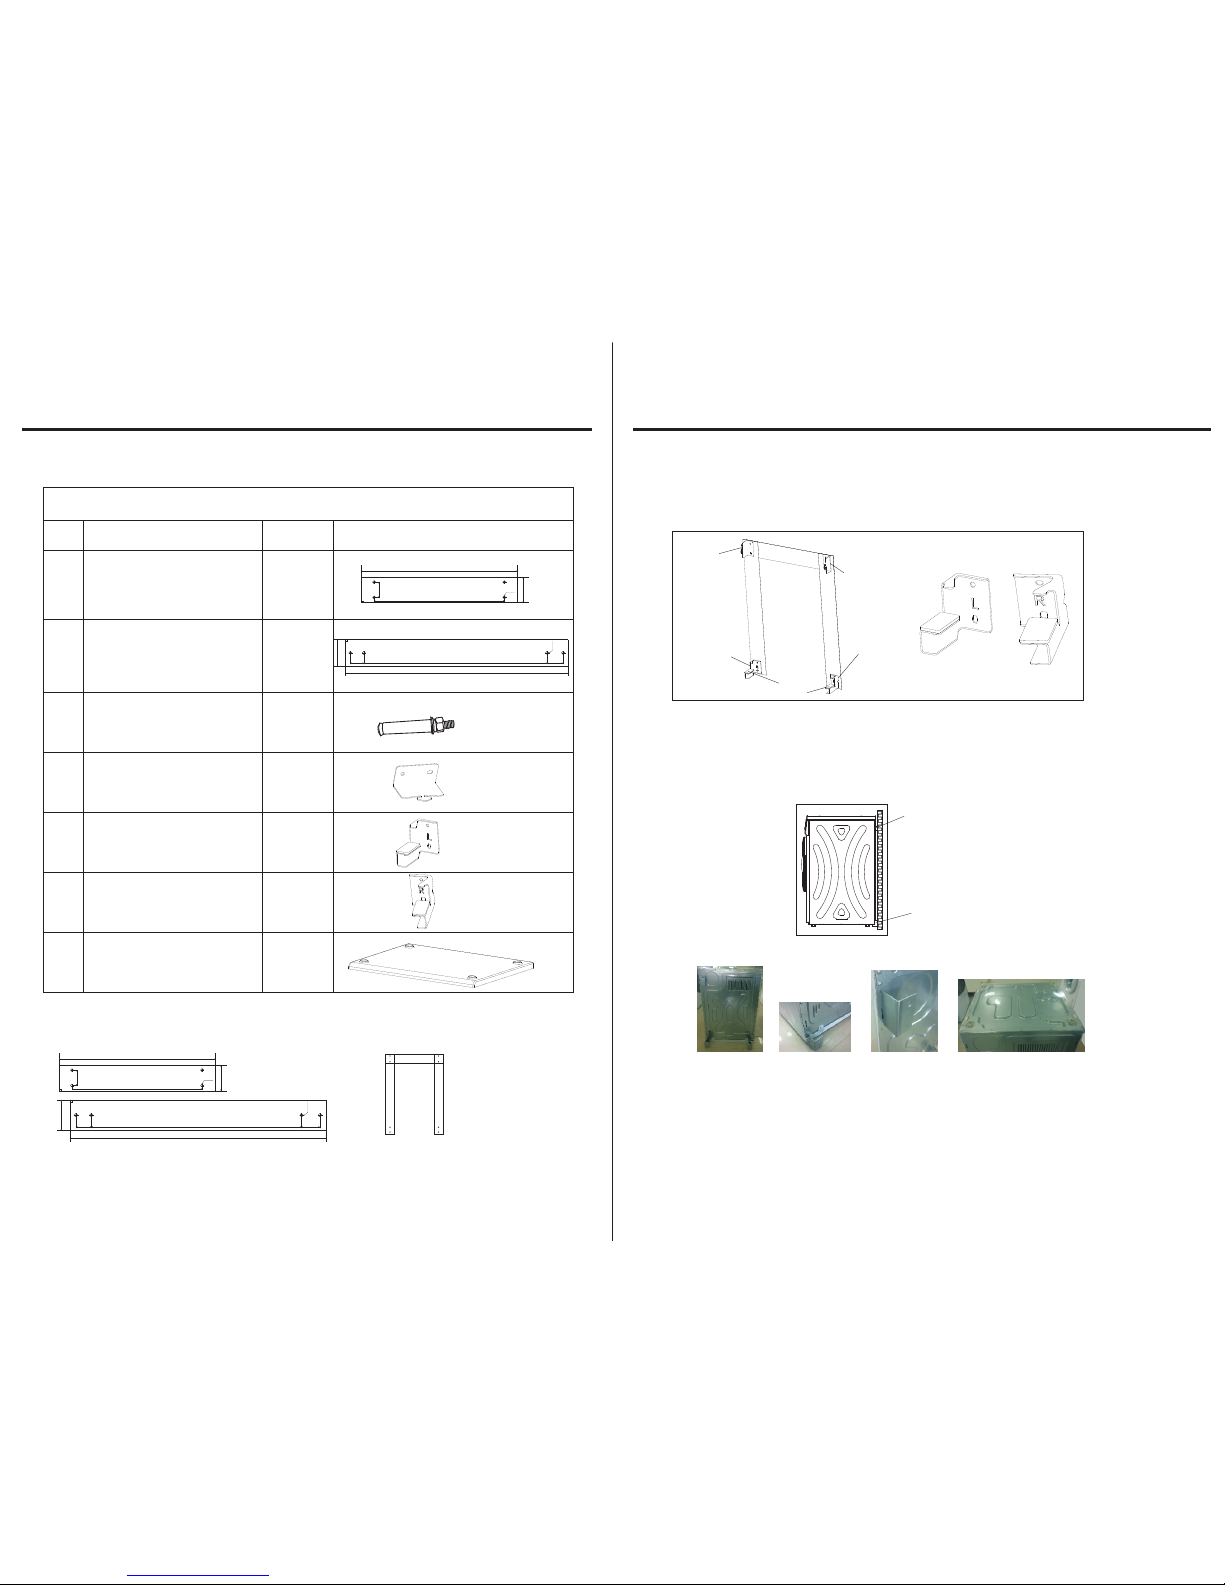
Part name
1.Top board 2.Control panel 3.Door 4.Front panel 5.Side panel 6.Filter
9.Switch 10.Tumbling box 11.Front vent flange(only to front vent)8.Power plug
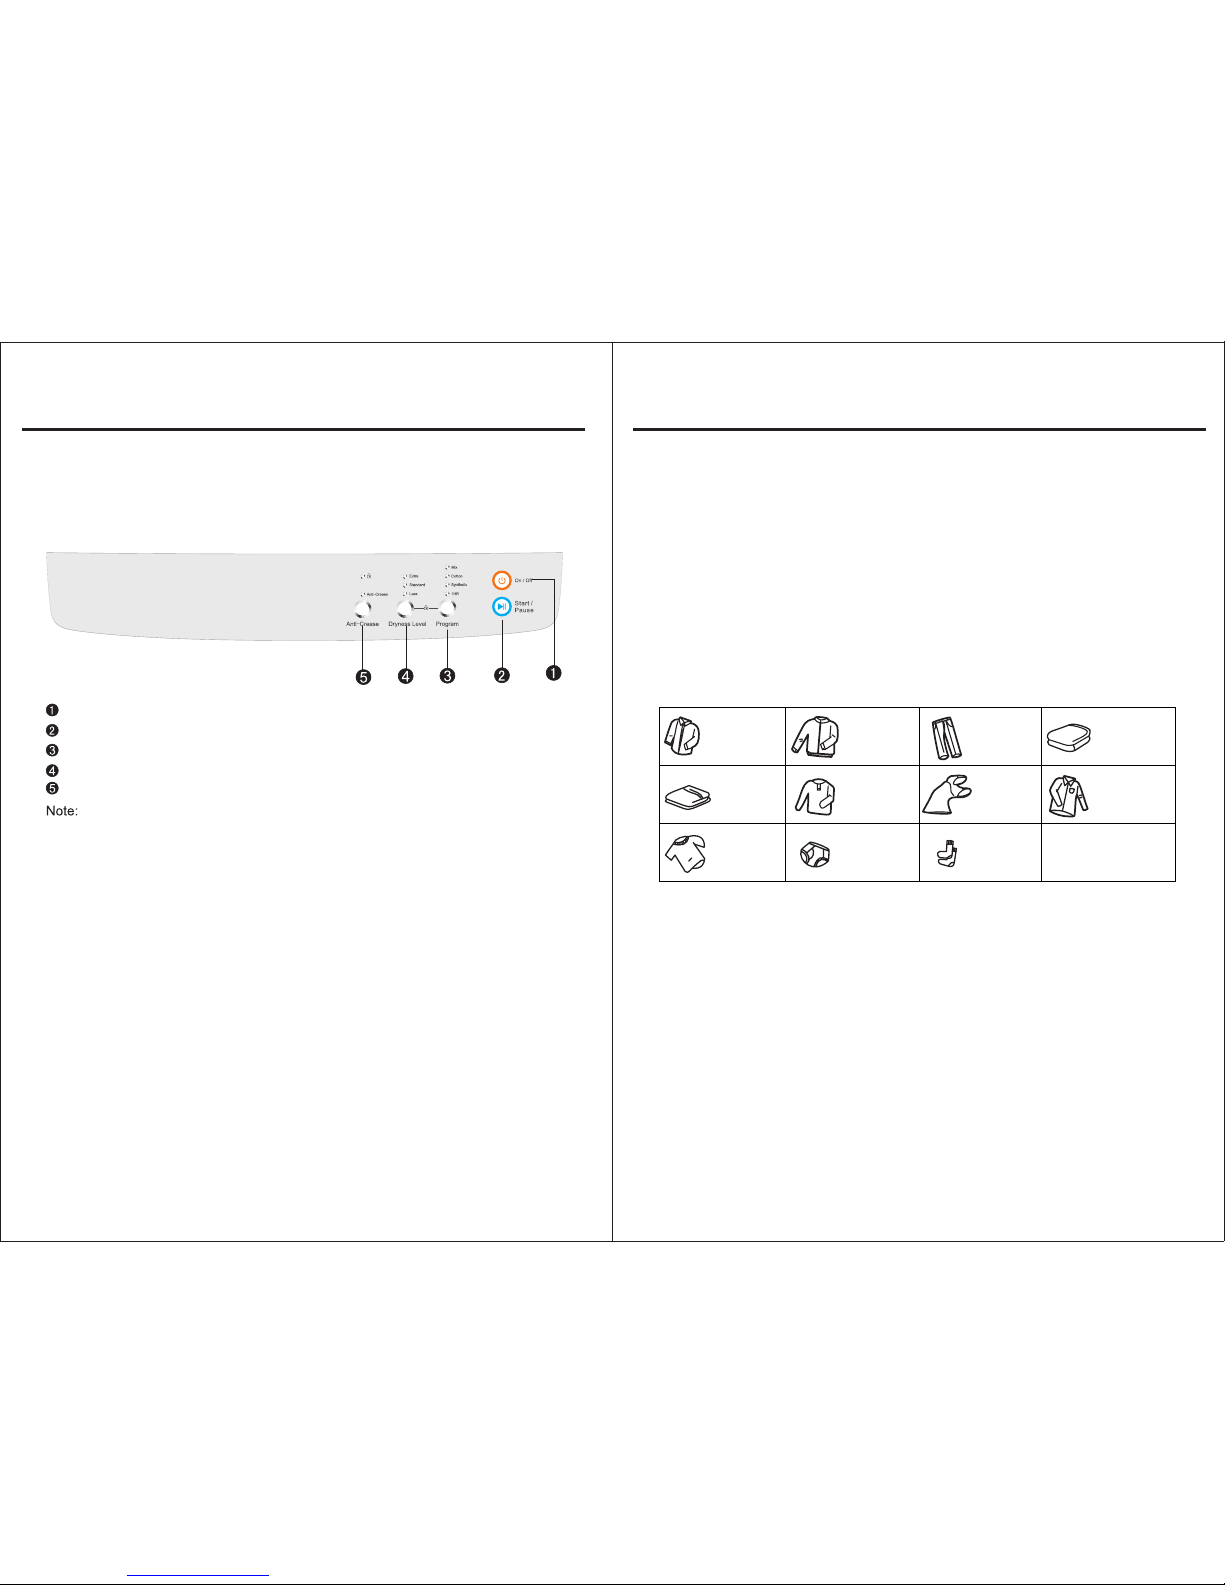
Notice before use
The first step: Power source and grounding.
The dryer employs alternative current with the rated voltage and frequency. When the voltage
fluctuates between 6% of rated voltage, the dryer can work normally. A special power socket for
the dryer had better be set beside the dryer for convenience and safety. The method of
connection of the socket is as the figure below.
To be safe, please make improvements as soon as possible
according to the rules and suggestions mentioned above.
Notices:
The socket and the grounding wire must be installed by an electrician to prevent incorrect
installation or use of the socket and to guarantee the safety of use of electricity. The power wire
of the dryer employs Y connection, if the supply cord is damaged, it must be replaced by the
manufacturer, its service agent or similarly qualified persons in order to avoid a hazard. No
connection of the grounding wire the neutral wire, otherwise the cabinet will be charged, which
is likely to cause the danger of electric shock.
Grounding
11