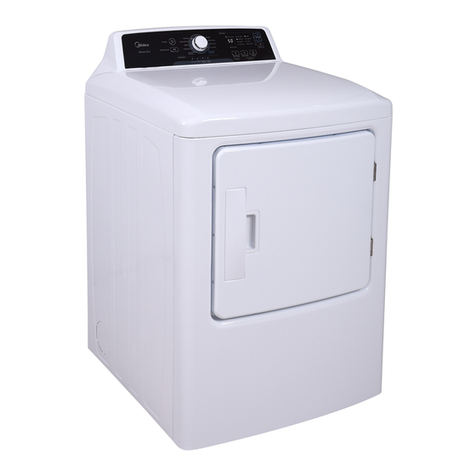
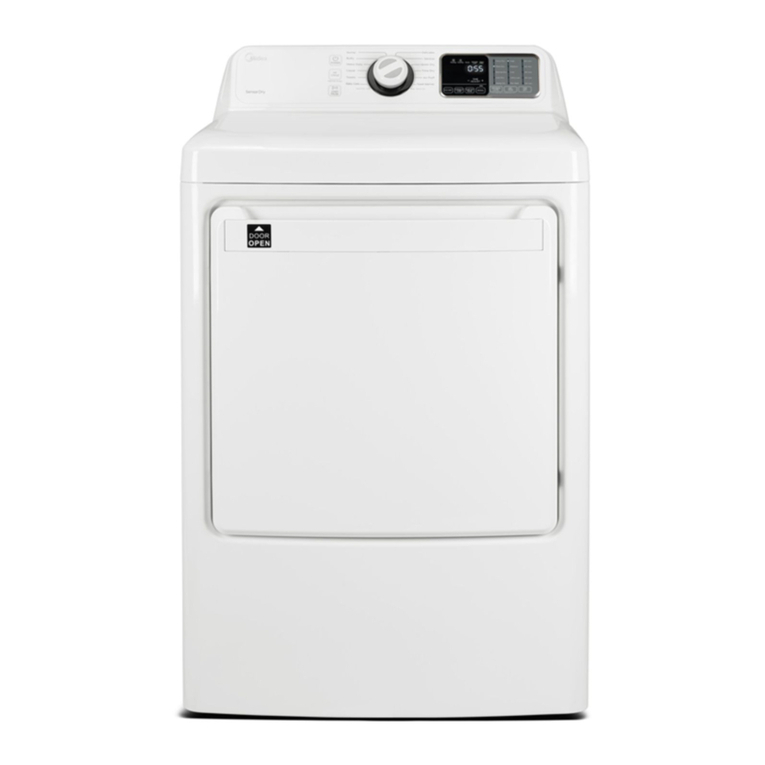
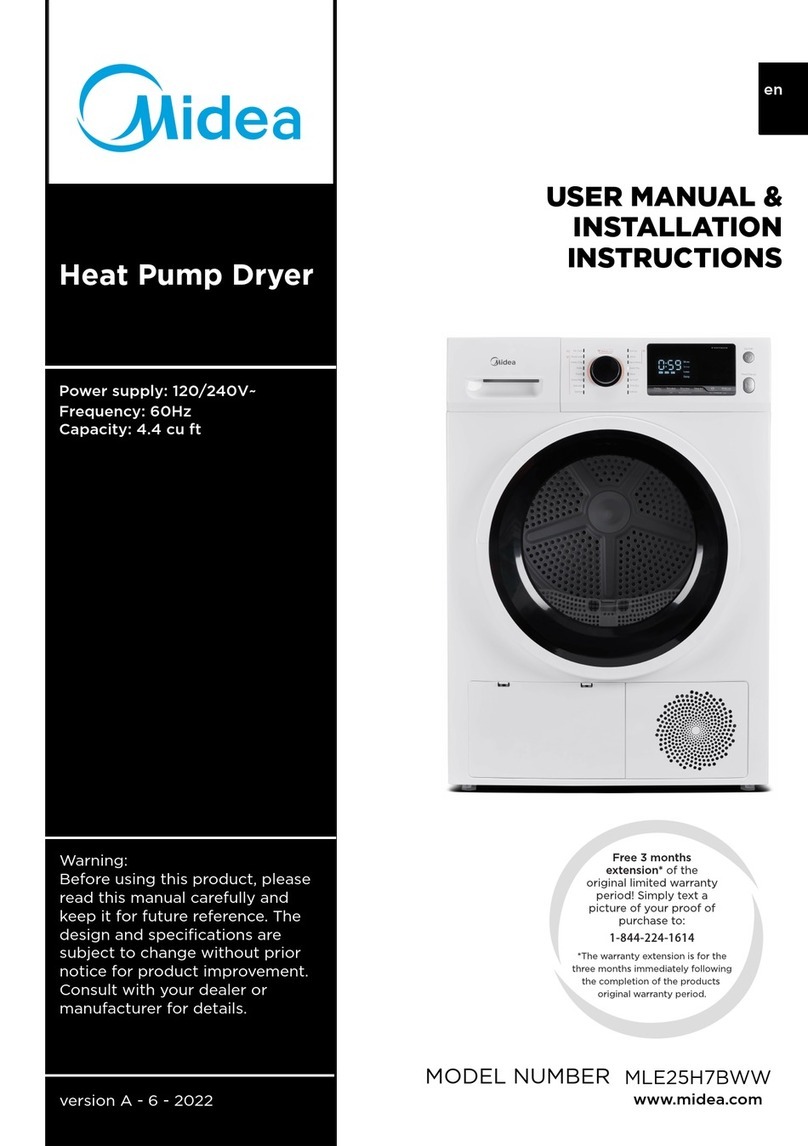
Midea MLE41N1AWWC Manual

Electric Dryer
version A
USER MANUAL &
INSTALLATION
INSTRUCTIONS
Warning:
Before using this product,
please read this manual carefully
and keep it for future reference.
The design and specifications
are subject to change without
prior notice for product
improvement. Consult with your
dealer or manufacturer for
details.
Power supply: 120/240V
Frequency: 60 Hz
MODEL NUMBER
MLE41N1AWWC
www.midea.com/ca
en

2
Contents
IMPORTANT SAFETY INSTRUCTIONS. . . . . . . . . . . . . . . . . . . . . . . . . . . . . . . . . . . . . . . . . . . . . . . .. . . . . . . . . . . . . . . . . . . . . . . . . 3
Features. . . . . . . . . . . . . . . . . . . . . . . . . . . . . . . . . . . . . . . . . . . . . . . . . . . . . . . . . . . . . . . . . . . . . . . . . . . . . . . . . . . . . . . . . . . . . . . . . . . . 5
Package contents . . . . . . . . . . . . . . . . . . . . . . . . . . . . . . . . . . . . . . . . . . . . . . . . . . . . . . . . . . . . . . . . . . . . . . . . . . . . . . . . . . . . . . . . 5
Front components . . . . . . . . . . . . . . . . . . . . . . . . . . . . . . . . . . . . . . . . . . . . . . . . . . . . . . . . . . . . . . . . . . . . . . . . . . . . . . . . . . . . . . . 5
Back components . . . . . . . . . . . . . . . . . . . . . . . . . . . . . . . . . . . . . . . . . . . . . . . . . . . . . . . . . . . . . . . . . . . . . . . . . . . . . . . . . . . . . . . . 5
Control panel. . . . . . . . . . . . . . . . . . . . . . . . . . . . . . . . . . . . . . . . . . . . . . . . . . . . . . . . .. . . . . . . . . . . . . . . . . . . . . . . . . . . . . . . . . . . . . . . . . . . . . . . 6
Unpacking your dryer. . . . . . . . . . . . . . . . . . . . . . . . . . . . . . . . . . . . . . . . . . . . . . . . . . . . . . . . . . . . . . . . . . . . . . . . . . . . . . . . . . . . . . . 7
Choosing a location . . . . . . . . . . . . . . . . . . . . . . . . . . . . . . . . . . . . . . . . . . . . . . . . . . . . . . . . . . . . . . . . . . . . . . . . . . . . . . . . . . . . . . . 7
Exhausting requirements . . . . . . . . . . . . . . . . . . . . . . . . . . . . . . . . . . . . . . . . . . . . . . . . . . . . . . . . . . . . . . . . . . . . . . . . . . . . . . 11
Ducting requirements . . . . . . . . . . . . . . . . . . . . . . . . . . . . . . . . . . . . . . . . . . . . . . . . . . . . . . . . . . . . . . . . . . . . . . . . . . . . . . . . . .11
Electricrequirements—Canadaonly .......................................................... . . . . . . . . . . 13
Grounding requirements . . . . . . . . . . . . . . . . . . . . . . . . . . . . . . . . . . . . . . . . . . . . . . . . . . . . . . . . . . . . . . . . . . . . . . . . . . . . . . . 14
Installing your dryer . . . . . . . . . . . . . . . . . . . . . . . . . . . . . . . . . . . . . . . . . . . . . . . . . . . . . . . . . . . . . . . . . . . . . . . . . . . . . . . . . . . . . . .15
Tools you will need . . . . . . . . . . . . . . . . . . . . . . . . . . . . . . . . . . . . . . . . . . . . . . . . . . . . . . . . . . . . . . . . . . . . . . . . . . . . . . . . . . . . 15
Before you start . . . . . . . . . . . . . . . . . . . . . . . . . . . . . . . . . . . . . . . . . . . . . . . . . . . . . . . . . . . . . . . . . . . . . . . . . . . . . . . . . . . . . . . . 15
Step-by-Step instructions . . . . . . . . . . . . . . . . . . . . . . . . . . . . . . . . . . . . . . . . . . . . . . . . . . . . . . . . . . . . . . . . . . . . . . . . . . . . . . 15
Reversing the dryer door . . . . . . . . . . . . . . . . . . . . . . . . . . . . . . . . . . . . . . . . . . . . . . . . . . . . . . . . . . . . . . . . . . . . . . . . . . . . . . 18
Using your dryer. . . . . . . . . . . . . . . . . . . . . . . . . . . . . . . . . . . . . . . . . . . . . . . . . . . . . . . . . . . . . . . . . . . . . . . . . . . . . . . . . . . . . . . . . . . 20
Drying a load of clothes . . . . . . . . . . . . . . . . . . . . . . . . . . . . . . . . . . . . . . . . . . . . . . . . . . . . . . . . . . . . . . . . . . . . . . . . . . . . . . . . 20
Unloading your dryer . . . . . . . . . . . . . . . . . . . . . . . . . . . . . . . . . . . . . . . . . . . . . . . . . . . . . . . . . . . . . . . . . . . . . . . . . . . . . . . . . . . 21
Setting the child lock . . . . . . . . . . . . . . . . . . . . . . . . . . . . . . . . . . . . . . . . . . . . . . . . . . . . . . . . . . . . . . . . . . . . . . . . . . . . . . . . . . . 21
Dryer options and settings . . . . . . . . . . . . . . . . . . . . . . . . . . . . . . . . . . . . . . . . . . . . . . . . . . . . . . . . . . . . . . . . . . . . . . . . . . . . . . . 23
Special laundry tips. . . . . . . . . . . . . . . . . . . . . . . . . . . . . . . . . . . . . . . . . . . . . . . . . . . . . . . . . . . . . . . . . . . . . . . . . . . . . . . . . . . . . 24
Maintaining your dryer . . . . . . . . . . . . . . . . . . . . . . . . . . . . . . . . . . . . . . . . . . . . . . . . . . . . . . . . . . . . . . . . . . . . . . . . . . . . . . . . . . . .24
Cleaning the exterior . . . . . . . . . . . . . . . . . . . . . . . . . . . . . . . . . . . . . . . . . . . . . . . . . . . . . . . . . . . . . . . . . . . . . . . . . . . . . . . . . . . . 24
Cleaning the drum. . . . . . . . . . . . . . . . . . . . . . . . . . . . . . . . . . . . . . . . . . . . . . . . . . . . . . . . . . . . . . . . . . . . . . . . . . . . . . . . . . . . 24
Cleaning the control panel . . . . . . . . . . . . . . . . . . . . . . . . . . . . . . . . . . . . . . . . . . . . . . . . . . . . . . . . . . . . . . . . . . . . . . . . . . . . . . . 24
Cleaning and inspecting the exhaust system . . . . . . . . . . . . . . . . . . . . . . . . . . . . . . . . . . . . . . . . . . . . . . . . . . . . . . . . . . . 25
Troubleshooting. . . . . . . . . . . . . . . . . . . . . . . . . . . . . . . . . . . . . . . . . . . . . . . . . . . . . . . . . . . . . . . . . . . . . . . . . . . . . . . . . . . . . . . . . . . 25
Understanding the error codes. . . . . . . . . . . . . . . . . . . . . . . . . . . . . . . . . . . . . . . . . . . . . . . . . . . . . . . . . . . . . . . . . . . . . . . . . . . 26
Fabric care chart . . . . . . . . . . . . . . . . . . . . . . . . . . . . . . . . . . . . . . . . . . . . . . . . . . . . . . . . . . . . . . . . . . . . . . . . . . . . . . . . . . . . . . . . . . 27
2
Dear user
THANK YOU and CONGRATULATIONS on your purchase of this high-quality Midea
product. Your Midea dryer is designed for reliable, trouble-free performance.
Please take a moment to register your new dryer.
Register your new dryer at
For future reference, record your product model and serial numbers located on
the inside frame of the dryer.
Model Number________________________________________
Serial Number__________________________________________

#!$% &%(!' "#
4
6
7#
4
&4
72
728
724
7(4
7
49$9
7
744
.
!"!
$3
6
243
#$
%%&'(
724
+
434
3!
4
4.4
4.
4
)
*
)
:
'!(+,
!#
+
3+
6
*
4
:
-'!(+,
'',!-!.
4
/
!%!(%!'
01/!.
(#2+
7 3%!
.1
(4
4+#
(4
.4
3
4
+
#(
4
5
3
4
4:
43
/
2
4
.
/
/
%2

4
SAFETY and PRECAUTIONS
tThere are many highly ammable items used in
homes, such as acetone, denatured alcohol,
gasoline, kerosene, some liquid household
cleaners, some spot removers, turpentine, waxes,
and wax removers.
tDo not dry items containing foam rubber (may be
labeled latex foam) or similarly textured
rubber-like materials on a heat setting. Heated
foam rubber materials can, under certain
circumstances, produce re by spontaneous
combustion.
Basic Precautions
IMPORTANT SAFETY INSTRUCTIONS
1Read all instructions before using the appliance.
2Use this appliance only for its intended purpose
as described in this User Guide.
3Before use, your dryer must be properly
installed as described in this guide.
4Always follow the fabric care instructions
supplied by the garment manufacturer.
5Do not dry articles that have been previously
cleaned in, washed in, soaked in, or spotted with
gasoline, dry-cleaning solvents, or other
ammable or explosive substances as they give
ovapors that could ignite or explode.
6Do not use your dryer to dry clothes which have
traces of any ammable substance, such as
vegetable oil, cooking oil, machine oil,
ammable chemicals, thinner, etc., or anything
containing wax or chemicals, such as mops and
cleaning clothes. Flammable substances may
cause the fabric to catch re by itself.
7Do not store or use gasoline or other ammable
vapors and liquids near this or any other
appliance.
8Do not allow children to play on or in the
appliance. Close supervision of children is
necessary when the appliance is used near
children.
9When discarding or storing your old clothes
dryer, remove the door.
10 Do not reach into the appliance if the drum is
moving.
11 Do not install or store this appliance where it
will be exposed to the weather or freezing
temperatures.
12 Do not tamper with the controls.
13 Do not repair or replace any part of the
appliance or attempt any servicing unless it is
cally recommended in the
user-maintenance instructions or in published
user-repair instructions that you understand
and have the skills to carry out.
15 Packaging material can be dangerous for
children. There is a risk of su ocation! Keep all
packaging away from children.
16 Always check the inside of the dryer for foreign
objects before loading laundry. Keep the door
closed when not in use.
17 Do not use fabric softeners or products to
eliminate static unless recommended by the
manufacturer of the fabric softener or product.
18 Clean the lint screen before or after each load.
19 Keep the area around the exhaust opening and
surrounding areas free from lint, dust, and dirt.
20 The interior of your dryer and the exhaust duct
should be cleaned periodically by quali ed
service personnel.
21 This appliance must be properly grounded.
Never plug the power cord into a receptacle that
is not grounded adequately and in accordance
with local and national codes. See Electric
requirements on page 13 and Grounding
requirements on page 14.
22 Make sure that pockets are free from small
irregularly shaped hard objects and foreign
material (such as coins, knives, and pins). These
objects could damage your dryer.
23 Do not use heat to dry articles containing foam
rubber or similarly textured rubber-like
materials.
24 Gas leaks may occur in your system, resulting in
a dangerous situation.
25 Gas leaks may not be detected by smell alone.
26 Gas suppliers recommend that you purchase
and install a cUL approved gas detector.
1Do not sit on top of the dryer.
2Because of continuing product improvements,
we reserve the right to change sp cations
without notice. For complete details, see the
installation instructions in this User Guide before
selecting cabinets, making cutouts, or
beginning installation.
3Do not dry clothing with large buckles, buttons,
or other heavy metal or solid things.
4Install and use in accordance with the
manufacturer’s instructions.
5Residual oil on clothing can ignite
spontaneously. The potential for spontaneous
combustion increases when items containing
vegetable oil or cooking oil are exposed to heat.
If this heat cannot escape, the items can
become hot enough to catch re. Piling,
stacking, or storing these kinds of items may
prevent heat from escaping and can create a re
hazard.
6Take care that children’ ngers are not caught
in the door when closing it. This may result in
injury.
WARNING
CAUTION
14 Do not place items exposed to cooking oils in
your dryer. Items contaminated with cooking
oils may contribute to a chemical reaction that
could cause a load to catch fire. To reduce the
risk of fire due to contaminated loads, the final
part of a tumble dryer cycle occurs without
heat (cool down period). Avoid stopping a
tumble dryer before the end of the drying cycle
unless all items are quickly removed and spread
out so that the heat is dissipated.

1
#!$% &%(!' "#
$%
4(44
.
9
234
234;<
44
4
$34
+4
4
9+
1 +6
!
-'
/
2
$
(
(4
!64;@<
3!$-'
743
+
!$!.
7
%2

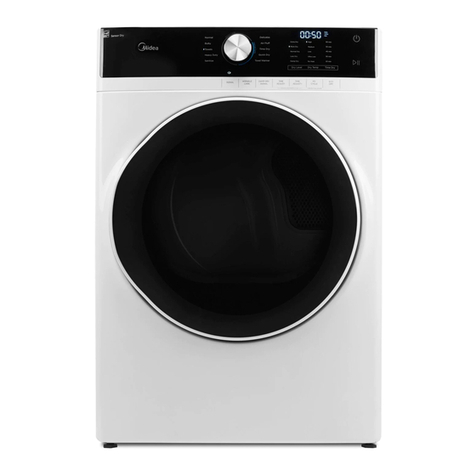
Control panel
# ITEM DESCRIPTION
Press to turn your dryer on or o . If your dryer is on for more than 10 minutes without any
buttons being pressed, it automatically turns o .
2Cycle selector
Turn to select the cycle for the type of load. The cycle you select determines the heat control
for the cycle. The Normal, Delicates, Casual, Towels, Sanitize, Heavy Duty, and Bulky
cycles are Sensor dry cycles. The Quick Dry, Time Dry, and Air Fluffcycles are Manual dry
cycles. For more information, see Dryer options and settings on page 26.
3Digital display
Displays the time while you are pressing the –Time Adjust + button to set the time for the
Quick Dry, Time Dry, or Air Fluff cycle.
Displays the remaining cycle time while your dryer is running.
4–Time Adjust +
button
Press repeatedly to select the drying time. This button only works for the Quick Dry, Time
Dry, and Air Fluff cycles.
5Wrinkle Care
button
Press once to add the Wrinkle Care step to the drying cycle. Press again to cancel.
Wrinkle Care provides approximately 90 minutes of intermittent tumbling in unheated
air at the end of the cycle to reduce wrinkling. The load is already dry and can be removed at
any time during the Wrinkle Care cycle.
6/Start Pause
button
Press to start or pause the drying cycle. When you pause the cycle, you can add items to the
dryer, but your cannot change any settings.
7Cycle status indicators
Indicate what stage in the drying cycle your dryer is in. For example, when your dryer is in
the cooling down stage of the cycle, the Cooling indicator lights. When the cycle is
complete, the Clean Filter indicator hes to remind you to clean the er.
8MyCyclebutton Press and hold for three seconds to save your favorite drying cycle. Press once to load your
favorite cycle setting.
9DryLevel button
Press to select the dryness level. Di erent dryness levels result in erent drying times. For
clothes to be ironed manually, select a lower dryness level. For more information, see Dryer
options and settings on page 26.
10 Child Lock
Press and hold the Dry Level and Te m p buttons at the same time for three seconds to
turn on the child lock function. Press and hold for three seconds to turn o the function.
When the child lock function is turned on, the only button that works is the Power button.
11 Temp button
Press to select the drying temperature. Your can select High, Medium, Low, Ultra Low, or
No Heat. Temperature changes are only available on Quick Dry and Time Dry settings. For
more information, see Dryer options and settings on page 26.
1Power button
INSTALLATION INSTRUCTIONS
6

"# !BB! ""# '( "#
'!$.,,
7'++
+ *
7 6
#.!(!
&
43
&53
+54
/!.
7+4?+
;4<
7242
4.
6
-'!!((
!#%((;.!%((,A%!((.#,B
4+
7 44
7
4
7!
7
4
3
/!.
&43+
%2
5

243?
444.&44
?5
,
0CD&
A-A
,'
0CD&
@-A
0)*
6
"# !BB! ""# '( "#

!"
F
44, .;@A*.<
) ;,A<4!.4
46G
7#C0;*<
7!C*;0,<
7'C@;A0<
7C;*0<
/!.
7&3+
72" 54
$43
%3.00
@-9
)0C9
@9
0**9
)
,A
)
,A
7
"# !BB! ""# '( "# %2

0
*
,
A-A
0
*
@
A0
*
0,
*0
48
"# !BB! ""# '( "#

&#!.D-
7243
7 34@;0C<
7 343,-;@<
7'5344
7'#+(2 2#460*-!
#2.00 344
.D-
/!.
23
4
&43+
%3
44
/!.
*E**F3*
73+544
7'354
3
/!.
&43
7'@5;0C<:2
72@;0C<
7B4
734234
!4+344
7"34
7?34
7#62
734++43
9
7%33
7 3354+
"3
7 0;)C*<44
4
7"3
7 43
723
734
34
73
7'4
7(+.+3
7(+C
+4
7234
:34
72534
7 +'# %%H=!'# %2' 2#
44
"# !BB! ""# '( "# %2

#"$%%&'()#
-!#,-A!$'C
4++
3
+
2#5
2
30C;*@<
54+
B4+
4
"# !BB! ""# '( "#

*+#+"%)
33+G
7 3
7&34
7&43
7
7 3
$4344)-
4C
(D-
7&0CF@CAC=:!()C54+
4
7!( 4
)C5
7(C-
/
'5
IDCJ4
C DC;,@< AC;0-)<
0 AC;0-)< @*;0),<
@*;0),< )*;0C,<
) )*;0C,< *;,A<
$(
.5
/!.
7 4
72
4.
7
4
.4
.
@;0C<
@
;0C<
@;0C<
@;0C<
*
;A@<
4
"# !BB! ""# '( "# %2

14
Grounding requirements
Your dryer must be grounded. If a malfunction or breakdown occurs, the grounding reduces the risk of electrical
shock by providing a path of least resistance for the electrical current. This appliance is equipped with a cord having
an equipment-grounding conductor and a grounding plug. The plug must be plugged into an appropriate outlet
that is properly installed and grounded in accordance with all local codes and ordinances.
Warning
The wiring diagram is located on the back board of your dryer.
tIncorrectly connecting your dryer’s grounding conductor can result in
electric shock. Check with a qualied electrician or serviceman if you are
in doubt as to whether your dryer is correctly grounded.
tDo not modify the plug provided with your dryer. If the plug does not t
the outlet, have the correct type outlet installed by a qualied electrician.
tTo prevent unnecessary risk of re, electrical shock, or personal injury, all
wiring and grounding must be done in accordance with local codes, or in
the absence of local codes, with the National Electrical Code, ANSI/NFPA
No. 70 - Latest Revision (for the U.S.) or the Canadian Electrical Code CSA
C22.1-Latest Revisions and local codes and ordinances (for Canada).
tYou are responsible for providing adequate electrical services for your
dryer.
All gas installations must be done in accordance with the National Fuel Code
tANSI/Z2231 - Latest Revision (for the U.S.) or CAN/CGA - B149 Installation
Codes - Latest Revision (for Canada) and local codes and ordinances.
tGas dryers installed in residential garages must be raised 18" (46 cm)
above the oor.
tAdditionally, a 1/8" (0.3 cm) N.P.T. (National Pipe Thread) plugged
tapping, accessible for test gauge connection, must be installed
immediately upstream of your dryer’s gas supply connection.
tThe dryer must be disconnected from the gas supply piping system
during pressure testing at pressures greater than 1/2 psi (3.5 kPa).
tOn dryers not equipped with a gas union in the dryer manifold, the
instructions shall specify that a listed connector in compliance with the
Standard for Connectors for Gas Appliances, ANSI Z21.24 - CSA 6.10 be
used to connect the dryer to the supply piping.
Certain internal parts are intentionally not grounded and may present a risk
of electric shock only during servicing. Service Personnel - Do not contact
the following parts while the appliance is energized: Control Board and
Temperature-Regulating Thermistor (Located on Blower Housing ).
"# !BB! ""# '( "#

"# !BB! ""# '( "#
!((.,,
(,;((
!!(,;((
7)@5;<%?
7%3+
3%,!
+G
7 #1.0@
7&3;<345#2
.00
'EA,E'
)-(#++$"#$
7'+ :4
).%#"%+%#"
744+&
4
-'!
7.
B 2
!64
0L
;*<
(+
$5
41
%2

40
)/0+*+#"#
4+3
3%3 04
/--#!,#!<!'%!(!((#&#!#B
-'!
3.
2.00
/!.
7+3
7?4
72" 3
72" 4
72" 343
7'@;0C< 6
72"
4N4
72" 4+
7(4
3
72" 534
72"
2
7
23
@M
7
2
"# !BB! ""# '( "#

17
INSTALLATION INSTRUCTIONS
2Connect one end of the exhaust ducting to your dryer, then use duct tape to secure the ducting to your dryer.
The crimped ends of the duct sections must point away from your dryer. Use a 4 in. (10.2 cm) diameter rigid
metal duct.
3Connect the other end of the ducting to the exhaust hood. Tape all joints, including at the dryer.
Step 4: Level your dryer
tIf your dryer is not level, carefully tilt your dryer just enough to adjust the leveling feet on the bottom of your
dryer. Extend the feet only as much as is necessary. If the feet are extended too much, your dryer may vibrate.
Step 5: Plug in your dryer
Make sure that all exhaust and electrical connections are complete, then plug your dryer into the electrical outlet.
Step 6: Check the final installation
tBefore you use your dryer, make sure that:
tYour dryer is plugged into an electrical outlet and is properly grounded.
tYou used rigid or sti-walled exible metal vent material. You did not use a plastic exible ducting.
tThe exhaust duct work is hooked up and the joints are taped.
tThe dryer is level and sits rmly on the oor.
tStart your dryer to conrm that it runs, heats, and shuts o.
Level
Tighten
Loosen
Adjustable
leg
%2

!"#$%%
4+
7
!
++
2+6+
1
+
+
"# !BB! ""# '( "#
46

044
5#40-CJ4 4
6
7!
4
4
#
"# !BB! ""# '( "#
19
%2

Using your dryer
Drying a load of clothes
Step 1: Turn on your dryer
tPress the /Power button to turn on your dryer.
Step 2: Load your dryer
tPlace only one wash load in your dryer at a time.
tight weight fabrics in a
load, lightweight fabrics may be dry at the end of the cycle while heavy fabrics may still be damp.
t
couple of similar items to the load.
tOverloading restricts tumbling action which results in uneven drying and excessive wrinkling of some fabrics.
Step 3: Select the dryer cycle and options
1Turn the Cycle Selector to select a drying cycle. For more information, see Dryer options and settings on
page26 .
2 Optional: Use the control panel buttons (like Wrinkle Care ) to customize the drying cycle. For descriptions
of buttons, see Control panel on page 6. For information about which buttons are available for each cycle type,
see Dryer options and settings on page26 .
3 Optional: After you select a drying cycle and customize the cycle, press and hold the My Cycle button for
our settings are saved.
When you want to use your saved cycle and settings again, press the My Cycle button.
Step 4: Start your dryer
1Press the button. The Drying indicator lights
Press for three seconds
/Start Pause
20
OPERATING INSTRUCTIONS
Table of contents
Languages:
Other Midea Dryer manuals

Midea
Midea MD-6288 User manual

Midea
Midea MDV160-V042/F01-SA User manual

Midea
Midea MD100A70 User manual

Midea
Midea MD-6288 User manual

Midea
Midea MDG09EH80 User manual

Midea
Midea MDV160-V02A2/F01-US1305 User manual

Midea
Midea MD600W User manual

Midea
Midea MDD160-V052/F01-US1305 User manual

Midea
Midea MLE52N3AWW Manual

Midea
Midea MDS70-VR072/A04-AU User manual

Midea
Midea MD-7388 User manual

Midea
Midea 361170 Wiring diagram

Midea
Midea MLE45N1BWWC Manual

Midea
Midea MDG09H80/W-ES User manual

Midea
Midea DMDHP70 User manual

Midea
Midea MLE45N1AWW Manual

Midea
Midea MLE47C4AWW Manual

Midea
Midea MDG80-C09 User manual

Midea
Midea MLE45N1BWW Manual

Midea
Midea MDA60-V012 User manual