Midea GS-120D User manual

GS-120D
Garment Steamer
Use’s Manual
READ AND SAVE THESE INSTRUCTIONS
Attention: Pictures in the IM are for reference only.

Safety Cautions
1
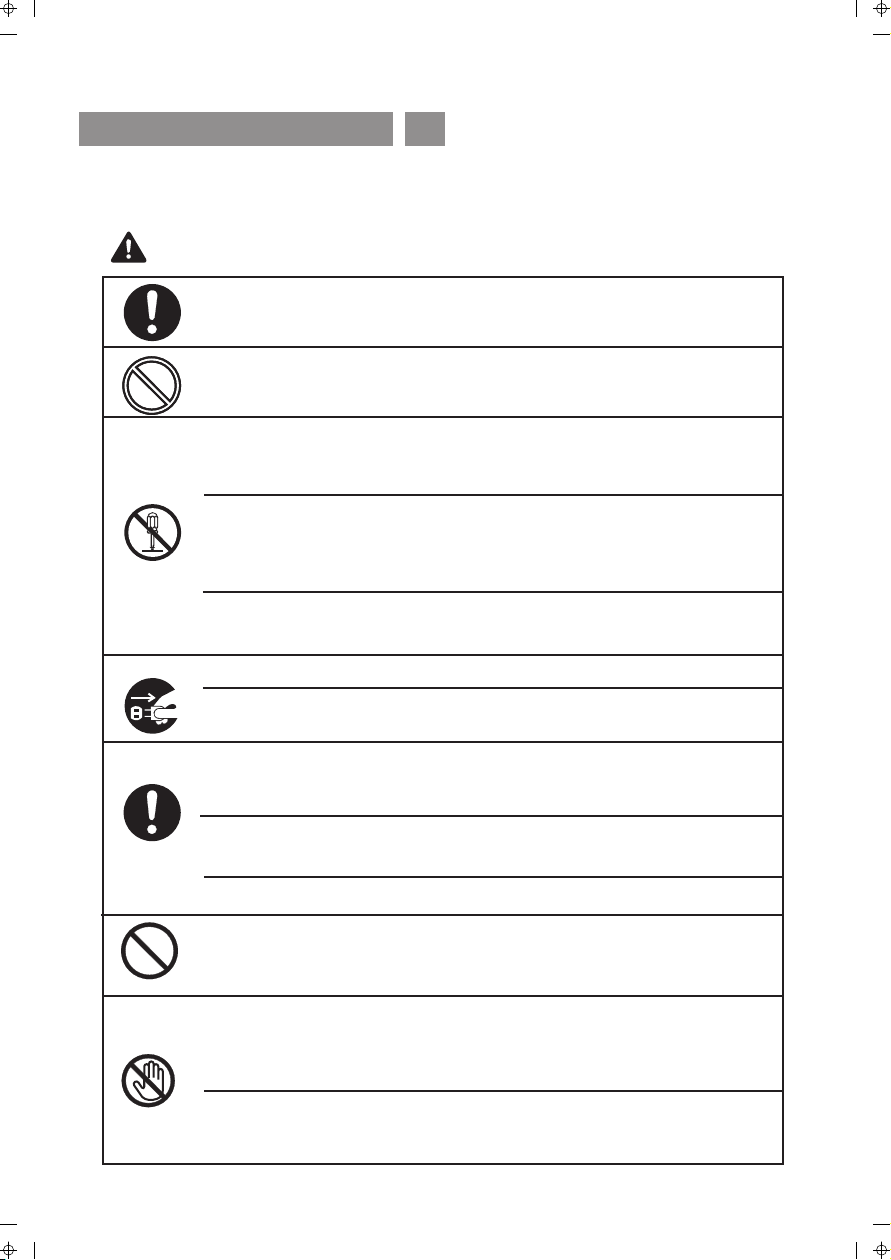
Before use, please read the instruction manual completely, and use the appliance
in accordance with the requirements to avoid any damage to persons or properties.
Never use this appliance for any purpose other than ironing clothes.
Never use other high-power electric appliance on the same socket to
avoid overload of circuits.
Never dismantle this appliance on your own. Any person
other than
qualified personnel shall not dismantle and repair the appliance, and
otherwise it may cause fire, electric shock or personal injury.
Before switching on the garment steamer, please check
the plug and
power cord carefully, and in case of damage, never use them.
Replacement must be
conducted by the manufacturer or its repair
department
or similar professionals to avoid danger.
Before inserting or pulling out the plug, be sure to switch
off the appliance.
When inserting or pulling out the plug, be sure to hold
the plug with
a hand, and never pull the power cord or
operate with a wet hand.
Before adding water, be sure to switch off first.
Please send the product to the
authorised agent for repair.
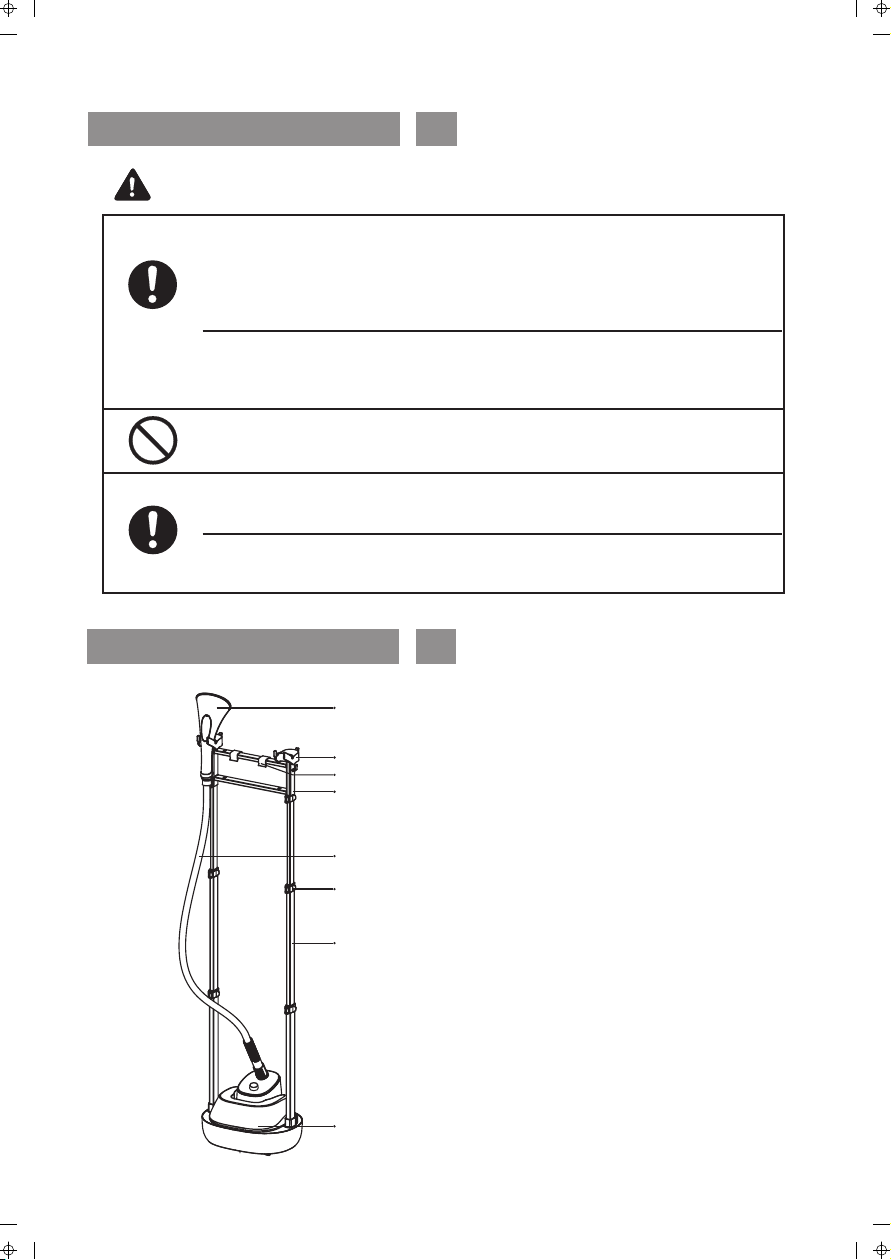
Before operation of the garment steamer, make sure that supporting
surface is even and secure to prevent
the garment steamer from
overturning or water from overflowing.
Do not heat the garment steamer when the water tank has not been
placed properly or water level is not enough.
Never add perfume, vinegar
, detergents or other chemicals into the water
tank. Otherwise they will stain the clothes and damage the garment
steamer.
All appliances in the product must be placed beyond the
reach of children
or the disabled to prevent any danger such as electric shock and
scratch. During operation of the garment steamer, the user shall not
leave.
WARNING
When the garment steamer is operating, do not point the steaming
nozzle at people.

2
Safety Cautions
WARNING
When the garment steamer is operating, its steaming nozzle, steam
supply hose and hose joint will become very hot. Do not, never touch
them so as to avoid scalding.
When the garment steamer is operating, never have the power cord in
touch with hot surfaces of the appliance, such as the steam supply hose
steamer head.
When the garment steamer is operating, never bend or wind the steam
supply hose.
This appliance is not intended for use by persons (including
children) with reduced physical, sensory or mental capabilities, or
lack of experience and knowledge, unless they have been given
supervision or instruction concerning use of the appliance by a
person responsible for their safety.
Children should be supervised to ensure that they do not play with the
appliance.
Care should be taken when using the appliance due to the emission of
high temperature steam;
Unplug the appliance during filling and cleaning.
If the appliance or power cord is damaged, it must be replaced by
manufacturer or its service agent or a similarly qualified person in order
to avoid a hazard.
Never use the garment steamer on clothings with poor heat resistance
(such as for clothing), as the high temperature steam produce by the
steamer may cause deformation and discolouration to the clothing.
when the garment steamer is operating, NEVER touch the steaming
nozzle nor attach/ remove any accessories to the steamer head so as
to prevent any scalding injuries.

Parts Descriptions
Safety Cautions
CAUTIONS
When moving the appliance, hold the appliance body for movement.
Never drag the appliance by pulling the power cord.
To store the appliance, make sure that the garment
steamer has cooled
down, and water has been discharged
from the
machine.
Never immerse the appliance in water or any other liquid,nor rinse it
under the tap.
To prevent the hose from forming a U-shape,always place the steamer
on the floor to ensure that the hose is straight. If you hear an excessive
croaking sound or if the steam output is irregular, lift the steamer head
/
ironing head
from time to time to straighten the hose. This will allows
any condensation to flow back into the water tank.
After use, please turn off the switch, and pull out the plug.During draining
of water or cleaning, be sure to switch off, and keep the garment steamer
to cool down for at least 10min to avoid scalding by hot water.
3
3
Steamer head
steamer head and hanger holder
Cothes clamp
Clothes rail assembly
steam supply hose
Support rod
Locking spanner
Water tank

Parts Descriptions
Installation Instructions
(The schematic above is for reference only, the actual product may vary slightly.)
Seam clamp Brush Ironing board Glove
Usage Tips:
It is recommended to use purified water or filtered water, which makes
the Garment Steamer more durable. Clean regularly to avoid damaging of clothing by the
impurities in the water after long use.
Warning:
The appliance shall be used in an environment with temperature of
10-40℃and relative humidity of less than 90%.
4
Installation of support rod
1
Drain plug
Insert
Insert
Insert
Place the holder on the clothes rail
assembly (as shown), and press down
firmly to clip it into position.
Release the lock button,
insert the support rod into the
mainframe, and lock each spanner.
Install each part in sequence
according to the figure.
1

Installation Instructions
2.Rotate the fastener clockwise,
and lock by aligning the arrow
with the“ ” .
Installation of Steam Supply Hose
1.Align the arrow of the hose
fastener with the “ ”and
insert it in end.
5
2
Installed
dismantled
Place the brush top end on the upper
edge of steamer head, and fasten the
brush when the steamer head is aligned
with the boss of brush lower edge.
Dismantle in reverse order after use.
Place the clamp top end on the upper
edge of steamer head, with lower boss
snapped below.
Dismantle in reverse order after use.
Installed
dismantled
3 4
Installation of brush Installation of seam clamp

1.Hang up the clothes
2. Fill the water tank. 3.Put the tank back,
and start the machine.
6
Instructions
Preparations
1
1. Rotate the knob clockwise, and start the machine.
2.Choose different steam strength by adjusting the knob.
3.The stream reaches maximum on “3” and minimum on “1”.
2Konb-operated control
(The schematic above is for reference only, the actual product may vary slightly.)

7
Method
General application
Wear gloves or glove boards to
prevent from being scalded.
Ironing board can be used as an
auxiliary tool for ironing corners
such as collars, cuffs.
A brush can be used for removing
the fluffing.
Usage tips: Do not iron one place for a long time, so as not to damage the clothes.
(The schematic above is for reference only, the actual product may vary slightly.)

8
Ironing of trousers
Use the clothes clamp to aid
the ironing of trousers
Fix the trousers axis by setting
the seam clamp, press the
spanner, and iron from the top
to downwards.
Usage tips: Avoid overbending
or U-shaping the steam duct
during operation.
Method

9
Basic parameters
358X293X1600mm
Dimensions
GS-120D
Product nameGarment steamer
220-240V~
1500-1785W
2.0L
Model
power
Water tank capacity
Weight
voltage
6.0kg
frequency
50/60Hz
Safety Features
1. Temperature detection sensor: The Garment Steamer is equipped with
a built-in temperature sensing element. When there is abnormal temperature,
the temperature sensing element will emit signals to control the connection
and disconnection of the heating element, thus keeping the product
temperature within a suitable range.
2. Thermal fuse protection: The garment steamer has a thermal fuse installed.
When the temperature is abnormal and the thermostat fails, it switches off
directly to avoid any accident.
Maintenance and Storage
1. Turn the knob to “OFF” to switch off the garment steamer.
3. After cooling the product for 30 minutes, open the water tank cover, lift and tilt the
product, and pour out the water inside the product from the water tank cover.
4. Unscrew the drain plug counter-clockwise, the water in the principal machine will
flow out from the drain plug. (Note: Clear the accessories of the product before
unscrewing the drain plug in case the water flows out of the principal machine and
gets the accessories wet.)
5. After using the product for a long time, it is recommened to clean off the water scale
regularly to avoid impurities within the water staining the clothing; disassemble the
steam supply tube from the main body and fill the water into water inlet and shake the
machine. Then drain out the dirty water via the drainage hole.
The performance of the steamer will be better when repeating the above steps.
6. After winding the power cord and air duct, put the product in a dry place.
2. Disconnect the power plug.

10
Add water to the water tank.
Steam pipe bent or torn
apart.
Heating plate damaged.
Water dripping
from the steaming
nozzle Heating plate damaged.
In use, shake the steaming
nozzle.
Trouble Possible Reasons Solution
After start, the
machine fails to
work
The plug not inserted.
Insert the plug.
The circuit of home tripped
or the fuse burned out.
Have it inspected and repaired
by a qualified person.
Have it inspected and repaired
by a qualified person.
Have it inspected and repaired
by a qualified person.
Have it inspected and repaired
by a qualified person.
Have it inspected and repaired
by a qualified person.
The circuit of product failing.
After start, the
machine working
but no steam
generated.
No water in the tank or too
little water.
Steam condensates, which
is a normal phenomenon.
In work, "buzzing"
can be heard Sound of the motor working. It is a normal phenomenon.
The gasket is damaged.
Pump does not work.
Troubleshooting
Have it inspected and repaired
by a qualified person.
Have it inspected and repaired
by a qualified person.
Steam appearing
from other location
other than the
steaming nozzle

GS-120D
蒸汽挂烫机
Use’s Manual
请仔细阅读此操作手册,并保存以作日后参考。
图片仅供参考,具体以实物为准。

安全事项
使用前请仔细阅读安全注意事项并按照要求使用以免造成人身伤害。
请勿将本产品用于熨烫衣物外的其他用途。
不要在同一插座上使用其他高功率电器,避免电路过载。
请勿自行拆卸,除专业人员以外的任何人不许进行拆卸、修理,否则
可能会造成火灾、触电、人身伤害
警告
连接电源前,请仔细检查插头、电源线。如果电源线损坏,为避免危险,
必须由制造商、其维修部或类似部门的专业人员更换。使用前要保证电
源插头干燥。
修理时请到本公司指定的售后维修网点进行维修。
使用完毕,请先关闭机器电源开关,再拔出电源线插头。
插拔插头时,必须手握插头,禁止拉电源线或湿手操作。
挂烫机工作前,要确保整机和支撑杆底座平整稳固,以免挂烫机翻倒或
水溢出。
若没有按照要求正确加水或者水位没有达到水平线,不得加热。
加水前,请先关掉开关。
不要把香水、醋、洗涤液剂或其他化学物质放在水里,否则会弄脏和
损害衣服。
请勿让儿童单独操作使用,产品所有器具需放在婴幼儿或无行为能力人
士不能触及的地方,以免发生触电、刮伤等危险。
挂烫机通电工作期间,要注意防止由于蒸汽喷溅的危险,切勿将烫头对
着人,以免烫伤。
1

如果设备或电源线损坏,必须由制造商及其代理,或专业人员进行维修
或更换,避免风险。
安全事项
挂烫机通电工作期间,烫头、导汽管和导汽管接头都会变得非常烫,
请勿触摸,以免烫伤。
挂烫机通电工作期间,会产生高温蒸汽,对耐热性不好的衣物(如皮衣)
会引起变形、变色,请勿使用。
挂烫机通电工作期间,请勿将电源线接触到机器发热的表面,比如:
导汽管、烫头等。
挂烫机通电工作期间,请勿弯折、缠绕导汽管。
挂烫机通电工作期间,不要进行任何可能会接触到蒸汽喷嘴的操作,
例如,安装一个刷子或者插拔导汽管,以免烫伤。
请小心照看好儿童,确保他们不玩耍此电器。
使用时应注意挂烫机喷出的蒸汽。
在装水和清洗前,请先拔掉电源
以下人员(包括儿童、无行为能力、或缺乏经验的人)不允许使用本机,
除非他们得到监督或指导。
警告
2

部件说明
安全事项
警告
蒸汽烫头
挂衣杆组件
导汽管
固定掰手
支撑杆
水箱
烫头架
夹紧片
防止软管形成U形,当挂烫机放在地板上时,要确保软管是直的。如果
听到奇怪的咕噜咕噜的声音或者蒸汽输出不均匀,请时不时抬想蒸汽烫
头使导汽管拉直,这样将可以使蒸汽冷凝水回流到水箱。
使用后,请关闭开关,并拔下插头。在加水或清洗时,请注意关掉开关
并保持机身冷却至少10分种,避免被热水烫伤。
移动机器时,需提起机器移动。禁止拉电源线,导汽管拖动机器。
不要将机器浸入水或任何其他液体中,也不要将其放在水龙头下冲洗。
为了更好的存放产品,每次使用后需确保挂烫机冷却,并将机身的水
排出。
3

安装说明
(以上图片仅供参考,具体以实物为准)
裤缝夹 毛刷 辅助烫衣板 防烫手套
警告:本产品应在温度为10-40
支撑杆组件安装
1
排水塞
烫头架装到挂衣杆组件上,
并用力按压,确保安装到位
松开锁紧按钮,将支撑杆插
入主机,锁紧各个固定掰手
如图所示:依次装好各部件
可伸缩调节高度
插入
插入
插入
部件说明
温馨提示:建议使用清水或者蒸馏水,以防止使用久了以后产生的水垢对衣服造
成伤害,并可延长使用寿命。
︒
C,湿度低于90%的环境中使用。
4

导汽管安装
2
安装说明
1
. 将导汽管固定件的凸台标志
对准
“
”
标志,并插到底。
2. 顺时针旋转导汽管固定件,凸
台对准
“
”
标志即可锁紧。
3毛刷安装 4裤缝夹安装
扣紧
拆下
扣紧
拆下
用完反向拆下即可。
将裤缝夹上端扣合在烫头
上边缘,下端凸台扣合于
烫头下方。
用完反向拆下即可。
将毛刷上端扣合于烫头
上边缘,烫头对正毛刷
下边缘凸台后扣紧。
5

使用说明
准备工作
1
1. 顺时针旋转旋钮, 启动机器.
2. 通过旋转旋钮来调节档位, 选择不同蒸汽量.
3. 最高蒸汽档位为三档, 最低为一档.
2机械旋钮控制
1. 挂好需熨烫的衣物.
2. 水箱加水。 3. 放回水箱,通电。
(以上图片仅供参考,具体以实物为准)
6

熨烫方法
烫衣板可辅助熨烫衣领、
袖口等边角
需要除毛时,可配合毛刷使用
普通熨烫
戴防烫手套可以防止烫伤
温馨提示:熨烫时不要长时间按压一个地方,以免损伤衣物。
(以上图片仅供参考,具体以实物为准)
7

熨烫方法
裤子熨烫
对裤线或轴线有需求的客户,可用裤
缝夹辅助熨烫。
装好裤缝夹,按下裤缝夹扳手;将裤
缝夹夹紧裤线或轴线,缓慢往下移动
熨烫。
温馨提示:
熨烫过程中,请勿将导气管过度弯折
型管熨烫。或呈U
8
Table of contents
Languages:
Other Midea Steam Cleaner manuals