Midea MFW-V1100DDi User manual

Washing Machine
OWNER’S MANUAL
Before using your washing machine, please read
this manual carefully and keep it for future reference.
Inside you will find many helpful hints on how
to use and maintain your washing machine properly.
Just a little preventative care on your part can
save you a great deal of time and money over
the life of your washing machine. You'll find many
answers to common problems in the chart of
troubleshooting tips. If you review the chart of
Troubleshooting Tips first, you may not need
to call for service.
Read This Manual
MODEL:MFW-V1100DDi

Technical specifications................................................................................
18
18
Malfunction display and solutions..........................................................
17
Identify usual trouble of washer..................................................................................
16
Cleaning and Maintenance of the washing machine....................................
15
........................................................................ Add fabric care products
15
.................................................................................. How to use I-Add
14
.................................................................................. Special features
13
....................................................................................Other program
12
The main wash....................................................................................
11
Quick start..........................................................................................
Instruction of the washer operation panel............................................... 9
8
............................................................................... Parts identification
7
Preparation before washing..................................................................
5
Installation of the washer......................................................................
2
Safety and precautions........................................................................
12
Contents
Observe the following items in order to prevent from injuring yourself, others and the
damage of property:
Please observe following contents of graphics.
!!!
!
Warning
Warning
Caution
This indicates serious injury or death to human being
may be caused.
This will remind you that injury to people and damage
to property may occur.
Please do not directly rinse the
machine with water when
cleaning.
Please do not install the machine in
damp and raining environment to avoid
electric shocking, catching fire, faults
and distortion
accidents.
No dismantling No touching
No dampness No rinsing
!
This graphics represents[operation prohibited], and detailed prohibitive
items will be displayed inside the graphics.
This graphics represents[cause attention],and detailed cautions
will be displayed inside the graphics.
This graphic represents [forcible execution], and detailed forcible
execution items will be displayed inside the graphics.
Please do not disassembly
and assembly the
machine without
authorization.
Please do not insert your hand
and take out clothes inside the
spin barrel before
it is fully stopped.
Safety and precautions
...............................................14 The instructions of Children-Lock function

34
Please do not let children climb the
machine or peer into the rotating
spin barrel to avoid accidents.
It is prohibited to wash the clothes
touching with kerosene, gasoline,
alcohol and other flammable materials.
Please do not damage power flexible
cord and power plug to avoid electric
shocking, short circuit and catching
fire.
Regularly clean the power plug to
remove dust and dirt to avoid contact
failure.
Please pull out plug from the socket
if the machine is not in use.
Please well connect the earth line of
socket to avoid electric shocking by
accidental leakage.
(earthing)
Please insert the power plug tightly.
!
!
!
Prohibited
Prohibited
Prohibited
Smoke and fire prohibited
Earthing
Pull out the plug
Warning
Please do not place on the washer
burning candle, mosquito-repellent
incense, cigarette and other
flammable things, as well
as electric stove, air
heating fan and other
heating
sources.
Please use correct power source. Please do not pull out or insert the
plug with wet hands to avoid electric
shocking.
Please ensure that the water inlet pipe
is connected and the tap is opened
before washing
clothes.
Customers are not allowed to change
the power line without permission.
It is strictly prohibited to place and sit
children or lay
weights on the
washer.
Please do not pull the electric cord
when pulling out the
plug.
Please do not wash down jacket,
raincoat, fishing coat and similar
clothes in the
washer.
!
!
!
!
Wet hands are
prohibited
+
+
The water temperature shall not exceed
50℃ when washing
with warm water.
Prohibited
Prohibited Prohibited
Prohibited
Caution

56
+
+
+
+
Water inlet hose
Clamping nut
Installation of the washer Installation of the washer
Remove package
! Remove package and take out the bottom board of
the cabinet on the foam cover.
! Open the lid of washer's door and take out accessories.
! A trial operation or washing on the foamed cushion is
strictly forbidden.
Base foamed cushion
Installation of water inlet hose
Put the water inlet pipe(which has
metallic filtering bag) screw on to the tap.
Tightly screw another end of water
inlet hose on water inlet valve .
(with rubber seal ring inside).
Note: When tightening the
clamping nut, evenly apply the
force and do not twist the water
inlet valve to avoid breaking of
water inlet valve joint.
Installation of water inlet hose
Water inlet adapter
Connector socket Fastening screw
Lock nut
Speedy connector
Slide jacket
The water inlet consists
of connection socket and
speedy connector.
+
+
+
+
+
+
+
+
Small ball
Junk ring
Connect: Push down the slide jacket of
speedy connector ( 4 small
balls must be exposed ),
insert it into the connection
socket and then push upward
Release the connection of
water tap with speedy
connector is completed. If it
is required to feed water,
simply open the water tap.
Separate: Close the water tap, push down
the slide jacket of speedy
connector and pull out the
speedy connector.
Unscrew four screws of part
A and sleeve part A horizontally
over the mouth at the end of
water tap (the mouth at the end
of water tap must be flat and
smooth. Flatten it by filing if it is
not flat) and push it upward with
force making the rubber washer
firmly press the plane center of
water tap mouth. Then tighten
the screw sequentially.
After that, tightly screw on part B.
Connect Separate
The connection socket
consists of A and B two
parts. Before installation,
A and B two parts must
be unscrewed to about
5mm, or directly
disconnected. If the
bore of water tap is
larger, remove the
plastic junk ring of
part A.
Push down the slide jacket
to expose the small ball and
enable separation of connector
socket from speedy connector.
5mm
+
+
A
B
+
+
+
+
1
6
+
+
7
5
4
3
2
Installation of water inlet pipe
Tightly screw another end of water inlet hose on
water inlet valve . (with rubber seal ring inside).
Note: When tightening the clamping nut, evenly apply the
force and do not twist the water inlet valve to avoid breaking
of water inlet valve joint.
Installing the Anti-Rat Cover
1 Lay down the washing machine on a
soft fabrics or cushion.
2 Insert the anti-rat cover to be firmly
fixed from the back or front of washing
machine and screw it.
Soft fabrics
FRONT
Water inlet hose
Clamping nut

7
12
3
4
+
+
5
6
+
+
Accessories
8
+
+
Adjustable foot (extend when
turning clockwise and shorten
when turning anti clockwise )
(Slightly tilt the machine. Adjust the foot knob
to ensure four corners of the machine are steadily
contacted with the ground. If the ground is
obviously not flat, correction should be made on
the ground surface, otherwise the washer barrel
will incline and knock the cabinet)
Adjust the feet to level the machine
Preparation before washing
Install the water
inlet hose.
one inlet hose
two inlet hoses
Before washing, please do take out coins,
keys and other hard goods, and pull to close
the zip fastener to prevent clothes and
barrel from damage.
!
NOTICE
Connect to
the power
source.
Open the
water tap.
Put in clothes and suitable amount
of washing powder.
Put down the drain hose.
Parts identification
Inlet hose 1pc
Top lid
Water inlet valve
Drain hose
Power line
Handle
Cabinet
Cabinet handle
Adjustable foot knob
Wash·Spin barrel
Filter Holder
Control panel
Impeller
FRONT
1 .Lay down the washing machine on a soft fabrics or
cushion.
2 .To change the direction
of the hose, pull out the
hose and change the
direction. Install the
hose properly at the
slot.
Change the direction of the drain hose
Powder compartment
Soften compartment
Liquid detergent

10
9
Instruction of the washer operation panel
DETERGENT BUTTON
SOFTENER BUTTON
WASH LEVEL BUTTON
OPTION BUTTON
POWER BUTTON
DELAY BUTTON
START PAUSE BUTTON
WASH RINSE SPIN BUTTON
WASH SPEED/SPIN SPEED BUTTON
PROGRAM BUTTON RINSE LEVEL BUTTON
After program selection, press the
button to start wash cycle.
Press this button to pause and resume
the wash cycle.
By pressing this button you could
select wash or spin speed.
After Program Selection,
Press the wash level button
to Select the proper water
level for wash.
Press the Detergent button, The auto
dosing system will take right amount of
detergent.
You can also press the Detergent button
to add more or less detergent according
to the soil level
Press the Softener button, the
auto dosing system will take
right amount of softener, At the
last rinse tme.
After choosing the washing procedure,
washing time, rinsing times and spin time
also have default values, You can choose
any parameters according to your
requirement.
Before start, Continuous press the
option button, You can choose Memory,
Less Tangling, Drum Clean and Air Dry
procedures.
Start default to the standard procedure,
Before start, press the procedure button,
You can choose any procedures which
you want.
After user press the start/pause button to
start, you can also press the delay and wash
button in the same time to start the children-
lock function, if you want to clear this function,
you just need to press the delay and wash
button in the same time again, remark: the
function of the child-lock is effective only after
the procedure was start.
The rinsing water level button is alternative
for users, changing the water level for rinsing,
The corresponding pilot lamp is on when
you choose which water level, The default
rinsing water level is one gear higher than
washing level except the highest water level.

11 12
Quick start The main wash
The wash stops
Programme selection
1 Install the washing
machine
3 measure out the
detergent 7 Plug the power supply
6 Turn on the water tap
8 Select the desired
programme
5 Put down (hang up)
the drain pipe
4 Close the
machine door
9 Press the
[start/pause] key
When the wash stops, the buzzer will buzz continuously for 6 times and
then the power will be automatically cut off.
Turn off the water tap.
Although the power can be cut off automatically, the power plug must be pull
out as well for the safety.
1Press the POWER button.
3To press the start/pause key.
2 Select the proper water level or other attached functions.
2 Load the laundry
! Close the lid when machine is running, otherwise, it will automatically
stop working during spin process and send out abnormal warning.
!The washer will not work when the filled water does not reach the set water level.
! The selection of rinse water level: the level is equal to wash water level.
Press [Rinse Level] button, the indicator light which stand for rinse level flickered.
User can select the rinse water level according to needs. Rinse level exceed that
wash level all the time. It shows the wash level if not press this button. And only
show rinse level when rinse.
! After pressing down [ Power Switch ], if the [Start / Pause ] button is not pressed,
the power will be automatically cut off after 10 minutes.
NOTICE
!
Users can freely set up wash ,rinse and spin's separate process or Process combination
according to own need. The specific operation as below:
The operation of one touch spin
1.Press the Power button.
2.Press the spin button to choose the spin time.
3.Press the start/pause button.
Washing machine will operate the single spin process.
The operation of single wash
1.Press the Power button.
2.First Press the spin button to make the spin parameter to return to zero, Then Press
wash button to choose the wash tine.
3.Press the start/pause button.
Washing machine will operate the single wash process.
The operation of 'wash and rinse'
1.Press the Power button.
2.First Press the spin button to make the spin parameter to return to zero. Then Press
rinse button, wash button to choose the required parameter.
Washing machine will operate the 'wash and rinse' process. Any other process
combinations are similar with the above
3.Press the start/pause button.
The Operation of Washing process
Normal program
1.Press the power .
2.
3.Press the button.
button
Press the button to select .Program Normal program
Start/Pause
Normal program is the easiest, most convenient and most common washing
program.

13 14
3.DRUM CLEAN
4.AIR DRY
AIR DRY program is that the formation of the swing of the wind within the barrel
through high-speed rotation, which can dry the clothes barrel, and user can select
different stage you need.
It will be adhere to wash powder's residue inside and outside the barrel because of
The pollution and the problem of the water quality. It will take smelly and the drain
will not be flowing. Otherwise, the adhering residue will take off during the wash
process. And the clothing will be dirty. User should clean the tub monthly.
NOTICE
! Please do not start the program continuously.
! You should take few chloric bleacher to enhance the effect of tub clean.
! This program is used for clean the barrel and do not put the clothes in.
!
1.QUICK
2.STRONG WASHING
To wash light dirty cloths with only one rinsing cycle.
3.WOOL
5.KIDS WEAR
The water flow is infirmly. It is used for washing woollens, thin clothes or cleaner
clothes.
4.SOAK
SOAK program is with strong water flow similar to normal washing program .
However , there is a motional soak process lasting about 30 minutes just
before the washing process , Thus it is used for washing more dirty clothes.
6.JEANS
This program is used for washing .Jeans
Other program Special features
DELAY
! This washer has the functions of delay start for 24 hours.
! After the DELAY program start to work, the digital tube show the delay start time.
And the indicator light which stand for delay lightened. When the time arrive, the
indicator light which stand for delay goes out. And the indicator light which stand
for remain lightened. Showing the remain time.
! The DELAY time stand for washing clothes after [XX] hours.
This program is special designed for fabrics you don't wanna get tangled.
Use this program when washing heavy duty clothes like Jeans and blanket
Use this program for washing kids fabrics.
ECO is a designed program for a normally soiled load, that enables you to wash
laundry effectively with less water and energy.
7.ECO
Memory procedure, It can remember all the washing parameters which users have set up,
such as water lever, washing time, rinsing times etc. Memory procedure is effective after
you press the start/pause button, next start when you choose the Memory procedure, You
can see all the state which you choose last time.
1.MEMORY
2.LESS TANGLING
When the washing machine start to wash, If a kid open the cover lid, The Buzzer will
be continuous singing, Reminding user to close the cover lid. if no one to close the
cover lid exceed 20 seconds, Default the kid have dropped into the tub, The washing
machine will force to drain off all the water of the tub.
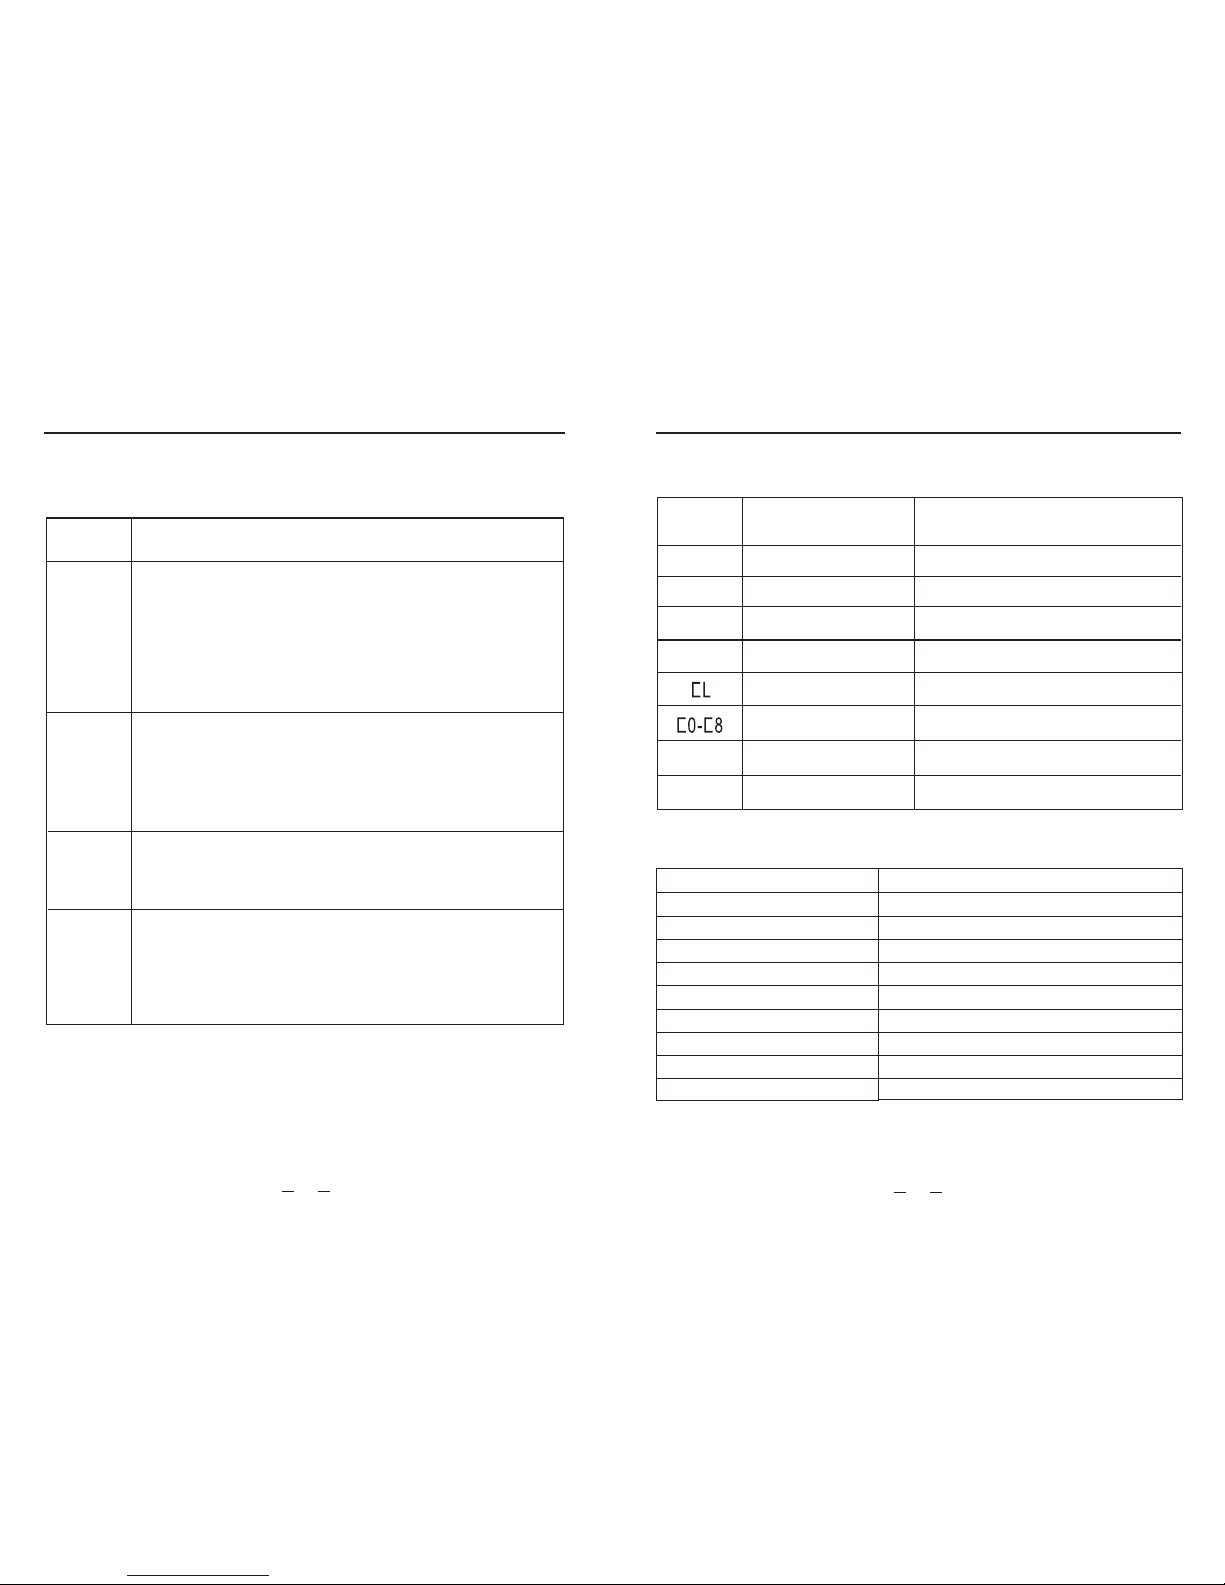
Force to drain off water's condition:
Abnormal condition. The buzzer singing, The digital window display“CL”, Pls check
the tub.
Abnormal condition's solution:
when the “CL” alarm happens, Pls power off 5 seconds, Later you can restart(the
other button is useless).Pls users reset the washing parameters according
requirement.
The instructions of Children-Lock function

15 16
Cleaning and Maintenance of the washing machine
!
! Please keep the washer with neat appearance and perform correct
maintenance to prolong the service life of washer.
Make sure to pull out the power plug before the cleaning and maintenance.
Cleaning of water inlet hose joint
Unscrew and remove the water inlet hose joint from the washer and clean the filtering
screen of inlet valve with brush.
!
NOTICE
The special circulation water flow is designed for this washer, thus the flock powder
and flock residues will be automatically collected into the filtering bag. After application,
the user shall regularly clean the filtering bag to remove the flock powder and flock residues.
Detail operation methods are following:
Cleaning of filtering bag
Jack
Press it according to the arrowhead
point . And you can discharge the
frame of filtering bag.
Put the frame of filtering bag into the
two jacks and push into emphatically
as shown in figure above.
Don't use high foam detergent. Read the specific instructions on how to use the detergent.
DO NOT EXCEED STATED DOSE, OVER . Excessive detergent will cause too much
foam, will overflow from the unit, and will spend more time for rinsing. Washing powder may
gather and block the box, please pay attention to Clean.
Liquid detergent storage box.
Open the lid, Add the liquid
detergent into the Liguid
Storage box slowly.
Fabric softener storage box.
Open the lid, Add the softener into
the Softener Storage box slowly.
This box not used for auto-dosing.
Add Laundry powder in this box.
DO NOT EXCEED STATED DOSE, OVER .
How to use I-Add
Kind tips
1 First time use, the amount of auto-dosing maybe not sufficient.
2 It will be frozen when the temperature below 0 ℃.
3 Please add detergent and softener liquid when the ADD lights alarm.
How to clean the I-Add box
The detergent and softener box may get stuck,(long-time no use)
You should clean the I-Add box:
1 Flush warm water into the box.
2 Press the power button to turn power on.
3 Press both the"option"and "wash speed".
4 Press "detergent" and "softener"to pump out the liquid.
5 Run a complete cycle of “Drum clean”to clean the drum.
I-ADD is a Auto dosing system, it will take right amount of detergent and softener.
You can also press the Detergent button to add more or less detergent according to the
soil level.
)
(I-ADD only apply to liquid detergent, softener. Don't add powder into the
I-ADD boxes.

17 18
220-240V~50HZ
390W
10.0kg
10.0kg
XX
580 640 990
42kg
0.03MPa~0.8MPa
E1
When the washer couldn’t work well, being abnormal or in alarm, please check and correct
it as follows.
Malfunction display and solutions
Causes Solutions
Display
E2
E3
E4
F1-F8
Check the water tap is opened or not.
Check the water level sensor and
drain pump.
Closed the lid.
Manually balance clothes in the barrel
by hands.
Rated power supply
Input power of motor
Rated washing capacity
Rated spin capacity
Overall dimensions
Application water pressure
Weight of whole machine
Washing mode
Draining mode
Spin mode
Technical specifications
New water flow
Centrifugal spin
Identify usual trouble of washer
No
washing
Abnormal
draining
Abnormal
spin
List of faults and inspection
Faults Inspection Items
No water
flows in
! If the power is off or the fuse is burned out.
! If the water supply is cut off or the water pressure is too low.
! If the inlet hose is properly connected and the water tap is opened.
! If the filtering screen of inlet valve is blocked by dirt.
! If the coil of inlet valve is damaged. (The slight electromagnetic
sound is normal phenomenon when the inlet valve is switched on)
! If the "Start / Pause" button is pressed after the power
switch is pressed.
! If the door lid is closed.
! If all clothing piled largely at one side of barrel or the clothing
is excessively placed.
! If the washer is not placed in stable condition or it is placed in
inclination state. (The ground is not flat).
! If the motor belt is loosened.
Note: During the de spin process, if washing are piled at one side of the spin barrel,
it will cause unbalance of spin barrel resulting in striking. At this moment, the
computer inside the washer will feel this unbalance phenomenon and will automatically
correct it ( fill in water Washing ). However, if unbalance situation is not removed after
continuous three corrections, which means the computer auto-correction can not
resolve the problem. Then the user has to manually and evenly place the clothing
inside the barrel to solve the problem.
If the washer can not work normally, or appear abnormal or alarms, please check and
correct as follows.
! If the water drain hose is placed very high.
! If the end of water drain hose is sealed in pond.
! If the internal rubber ring of drain valve is blocked by dirt.
! If the power is off or the fuse is burned out.
! If the power supply voltage is too low.
! If the water amount reaches to the required water level.
(The washer will not work if the water amount does not reach the
required water level)
! If it is set to "Delay" washing mode. (It will only start to work
until the reservation time reached)
Children-Lock Alarm if the cover lid open.
Power off 5 seconds and Restart.
Any other abnormal.
Any other abnormal.
1.power off 5 seconds and Restart. 2.submit repair.
The light of adding
detergent is on
Alarm if the detergent is not enough.
Add liquid detergent.
Alarm for abnormal water intaking.
Alarm for water drain has not finished.
Alarm for lid not closed before spin.
Alarm for washing stay at one side.
Gravity drain
Table of contents
Other Midea Washer manuals

Midea
Midea MLV45N1B Series Manual

Midea
Midea MFW-1250MV2 User manual

Midea
Midea MSW-1508P User manual

Midea
Midea MFWS712 User manual

Midea
Midea RW145 User manual

Midea
Midea MWD-40P User manual

Midea
Midea MAE50-S1102 User manual

Midea
Midea MF200W80WB Series User manual

Midea
Midea MFW-EC850 User manual

Midea
Midea MA100W75 User manual

Midea
Midea MAE180-2404TPS/01FM User manual

Midea
Midea MWMTL075ZOF User manual

Midea
Midea MTWM60 User manual

Midea
Midea MF200W80B/E User manual

Midea
Midea MFL80-ES1200 User manual

Midea
Midea MFW-850M2 User manual

Midea
Midea 360111 User manual

Midea
Midea G06 User manual

Midea
Midea MF200W100WB Series User manual

Midea
Midea MAV160-A2808PS/01FM-US User manual