Midea MYD718S-X User manual

Warning notices: Before using this product,please read this manual carefully and keep it for future reference.
The design and specifications are subject to change without prior notice for product improvement.
Consult with your dealer or manufacturer for details.
The diagram above is just for reference. Please take the appearance of the actual product as the standard.
MYD718S-X
USER MANUAL
Water Dispenser

THANK YOU LETTER
Thank you for choosing Midea! Before using your new Midea product, please read
this manual thoroughly to ensure that you know how to operate the features and
functions that your new appliance oers in a safe way.
CONTENTS
0
02
1
01
11
21
31
41
05
06
THANK YOU LETTER
SAFETY INSTRUCTIONS
SPECIFICATIONS
PRODUCT OVERVIEW
PRODUCT INSTALLATION
OPERATION INSTRUCTIONS
CLEANING AND MAINTENANCE
TROUBLESHOOTING
TRADEMARKS, COPYRIGHTS AND LEGAL STATEMENT
DISPOSAL AND RECYCLING
DATA PROTECTION NOTICE
08
09

Danger
This symbol indicates that there are dangers to the life and health of
persons due to extremely flammable gas.
Warning of electrical voltage
This symbol indicates that there is a danger to life and health of
persons due to voltage.
Warning
The signal word indicates a hazard with a medium level of risk which, if
not avoided, may result in death or serious injury.
Caution
The signal word indicates a hazard with a low degree of risk which, if
not avoided, may result in minor or moderate injury.
Attention
The signal word indicates important information (e.g. damage to
property), but not danger.
Observe instructions
This symbol indicates that a service technician should only operate and
maintain this appliance in accordance with the operating instructions.
The following safety guidelines are intended to prevent unforeseen risks or damage from
unsafe or incorrect operation of the appliance. Please check the packaging and appliance
on arrival to make sure everything is intact to ensure safe operation. If you find any
damage, please contact the retailer or dealer. Please note modifications or alterations to
the appliance are not allowed for your safety concern. Unintended use may cause
hazards and loss of warranty claims.
Read these operating instructions carefully and attentively before using/commissioning the
unit and keep them in the immediate vicinity of the installation site or unit for later use!
Intended Use
Explanation of Symbols
SAFETY INSTRUCTIONS
02

03
DANGER: Risk of Fire/Flammable materials
●
●
●
Do not store explosive substances such as aerosol cans with a flammable propellant in
this appliance.
The appliance must be disconnected from the main safter use and before user-per-
formable maintenance is carried out.
The following safety guidelines are intended to prevent unforeseen risks or damage
from unsafe or incorrect operation of the appliance. Please check the packaging and
appliance on arrival to make sure everything is intact to ensure safe operation. If you
find any damage, please contact the retailer or dealer. Please note modifications or
alterations to the appliance are not allowed for your safety concern. Unintended use
may cause hazards and loss of warranty claims.
●
●
●
●
●
●
●
●
●
●
●
●
●
●
CAUTION: Risk of injury!
WARNING
This appliance is not intended for use by persons (including children) with reduced
physical, sensory or mental capabilities, or lack of experience and knowledge, unless
they have been given supervision or instruction concerning use of the appliance by a
person responsible for their safety.
Children should be supervised to ensure that they do not play with the appliance.
This appliance is intended to be used in household and similar applications such as:
sta kitchen areas in shops, oces and other working environments; farm houses and
by clients in hotels, motels and other residential type environments; bed and breakfast
type environments; catering and similar non-retail applications.
If the supply cord is damaged, it must be replaced by the manufacturer, its service
agent or similarly qualified persons in order to avoid a hazard.
This appliance is intended to be used by expert or trained users in shops, in light
industry and on farms, or for commercial use by lay persons.
The appliance is suitable for indoor use only.
WARNING: Keep ventilation openings, in the appliance enclosure or in the built-in
structure, clear of obstruction.
WARNING: When positioning the appliance, ensure the supply cord is not trapped or
damaged.
WARNING: Do not locate multiple portable socket-outlets or portable power supplies
at the rear of the appliance.
WARNING: To avoid a hazard due to instability of the appliance, it must be fixed in
accordance with the instructions.
The appliance must not be cleaned by a water jet.
The appliance must not be immersed.
This product is not recommended to use in areas above 1,500m altitude.
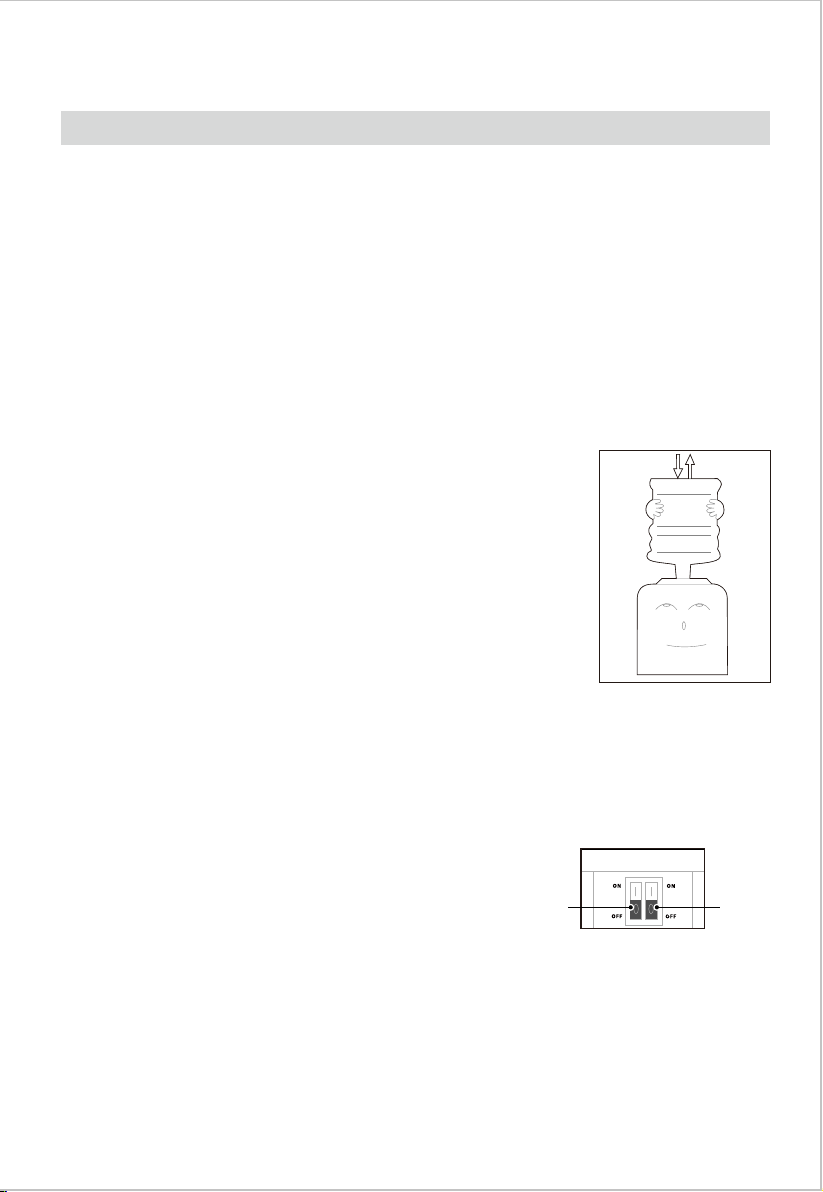
It is recommended to use bottled pure water. If you use hard water, may lead to hot
pot furring or detonation tank or pipeline risk. If you need cleaning tube, remove scale,
need to find aprofessional institutions and professional operation.
Failure to comply with the safety information and instructions may result in injury.
Safety of children and persons with reduced abilities.

SPECIFICATIONS
04
MYD718S-XProduct Model
Rated Voltage
Rated Frequency
220-240V~
50/60Hz
420W
1.0A
4L/h(≥85°C)
0.5L/h(≤15°C)
Rated power
Heating power
Cooling current
Hot water capacity
Cold water capacity
500W

Product
PRODUCT OVERVIEW
05
Top cover
Outlet of hot waterOutlet of cold water
Heating Indicator Light
Power Indicator Light
Cooling Indicator Light
Water collector
Door
Tap of hot water
Tap of cold water
Bottle supporter
Heating switch
Cooling switch

Accessories
06
Instruction Manual x1 Screw x1
Warranty Card x1

07
PRODUCTINSTALLATION
GETTING STARTED
Install Water Bottle
1. Tear the label from the bottle.
2. Vertically insert the bottle into the bottle supporter on top of
the machine. Do not plug the power cord or push the heating
switch until water runs out from the tap of hot water.
3. Insert the plug to socket, then turn on the power switch.
Indicators light up accordingly once the machine works.
4. Vertically pull out the bottle by two hands when the bottle is
empty, then replace it with another bottle of water.
5. This appliance should work under environment of temprature
from 10°C-43 °C humidity ≤90%.
6. This appliance is not suitable for installation in an area where a
water jet could be used.
Notice: This unit has been tested and sanitized prior to packing and shipping.During
transit dust and odors can accumulate in the tank and lines. Dispense and dispose at
least one quart of water prior to drinking any water.
Provide Electricity
First make sure that the two switches on the back of the
water dispenser are turned O. If it is On it will damage
the water dispenser. Plug power cord into a properly
grounded wall outlet, the power pilot lamp will be On at
the same time. It will take up to 3~4 minutes to fill both
tanks for the 1 time.
st
Cooling
switch
(Green)
Heating
switch
(Green)
Locate Dispenser
1. Use the appliance indoors, where is no likelihood of rain or bad weather, as there is
damage risk to the product electrical system.
2. Place dispenser upright the product must be installed in as easily accessible location
in case of repairs.
3. Place dispenser upright on a flat surface and keep a minimum distance of 20cm from
the wall. Make sure that the ventilation openings of the product are not being
obstructed.
Notice: Must make sure the outlet is connected to ground wire well before installing,
Do NOT plug in power cord yet.

PRODUCTINSTALLATION
MACHINE INSTALLATION
WARNING! To avoid a hazard due to instability of the appliance, it must be fixed in
accordance with the instructions.
08
Activate Heating & Cooling
Notice: This unit will not dispense hot or cold water until the switches are activated,
and make sure water comes out of taps before activating heating or cooling switch;
To activate, push power switches on the left side in to start heating and cooling water
and the heating pilot lamp or cooling pilot lamp is on at the same time.
- If you do not want to heat water, push bottom side of red switch to the OFF position.
- If you do not want to cool water, push bottom side of green switch to the OFF position.
Water dispenser
The hole for
tighten screw
1-2. Twist the screw into the lower-left corner hole.
3. Fix the machine on the ground or the table.
1 2 3

09
OPERATION INSTRUCTIONS
Operation Panel
Power Indicator
Light
●
Cooling Indicator
Light
●
●
No.1
No.3
No.2
Description
Plug cord into a properly grounded wall outlet, turn
on the heating switch, the heating pilot lamp is on
when heating is in progress, and o when heating has
been completed; the heating pilot lamp is o and
stop heating when turn o the heating switch;
Plug cord into a properly grounded wall outlet, turn
on the cooling switch, the cooling pilot lamp is on
when cooling is in progress, and o when cooling has
been completed; the cooling pilot lamp is o and
stop cooling when turn o the cooling switch;
Plug cord into a properly grounded wall outlet, the
power pilot lamp is on, and o when unplug;
Dispensing Water
Dispensing Cold Water
Cooling water is ready after 2 hours for the 1 install. The refrigeration unit will work
again and you have to wait until the cooling light is o. During this time the refrigeration
unit could run continuously. This is normal.
1. Position bottle, glass, pitcher or cooking pot below tap.
2. Depress cold water button downward to start cold water flow.
3. Release button once desired fill level is achieved.
Dispensing Hot Water
Hot water is ready after 15 minutes for the 1 install. The water will be heated again. You
have to wait until the heating light is o.
1. Position bottle, glass, pitcher or cooking pot below tap.
2. Depress hot water button downward to start hot water flow.
3. Release button once desired fill level is achieved.
st
st
1 2 3
Heating Indicator
Light

10
CLEANING AND MAINTENANCE
To avoid accident, cut off the power supply before operation according
to the following instructions.
1. The machine had been disinfected before departing from factory. Clean the
Clean the dispenser prior to installing a full bottle of water for the fist time.
2. Cleaning and draining instruction:
1) Before cleaning, make sure the power switch in the O(o) position and
unplug the water dispenser.
2) Vertically insert the bottle into the supporter on tap of the machine.
3) Open the taps, let about 3 liter water flow into a container.
4) Remove the water bottle from the dispenser.
5) Place a large bucket beneath the drain outlet. Remove the drain cover
and allow water to drain.
6) After draining, replace the drain cover and you can use the machine.
Attention: The dispenser heats water to a temperature of approximately 85 °C.
It can cause severe burns. Please operate it carefully.
3. Sanitizing
The machine should be disinfected with a disinfectant according to the instruction
manual of the disinfectant and then clean it with water(see cleaning and draining
instruction) Generally this should be done every three months.
4. To Remove Mineral Deposits:
Mix 4 liters water with 200g citric acid crystals, inject into the machine and make
sure the water can flow out of the hot water tap. Switch on the power and heat it
about 10 minute. 30 minutes later, drain o the liquid and clean it with water two
or three times. Generally this should be done every six months.
Never disassemble this machine by yourself to avoid danger from damaging
machine.

EN
TROUBLESHOOTING
Possible reason SolutionProblem
No hot or cold
water
Please check the followings before having the machine repaired.
Over consumption of hot or
cold water in short time.
Just wait a moment, then hot
or cold water is available again.
No power supply. Connect plug to socket, turn
on heating or cooling switch.
Noisy operation
No water running
out from taps
Leakage from bottle
supporter
Empty bottle. Replace it with another one.
Inlet of bottle supporter.
blocked by bottle seal.
Clean out wasted paper&bot-
tle seal, install bottle again.
Broken bottle. Replace it with a new bottle.
●
●
●
●
●
Not placid installation. Place the machine on placid &
solid surface.
●
11

EN
logo, word marks, trade name, trade dress and all versions thereof are
valuable assets of Midea Group and/or its aliates (“Midea”), to which Midea owns
trademarks, copyrights and other intellectual property rights, and all goodwill derived
from using any part of an Midea trademark. Use of Midea trademark for commercial
purposes without the prior written consent of Midea may constitute trademark
infringement or unfair competition in violation of relevant laws.
This manual is created by Midea and Midea reserves all copyrights thereof. No entity or
individual may use, duplicate, modify, distribute in whole or in part this manual, or
bundle or sell with other products without the prior written consent of Midea.
All the described functions and instructions were up to date at the time of printing this
manual. However, the actual product may vary due to improved functions and designs.
TRADEMARKS, COPYRIGHTS
AND LEGAL STATEMENT
12

13
EN
DISPOSAL AND RECYCLING
Important instructions for environment
Compliance with the WEEE Directive and Disposing of the Waster Product:
This product complies with EU WEEE Directive (2012/19/EU). This product bears a
classification symbol for waster electrical and electronic equipment (WEEE).
This symbol indicates that this product shall not be disposed
with other household wastes at the end of its service life. Used
device must be returned to ocial collection point for
recycling of electrical electronic devices. To find these
collection systems please contact to your local authorities or
retailer where the product was purchased. Each household
performs important role in recovering and recycling of old
appliance. Appropriate disposal of used appliance helps
prevent potential negative consequences for the environment
and human health.
Compliance with RoHS Directive
The product you have purchased complies with EU RoHS Directive (2011/65/EU). It does
not contain harmful and prohibited materials specified in the Directive.
Package information
Packaging materials of the product are manufactured from
recyclable materials in accordance with our National Environ-
ment Regulations. Do not dispose of the packaging materials
together with the domestic or other wastes. Take them to the
packaging material collection points designated by the local
authorities.

14
EN
DATA PROTECTION NOTICE
For the provision of the services agreed with the customer,
we agree to comply without restriction with all stipulations of applicable data protection
law, in line with agreed countries within which services to the customer will be delivered,
as well as, where applicable, the EU General Data Protection Regulation (GDPR).
Generally, our data processing is to fulfil our obligation under contract with you and for
product safety reasons, to safeguard your rights in connection with warranty and
product registration questions. In some cases, but only if appropriate data protection is
ensured, personal data might be transferred to recipients located outside of the
European Economic Area.
Further information are provided on request. You can contact our Data Protection
personal date being processed for direct marketing purposes, please contact us via
[email protected]. To find further information, please follow the QR Code.

EN
Table of contents
Other Midea Water Dispenser manuals

Midea
Midea YL1131AS User manual

Midea
Midea YL1536S User manual

Midea
Midea YL1635T User manual

Midea
Midea YL2036S User manual

Midea
Midea MYD10S-W User manual

Midea
Midea YD1539T User manual

Midea
Midea MJR001T User manual

Midea
Midea YL1335S-W User manual

Midea
Midea YL1635S-W User manual

Midea
Midea YL1633S User manual
Popular Water Dispenser manuals by other brands

Follett
Follett 25CI425A/W Installation, operation and service manual

LINDR
LINDR Green Line AS-110-US manual

Grohe
Grohe Blue Home 36 407 instruction manual

Elkay
Elkay Space-ette FD700-3 1J Series Installation, care & use manual

Haier
Haier WDNS045 user manual

Columbia
Columbia Aqua FC-1750-F Technical manual