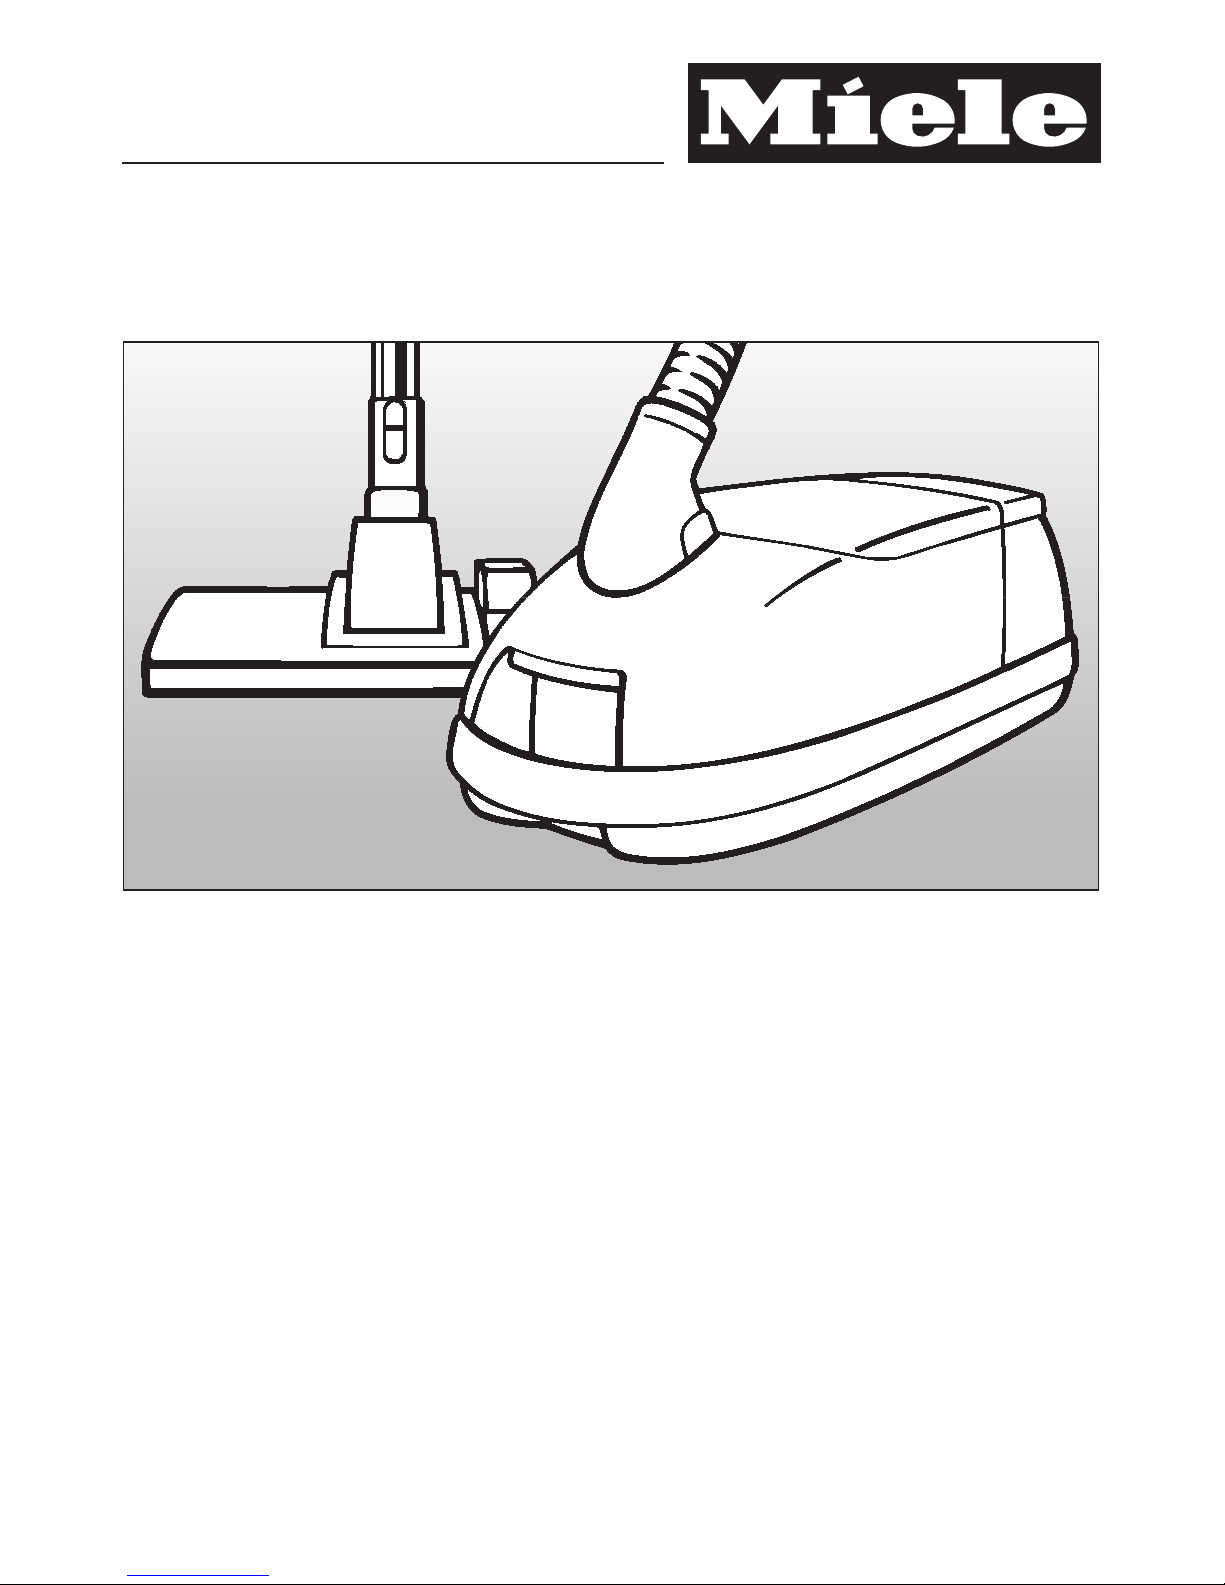
Miele S 858 User manual

Operating instructions
Vacuum cleaners
S 758
S 858
These operating instructions apply to
standard models S 758 and S 858
as well as to other models which are
distinguished by names rather than numbers.
WO
M.-Nr. 05 773 292

Caring for the environment
Description of the appliance
Warning and Safety instructions
Preparing for use
Accessories supplied
Using the accessories supplied
Crevice nozzle . . . . . . . . . . . . . . . . . . . . . . . . . . . . . . . . . . . . . . . . . . . . . . . . . . . . 16
Crevice nozzle extension. . . . . . . . . . . . . . . . . . . . . . . . . . . . . . . . . . . . . . . . . . . . 16
Dusting brush . . . . . . . . . . . . . . . . . . . . . . . . . . . . . . . . . . . . . . . . . . . . . . . . . . . . 17
Upholstery nozzle . . . . . . . . . . . . . . . . . . . . . . . . . . . . . . . . . . . . . . . . . . . . . . . . . 17
Operation
Unwinding and rewinding the mains cable . . . . . . . . . . . . . . . . . . . . . . . . . . . . . . 18
Auto-reverse. . . . . . . . . . . . . . . . . . . . . . . . . . . . . . . . . . . . . . . . . . . . . . . . . . . . . . 18
Switching on and off . . . . . . . . . . . . . . . . . . . . . . . . . . . . . . . . . . . . . . . . . . . . . . . 19
Vacuuming . . . . . . . . . . . . . . . . . . . . . . . . . . . . . . . . . . . . . . . . . . . . . . . . . . . . . . . 19
Regulating the suction . . . . . . . . . . . . . . . . . . . . . . . . . . . . . . . . . . . . . . . . . . . . . . 20
Switching the Electrobrush on and off. . . . . . . . . . . . . . . . . . . . . . . . . . . . . . . . . . 21
Blowing out . . . . . . . . . . . . . . . . . . . . . . . . . . . . . . . . . . . . . . . . . . . . . . . . . . . . . . 22
Setting down, transportation and storage
Park system . . . . . . . . . . . . . . . . . . . . . . . . . . . . . . . . . . . . . . . . . . . . . . . . . . . . . . 23
Maintenance and care
Purchasing new dustbags and filters . . . . . . . . . . . . . . . . . . . . . . . . . . . . . . . . . . 24
When to change the dustbag . . . . . . . . . . . . . . . . . . . . . . . . . . . . . . . . . . . . . . . . 25
Replacing the dustbag . . . . . . . . . . . . . . . . . . . . . . . . . . . . . . . . . . . . . . . . . . . . . 26
When to change the exhaust filter . . . . . . . . . . . . . . . . . . . . . . . . . . . . . . . . . . . . . 27
Replacing the "ACTIVE HEPA" filter . . . . . . . . . . . . . . . . . . . . . . . . . . . . . . . . . . . . 28
Replacing one type of filter with another . . . . . . . . . . . . . . . . . . . . . . . . . . . . . . . . 29
When to change the dust compartment filter (motor protection). . . . . . . . . . . . . . 30
To replace the dust compartment filter . . . . . . . . . . . . . . . . . . . . . . . . . . . . . . . . . 30
When to change the thread lifters . . . . . . . . . . . . . . . . . . . . . . . . . . . . . . . . . . . . . 31
To replace the thread lifters . . . . . . . . . . . . . . . . . . . . . . . . . . . . . . . . . . . . . . . . . . 31
Cleaning and care
Pro lem solving guide / After sales Service
Accessories availa le as optional extras
Electrical connection
Contents
2

Disposal of packing material
The transport and protective packing
material has been selected from
materials which are environmentally
friendly for disposal and can normally
be recycled.
Ensure that any plastic wrappings,
bags etc. are disposed of safely and
kept out of the reach of babies and
young children. Danger of suffocation!
Rather than just throwing these
materials away, please ensure they are
offered for recycling.
Disposal of your old appliance
Old appliances may contain materials
which can be reclaimed or recycled.
Please contact your dealer, your local
waste collection centre or scrap
merchant about potential recycling
schemes.
Before disposing of an old appliance
first make it unusable. Disconnect it
from the mains, cut the cable off the
appliance as close to the cleaner as
possible and cut the plug off. The plug
cut from the cable should be rendered
useless and then disposed of and on
no account be inserted into any socket
elsewhere in the house (electric shock
hazard).
Make appropriate arrangements for its
safe disposal and make sure that the
appliance presents no danger to
children while being stored for disposal.
Disposing of the dust ag and
filters
These are made from environmentally
friendly materials and can be disposed
of with the normal household waste.
The dustbag should only be disposed
of in this way if it has been used ex-
clusively for general household dust.
Caring for the environment
3

Description of the appliance
4

aHand piece
bPlus / Minus buttons for setting the suction power
cElectrobrush switch
dLocking button
eElectro-telescopic tube release button
fElectro-telescopic tube
gDust compartment lid catch
hDust compartment filter (for motor protection)
iDustbag
jElectrobrush (SEB 217 or SEB 236, depending on model)
kCarrying handle
lTwo point holder for suction tube
mExhaust filter
nMains cable with plug *
oCable rewind
pExhaust filter change indicator (Re-set button 7)
qPark system
rStand-by light
sOverheating warning light ,
tOn / Off switch
uAccessories compartment
vDustbag change indicator
wRelease button for accessories compartment
xElectro-elbow
yElectro-suction hose
*N.B. Plug may vary depending on country.
Description of the appliance
5

This appliance meets statutory
safety requirements. Inappropriate
use can however lead to personal
injury and damage to property.
Read the operating instructions
carefully before starting to use this
appliance. They give important
information on the safety, operation
and care of the appliance. This way
you will prevent the risk of accidents
or damage to the appliance. Please
keep these operating instructions in
a safe place for reference, and pass
them on to any future users.
Correct usage
This vacuum cleaner must only be
used in a domestic household
situation to vacuum dry floor surfaces.
Do not use on people or animals.
Any other usage is at the owner’s risk
and could be dangerous.
The manufacturer cannot be held
responsible for damage resulting from
improper or incorrect use of the
appliance.
Children
Do not let small children play with
the appliance or operate it. Please
supervise its use by older children and
the elderly or infirm.
Before using for the first time
A damaged vacuum cleaner can
be dangerous. Check the
packaging, the vacuum cleaner and
accessories for any signs of damage.
Do not use a damaged appliance. A
damaged vacuum cleaner can be
dangerous.
Ensure that the connection data on
the data plate (voltage and
frequency) match the mains electricity
supply. It is essential that they match to
avoid damage to the appliance.
Daily use
It is important to switch the vacuum
cleaner off before changing over
accessories and floor heads, especially
a turbo or electro brush.
To avoid the risk of damage, do not
use the vacuum cleaner without the
dustbag, dust compartment filter and
exhaust filter in place.
If a dustbag is not inserted, the
dust compartment cover does not
normally close. Do not force it.
There is a metal inlay underneath
the handle, which is designed to
protect the user from electrostatic
discharges. Please make sure that you
keep your hand in constant contact with
this metal strip during vacuuming. This
way any build-up of electrostatic
charge will be rendered ineffective.
Warning and Safety instructions
6

Do not vacuum up liquids or damp
dirt. This will cause major faults
and could seriously impair the
functioning and electrical safety of the
appliance. Wait until any freshly
cleaned or shampooed carpets or floor
coverings are completely dry before
attempting to vacuum.
Do not vacuum up anything which
has been burning or is still glowing
e.g. cigarettes, ashes or coal, whether
glowing or apparently extinguished.
The cleaner might catch fire.
Do not vacuum toner dust. Toner,
such as that used in printers and
photocopiers can conduct electricity.
The filter system in the vacuum cleaner
may not filter it completely and so the
toner could be blown back into the
atmosphere by the fan.
Do not vacuum up any inflammable
or combustible liquids or gases
and do not vacuum in areas where
such substances are stored. The
cleaner might explode.
Do not vacuum up items which are
heavy, hard or have sharp edges.
They could cause a blockage and
damage the appliance.
Floor attachments, accessories
and tubes must not be used at
head level to avoid the risk of injury,
e.g. to eyes and ears.
Do not carry the appliance by the
cable. When disconnecting from
the mains socket pull by the plug not by
the cable.
- Keep the cable away from sharp
edges and do not let it be squashed
at all, for example, under a door.
- Avoid running the vacuum cleaner
over the cable.
A damaged cable, plug or socket is a
danger to safety. The appliance must
not be used if any of these have
suffered damage.
Monitor the change dustbag
indicator and change the dustbag
if necessary. Check the exhaust and
dust compartment filters at the same
time and change them too if necessary.
A full bag or blocked filter will hamper
the suction power of the cleaner. A
temperature limiter switches the
vacuum cleaner off automatically if it
gets too hot, see section "Problem
solving guide".
Do not use aroma capsules if your
cleaner is fitted with an ACTIVE
HEPA filter or an ACTIVE air clean filter.
The active charcoal layer in the filter will
absorb the aroma from the capsules
rendering them ineffective.
Warning and Safety instructions
7

Using accessories
To avoid the risk of injury when
vacuuming with a Miele Electro- or
Turbobrush do not touch the rotating
roller brush.
The Miele Electrobrush is a motor
driven accessory appliance for use
only with Miele vacuum cleaners. The
cleaner must not be used with an
electrobrush produced by another
manufacturer.
It is not advisable to vacuum
directly with the handle, i.e. without
an accessory attached as the rim could
get damaged and you could hurt
yourself on sharp edges.
Miele vacuum cleaner bags are
disposable and intended to be
used only once. Do not attempt to
re-use. Blocked pores reduce the
efficiency of the cleaner.
Use only genuine Miele dustbags,
filters and accessories. This ensure
optimum performance of the vacuum
cleaner throughout its life.
Cleaning, maintenance and
repairs
Always disconnect the vacuum
cleaner from the mains supply for
maintenance work and for cleaning.
Switch off at the wall socket and
remove the plug. Pull on the plug and
not the cable.
Do not let the vacuum cleaner get
wet. Clean only with a dry cloth or
slightly damp cloth when disconnected
from the mains supply. If moisture gets
into the appliance there is the risk of an
electric shock.
The electro-suction hose and the
electro-telescopic tube contain
electrical wires. The plug connectors
must not come in contact with water.
These items may only be cleaned with
a dry cloth, no moisture must touch
them. Danger of electric shock.
Repairs may only be carried out by
a suitably qualified and competent
person in accordance with national and
local safety regulations. Repairs and
other work by unqualified persons
could be dangerous. The manufacturer
cannot be held responsible for
unauthorised work.
If the cable is damaged it should
be replaced together with a
complete cable rewind by a Miele ser-
vice technician.
Disposing of an old appliance
When disposing of an old
appliance cut the cable off the
appliance as close to the cleaner as
possible and cut the plug off. The plug
cut from the cord should be rendered
useless and then disposed of and on
no account be inserted into any socket
elsewhere in the house (electric shock
hazard). See section "Disposal of your
old appliance" earlier in this booklet for
further advice.
The manufacturer cannot be held
liable for damage caused by
non-compliance with these Warning
and Safety instructions.
Warning and Safety instructions
8

Attaching the suction hose
^Open the dust compartment shutter.
The dust compartment shutter is
designed for hygienic handling and
prevents dust and odours escaping.
If you remove the suction hose from the
vacuum cleaner for storage purposes
close the dust compartment shutter
before putting the cleaner away (e.g. in
a cupboard).
^Insert the elbow into the suction
socket.
When inserting the elbow, ensure that
the plug connectors line up correctly.
To remove the suction hose
from the cleaner
^Press the release buttons at the side
of the elbow and lift the hose from the
socket.
Preparing for use
9

Connecting the suction hose
and the suction tu e
^Fit the hand piece of the suction hose
into the suction tube. (Ensure that the
plug connectors line up). They must
lock together with a click.
^To release the hand piece from the
suction tube press the locking button
(see arrow) and pull the hand piece
away from the suction tube.
Adjusting the
electro-telescopic tu e
One part of the electro-telescopic tube
is packed inside the other and can be
adjusted to suit your height for
comfortable vacuum cleaning.
^Press the telescopic tube release
button (see arrow) to release the
tubes. Draw out or push in to adjust
to the required height, then release
the button. The tube is locked in
position.
,When a resistance is felt it has
reached its maximum length. Do not
force it beyond its length!
Preparing for use
10

Using the Electro rush
The Electrobrush is particularly suitable
for intensive vacuuming of carpets
which are subject to hard wear. It is
very effective at removing deep seated
dirt and preventing areas of frequent
use being trodden into a path.
It is also important to observe the
flooring manufacturer's cleaning and
care instructions.
Do not use on carpets such as
saxony with very long-pile, berber
and sheepskin rugs, and valuable
hand-knotted carpets, e.g. Persian
and similar. There is a danger of the
threads being pulled out.
If in doubt, contact the carpet
manufacturer/retailer.
Floor surfaces with a varia le or
uneven profile
If your cleaner is fitted with an SEB 217:
–do not use it on variable or uneven
floor surfaces. The brush might come
into contact with the floor and cause
damage.
If your cleaner is fitted with an SEB 236:
–adjust the height of the floor brush.
Preparing for use
11

Fitting the Electro rush to the
vacuum cleaner
^Insert the electro-telescopic tube into
the Electrobrush. (Ensure that the
plug connectors line up). They must
lock together with a click.
For further information on use and
maintenance please refer to the
separate instructions supplied with the
Electrobrush.
Preparing for use
12

Using the standard floorhead
The floorhead can be used for all
normal cleaning of carpets and rugs. It
can also be used with the brush
protruding to vacuum hard flooring
which is not susceptible to scratching.
For hard flooring, such as stone and
floors which are susceptible to
scratching, e.g. parquet, we
recommend using the special Miele
floor brush (see "Accessories available
as optional extras").
It is also important to observe the
flooring manufacturer's cleaning and
care instructions.
Fitting the standard floorhead
^Push the suction tube into the floor-
head and turn it clockwise or anti-
clockwise until it clicks into position.
^To release the floorhead from the
suction tube, press the locking button
(see arrow) and pull the suction tube
away from the floorhead.
To carry the vacuum cleaner by the
handle and for storage purposes, fit
adapter ato the standard floorhead,
turbobrush or floorbrush and then fit the
suction tube to the adapter. The clips
on the standard floorhead, turbobrush
or floorbrush can then be fitted securely
into the two point holder on the side of
the cleaner (see "Description of the
appliance", illustration point 12).
Accessories supplied
13

Adjusting the standard
floorhead
Vacuum carpets and rugs with the
brush retracted:
^Press the foot switch to the g
position.
Clean hard flooring which is not
susceptible to scratching with the brush
protruding:
^Press the foot switch to the h
position.
Other tools, in addition to the
floorhead(s), are supplied with the
vacuum cleaner to help deal with
various types of cleaning.
aCrevice nozzle
bCrevice nozzle extension *
cDusting brush
dUpholstery nozzle
eFilter grille (supplied separately in
the box)
fBlower connection socket *, not
illustrated (see section "Operation -
Blowing out")
*optional accessory for the S 758
The filter grille eis required if you wish
to replace the "ACTIVE HEPA" exhaust
filter with a "SUPER air clean" filter.
Accessories supplied
14

Taking the accessories out
^Press the release button to open the
accessories compartment lid.
^Take out the accessory you require.
^Press down firmly on the lid to close
it.
S 858 accessories compartment
The extension for the crevice nozzle is
located in the compartment underneath
the crevice nozzle.
Accessories supplied
15

The different tools can either be fitted to
the hand-piece or, as required, to the
suction tube.
Crevice nozzle
For cleaning in folds, crevices or
corners.
Crevice nozzle extension
(only for S 858)
This accessory can be used to extend
the length of the crevice nozzle. Further
length is provided by pulling out the
inner section.
^Press the locking button to pull the
extension piece out or to push it in.
Using the accessories supplied
16

Dusting rush
For cleaning skirting boards, ornate or
carved articles, etc. The head of the
dusting brush can be swivelled to attain
the best cleaning position.
Upholstery nozzle
For cleaning upholstery, mattresses,
cushions, curtains, covers etc.
Using the accessories supplied
17

Unwinding and rewinding the
mains ca le
Unwinding
^Hold the plug and unwind cable to
the required length (S 785: max.
approx. 6.5 m / S 858 max. approx.
8.5 m).
,When vacuuming for longer than
30 minutes, pull the cable out to at
least 2/3of its total length, even when
working close to the wall socket.
Otherwise there is a danger of
overheating and damage.
Rewinding
^Switch off at the wall socket and
remove the plug.
^Press the rewind switch. The cable
will rewind automatically.
Auto-reverse
To switch on this function, move the
slide switch to "Auto-reverse". The
rewind brake on the cable drum is
released. It pays out the exact amount
of cable required and gathers in excess
cable so that the cable automatically
adjusts itself to the distance between
the appliance and the wall socket.
Operation
18

Switching on and off
To switch the vacuum cleaner on:
^Press the On-Off switch.
The Stand-by indicator light comes on
to show that the vacuum cleaner is
ready for use.
To switch the vacuum cleaner off:
^Press the On-Off switch again.
The Stand-by light goes out.
Switch the vacuum cleaner off with
the On-Off switch before opening
the dust compartment lid. Otherwise
the vacuum cleaner will
automatically switch on when the lid
is opened (this enables the blower
facility to work).
Vacuuming
^When vacuuming, pull the cleaner
behind you on its wheels. You can
stand it upright for vacuuming stairs
and curtains etc.
,When vacuuming especially fine
dust, e.g. sawdust, sand, plaster,
flour, talcum powder etc.,
electrostatic charges build up
naturally. Under certain conditions
these charges will be released. To
avoid the unpleasant effects of these
discharges, a metal inlay has been
incorporated into the underside of
the handle. Please make sure that
you keep your hand in constant
contact with this metal strip during
vacuuming. This way any build-up of
electrostatic charge will be rendered
ineffective.
Operation
19

Regulating the suction
^Switch the machine on.
Use the pand mon the hand-piece
to regulate the suction to suit the type
of flooring. The power setting selected
is shown on the handle.
Setting 9= no suction
Low setting = weak suction
High setting = strong suction
The symbols on the controls of your
vacuum cleaner indicate the type of
use the settings are suitable for.
a- curtains, lightweight fabrics
b- upholstery, cushions
c- thick pile carpets, rugs and
runners
d- for energy-saving daily use
e- lightly soiled textured carpets
f- textured hard flooring, and for
intensive cleaning of carpets
Operation
20
Table of contents
Other Miele Vacuum Cleaner manuals

Miele
Miele HS19 User manual

Miele
Miele SGSH2 User manual

Miele
Miele CarCare User manual

Miele
Miele SEB 228 Electro Plus User manual

Miele
Miele S 7000 series User manual

Miele
Miele HS14 User manual

Miele
Miele S 5001 User manual

Miele
Miele S 500 Series Manual

Miele
Miele S 500 Series User manual

Miele
Miele S 800 series User manual