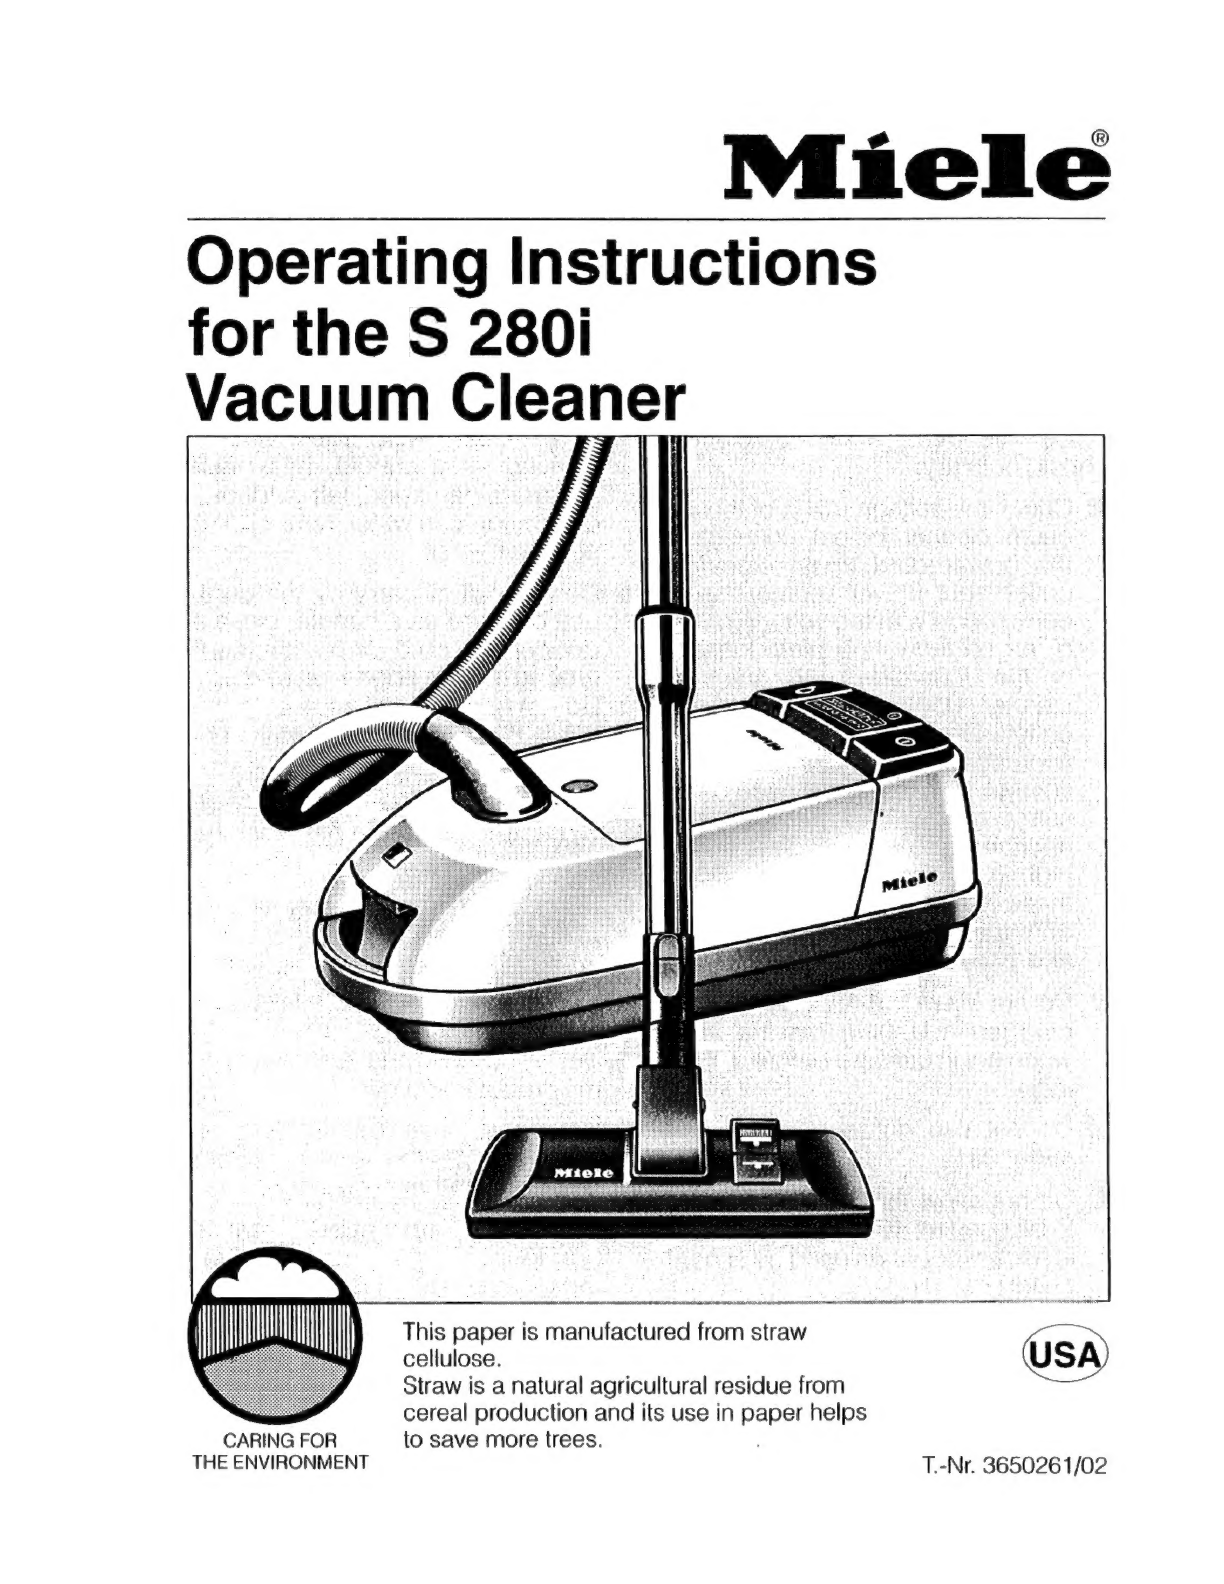
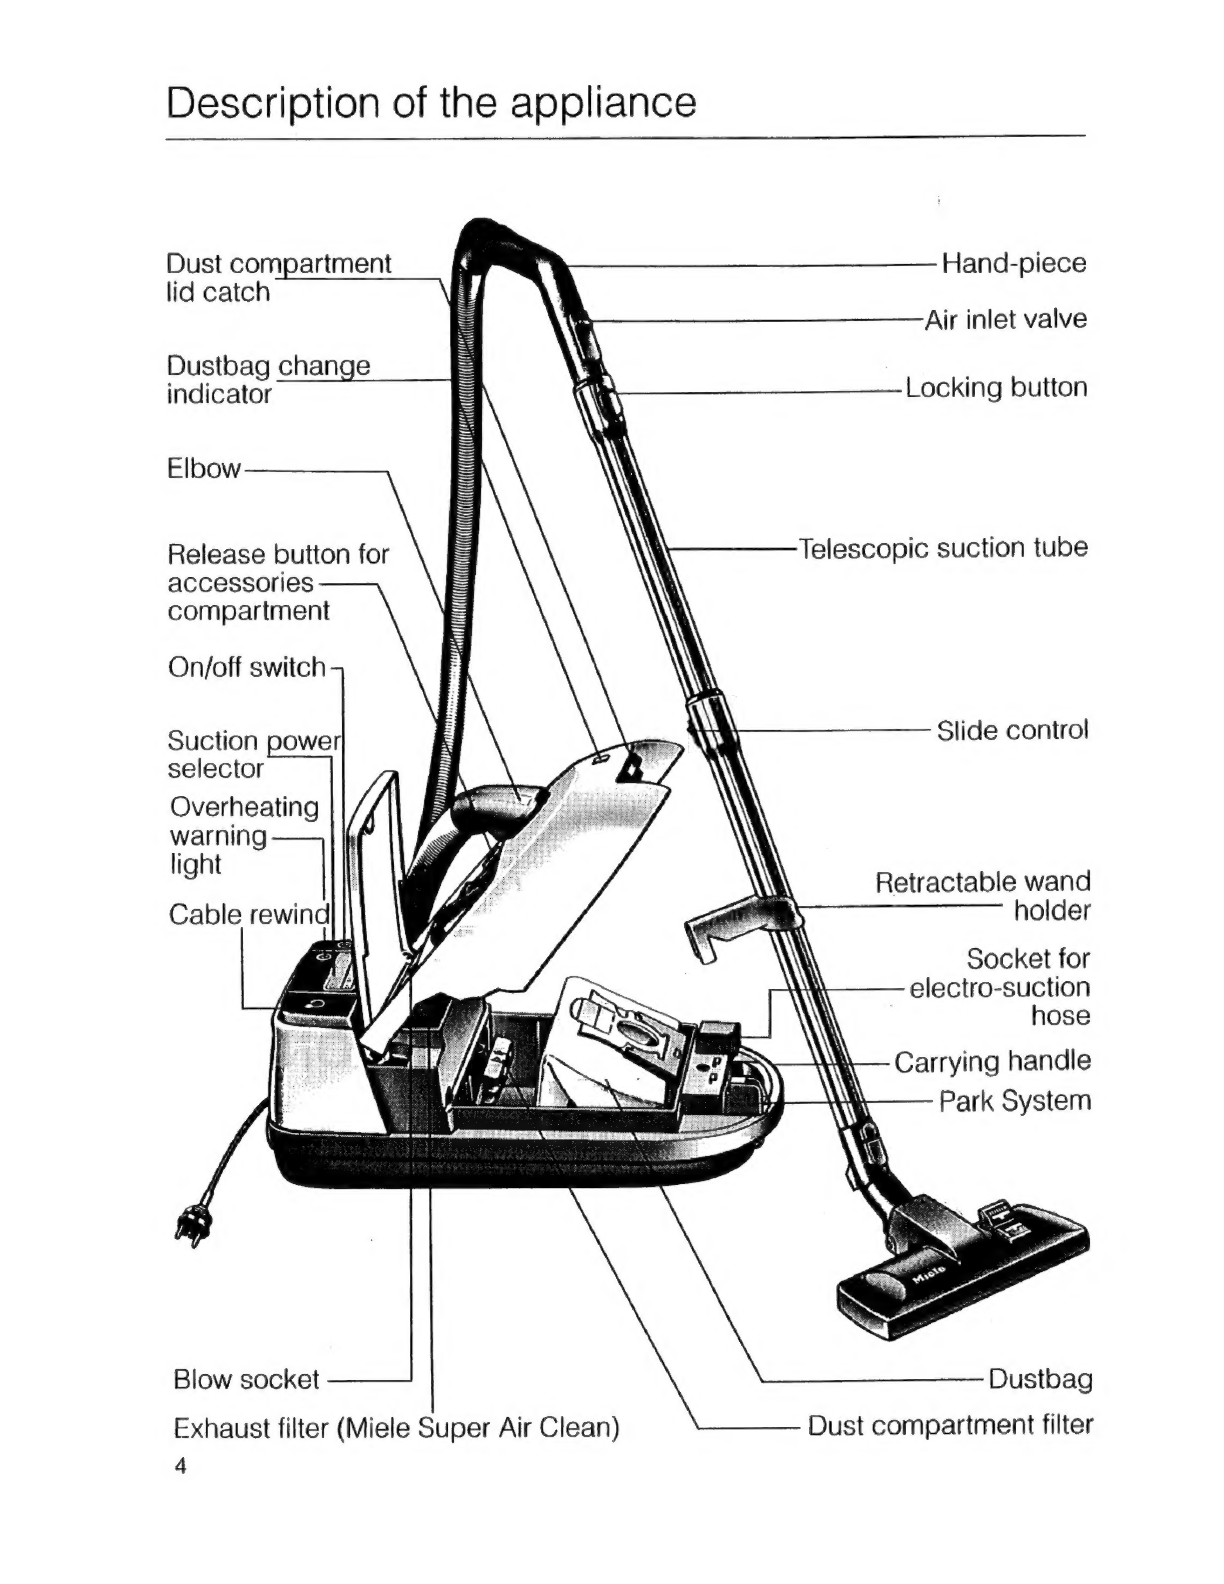
Miele S 280i User manual

Miele
Operating
Instructions
for
the
S
280i
Vacuum
Cleaner
|
cellulose.
Straw
is
a
natural
agricultural
residue
from
cereal
production
and
its
use
in
paper
helps
CARING
FOR
to
save
more
trees.
THE
ENVIRONMENT
T.-Nr.
3650261/02
ian
This
paper
is
nahubee
hired
‘ror
eae
7
sa

IMPORTANT
SAFETY
INSTRUCTIONS
When
using
an
electrical
appliance,
basic
precautions
should
always
be
followed,
including
the
following:
READ
ALL
INSTRUCTIONS
BEFORE
USING
THIS
APPLIANCE
WARNING
-
To
reduce
the
risk
of
fire,
electric
shock,
or
injury:
2
Check
the
voltage
rating of
the
va-
cuum
cleaner
before
connecting
the
power
cord
to
an
electrical
outlet.
Your
power
source
should
correspond
with
the
voltage
rating
given
on
the
rating
plate
located
on
the
underside
of
the
vacuum
cleaner.
Use
only
household
AC
outlets.
Never
use
DC
power
sources.
If
you
are
unsure
of
the
voltage
supply
in
your
area,
con-
sult
a
qualified
electrician.
Con-
nection
of
the
vacuum
cleaner
to
a
higher
voltage
than
indicated
in
these
instructions
may
result
in
damage
to
the
vacuum
cleaner
and
personal
injury.
Do
not
leave
the
appliance
when
plugged
in.
Unplug
from
the
outlet
when
not
in
use
and
before
servic-
ing.
Do
not
use
outdoors
or
on
wet
surfaces.
Do
not
allow
the
vacuum
cleaner
to
be
used
as
a
toy.
Close
attention
is
necessary
when
used
by
or
near
children.
Use
only
as
described
in
this
ma-
nual.
Use
only
manufacturer's
re-
commended
attachments.
Do
not
use
with
damaged
cord
or
plug.
If
the
appliance
is
not
working
as
it
should,
has
been
dropped,
damaged,
left
outdoors,
or
immersed
in
water,
return
it
toa
service
center.
Do
not
pull
or
carry
by
the
cord,
use
the
cord
as
a
handle,
close
a
door
on
the
cord,
or
pull
the
cord
around
sharp
edges
or
corners.
Do
not
run
the
appliance
over
the
cord.
Keep
the
cord
away
from
heated
surfaces.
Do
not
unplug
by
pulling
the
cord.
To
unplug,
grasp
the
plug,
not
the
cord.
Do
not
handle
the
plug
or
ap-
pliance
with
wet
hands.
Do
not
put
any
objects
into
the
openings.
Do
not
use
with
any
opening
blocked;
keep
free
of
dust,
lint,
hair,
and
anything
that
may
reduce
air
flow.
Keep
hair,
loose
clothing,
fingers,
and
all
parts
of
the
body
away
from
openings
and
moving
parts.
Do
not
pick
up
anything
that
is
burning
or
smoking,
such
as
ciga-
rettes,
matches,
or
hot
ashes.
Do
not
use
without
the
dustbag
and/or
filters
in
place.
Turn
off
all
controls
before
unplug-
ging.

@
Use
extra
care
when
cleaning
on
stairs.
@
Donotuse
to
pick
up
flammable
or
combustible
liquids,
such
as
gas-
oline,
or
use
in
areas
where
they
may
be
present.
@
When
using
this
appliance
in
con-
junction
with
a
motorized
nozzle
and
a
current-carrying
hose:
-
The
hose
contains
electrical
wires.
Do
not
use
if
damaged,
cut,
or
punctured.
Avoid
picking
up
sharp
objects.
-
Always
turn
off
this
appliance
before
connecting
or
discon-
necting
either
the
hose
or
the
motorized
nozzle.
@
This
appliance
is
equipped
with
a
power
cord
reel:
-
Hold
the
plug
when
rewinding
onto
the
cord
reel.
Do
not
allow
the
plug
to
whip
when
rewind-
ing.
@
When
using
this
appliance
in
con-
junction
with
the
Turbobrush:
-
Always
unplug
before
connect-
ing.
WARNING:
Electric
shock
could
occur
if
the
vacuum
cleaner
is
used
outdoors
or
on
wet
surfaces.
@
Always
switch
off
the
vacuum
cleaner
and
disconnect
the
plug
from
the
wall
outlet
before
servic-
ing
(see
‘Maintenance’).
Do
not
attempt
any
other
repairs.
Other
servicing
should
be
performed
by
an
authorized
Service
Agent.
@
Protect
your
vacuum
cleaner
from
heat
and
moisture.
Store
in
a
cool,
dry
place,
away
from
children
and
household
traffic.
@
Use
only
attachments
specified
by
the
manufacturer.
Do
not
use
the
blower
to
operate
paint
sprayers
or
similar
devices
that
emit
volatile
or
toxic
vapors.
@
The
vacuum
cleaner
shuts
off
automatically
by
thermostatic
con-
trol
if it
overheats.
Overheating
could
be
due
to
a
clogged
hose,
a
heavily
soiled
dust
compartment
or
exhaust
filter,
or
a
full
dustbag.
If
this
occurs,
rectify
the
problem
and
wait
about
15
minutes
for
the
motor
to
cool
down.
The
vacuum
cleaner
can
then
be
switched
on
again.
@
Do
not
switch
on
or
attempt
to
operate
the
vacuum
cleaner
un-
less
a
dustbag
and
dust
compart-
ment
and
exhaust
filters
are
in
place.
Use
only
genuine
MIELE
double-layer
dustbags
and
filters
(see
‘Maintenance’
for
instructions
on
how
to
insert
the
dustbag
and
filters).
If
no
dustbag
has
been
inserted,
the
dust
compartment
cover
cannot
be
closed.
DO
NOT
USE
FORCE!
SAVE
THESE
INSTRUCTIONS
THIS
APPLIANCE
IS
INTENDED
STRICTLY
FOR
HOUSEHOLD
USE
ONLY

Description
of
the
appliance
Dust
compartment
Hand-piece
lid
catch
Air
inlet
valve
Dustbag
change
indicator
Locking
button
Elbow
UC
Release
button
for
Telescopic
suction
tube
accessories
compartment
HCCC
On/off
switch
\\
Slide
control
iy
Suction
power
selector
Overheating
warning
light
9
Retractable
wand
Cable
rewind
Sa
holder
“g
CN,
Socket
for
\\
electro-suction
\
hose
Carrying
handle
Park
System
Dustbag
Blow
socket
Exhaust
filter
(Miele
Super
Air
Clean)
4
Dust
compartment
filter

Assembling
the
vacuum
cleaner
Connecting
the
suction
hose
to
the
vacuum
cleaner
@
Insert
the
“elbow”
hose
coupler
into
the
suction
opening,
as
shown,
until
it
snaps
into
position.
@
Jo
disconnect
the
hose
from
the
vacuum
Cleaner,
press
the
locking
button
on
the
“elbow”
and
lift
out
of
the
suction
opening.
NOTE:
The
suction
hose
may
be
connected
to
the
exhaust
end
of
the
vacuum
cleaner
to
be
used
as
a
blower
and
also
to
unclog
the
hose,
wand,
etc.
@
Open
tool
caddy.
@
Connect
hose
“Elbow”
and
move
filter
cover
to
the
left.
After
Completion
of
the
blowing
operation:
@
Remove
hose
“Elbow”.
@
Close
tool
caddy.
The
filter
will
be
opened
automatically.

Assembling
the
vacuum
cleaner
For
very
intensive
blowing
action
use
the
enclosed
blower
plate.
@
Important:
Close
the
tool
caddy
first
and
then
open
it.
This
ensures
that
the
exhaust
grille
is
in
the
proper
position.
@
Open
dust
compartment
lid
and
remove
the
Miele
Air
Clean
Filter.
@
Insert
the
blower
plate
and
close
dust
compartment
lid.
After
use
as
a
blower
replace
the
Miele
SUPER
Air
Clean
Filter!

Assembling
the
vacuum
cleaner
Connecting
the
telescopic
suction
wand
to
the
suction
hose
@
Slide
the
hand
grip
of
the
suction
hose
into
the
telescopic
wand
until
it
“clicks”
into
place,
as
shown.
@
Fit
the
hand-piece
of
the
suction
hose
firmly
together
with
the
suc-
tion
wand.
@
Torelease
the
hand-piece
from
the
suction
wand,
press
the
locking
button
(see
arrow).
Adjusting
the
telescopic
wand
The
telescopic
wand
has
two
inter-
connected
parts
that
can
be
adjusted
to
suit
your
height
for
convenient
vacuum
Cleaning.
To
adjust:
@
Bring
the
adjuster
control
up-
wards,
or
press
downwards
and
adjust
the
suction
tubes
to
the
required
length.

Assembling
the
vacuum
cleaner
Telescopic
Wand
Holder
Before
attaching
the
floor
nozzle,
at-
tach
the
retractable
wand
holder
to
the
telescopic
suction
wand
and
fold
down.
In
the
unfolded
position,
the
wand
holder
allows
the
entire
wand
(including
nozzle)
to
be
attached
by
placing
the
holder
into
the
receptacle
on
the
canister.
This
allows
for
easy
transportation
and
storage.
Attaching
the
floor
nozzle
or
Turbo-
brush
The
floor
nozzle
is
recommended
for
routine
cleaning
of
rugs,
carpeting
and
bare
flooring
such
as
parquet,
tile,
linoleum
or
stone.
@
Fit
the
telescopic
suction
wand
into
the
circular
opening
of
the
floor
nozzle,
as
shown
by
the
ar-
row.
The
floor
nozzle
must
lock
into
place
securely.
@
Torelease
the
floor
nozzle
from
the
suction
wand,
press
the
locking
button.
@
The
floor
nozzle
can
be
adjusted
to
conform
to
the
type
of
flooring
to
be
cleaned.
@
To
clean
bare
floors,
depress
SYMDOI
im.
The
brush
is
now
protruding.
@
To
clean
rugs
and
carpeting,
symbol
-
Should
be
depressed.
This
retracts
the
brush.

Each
vacuum
cleaner
features
as
standard
equipment
a
three-piece
set
of
accessories
designed
to
meet
a
variety
of
cleaning
requirements.
@
Crevice
tool
@
Upholstery
nozzle
@
Dusting
brush
All
three
accessories
can
be
fitted
onto
the
hand
grip
or
used
with
the
telescopic
suction
wand
for
addi-
tional
cleaning
reach.
The
accessories
are
conveniently
lo-
cated
in
a
recessed
storage
caddy
in
the
vacuum
cleaner
body.
@
The
tool
caddy
can
be
opened
by
depressing
the
release
button
on
the
dust
compartment
cover,
as
shown.
Standard
accessories

Standard
accessories
Crevice
nozzle
For
cleaning
in
folds,
crevices
and
corners.
Upholstery
nozzle
For
cleaning
upholstery,
mattresses,
cushions,
curtains,
clothing,
etc.
Dusting
brush
For
cleaning
skirting
boards,
ornate
or
carved
articles,
etc.
The
head
of
the
dusting
brush
can
be
swivelled
to
attain
the
best
cleaning
position.

Turbo-brush
S
021
Recommended
for
deep-cleaning
and
restoring
crushed
carpet
pile
on
low-nap
Carpeting.
The
turbobrush
is
fitted
onto
the
tele-
scopic
suction
wand
and
is
mechan-
ically
driven
by
the
suction
power
of
the
vacuum
cleaner.
Floor
Brush
For
cleaning
of
hardwood
floors,
stone
or
PVC
floors.
Cloth
Dustbag
The
cloth
bag
is
easily
emptied
and
shaken
out
by
removing
the
pinch
bar.
Do
not
wash
dustbag
this
will
restrict
the
capacity
of
the
bag.
Both
cloth
and
paper
dustbags
are
available
at
your
local
Authorized
Miele
dealer.
Optional
extras

Optional
extras
Radiator
Brush
For
cleaning
radiators,
narrow
shelves
or
crevices.
Fit
the
radiator
brush
onto
the
crevice
nozzle.
Universal
Brush
For
dusting
shelves,
bookcases,
etc.
These
and
other
fine
Miele
products,
including
the
SEB
245
Electric
Power-
brush
are
available
at
your
local
Autho-
rized
Miele
Dealer.
12

Operation
Unwinding
and
rewinding
the
cable
Unwinding
@
Hold
the
plug
and
unwind
the
cable
to
the
required
length
(max.
21
ft.)
Rewinding:
Depress
the
rewind
button,
and
the
cord
will
automatically
rewind.
It
is
recommended
that
you
guide
the
last
few
feet
of
the
cable
into
the
bin
to
prevent
any
whip
effect.

Operation
Switching
on
and
off
Depress
foot
switch
to
switch
the
vacuum
cleaner
on
or
off.
Selection
Suction
The
vacuum
cleaner
is
equipped
with
an
electronic
suction
selector.
By
depressing
the
selector
you
can
choose
either
the
5
manual
settings
on
the
automatic
setting.
Automatic
Suction
Selector
When
set
on
“A”
for
automatic
the
electronic
suction
power
will
automa-
tically
adjust
to
the
various
types
of
carpet
piles.
@
Depress
the
suction
power
se-
lector
with
the
foot
until
the
re-
quired
power
setting
appears
in
the
indicator
window.
Reducing
the
suction
power
reduces
the
amount
of
effort
required
for
ma-
noeuvring
the
cleaning
attachment.
By
setting
the
suction
regulator
ac-
cording
to
the
degree
of
soiling
and
type
of
flooring
being
cleaned
energy
will
also
be
saved.
The
symbols
on
the
suction
power
selector
are
an
indication
of
the
cor-
rect
setting
of
the
suction
regulator.
14

Operation
When
in
“automatic”
suction
mode,
the
air
inlet
valve
must
remain
closed
—
otherwise
the
electronic
suction
regulation
does
not
function
pro-
perly.
Manual
Suction
Settings
The
vacuum
also
has
5
different
ma-
nual
suction
settings.
Below
are
the
symbols
as
they
ap-
pear
on
the
suction
selector:
[A]
=
Drapes,
Textiles
=
Furniture,
Pillows
(4)
=
Energy
saving,
daily
cleaning
-|
=
Quality
carpeting,
Orientals
rugs
=
Hardwood
floors,
deep-cleaning
of
carpeting
&
floors.
A
=
Suction
automatically
adapts
to
the
various
carpet
piles
and
floors.

Operation
Suction
regulator
(Air
inlet
valve)
For
quick
and
easy
reduction
of
suc-
tion
power,
as
needed
when
cleaning
curtains,
drapes
and
_
light-weight
area
rugs:
@
To
avoid
rugs,
drapes,
etc.,
from
getting
sucked
up.
@
Only
open
the
suction
regulator
until
the
suction
nozzle
can
be
easily
moved.
Opening
the
air
inlet
valve
reduces
the
amount
of
effort
and
suction
re-
quired
for
manoeuvring
the
cleaning
attachment
being
used.
Dustbag
change
indicator
(4
This
indicates
when
the
dustbag
needs
changing.
Set
the
suction
power
selector
to
maximum.
When
the
red
mark
on
the
dustbag
change
indicator
covers
the
window
completely,
change
the
dustbag,
even
if
it
does
not
seem
completely
full.

Dustbag
change
indicator
This
indicates
when
the
dustbag
needs
changing.
@
Set
the
suction
power
selector
to
maximum.
Switch
on
the
vacuum
cleaner
and
lift
up
the
floor
nozzle
so
that
it
is
not
resting
on
the
floor.
If
the
red
mark
on
the
dustbag
change
indi-
cator
covers
the
window
comple-
tely,
change
the
dustbag,
even
if
it
does
not
seem
completely
full.
Please
note:
The
dustbag
change
indicator
reacts
to
the
air
porosity
of
the
dustbag.
On
the
one
hand,
a
small
amount
of
cement,
plaster
or
fine
dust
is
enough
to
indicate
a
full
bag,
although
the
latter
is
almost
empty.
On
the
other
hand,
the
bag
can
be
full
of
carpet
fluff
and
threads,
although
the
indi-
cator
scarcely
reacts.
Such
extremes
seldom
occur,
as
household
dust
is
usually
a
mixture
of
carpet
fluff,
hair
and
sand.
The
MIELE
dustbag
change
indicator
is
designed
to
react
to
such
mixtures
of
dust.
Operation
We
recommend
the
following:
1.
When
vacuuming
a
lot
of
sand
and
dust:
Change
the
dustbag,
if
indicator
shows
“full”.
2.
When
picking
up
a
lot
of
fluff
and
hair,
the
indicator
will
show
the
dustbag
as
only
“half
full”,
when
it
is
actually
bulging.
Important:
Nozzles,
such
as
the
crevice
nozzle,
affect
the
function
of
the
dustbag
change
indicator.
There-
fore,
only
attach
the
floor
nozzle
when
checking
whether
the
bag
is
Il.
the

Transport
&
storage
During
transportation,
when
not
in
operation
and
during
storage:
@
Place
in
a
vertical
position.
@
Push
down
the
retractable
wand
holder
on
the
telescopic
suction
wand
and
insert
into
the
vacuum
cleaner.
The
wand
holder
can
be
moved
as
desired.
Park
System
A
Park
System
has
been
designed
for
conveniently
parking
the
vacuum
cleaner
during
pauses.
A
special
parking
attachment
is
fitted
to
the
floor
nozzle
and
to
the
nose
of
the
cleaner.

Maintenance
The
vacuum
cleaner
is
fitted
with
three
filters
which
must
be
replaced
regu-
larly
in
order
to
guarantee
proper
suc-
tion
efficiency:
@
Dustbag
(paper
filter
bag)
@
Dust
compartment
filter
@
Exhaust
filter
(Miele
Super
Air
Clean
filter)
Replacement
filters
can
be
obtained
from
your
local
MIELE
dealer.
Use
only
genuine
Miele
filters
and
dustbags,
making
sure
they
are
the
correct
ones
for
your
vacuum
cleaner
model.
Always
state
the
part
number
of
the
bag,
with
designation
H,
and
the
model
number
of
the
cleaner
when
ordering
new
dustbags.
Change
paper
dustbag:
when
the
indicator
shows
the
bas
is
full,
or
under
the
conditions
described
on
page
16.
Change
the
exhaust
filter
(Super
Air
Clean
Filter)
Each
time
you
start
a
new
packet
of
Miele
paper
filter
bags.
Change
the
dust
compartment
filter
The
dust
compartment
filter
should
last
a
long
time
and
only
needs
to
be
changed
if
it
gets
very
dirty.
This
may
happen
if,
for
instance,
the
dust
bag
is
damaged
and
leaks.
Changing
the
filters
Open
the
dust
compartment
lid
as
follows:
With
the
machine
lying
flat
lift
lid
catch
and
raise
dust
compartment
lid
until
it
clicks
into
place.

Maintenance
Replacing
the
paper
dustbag
The
paper
dustbag
has
a
closing
flap
which
closes
automatically
when
the
dustbag
is
removed
to
prevent
any
dust
escaping.
20
To
remove
the
dustbag
grasp
the
card
collar
by
the
two
finger
holes
and
pull
it
out.
It
can
then
be
disposed
of
with
the
normal
household
waste
as
long
as
it
has
only
been
used
_
for
vacuuming
up
normal
household
dust.
Place
the
new
dustbag
collar
securely
in
the
frame.
If
it
is
not
correctly
located
the
dust
com-
partment
lid
will
not
close.
Please
ensure
that
the
dustbag
is
not
trapped
when
the
lid
of
the
dust
compartment
is
closed.
Other manuals for S 280i
1
Table of contents
Other Miele Vacuum Cleaner manuals

Miele
Miele 10354220 User manual

Miele
Miele SERIE S4 User manual

Miele
Miele S 7000 series User manual

Miele
Miele S 140 User manual

Miele
Miele SKCE0 User manual

Miele
Miele SJQL0 User manual

Miele
Miele Boost CX1 Cat & Dog User manual

Miele
Miele S 251i User manual

Miele
Miele Triflex HX2 User manual

Miele
Miele S 5211 - S 5781 User manual

Miele
Miele SEB 217 User manual

Miele
Miele S179i User manual

Miele
Miele HS15 User manual

Miele
Miele VACUUM CLEANER S135 User manual

Miele
Miele HS11 User manual

Miele
Miele HS23 User manual

Miele
Miele S5 S5481 User manual

Miele
Miele Complete C3 Active User manual

Miele
Miele Capricorn S5980 User manual

Miele
Miele S401I - User manual