Mifare T8 User manual

1
Preface
1 Honorable customers
Thanks for choosing products of this company. T8, with world cutting
edge technologies—fingerprint recognition, computer communication, as
well as microelectronics, is considered to be combination of three
technologies: electronics, optics and computer communication.
It is no doubt that it has become the first choice of access control
system for entrances, enterprises and government with its strong
function and veracity.
Please read this user manual carefully to have an initial
understanding of functions and basic knowledge of installation,
debugging, maintenance, application and management to better use this
product.

2
2 Brief introduction of Fingerprint & mifare
Card reader
Easy technology for identification becomes more and more
important for personal security. Meanwhile, with the development of
information technology, people rely more and more on digital information
such as smart card, ID number and password. Yet, digital information is
not 100% secure and people keep on looking for higher security level.
Thus, the unique feature of our body begins to Fingerprint identification
system makes daily life simpler. There is no need to carry cards. Just one
finger solves it all. Bill Gates once said in a memo that biometric
identification technology would be the most important innovation in the IT
industry for the next few years. The existing identification method like
smart card and password is far from satisfactory. Biometric identification
technology provides a solution.
The launch of fingerprint and card reader T8 successfully combines
security with easy technology. It helps to greatly solve the security issue
in access control.
Industrial design comply to international standards, small in
size and compact in design. Can be easily installed on
doorframe or wall
Dual identification of high security level: Mifare card +
Fingerprint, Mifare card only and Fingerprint only
Anviz Optical fingerprint sensor, Scratch resistance. Dirty,
sweaty and dry fingers don’t affect its efficiency.
Stable RFID card read module, compatible with many kinds of
ID card
Fingerprint Storage Capacity: 1760(can be expanded)
Fast and easy fingerprint enrollment: less than 3 seconds
Alarm Feature: tamper alarm, threatening door-open alarm

3
User Enrollment on the unit via Master Card or in the
management software on computer
Communicate with computer via RS485
Wiegand 26 Output. Can work with standard access controller
LED Indicator light (Blue, red, green), Inside buzzer
High quality industrial plastic
Size:60 x 110x 40MM

4
3 Preparation before enrolling
A. Before registering users, firstly setup the Administration card and
alarm card and the password modification card.
The newly purchased T8 equips with three cards with Anviz key.
When T8 is powered, automatically set up the card which is firstly
showed to the T8 as the administration card, the second as the alarm
card, and the third as the password modification card. After setting, T8
will work for the users with the three cards.
B. Change the key of the user cards
The keys of the user cards are different with the key stored inside T8.
Before using, you must change the key of user card to be same as the
one inside T8. The method as following:
Swipe the password modification card firstly, meanwhile, the
indication light appears to be green color and flash.
Swipe the user card to T8 while those cards are needed to change
the keys, at that time, T8 will sound three times and flash three times with
green light. In this way, it indicates that modification of key of user card is
successful.
If in the process of changing key, T8 sound all the time and flash
with the red color, so it indicates failure and you need to change the key
again.
[Notice]: Do not change the key of user card freely. If need to be
changed in deed, you must remember the key of the user card.
Otherwise it will cause the entire user cards out of work. Be cautious to
do the operation.
Finally register users with cards that has already changed keys, Find
details from User registration.
3.1 User registration

5
3.1.1 Offline enrollment
As to the initialization of T8, please press the reset button after being
powered. Press your finger flatly and centrally on fingerprint sensor area,
then press reset button to initialize the device. If you initialize T8, it will
empty the single fingerprint data and the black list inside of T8. Please be
cautious.
When enrolling users, it can be done through the administration card
attached with the device (three methods optional: “single fingerprint
identification” “ card + fingerprint” “ single card identification” ).
A. When enrolling users with the administration card, swipe the
administration card firstly, at that time, the indication light appears to be
blue and flash.
a. Single fingerprint identification: when the indication light is
flashing, please swipe the user card firstly, then the light stops flashing.
Then press finger for two times continually, each time with one sound
and green light flashing. After two times, the indication light is blue with
three sounds and flashing with the green light, then the user registration
is successful. At that time, T8 restores to the situation of flashing with the
blue light when swiping the administration card. You can enroll the user
continually. If need to exit, please swipe the administration card again.
b. Card + fingerprint:
when the indication light is flashing, press the finger two times firstly.
Each time will accompany with one sound and the flashing of the light.
After two times, swipe the user card again. At that time T8 will sound
three times and flash three times with the green light, so the user
registration is successful. T8 restores to the situation of flashing with the
blue light when swiping the administration card. You can enroll the user
continually. If need to exit, please swipe the administration card again.
C. Single card identification mode:
After flashing, swipe the user card for two times. At that time, T8 will
sound three times and flash with the green light, then the user card

6
registration is successful. T8 restores to the situation of flashing with the
blue light when swiping the administration card. You can enroll the user
continually. If need to exit, please swipe the administration card again.
Notice: You should swipe the administration card firstly before each
enrollment, then it will enter into the enrollment status. When exit, just
swipe the administration card to save and exit. If in the process of
enrolling, T8 sound all the time and flash with the red light, so you are fail
to enroll and need to enroll again.
B. under some special situations, we need employee has the
condition of alarming for the insecurity. Consequently we can enroll alarm
fingerprint and alarm card.
When enrolling, please swipe alarm card firstly. At that time, the
indication light is red and flashing.
Alarm fingerprint
After flashing, swipe the user card firstly, then the light stops flashing,
then swipe user card, secondly press finger continually for two times, and
every time accompanies with the sound and flash with the green light.
After two times, T8 will sound three times and flash with the green light,
then the alarm finger registration is successful. T8 restores to the
situation of flashing with the blue light when swiping the administration
card. You can enroll the user continually. If need to exit, please swipe the
administration card again.
Alarm card
After flashing, Swipe the user card directly, swipe user card again.At
that time, T8 will sound three times and flash with the green light, then
the alarm card registration is successful. At that time, T8 restores to the
situation of flashing with the blue light when swiping the administration
card. You can enroll the user continually. If need to exit, please swipe the
administration card again.
Notice: You should swipe the alarm card firstly before each
enrollment, and then enter into the enrollment status. When exit, just

7
swipe the alarm card again to save and exit. If in the process of enrolling,
T8 sound all the time and flash with the red light, so you are fail to enroll
and need to enroll again.
3.1.2 Online enrollment
When online enrolling, it needs work with the T8 management
software.As to the detail, please refer to the online enrollment of the staff
management.
Words explanation
Anviz key: Default key that set up by Anviz company
Company key: Key that be set up by user company
4 Product show
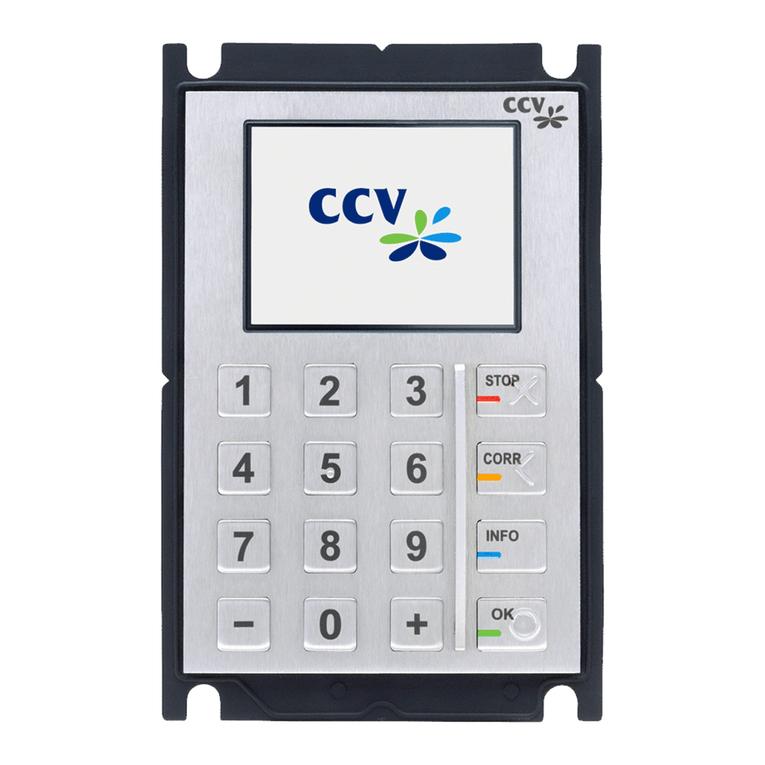
T8 is slim and compact, there are fingerprint sensor, LED indicator
light, card read area on the frontispiece, on the bottom, there are 4 small
holes includes 2 fixation holes(separately in two sides)、Reset button
(middle left)、RS485 interface(middle right).
Fixation holes: Fix T8 firmly when T8 is installed to wall or door
frame.
Reset button: Initialize T8 terminal when T8 is offline.
RS485 Interface: The interface that enables T8 to communicate with
other devices.

8
Card Read Area
Finger Scan Area
Fixation holes
Reset button
RS485 Interface
LED Indicator

9
5 System Installation
Install T8 management software to manage T8 fingerprint & mifare
card reader. See detail of software installation as following:
5.1 Operation environment
Hardware requirement
Pentium Ⅱ266 and above; Pentium Ⅲ1G and above is
recommended
128 Memory and above; Minimum 100M hardware space
USB Port
CD-ROM (CD-ROM needed in installation)
VGA support 800*600 resolution and above
Operating system
Microsoft Windows 2000(recommended)
Microsoft Windows XP
5.2 System Installation
Please insert disc into CD-ROM and the disc will automatically run
the installation program. If not, please run setup.exe in the root directory
of the disc. The following window will pop up:

Click “Next” to continue installation (see the picture below:)
Select the target directory to install the program or the default
directory is:“C:\T8”,click “next” to continue:
10

Confirm each steps are correct, after that please click “next” to
continue, or else, click “back” to return to previous step and reset the
target directory.
System installation will be completed in several seconds as
following:
Click “Finish” to exit installation wizard, you’ll find shortcut is
added to desktop, double click it to run T8 management software; In
addition, “T8 management system” has been added to “All Programs” as
well as the Shortcut is included.
11

12
Uninstall the program
Click “Uninstall T8 management System” under “ All programs”, click
“Next” and the program will be uninstalled automatically.
Please note: All the files and data will be deleted after uninstalling
the program so please make sure before operation.

13
6 Communication software
This management software connects T8 terminal through Com port,
after successful connection, you can manage T8 model through software,
the main function includes: Terminal management, set parameters of T8
model as well as add, delete or modify Com port; Terminal management
includes terminal initialization, reading info from terminal and data
management which is the management of people, it includes online
registration, data transfer, the importation and exportation of staffer
information and so on.
6.1 Main interface:
Double click“T8 management software”to start software. There’s
no info in the list because no com port information is added initially. So
you need to add com port and then connect software with terminal, after
that, highlight the com port list and then click【connect】, if “connected
successfully” is displayed, it means the connection between software and
terminal is regular. Or else, please reset and reconnect.
Main interface:

In the main interface, you can operate software by clicking shortcuts
on menu bar as well as selecting from menus. As for terminals, connect
each terminal by different com port numbers.
Shortcuts in main interface:
6.1.1 Add terminal:
The following window will pop up after clicking 【Add】:
Enter the corresponding “Terminal SN”, select the right Serial port,
enter the Memo for the terminal as the above picture displayed and click
14

【OK】to complete. Important: Terminal SN can be found on the label on
the back cover. Format: SN: XXXXXXXX, serial port: usually it is COM 1,
if terminal is connected to COM 2, then please select COM 2 as picture
above.
6.1.2 Delete terminal:
Select the terminal to be deleted, click【Delete】,follow the prompt
and the terminal will be deleted.
6.1.3 Modify terminal:
Select the com port list and Click【Modify】and the following window
will pop up:
Modify the corresponding information accordingly and click【OK】to
complete.
Click【System management】, besides function of add terminal,
delete terminal and modify terminal, you can start database setting:
Linking to database…
This software uses Microsoft ADO database interface, adopts single
Access2000 database, The default database is T8.mdb under installation
folder of application, you can reset the database linking according to real
instance.
You need to correct database linking when following error appears:
15

Click【System management】and click【Database linking…】,
following appears:
Select or input database name: click button, select the right
database file, input corresponding log on information, click【OK】to finish.
(Note: Test the database connection by clicking 【test connection】)
6.1.4 Exit system
Exit system when all operations are done. Before exit the system,
please check if all operations are saved properly. Or else, all operations
will be invalid if exit system.
When you want to exit system, click【System management】and click
【Exit system】, following appears:
Click【OK】, it will exit management system and return to Windows
operating system. If click【Cancel】then returns to management system
for continuous operation.
Control terminal
16

Click【Terminal control】, following menu appears:
6.1.5 Disconnect
Sometimes, the terminal is repowered or any other operation is done
to it which needs to be done while the connection is disconnected
between software and terminal. So you need to click【Disconnect】to
disconnect the connection between software and terminal. At the same
time, the software will display disconnected! See following picture:
6.1.6 Parameter setting
Set parameters for terminal T8, namely set parameters for user card,
company key and user key.
Recover to factory status: This operation will recover administration
card, alarm card, password modification card to factory status. Please be
careful to operate it! Or else, if anything is changed, some cards will not
be valid anymore.
Initialize terminal: This operation will delete fingerprint templates and
black list in T8 terminal. Please be careful to operate it!
Retrieving setting: When read T8 terminal, it will read information
from T8 and display all information in the software.
Click【Setting】, following appears:
17

a.Click【Recover to factory status】, following appears:
Click 【OK】to recover configuration of administration card, alarm
card and password modification card to be factory status, be careful to do
it! b. Click【Initialize terminal】, following appears:
Click【OK】,it will delete all fingerprint templates and black list, please
be careful!
c.Click【Retrieving setting】, following appears:
Click【OK】, Configuration of terminal will be displayed in the
18

software, all data will be displayed in input field.
d. 【Advanced setting】Set for the key of user card, Click 【OK】to
confirm after entering:
When modifying key of user card, enter old but right key first, or else,
new key can not be added.
【note:】Please do keep the new key in mind when you modified the
key, or else, all user cards that use the old key will be invalid!
User card key: Set for the key of user card, Click 【OK】to confirm
after entering.
6.2 Staff management:
Staff management is the most important part of this software,
because all the settings of other parts are in order to serve this part. The
main function of this part is to register staff and staff fingerprints.After the
connection of T8 and software is done, you can retrieve data or upload
19

data between T8 and software as well as importing data and exporting
data.
Function button is as follows:
6.2.1 Add User
Click 【Append】and import relative information about staff ID
besides card number which cannot be edit and click【Save】to complete
staff information adding.
Notice: card number is the unique way to identify a user.
6.2.2 Delete user
Choose the staff ID and then click 【Delete】. Then follow the
instructions and click 【Save】to complete staff information deletion.
6.2.3 Modify staff information
20
Table of contents
