manuals.online logo
Brands
  1. Home
  2. •
  3. Brands
  4. •
  5. HIK VISION
  6. •
  7. Touch Terminal
  8. •
  9. HIK VISION DS-K5672MW-Z User manual

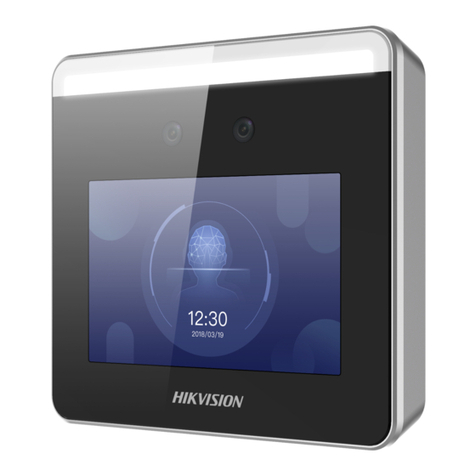
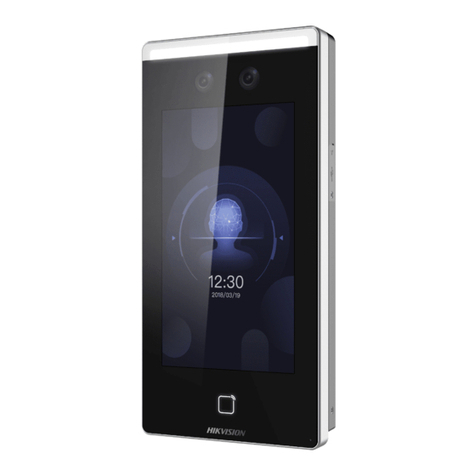
HIK VISION DS-K5672MW-Z User manual

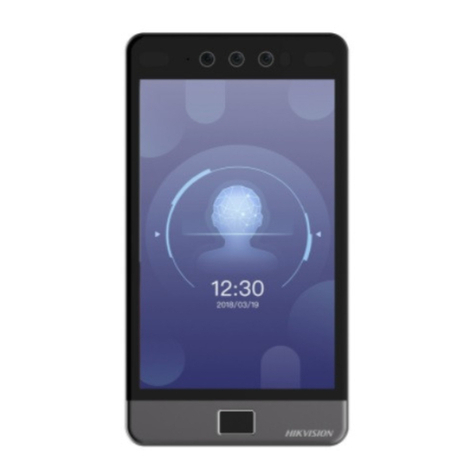
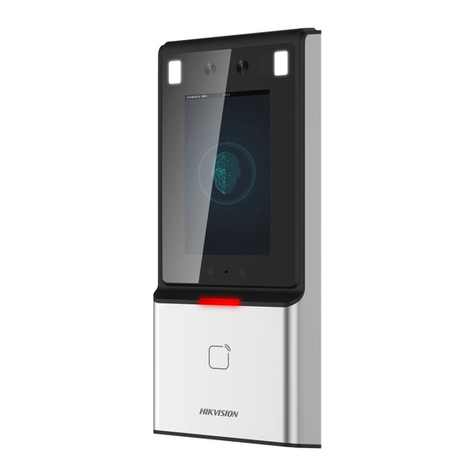
DS-K5672 Series Face Recognition Terminal
Quick Start Guide
©2020 Hangzhou Hikvision Digital Technology Co., Ltd. All rights reserved.
About this Manual
The Manual includes instrucons for using and managing the Product. Pictures, charts, images
and all other informaon hereinaer are for descripon and explanaon only. The informaon
contained in the Manual is subject to change, without noce, due to firmware updates or other
reasons. Please find the latest version of this Manual at the Hikvision website
(hps://www.hikvision.com/).
Please use this Manual with the guidance and assistance of professionals trained in supporng
the Product.
Trademarks
and other Hikvision's trademarks and logos are the properes of Hikvision in various
jurisdicons.
Other trademarks and logos menoned are the properes of their respecve owners.
Disclaimer
TO THE MAXIMUM EXTENT PERMITTED BY APPLICABLE LAW, THIS MANUAL AND THE PRODUCT
DESCRIBED, WITH ITS HARDWARE, SOFTWARE AND FIRMWARE, ARE PROVIDED “AS IS” AND
“WITH ALL FAULTS AND ERRORS”. HIKVISION MAKES NO WARRANTIES, EXPRESS OR IMPLIED,
INCLUDING WITHOUT LIMITATION, MERCHANTABILITY, SATISFACTORY QUALITY, OR FITNESS
FOR A PARTICULAR PURPOSE. THE USE OF THE PRODUCT BY YOU IS AT YOUR OWN RISK. IN NO
EVENT WILL HIKVISION BE LIABLE TO YOU FOR ANY SPECIAL, CONSEQUENTIAL, INCIDENTAL, OR
INDIRECT DAMAGES, INCLUDING, AMONG OTHERS, DAMAGES FOR LOSS OF BUSINESS PROFITS,
BUSINESS INTERRUPTION, OR LOSS OF DATA, CORRUPTION OF SYSTEMS, OR LOSS OF
DOCUMENTATION, WHETHER BASED ON BREACH OF CONTRACT, TORT (INCLUDING
NEGLIGENCE), PRODUCT LIABILITY, OR OTHERWISE, IN CONNECTION WITH THE USE OF THE
PRODUCT, EVEN IF HIKVISION HAS BEEN ADVISED OF THE POSSIBILITY OF SUCH DAMAGES OR
LOSS.
YOU ACKNOWLEDGE THAT THE NATURE OF INTERNET PROVIDES FOR INHERENT SECURITY
RISKS, AND HIKVISION SHALL NOT TAKE ANY RESPONSIBILITIES FOR ABNORMAL OPERATION,
PRIVACY LEAKAGE OR OTHER DAMAGES RESULTING FROM CYBER-ATTACK, HACKER ATTACK,
VIRUS INFECTION, OR OTHER INTERNET SECURITY RISKS; HOWEVER, HIKVISION WILL PROVIDE
TIMELY TECHNICAL SUPPORT IF REQUIRED.
YOU AGREE TO USE THIS PRODUCT IN COMPLIANCE WITH ALL APPLICABLE LAWS, AND YOU ARE
SOLELY RESPONSIBLE FOR ENSURING THAT YOUR USE CONFORMS TO THE APPLICABLE LAW.
ESPECIALLY, YOU ARE RESPONSIBLE, FOR USING THIS PRODUCT IN A MANNER THAT DOES NOT
INFRINGE ON THE RIGHTS OF THIRD PARTIES, INCLUDING WITHOUT LIMITATION, RIGHTS OF
PUBLICITY, INTELLECTUAL PROPERTY RIGHTS, OR DATA PROTECTION AND OTHER PRIVACY
RIGHTS. YOU SHALL NOT USE THIS PRODUCT FOR ANY PROHIBITED END-USES, INCLUDING THE
DEVELOPMENT OR PRODUCTION OF WEAPONS OF MASS DESTRUCTION, THE DEVELOPMENT OR
PRODUCTION OF CHEMICAL OR BIOLOGICAL WEAPONS, ANY ACTIVITIES IN THE CONTEXT
RELATED TO ANY NUCLEAR EXPLOSIVE OR UNSAFE NUCLEAR FUEL-CYCLE, OR IN SUPPORT OF
HUMAN RIGHTS ABUSES.
IN THE EVENT OF ANY CONFLICTS BETWEEN THIS MANUAL AND THE APPLICABLE LAW, THE
LATER PREVAILS.
Data Protecon
During the use of device, personal data will be collected, stored and processed. To protect data,
the development of Hikvision devices incorporates privacy by design principles. For example,
for device with facial recognion features, biometrics data is stored in your device with
encrypon method; for fingerprint device, only fingerprint template will be saved, which is
impossible to reconstruct a fingerprint image.
As data controller, you are advised to collect, store, process and transfer data in accordance
with the applicable data protecon laws and regulaons, including without limitaon,
conducng security controls to safeguard personal data, such as, implemenng reasonable
administrave and physical security controls, conduct periodic reviews and assessments of the
effecveness of your security controls.
Scan the QR code to get the user manual for detailed informaon.
UD17938B-B
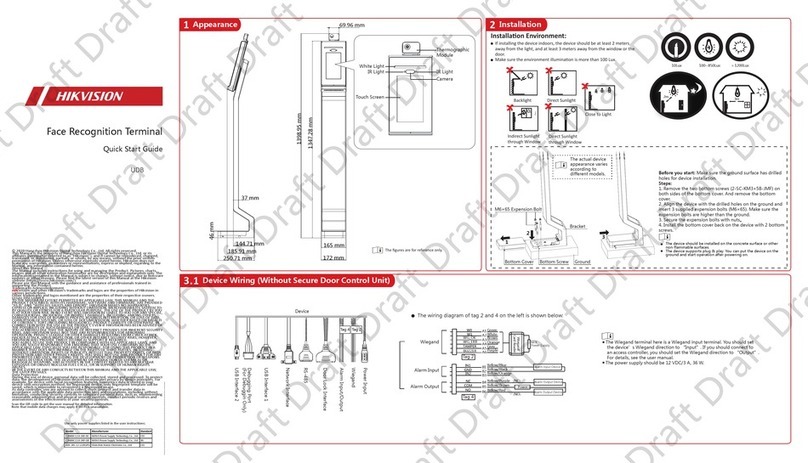
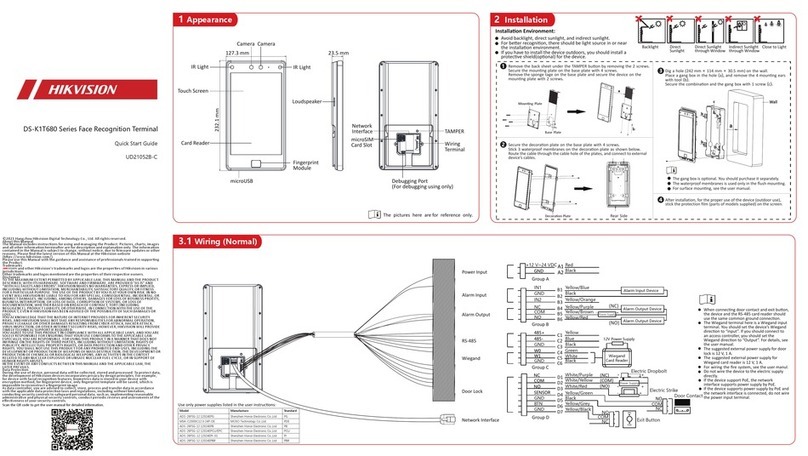
3.1 Wiring (Normal)
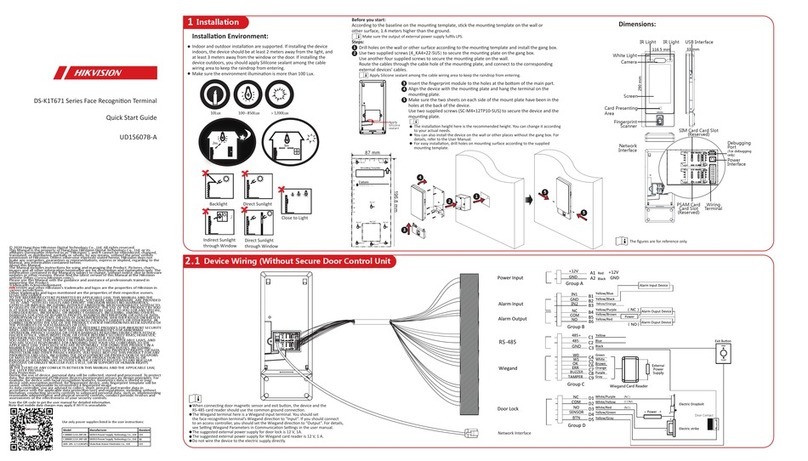
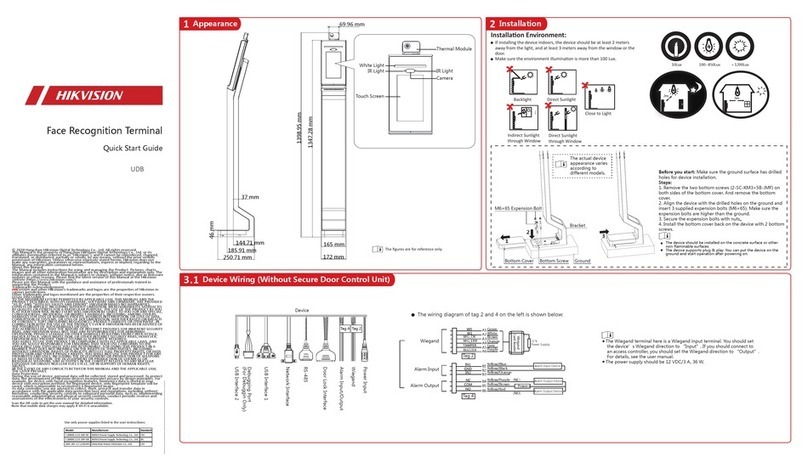
1 Installation
Use only power supplies listed in the user instrucons:
Model Manufacturer Standard
ADS-26FSG-12 12024EPG
MSA-C2000IC12.0-24P-DE
ADS-26FSG-12 12024EPB
MOSO Technology Co., Ltd
Shenzhen Honor Electronic Co., Ltd PB
PDE
103.36 mm 100 mm
286.3 mm
2 Appearance
microUSB Interface
(Use microUSB to USB cable
to connect with USB interface)
Camera Camera
IR Light
IR Light
Screen
Card Presenng
Area
The figures are for reference only.
3
4
67 mm
67 mm
80 mm
1
2
Backlight Direct
Sunlight Direct Sunlight
through Window Indirect Sunlight
through Window Close to Light
Installaon Environment:
Indoor and outdoor installaon are supported. if installing the device
indoors, the device should be at least 2 meters away from the light,
and at least 3 meters away from the window or the door. If installing
the device outdoors, you should apply Silicone sealant among the
cable wiring area to keep the raindrop from entering.
Width of Reinforcing Board > 125 mm
Use 4 screws (M3 or
M4),Secured by flange
nuts
Press 8 rivet water-
proof nut
Model: BS-M6-1
15 mm(Suggested)
4- 12 mm Soldering
Hole Solder the four
holes, polish the outer
surface, and implement
with wire drawing.
Reinforcing Board
Inner Surface
of Turnsilte
The distance between the turnsle
and the board edge should be no
longer than 10 mm 25 mm(Suggested)
Before you start:
1. Use 4 screws (M3 or M4),
secured by flange nuts, to
install the reinforcing board
on the inner surface of the
turnsle.
The distance between the
turnsle and the edge should be
no longer than 10 mm.
2. Drill holes on the
turnsle’s inner surface
according to the figure
displayed below. And install
water-proof nut.
Solder aer pressing rivets
to avoid water from entering.
Rotate to open the lower cover.
Route the cables through the cable hole on the turnsle.
Align the holes on the base with those on the turnsle and place the
device with bracket on the turnsle.
Use 4 screws to secure the bracket and the turnsle.
1
2
Lower Cover
Screw
Base
Cover the lower cover on the base and rotate to secure.
3
4Loosen the screws inside and adjust the device elevaon.
Aer adjustment, secure the screws and install the upper cover.
Turnsle
The default elevaon angle is 15°. The adjustable elevaon angle is from 0
to 15°.
Upper Cover
Adjustable
Elevaon
Screws
Shenzhen Honor Electronic Co., Ltd
PG
PCU
PI
PBR
ADS-26FSG-12 12024EPCU/EPC
ADS-26FSG-12 12024EP-01
ADS-26FSG-12 12024EPBR
GND Black
Green
White
Yellow
Blue
Black
White/Purple
White/Yellow
Yellow/Green
White/Red
Black
Yellow/Grey
GND
GND
Yellow/Black
GND
BTN
12V Power Supply
Wiegand
Card Reader
Group B
Group D
IN2
GND
IN1
Red
Black
NO
COM
NC
COM
NC
NO
COM
Electric Dropbolt
Power Supply
Electric Strike
Exit Button
Power Input
Alarm Input
Alarm Output
RS-485
Wiegand
Door Lock
Network Interface
When connecng door contact and exit buon,
the device and the RS-485 card reader should
use the same common ground connecon.
The Wiegand terminal here is a Wiegand input
terminal. You should set the device’s Wiegand
direcon to “input”. If you should connect to
an access controller, you should set the
Wiegand direcon to “Output”. For details, see
the user manual.
The suggested external power supply for door
lock is 12 V, 1 A.
The suggested external power supply for
Wiegand card reader is 12 V, 1 A.
For wiring the fire system, see the user manul.
Do not wire the device to the electric supply
directly.
B1
B2
B3
B4
B5
B6
C1
C2
C3
C4
C5
C6
D1
D2
D3
D4
D5
D6
D7
(NC)
(COM)
(NO)
NC
NO
Yellow/Orange
Black
Yellow/Blue
Yellow/Red
Yellow/Brown
Yellow/Purple
Door Contact
5 Add Face Picture
Correct Tilt Raise
Side Bow
Tips When Collecng/Comparing Face Picture
Expression
Keep your expression naturally when collecng or comparing
face pictures, just like the expression in the picture on the right.
Posture
In order to get a good quality and accurate face picture, posion your face looking at
the camera when collecng or comparing face picture.
Size
Make sure your face is in the middle of the collecng window.
Do not wear hat, sunglasses, or other accessories that can affect
the facial recognion funcon.
Do not make your hair cover your eyes, ears, etc. and heavy
makeup is not allowed.
Correct Too FarToo Close
Posions When Collecng/Comparing Face Picture
Recommended Height:
1.43 m to 1.90 m
Too High
Too Low
Too Far
Too Close
0.5 m 1.2 m
0.5 m 0.5 m
1.4 m 1.4 m
1.4 m 1.4 m
Regulatory Information
FCC Informaon
Please take aenon that changes or modificaon not expressly approved by the party
responsible for compliance could void the user’s authority to operate the equipment.
FCC compliance: This equipment has been tested and found to comply with the limits for a
Class B digital device, pursuant to part 15 of the FCC Rules. These limits are designed to
provide reasonable protecon against harmful interference in a residenal installaon. This
equipment generates, uses and can radiate radio frequency energy and, if not installed and
used in accordance with the instrucons, may cause harmful interference to radio
communicaons. However, there is no guarantee that interference will not occur in a
parcular installaon. If this equipment does cause harmful interference to radio or
television recepon, which can be determined by turning the equipment off and on, the user
is encouraged to try to correct the interference by one or more of the following measures:
—Reorient or relocate the receiving antenna.
—Increase the separaon between the equipment and receiver.
—Connect the equipment into an outlet on a circuit different from that to which the receiver
is connected.
—Consult the dealer or an experienced radio/TV technician for help.
This equipment should be installed and operated with a minimum distance 20cm between
the radiator and your body.
FCC Condions
This device complies with part 15 of the FCC Rules. Operaon is subject to the following two
condions:
1. This device may not cause harmful interference.
2. This device must accept any interference received, including interference that may cause
undesired operaon.
2006/66/EC (baery direcve): This product contains a baery that cannot
be disposed of as unsorted municipal waste in the European Union. See
the product documentaon for specific baery informaon. The baery is
marked with this symbol, which may include leering to indicate cadmium
(Cd), lead (Pb), or mercury (Hg). For proper recycling, return the baery to
your supplier or to a designated collecon point. For more informaon see:
www.recyclethis.info
2012/19/EU (WEEE direcve): Products marked with this symbol cannot be
disposed of as unsorted municipal waste in the European Union. For
proper recycling, return this product to your local supplier upon the
purchase of equivalent new equipment, or dispose of it at designated
collecon points. For more informaon see: www.recyclethis.info
This product and - if applicable - the supplied accessories too are marked
with "CE" and comply therefore with the applicable harmonized European
standards listed under the RE Direcve 2014/53/EU, the EMC Direcve
2014/30/EU, the RoHS Direcve 2011/65/EU.
Warning
In the use of the product, you must be in strict compliance with the electrical safety
regulaons
of the naon and region.
CAUTION: To reduce the risk of fire, replace only with the same type and rang of fuse.
CAUTION: This equipment is for use only with Hikvision’s bracket. Use with other (carts,
stands, or carriers) may result in instability causing injury.
To prevent possible hearing damage, do not listen at high volume levels for long periods.
Please use the power adapter, which is provided by normal company. The power
consumpon cannot be less than the required value.
Do not connect several devices to one power adapter as adapter overload may cause over-
heat or fire hazard.
Please make sure that the power has been disconnected before you wire, install or
dismantle the device.
When the product is installed on wall or ceiling, the device shall be firmly fixed.
If smoke, odors or noise rise from the device, turn off the power at once and unplug the
power cable, and then please contact the service center.
If the product does not work properly, please contact your dealer or the nearest service
center. Never aempt to disassemble the device yourself. (We shall not assume any
responsibility for problems caused by unauthorized repair or maintenance.)
Cauon
+ idenfies the posive terminal(s) of equipment which is used with, or generates
direct current. + idenfies the negave terminal(s) of equipment which is used with,
or generates direct current.
No naked flame sources, such as lighted candles, should be placed on the equipment.
The USB port of the equipment is used for connecng to a USB flash drive only.
The serial port of the equipment is used for debugging only.
Burned fingers when handling . Wait one-half hour aer the fingerprint sensor metal
switching off before handling the parts.
Install the equipment according to the instrucons in this manual.
To prevent injury, this equipment must be securely aached to the floor/wall in
accordance with the installaon instrucons.
Do not drop the device or subject it to physical shock, and do not expose it to high
electromagnesm radiaon. Avoid the equipment installaon on vibraons surface or
places subject to shock (ignorance can cause equipment damage).
Do not place the device in extremely hot (refer to the specificaon of the device for
the detailed operang temperature), cold, dusty or damp locaons, and do not expose
it to high electromagnec radiaon.
The device cover for indoor use shall be kept from rain and moisture.
Exposing the equipment to direct sun light, low venlaon or heat source such as
heater or radiator is forbidden (ignorance can cause fire danger).
Do not aim the device at the sun or extra bright places. A blooming or smear may
occur otherwise (which is not a malfuncon however), and affecng the endurance of
sensor at the same me.
Please use the provided glove when open up the device cover, avoid direct contact
with the device cover, because the acidic sweat of the fingers may erode the surface
coang of the device cover.
Please use a so and dry cloth when clean inside and outside surfaces of the device
cover, do not use alkaline detergents.
Please keep all wrappers aer unpack them for future use. In case of any failure
occurred, you need to return the device to the factory with the original wrapper.
Transportaon without the original wrapper may result in damage on the device and
lead to addional costs.
Improper use or replacement of the baery may result in hazard of explosion. Replace
with the
same or equivalent type only. Dispose of used baeries according to the instrucons
provided by the baery manufacturer.
Biometric recognion products are not completely applicable to an-spoofing
environments. If you require a higher security level, use mulple authencaon
modes.
Please make sure that the biometric recognion accuracy will be affected by the
collected pictures' quality and the light in the environment, which cannot be
completely correct.
Power on and wire the network cable aer installaon. You should
acvate the device before the first login.
If the device is not acvated yet, it will enter the Acvate Device
page aer powering on.
Step:
1. Create a password and confirm the password.
2. Tap Acvate to acvate the device.
STRONG PASSWORD RECOMMENDED-
We highly recommend you create a strong password of your
own choosing(using a minimum of 8 characters, including
upper case leers, lower case leers, numbers, and special
characters) in order to increase the security of your product.
And we recommend you reset your password regularly,
especially in the high security system, reseng the password
monthly or weekly can beer protect your product.
4 Quick Operation
Set Applicaon Mode
Aer acvaon, you should select an applicaon mode.
If you install the device indoors near the window or
the face recognion funcon is note working well,
select Others.
Set Administrator
Steps:
1. Enter the administrator’s name and tap Next.
2. Select a credenal to add. You can select face, fingerprint,
or card.
3. Tap OK.
Set Language
Select a language from the drop-down list.
3.2 Device Wiring (With Secure Door Control Unit
The secure door control unit should connect to an external power supply separately. The suggested external
power supply is 12 V, 0.5 A.
Secure Door Control Unit
NC
COM
NO
C1
C2
C3
Face Recognion Terminal
Secure Door
Control Unit
Wiring Terminal
Power Input
Sensor Input
Exit Buon
Lock Output
SENSOR
BUTTON
Black
Green/Brown
Green/Black
Black
Black
White/Purple
White/Black
White/Red
Red
B1
B2
B3
B4
(NC)
Power
(NO)
Door Contact
Exit Buon
Electric
Dropbolt
Electric
Strike
Black
Yellow
Blue
For other acvaon methods, see the device user manual.
admin or minda are not supported for the acvaon password.
GND
GND
GND
+12 V A1
A2 GND
+12 V
C1
C2
C3
485+
485-
GND
RS-485
User other authencaon methods if the device is affected by the
light or other items.
1:N Matching: The device will compare the captured face picture
with the ones in the database.
1:1 Matching: The device will compare the captured face picture with
the user linked face picture.
Biometric recognion products are not completely applicable to
an-spoofing environments. If you require a higher security
level, use mulple authencaon modes.
1. Use finger to hold the screen surface for 3 s and slide to right/le
and enter the acvaon password to enter the Home page.
2. Enter the User Management page, tap + to enter the Add User
page.
3. Set the user parameters according to actual needs.
4. Tap Face and add the face informaon according to the
instrucons.
You can view the captured picture on the screen, Make sure the face
picture is in good quality and size.
For details about the ps and posions when collecng or
comparing the face picture, see the contents on the right.
5. If the picture is in good condion, tap the .
Or tap the to take another face picture.
6. Tap the save icon to save the sengs.
Go back to the inial page to start authencaon.
For other authencaon methods, see the device user manual.
Other manuals for DS-K5672MW-Z

1

This manual suits for next models

1

Other HIK VISION Touch Terminal manuals

HIK VISION DS-K1T8003 Series User manual

HIK VISION

HIK VISION DS-K1T8003 Series User manual

HIK VISION Ultra Series User manual

HIK VISION

HIK VISION Ultra Series User manual

HIK VISION DS-K1T690 Series User manual

HIK VISION

HIK VISION DS-K1T690 Series User manual

HIK VISION DS-K1T341B Series User manual

HIK VISION

HIK VISION DS-K1T341B Series User manual

HIK VISION DS-K11T341BMI-T User manual

HIK VISION

HIK VISION DS-K11T341BMI-T User manual

HIK VISION DS-K1T343 Series User manual

HIK VISION

HIK VISION DS-K1T343 Series User manual

HIK VISION DS-K1A801MF User manual

HIK VISION

HIK VISION DS-K1A801MF User manual

HIK VISION DS-K5604A-3XF/V User manual

HIK VISION

HIK VISION DS-K5604A-3XF/V User manual

HIK VISION DS-K1T802E User manual

HIK VISION

HIK VISION DS-K1T802E User manual

HIK VISION DS-K1T321 Series User manual

HIK VISION

HIK VISION DS-K1T321 Series User manual

HIK VISION DS-K5032-D User manual

HIK VISION

HIK VISION DS-K5032-D User manual

HIK VISION DS-TPE100 User manual

HIK VISION

HIK VISION DS-TPE100 User manual

HIK VISION DS-K1TA70 Series User manual

HIK VISION

HIK VISION DS-K1TA70 Series User manual

HIK VISION DS-KH9510-WTE1 User manual

HIK VISION

HIK VISION DS-KH9510-WTE1 User manual

HIK VISION DS-K1T642 Series User manual

HIK VISION

HIK VISION DS-K1T642 Series User manual

HIK VISION DS-K1T606 series User manual

HIK VISION

HIK VISION DS-K1T606 series User manual

HIK VISION DS-K1T805MBWX User manual

HIK VISION

HIK VISION DS-K1T805MBWX User manual

HIK VISION DS-K1T680DG User manual

HIK VISION

HIK VISION DS-K1T680DG User manual

HIK VISION DS-K1T604M User manual

HIK VISION

HIK VISION DS-K1T604M User manual

HIK VISION DS-K5032 Series User manual

HIK VISION

HIK VISION DS-K5032 Series User manual

HIK VISION DS-K1T607 Series User manual

HIK VISION

HIK VISION DS-K1T607 Series User manual

HIK VISION DS-K1T342 Series User manual

HIK VISION

HIK VISION DS-K1T342 Series User manual

HIK VISION DS-K1A8503 User manual

HIK VISION

HIK VISION DS-K1A8503 User manual

HIK VISION DS-MDH005-B User manual

HIK VISION

HIK VISION DS-MDH005-B User manual

Popular Touch Terminal manuals by other brands

Motorola IRRInet-XL owner's manual

Motorola

Motorola IRRInet-XL owner's manual

steute Ex AD 115 FK Mounting and wiring instructions

steute

steute Ex AD 115 FK Mounting and wiring instructions

Wyse 3315SE reference guide

Wyse

Wyse 3315SE reference guide

Infinite Peripherals Mobi 100 quick start guide

Infinite Peripherals

Infinite Peripherals Mobi 100 quick start guide

Casio QT-6600 Reference manual

Casio

Casio QT-6600 Reference manual

Ericsson W25 Quick installation guide

Ericsson

Ericsson W25 Quick installation guide

3nStar PTA0010 user manual

3nStar

3nStar PTA0010 user manual

Symbol MC70 user manual

Symbol

Symbol MC70 user manual

FingerTec Face ID 6 quick start guide

FingerTec

FingerTec Face ID 6 quick start guide

Allen-Bradley 1797-TB3S installation instructions

Allen-Bradley

Allen-Bradley 1797-TB3S installation instructions

Omron PRT1-COM Operation manual

Omron

Omron PRT1-COM Operation manual

Huawei ETS2052 user guide

Huawei

Huawei ETS2052 user guide

Festo CPV E ASI-4E4A Series Brief description

Festo

Festo CPV E ASI-4E4A Series Brief description

Rockwell Automation Allen-Bradley DeviceNet 193-DNCT user manual

Rockwell Automation

Rockwell Automation Allen-Bradley DeviceNet 193-DNCT user manual

Festo CPX Assembly instructions

Festo

Festo CPX Assembly instructions

ICS Auto Sentry-eXP maintenance

ICS

ICS Auto Sentry-eXP maintenance

HIMA HIMatrix H 7033 manual

HIMA

HIMA HIMatrix H 7033 manual

Amano OPUS-7000 Series Operation manual

Amano

Amano OPUS-7000 Series Operation manual

manuals.online logo
manuals.online logoBrands
  • About & Mission
  • Contact us
  • Privacy Policy
  • Terms and Conditions

Copyright 2025 Manuals.Online. All Rights Reserved.