manuals.online logo
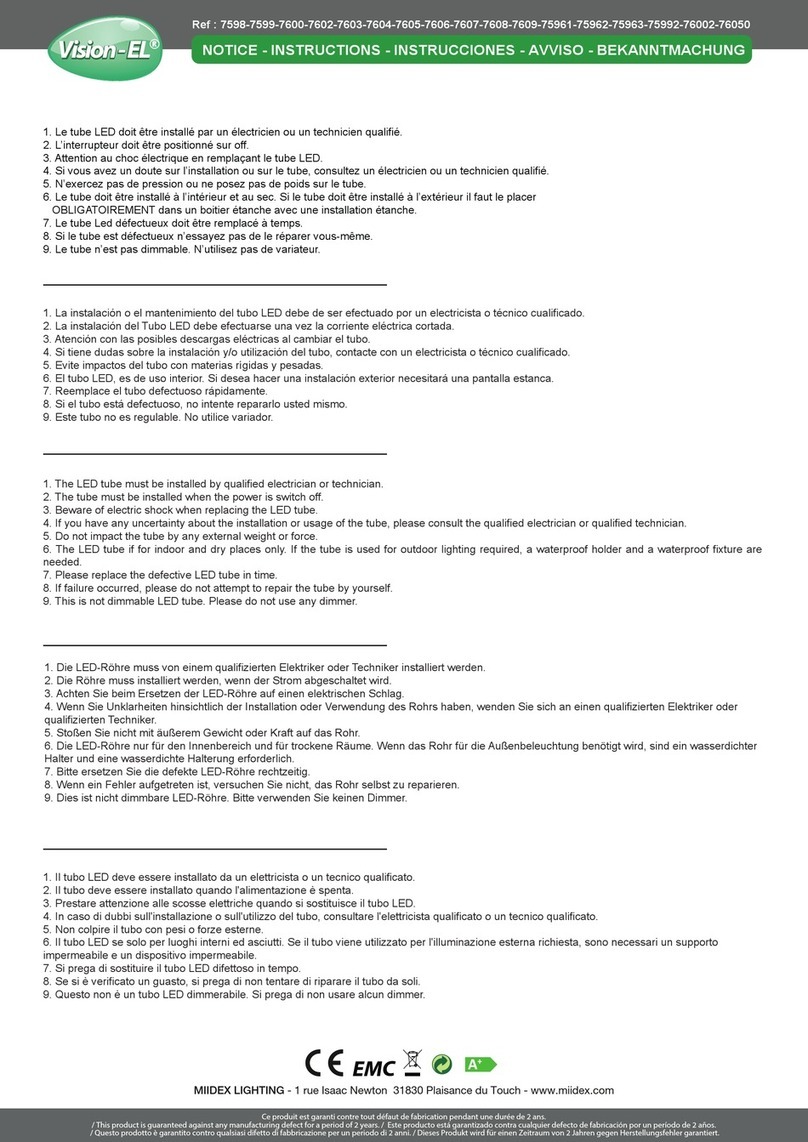
Brands
  1. Home
  2. •
  3. Brands
  4. •
  5. MIIDEX LIGHTING
  6. •
  7. Lighting Equipment
  8. •
  9. MIIDEX LIGHTING Vision-EL 7648 Operation and maintenance manual

MIIDEX LIGHTING Vision-EL 7648 Operation and maintenance manual

- Maintenez appuyer sur « marche » pendant 2 secondes pour avoir
l’éclairage blanc
- Règlez la couleur souhaitée en glissant votre doigt sur l’anneau sensitif
- Règlez la luminosité en glissant votre doigt sur l’arc sensitif
- Pour contrôler l’ensemble des 4 zones, appuyez d’abord sur « Tout Allumer »
Appuyez sur la touche « M » pour choisir le programme :
Programme 1 : rouge, vert, bleu et blanc
Programme 2 : rouge, vert, bleu, blanc, jaune, violet
Progamme 3 : DISCO clignotement aléatoire des couleurs
Programme 4 : rouge clignote trois fois et varie de 0 à 100%
Programme 5 : vert clignote trois fois et varie de 0 à 100%
Programme 6 : bleu clignote trois fois et varie de 0 à 100%
Programme 7 : changement aléatoire des couleurs avec
clignotement groupé
Programme 8 : enchainement fondu des couleurs
Programme 9 : blanc clignote
Press“M”key to select a program :
Program 1 : red, green, blue and white
Program 2 : red, green, blue, yellow, purple
Progam 3 : DISCO, random color ickering
Program 4 : red ickering 3 times and alter from 0 to 100%
Program: 5 green ickering 3 times and alter from 0 to 100%
Program 6: blue ickering 3 times and alter from 0 to 100%
Program 7: Random color change with ickering
Program 8: In chain color changing
Program 9: White ickering
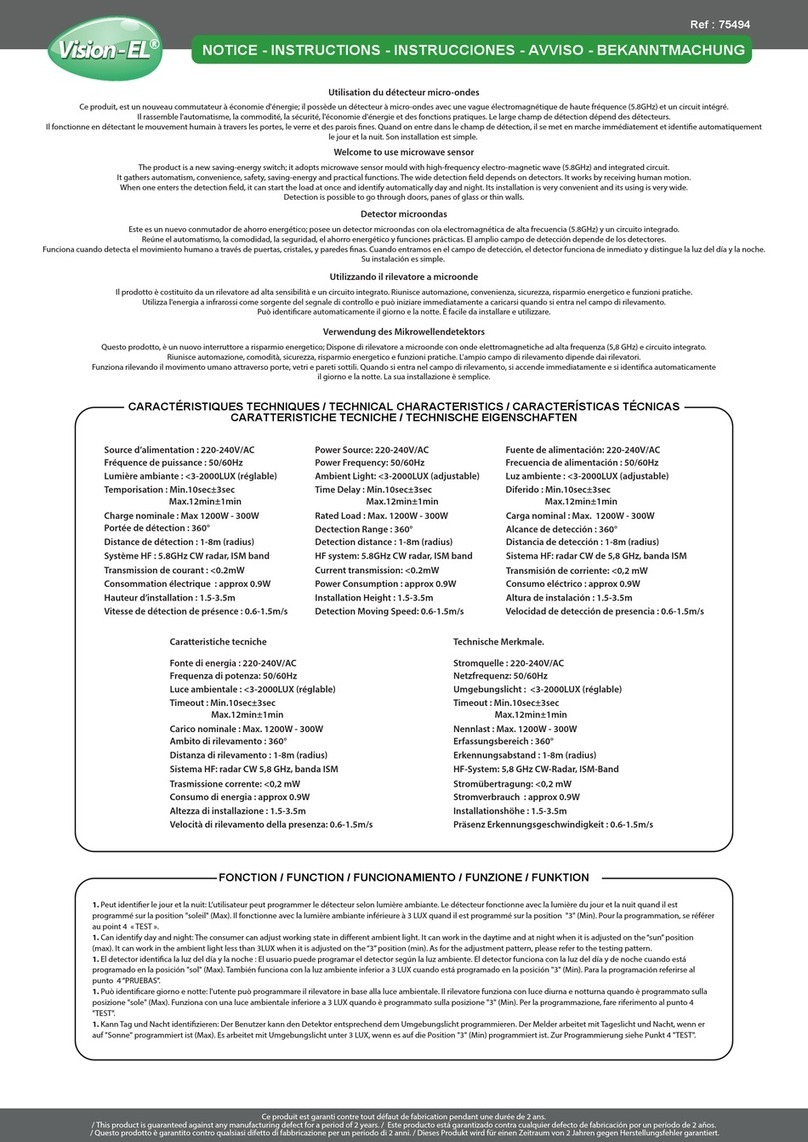
La télécommande fonctionne avec des piles AAA/LR03 (piles non fournies)
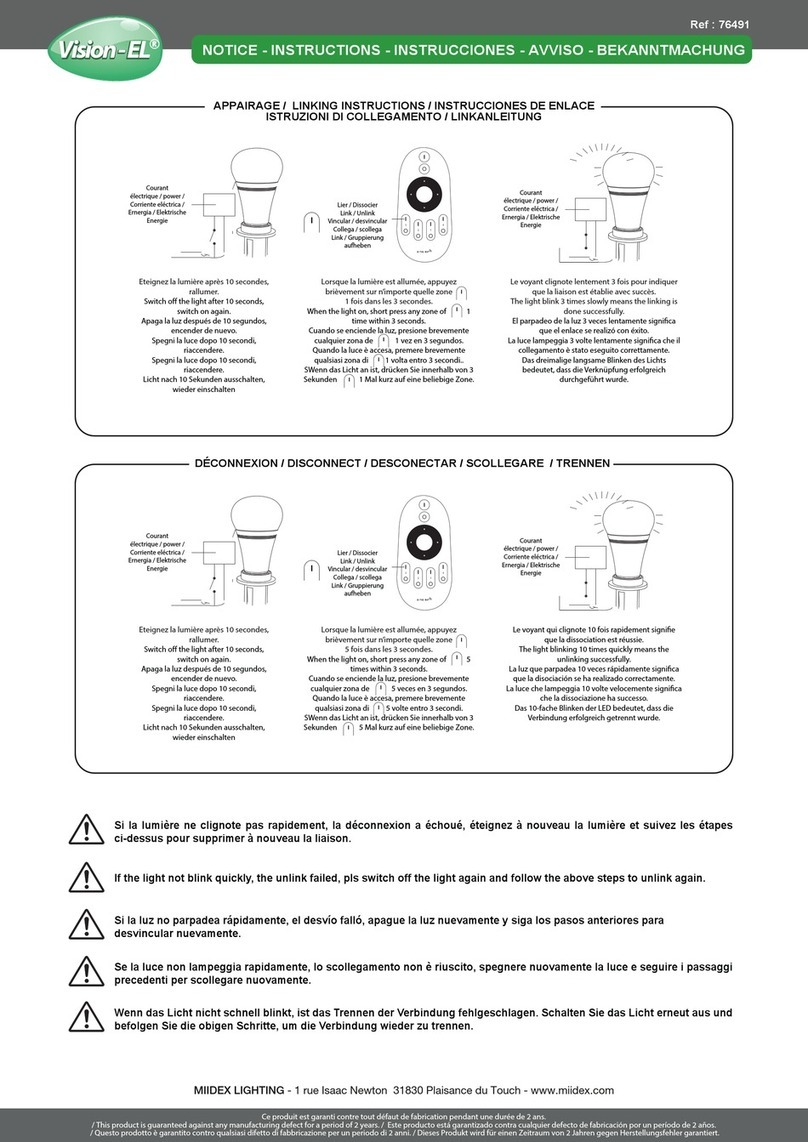
Associer un dowlight à une télécommande :
- Choisissez un canal de 1 à 4.
- Débrancher électriquement le bandeau que vous voulez associer.
- Rebrancher le bandeau et avant trois secondes maintenez appuyé le bouton «on» de la zone choisie.
- Quand l’association est correcte, le bandeau clignotera trois fois.
How to connect a downlight to the remote:
- Choose a cannel between 1 and 4
- Disconnect electrically the downlight you want to associate.
- Reconnect the downlight and before 3 seconds press once “ON”key of the chosen zone.
- Once the connection is done the downlight will ick 3 times.
Dissocier un downlight d’une zone :
- Vérier sur la télécommande quelle zone est associée à la télécommande.
- Débrancher électriquement le bandeau.
- Rebrancher le bandeau et avant 3 secondes, maintenez appuyé le bouton «on» de la zone choisie.
- Quand la dissociation est correcte, le bandeau clignote rapidement 6 fois.
How to dissociate a downlight from a zone
- Check with the remote which zone is connected to the remote
- Disconnect electrically the downlight
- Reconnect the downlight and before 3 seconds press 5 times“ON”key of the chosen zone.
-Once the dissociation is done downlight will ick 6 times
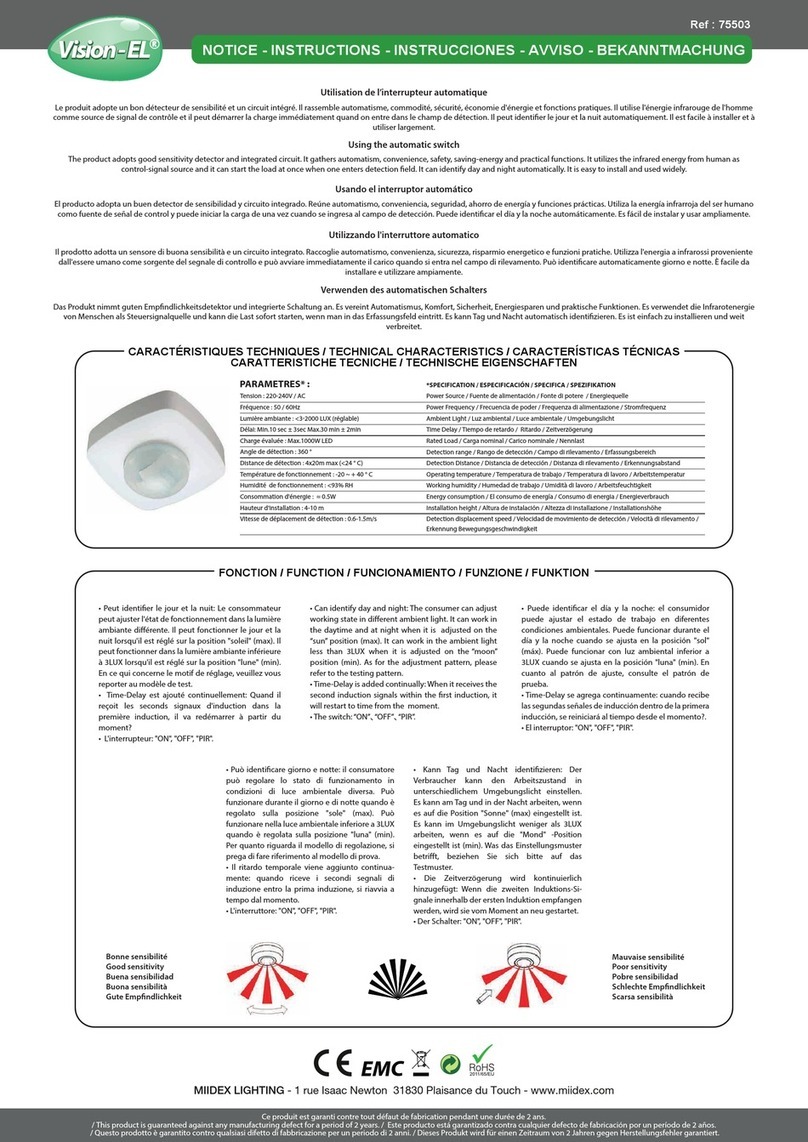
Commande multiple :
Vous pouvez associer plusieurs appareils selon une combinaison que vous choisissez. Un exemple est reproduit dans le schéma ci-dessous.
Control Multiple
You can connect several devices according
to the combination you chose.
See the example below.
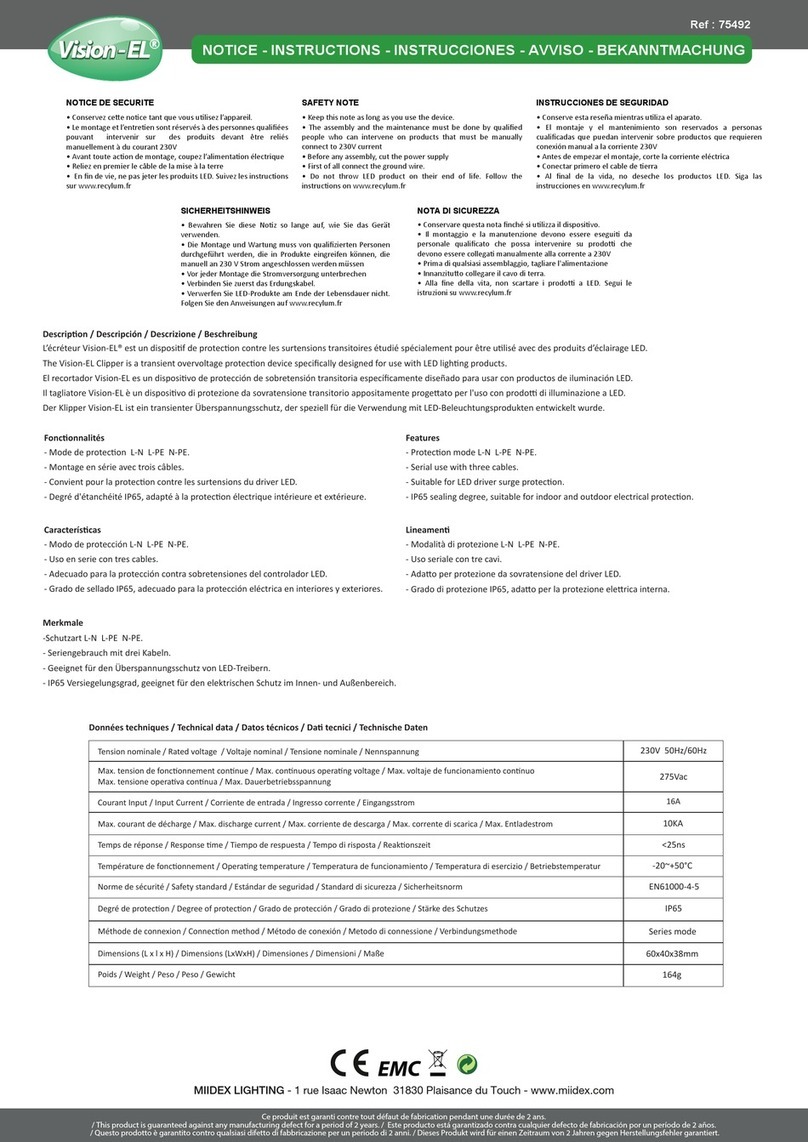
Ce luminaire est blanc + RGB. IL peut être contôlé par la télécommande radiofréquence.
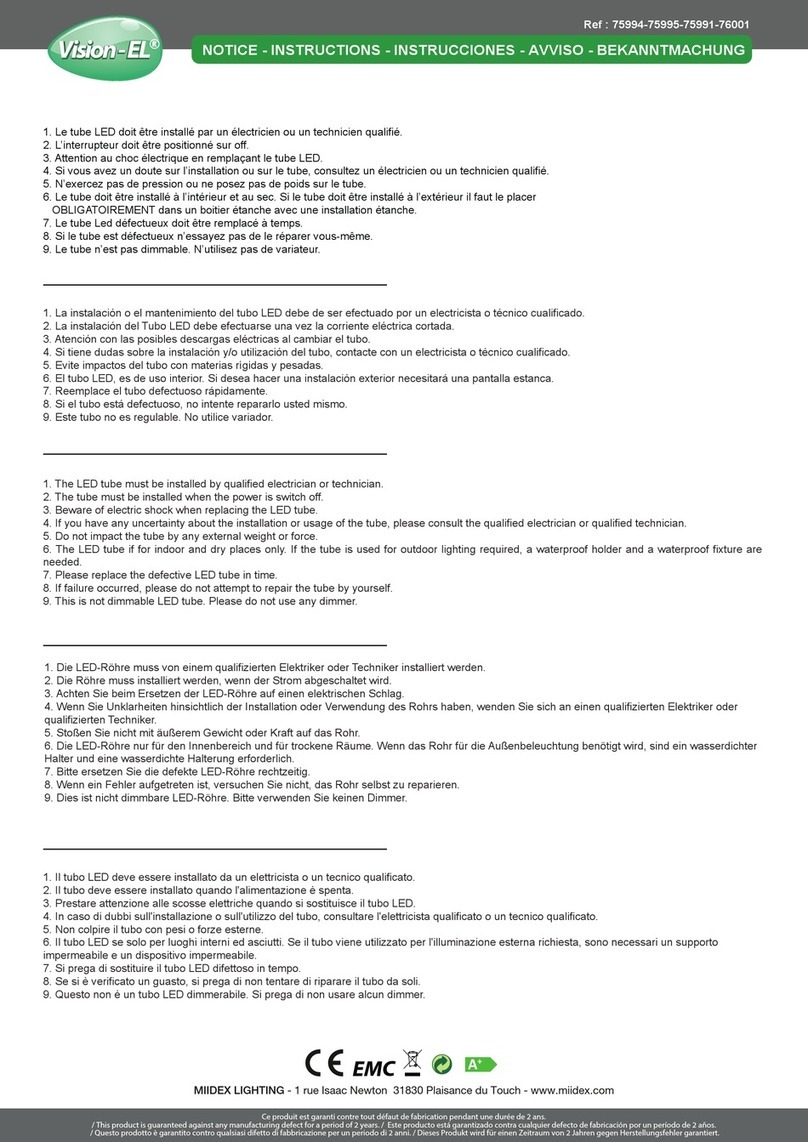
1. SECURITE
- Ne connectez cet appareil qu’une fois l’alimentation électrique coupée
- Manipulez l’appareil uniquement sur les parties en acrylique : ne touchez pas les parties métalliques qui pourraient être chaudes ou coupantes.
- L’installation ou l’intervention sur ce downlight sont réservées à des professionnels.
- Ne pas débrancher l’alimentation côté luminaire quand l’alimentation est sous tension.
- Le câble extérieur souple de ce luminaire ne peut être remplacé ; si le câble est endommagé, le luminaire doit être détruit.
- La source lumineuse de ce luminaire n’est pas remplaçable ; lorsque la source lumineuse atteint sa n de vie, le luminaire entier doit être remplacé.
- Le bloc de jonction n’est pas inclus ; l’installation peut exiger l’avis d’une personne qualiée.
2. INSTALLATION
2.1 Piles
- Tenez la télécommande et enlevez par un mouvement vers le bas, le couvercle du compartiment des piles
- Installez deux piles AAA LR03 comme montré ci-dessous en respectant les polarités
- Ne touchez pas l’anneau sensitif pendant l’installation
- Refermez le couvercle
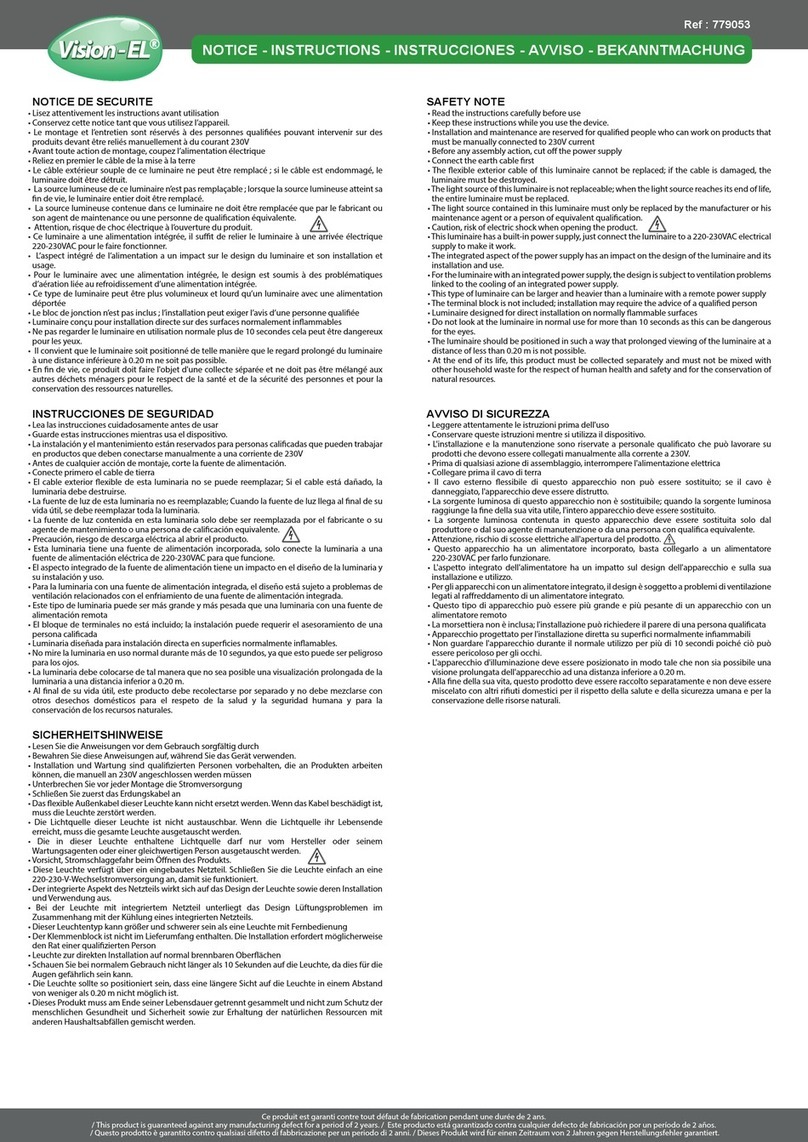
2.2 Downlight
- Ce produit est destiné à être posé en encastré dans un faux plafond
- Percez un trou de diamètre 125 à 140mm comme indiqué dans la gure 1
- Connectez le downlight conformément au dessin de la gure 2 en plaçant l’alimentation dans le plafond
- Assurez vous que les ressorts sont bien positionnés sur le plafond et maintiennent correctement le downlight
- Ne pas placer le dowlight sur un support vibrant
- Assurez vous préalablement à la pose de la solidité durable du support du faux plafond
- En fonctionnement, le luminaire produit de la chaleur. Assurez vous qu’aucun matériau ne soit positionné au contact deu luminaire an qu’elle se dissipe
This lamp is an RGB + White product. IT can be controlled by the Radiofrequency remote control or by WI-FI ( iOS or Android)
1. SECURITY
- Connect this device only once the power supply is o.
- Manipulate the device only on acrylic parts: do not touch the metallic parts which could be hot or sharp.
- The installation or the intervention on this downlight is reserved for professionals.
- Do not disconnect the power supply on the luminaire side when the power supply is on.
- The exible outer cable of this lamp can not be replaced; if the cable is damaged, the lamp must be destroyed.
- The light source of this lamp is not replaceable ; when the light source reaches its end of life, the entire lamp must be replaced.
- The terminal block isn’t included ; the installation may requiere the advice of a qualied person.
2. INSTALLATION
2.1 Batteries
- Hold the remote control and remove by a downward movement the lid of the batteries compartment.
- Install two AAA LR03 batteries as shown below respecting polarities.
- Do not touch the color control sensory ring during the installation
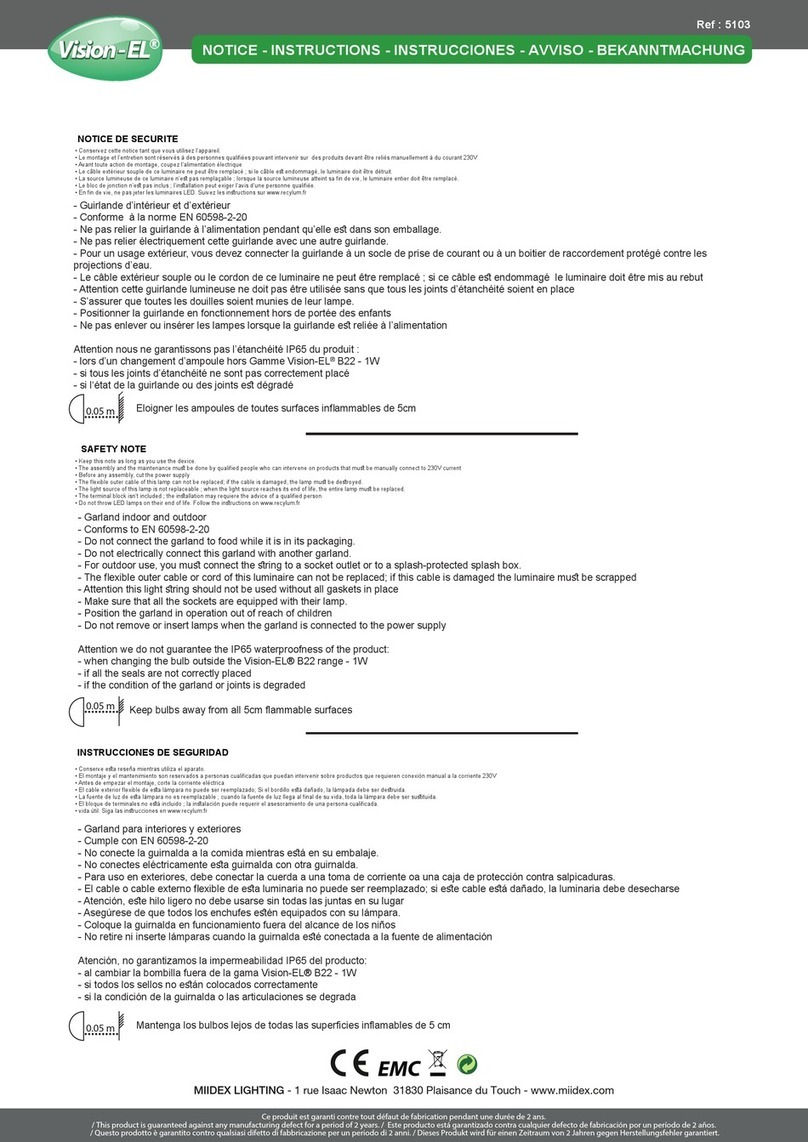
- Close the Lid
2.2 Downlight
- This product is intended to be put embeded in a dropped-ceiling
- Drill a hole from diameter 125 to 140 mm as indicated in pic.1
- Connect this downlight according to the pic. 2, placing the supply in the ceiling.
- Be sure that springs are positioned well on the ceiling and maintain correctly the downlight
- Do not place the downlight on a vibrating support
- Before the installation make sure of the long-lasting solidity of the dropped ceiling
- In functioning, the lamp produces some heat. Make sure that no materials are in contact with the lamp so the heat dissipates
- Hold down "ON" key during 2 seconds to get the white light.
- Set de colors using the tactile color ring.
- Set the luminosity using the tactile arch (-/+)
- To control 4 zones at the same time press “(-) switching on all”
The remote work with AAA/LR3 batteries (not included)
8022
®
NOTICE - INSTRUCTIONS - INSTRUCCIONES - AVVISO - BEKANNTMACHUNG
Ref : 7648-76484
Ce produit est garanti contre tout défaut de fabrication pendant une durée de 2 ans.
/ This product is guaranteed against any manufacturing defect for a period of 2 years. / Este producto está garantizado contra cualquier defecto de fabricación por un período de 2 años.
/ Questo prodotto è garantito contro qualsiasi difetto di fabbricazione per un periodo di 2 anni. / Dieses Produkt wird für einen Zeitraum von 2 Jahren gegen Herstellungsfehler garantiert.
MIIDEX LIGHTING - 1 rue Isaac Newton 31830 Plaisance du Touch - www.miidex.com
- Mantenga presionado "on" durante 2 segundos para tener luz blanca
- Ajuste el color deseado deslizando el dedo sobre el anillo sensorial
- Ajuste el brillo deslizando el dedo sobre el arco sensible
- Para controlar las 4 zonas, primero presione "All On"
- Tenere premuto "on" per 2 secondi per avere illuminazione bianca
- Impostare il colore desiderato facendo scorrere il dito sull'anello sensoriale
- Regola la luminosità facendo scorrere il dito sull'arco sensibile
- Per controllare tutte e 4 le zone, prima premere "All On"
Presiona la tecla "M" para elegir el programa:
Programa 1: rojo, verde, azul y blanco.
Programa 2: rojo, verde, azul, blanco, amarillo, púrpura
Programa 3: destello de color aleatorio DISCO
Programa 4: destellos rojos tres veces y rangos de 0 a 100%
Programa 5: Verde parpadea tres veces y varía de 0 a 100%
Programa 6: el azul parpadea tres veces y varía de 0 a 100%
Programa 7: cambio de color al azar con grupo parpadeando
Programa 8: desvanecimiento de colores.
Programa 9: destellos blancos
Premere il tasto "M" per scegliere il programma:
Programma 1: rosso, verde, blu e bianco
Programma 2: rosso, verde, blu, bianco, giallo, viola
Programma 3: DISCO lampeggiante a colori casuali
Programma 4: rosso lampeggia tre volte e va da 0 a 100%
Programma 5: il verde lampeggia tre volte e va da 0 a 100%
Programma 6: il blu lampeggia tre volte e va da 0 a 100%
Programma 7: cambio colore casuale con gruppo
lampeggiante
Programma 8: dissolvenza dei colori
Programma 9: lampi bianchi
El control remoto funciona con baterías AAA / LR03 (baterías no incluidas)
Il telecomando funziona con batterie AAA / LR03 (batterie non incluse)
Asocie un Dowlight con un control remoto:
- Elija un canal de 1 a 4.
- Desconecta eléctricamente la banda que quieras asociar.
- Vuelva a conectar la banda de cabeza y, antes de tres segundos, presione y mantenga presionado el botón "on" de la zona elegida.
- Cuando la asociación es correcta, el banner parpadeará tres veces.
Associare un dowlight con un telecomando:
- Scegli un canale da 1 a 4.
- Scollegare elettricamente la striscia che si desidera associare.
- Ricollegare la fascia e prima di tre secondi premere e tenere premuto il pulsante "on" della zona scelta.
- Quando l'associazione è corretta, il banner lampeggia tre volte.
Desvincular un downlight de un área:
- Verique en el control remoto qué zona está asociada con el control remoto.
- Desconectar eléctricamente la diadema.
- Vuelva a conectar la banda de la cabeza y, antes de 3 segundos, mantenga presionado el botón "on" de la zona elegida.
- Cuando la disociación es correcta, el banner parpadea rápidamente 6 veces.
Scollega un downlight da un'area:
- Controllare sul telecomando quale zona è associata al telecomando.
- Scollegare elettricamente la fascia.
- Ricollegare l'archetto e prima di 3 secondi, premere e tenere premuto il pulsante "on" della zona scelta.
- Quando la dissociazione è corretta, il banner lampeggia rapidamente 6 volte.
Orden múltiple
Puedes combinar múltiples dispositivos en cualquier combinación que elijas. Un ejemplo se reproduce en el siguiente diagrama.
Ordine multiplo:
Puoi combinare più dispositivi in qualsiasi
combinazione tu scelga. Un esempio è
riprodotto nello schema seguente.
Este accesorio es blanco + RGB. Puede ser controlado por el control remoto de radio.
1. SEGURIDAD
- No conecte esta unidad hasta que se apague la fuente de alimentación
- Manipule la unidad solo sobre piezas acrílicas: no toque las partes metálicas que puedan estar calientes o aladas.
- La instalación o intervención en este downlight está reservada a profesionales.
- No desconecte la fuente de alimentación del lado de la luminaria cuando la fuente de alimentación esté encendida.
- El cable exterior exible de esta lámpara no puede ser reemplazado; Si el bordillo está dañado, la lámpada debe ser destruida.
- La fuente de luz de esta lámpara no es reemplazable ; cuando la fuente de luz llega al nal de su vida, toda la lámpara debe ser sustituida.
- El bloque de terminales no está incluido ; la instalación puede requerir el asesoramiento de una persona cualicada.
2. INSTALACION
2.1 Baterias
- Sostenga el control remoto y baje la tapa del compartimiento de la batería
- Instale dos baterías AAA LR03 como se muestra a continuación respetando las polaridades
- No toque el anillo sensor durante la instalación.
- cerrar la tapa
2.2 Downlight
- Este producto está destinado a ser empotrado en un falso techo.
- Taladre un oricio de 125-140 mm de diámetro como se muestra en la Figura 1
- Conecte el downlight según el dibujo de la gura 2 colocando la fuente de alimentación en el techo
- Asegúrese de que los resortes estén colocados en el techo y sostenga el downlight correctamente
- No coloque la lámpara en un soporte vibrante
- Antes de instalar la solidez duradera del falso soporte de techo.
- En funcionamiento, la luminaria produce calor. Asegúrese de que no haya material en contacto con la lámpara para que se disipe
Questo dispositivo è bianco + RGB. Può essere controllato dal radiocomando.
1. SICUREZZA
- Non collegare questa unità no a quando l'alimentazione non viene disattivata
- Maneggiare l'unità solo su parti in acrilico: non toccare parti metalliche che potrebbero essere calde o taglienti.
- L'installazione o l'intervento su questo downlight sono riservati ai professionisti
- Non scollegare l'alimentazione dal lato dell'apparecchio quando l’alimentazione è accesa.
- Il cavo essibile esterno di questo apparecchio non può essere sostituito; se il cordolo è danneggiato, l'apparecchio deve essere distrutto.
- La fonte di luce di questo apparecchio non è sostituibile ; quando la fonte di luce raggiunge la sua ne della vita, l’intero apparecchio deve essere sostituito.
- La morsettiera non è inclusa ; l'installazione potrebbe richiedere la consulenza di una persona qualicata.
2. INSTALLAZIONE
2.1 Batterie
- Tenere il telecomando e abbassare il coperchio del vano batteria
- Installare due batterie AAA LR03 come mostrato di seguito rispettando le polarità
- Non toccare l'anello di rilevamento durante l'installazione
- Chiudi il coperchio
2.2 Downlight
- Questo prodotto è destinato ad essere incassato in un controsotto
- Praticare un foro del diametro di 125-140 mm come mostrato nella Figura 1
- Collegare il downlight secondo il disegno di gura 2 posizionando l'alimentatore nel sotto
- Assicurarsi che le molle siano posizionate sul sotto e tenere correttamente il downlight
- Non posizionare la luce dow su un supporto vibrante
- Prima di installare la solidità durevole del supporto del controsotto
- Durante il funzionamento, l'apparecchio produce calore. Assicurarsi che nessun materiale sia in contatto con la lampada in modo che si disperda
false
ceiling
false
ceiling
LED power
supplied
included
LED power
supplied
included
®
NOTICE - INSTRUCTIONS - INSTRUCCIONES - AVVISO - BEKANNTMACHUNG
Ref : 7648-76484
Ce produit est garanti contre tout défaut de fabrication pendant une durée de 2 ans.
/ This product is guaranteed against any manufacturing defect for a period of 2 years. / Este producto está garantizado contra cualquier defecto de fabricación por un período de 2 años.
/ Questo prodotto è garantito contro qualsiasi difetto di fabbricazione per un periodo di 2 anni. / Dieses Produkt wird für einen Zeitraum von 2 Jahren gegen Herstellungsfehler garantiert.
MIIDEX LIGHTING - 1 rue Isaac Newton 31830 Plaisance du Touch - www.miidex.com
- Halten Sie "on" 2 Sekunden lang gedrückt, um eine weiße Beleuchtung zu erhalten
- Stellen Sie die gewünschte Farbe ein, indem Sie den Finger auf den Sensorring schieben
- Passen Sie die Helligkeit an, indem Sie Ihren Finger auf dem empndlichen Lichtbogen bewegen
- Um alle 4 Zonen zu steuern, drücken Sie zuerst "All On".
Drücken Sie die "M" -Taste, um das
Programm auszuwählen:
Programm 1: Rot, Grün, Blau und Weiß
Programm 2: rot, grün, blau, weiß, gelb,
violett
Programm 3: DISCO zufällige Farbe blinkt
Programm 4: Rot blinkt dreimal und reicht
von 0 bis 100%
Programm 5: Grün blinkt dreimal und reicht
von 0 bis 100%
Programm 6: Blau blinkt dreimal und reicht
von 0 bis 100%
Programm 7: Zufällige Farbänderung mit
blinkender Gruppe
Programm 8: Farben verblassen
Programm 9: Weiß blinkt
Die Fernbedienung funktioniert mit AAA / LR03-Batterien (Batterien nicht im
Lieferumfang enthalten)
Verknüpfen Sie ein Fernlicht mit einer Fernbedienung:
- Wählen Sie einen Kanal von 1 bis 4.
- Trennen Sie den Streifen, den Sie zuordnen möchten, elektrisch.
- Schließen Sie das Kopfband wieder an und halten Sie die Einschalttaste der gewählten Zone vor drei
Sekunden gedrückt.
- Wenn die Zuordnung korrekt ist, blinkt das Banner dreimal.
Trennen Sie ein Downlight von einem Bereich ab:
- Prüfen Sie auf der Fernbedienung, welche Zone der Fernbedienung zugeordnet ist.
- Trennen Sie den Kopfbügel elektrisch.
- Schließen Sie das Kopfband wieder an und halten Sie die Einschalttaste der ausgewählten Zone gedrückt.
- Wenn die Dissoziation korrekt ist, blinkt das Banner 6 Mal schnell.
Mehrfachbestellung:
Sie können mehrere Geräte in beliebiger Kombination kombinieren. Ein Beispiel ist in der folgenden
Abbildung wiedergegeben.
Dieses Gerät ist weiß + RGB. Sie kann mit der Funkfernbedienung gesteuert werden.
1. Sicherheit
- Schließen Sie dieses Gerät erst an, wenn die Stromversorgung abgeschaltet ist
- Fassen Sie das Gerät nur an Acrylteilen an: Berühren Sie keine heißen oder scharfen Metallteile.
- Die Installation oder der Eingri in dieses Downlight ist Fachleuten vorbehalten
- Trennen Sie nicht die Stromversorgung auf der Leuchtenseite, wenn die Stromversorgung eingeschaltet ist.
- Das exible Außenkabel dieser Leuchte kann nicht ersetzt werden. Wenn der Bordstein beschädigt ist, muss die
Leuchte zerstört werden.
- Die Lichtquelle dieser Leuchte ist nicht austauschbar ; wenn die Lichtquelle das Ende inhrer Lebensdauer erreicht,
muss die gesamte Leuchte ausgetauscht werden.
- Die Klemmenleiste ist nicht enthalten ; Für die Installation kann der Rat einer qualizierten Person erforderlich sein.
2. INSTALLATION
2.1 Batterien
- Halten Sie die Fernbedienung und ziehen Sie den Batteriefachdeckel herunter
- Legen Sie zwei AAA LR03-Batterien ein, wie unten gezeigt, und achten Sie dabei auf die Polarität
- Berühren Sie den Sensorring während der Installation nicht
- Schließen Sie den Deckel
2.2 Downlight
- Dieses Produkt soll in eine Zwischendecke eingebaut werden
- Bohren Sie ein Loch mit einem Durchmesser von 125-140 mm wie in Abbildung 1 gezeigt
- Schließen Sie das Downlight gemäß der Zeichnung in Abbildung 2 an, indem Sie das Netzteil in der Decke
platzieren
- Stellen Sie sicher, dass sich die Federn an der Decke benden und halten Sie das Downlight richtig
- Stellen Sie das Dowlight nicht auf einen Vibrationsständer
- Vor dem Einbau der dauerhaften Festigkeit der Zwischendeckenstütze
- Die Leuchte erzeugt im Betrieb Wärme. Vergewissern Sie sich, dass kein Material mit der Leuchte in Berührung
kommt, damit sie sich zerstreut
8022
®
NOTICE - INSTRUCTIONS - INSTRUCCIONES - AVVISO - BEKANNTMACHUNG
Ref : 7648-76484
Ce produit est garanti contre tout défaut de fabrication pendant une durée de 2 ans.
/ This product is guaranteed against any manufacturing defect for a period of 2 years. / Este producto está garantizado contra cualquier defecto de fabricación por un período de 2 años.
/ Questo prodotto è garantito contro qualsiasi difetto di fabbricazione per un periodo di 2 anni. / Dieses Produkt wird für einen Zeitraum von 2 Jahren gegen Herstellungsfehler garantiert.
MIIDEX LIGHTING - 1 rue Isaac Newton 31830 Plaisance du Touch - www.miidex.com

This manual suits for next models

1

Other MIIDEX LIGHTING Lighting Equipment manuals

MIIDEX LIGHTING Vision-EL 779053 Operation and maintenance manual

MIIDEX LIGHTING

MIIDEX LIGHTING Vision-EL 779053 Operation and maintenance manual

MIIDEX LIGHTING Vision-EL ELV773725-10 User manual

MIIDEX LIGHTING

MIIDEX LIGHTING Vision-EL ELV773725-10 User manual

MIIDEX LIGHTING Vision-EL 754934 Operation and maintenance manual

MIIDEX LIGHTING

MIIDEX LIGHTING Vision-EL 754934 Operation and maintenance manual

MIIDEX LIGHTING Vision-EL 75503 Operation and maintenance manual

MIIDEX LIGHTING

MIIDEX LIGHTING Vision-EL 75503 Operation and maintenance manual

MIIDEX LIGHTING Vision-EL 75494 Operation and maintenance manual

MIIDEX LIGHTING

MIIDEX LIGHTING Vision-EL 75494 Operation and maintenance manual

MIIDEX LIGHTING VISION-EL 75492 Operation and maintenance manual

MIIDEX LIGHTING

MIIDEX LIGHTING VISION-EL 75492 Operation and maintenance manual

MIIDEX LIGHTING Vision-EL ELV416353 Operation and maintenance manual

MIIDEX LIGHTING

MIIDEX LIGHTING Vision-EL ELV416353 Operation and maintenance manual

MIIDEX LIGHTING Vision-EL 76491 User manual

MIIDEX LIGHTING

MIIDEX LIGHTING Vision-EL 76491 User manual

MIIDEX LIGHTING Vision-EL ELV404558 Operation and maintenance manual

MIIDEX LIGHTING

MIIDEX LIGHTING Vision-EL ELV404558 Operation and maintenance manual

Popular Lighting Equipment manuals by other brands

Stagnoli ERA80 manual

Stagnoli

Stagnoli ERA80 manual

Lightolier CD7-1 Specification sheet

Lightolier

Lightolier CD7-1 Specification sheet

Saxby Lighting Lucca Wall instruction manual

Saxby Lighting

Saxby Lighting Lucca Wall instruction manual

Ledj Spectra Q40 MKII user manual

Ledj

Ledj Spectra Q40 MKII user manual

Uplus Lighting 3010 IP PAR user manual

Uplus Lighting

Uplus Lighting 3010 IP PAR user manual

Tre-d-eng Variled 1000 Mod.501C Operation manuals

Tre-d-eng

Tre-d-eng Variled 1000 Mod.501C Operation manuals

herdstar MicroZone MPS100 Installation & operation

herdstar

herdstar MicroZone MPS100 Installation & operation

Lightolier CD7-9 Specification sheet

Lightolier

Lightolier CD7-9 Specification sheet

Captron CML1 Original operating instructions

Captron

Captron CML1 Original operating instructions

VelLight LEDA202 user manual

VelLight

VelLight LEDA202 user manual

Somogyi Elektronic home FL20LED/G instruction manual

Somogyi Elektronic

Somogyi Elektronic home FL20LED/G instruction manual

RAB Lighting FFLED18 Installation sheet

RAB Lighting

RAB Lighting FFLED18 Installation sheet

Larson Electronics FRL-4P-S1-60-1X-T5HO-130W-UVC instruction manual

Larson Electronics

Larson Electronics FRL-4P-S1-60-1X-T5HO-130W-UVC instruction manual

Elecro Engineering QUANTUM CLASSIC Q-65 Installation & operating manual

Elecro Engineering

Elecro Engineering QUANTUM CLASSIC Q-65 Installation & operating manual

American DJ Emerald Sync User instructions

American DJ

American DJ Emerald Sync User instructions

MARELD PERFORMANCE Series instruction manual

MARELD

MARELD PERFORMANCE Series instruction manual

GE 78937 Important safety instructions

GE

GE 78937 Important safety instructions

Prilux Hexagon ZENIT instruction manual

Prilux

Prilux Hexagon ZENIT instruction manual

manuals.online logo
manuals.online logoBrands
  • About & Mission
  • Contact us
  • Privacy Policy
  • Terms and Conditions

Copyright 2025 Manuals.Online. All Rights Reserved.