3
TABLE OF CONTENTS
1. PRELIMINARY EXAMINATION...................................................................................................................................4
2. INSTRUMENT OVERVIEW ..........................................................................................................................................5
3. SPECIFICATIONS.............................................................................................................................................................6
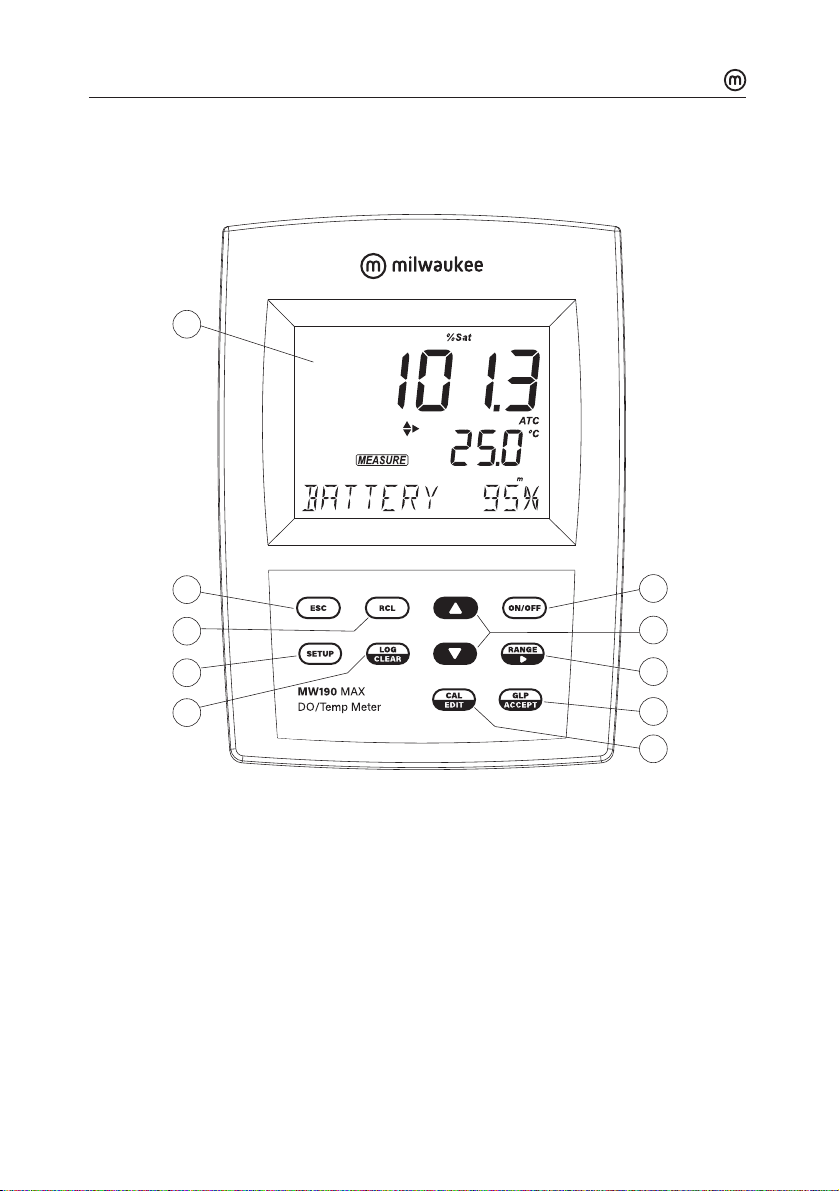
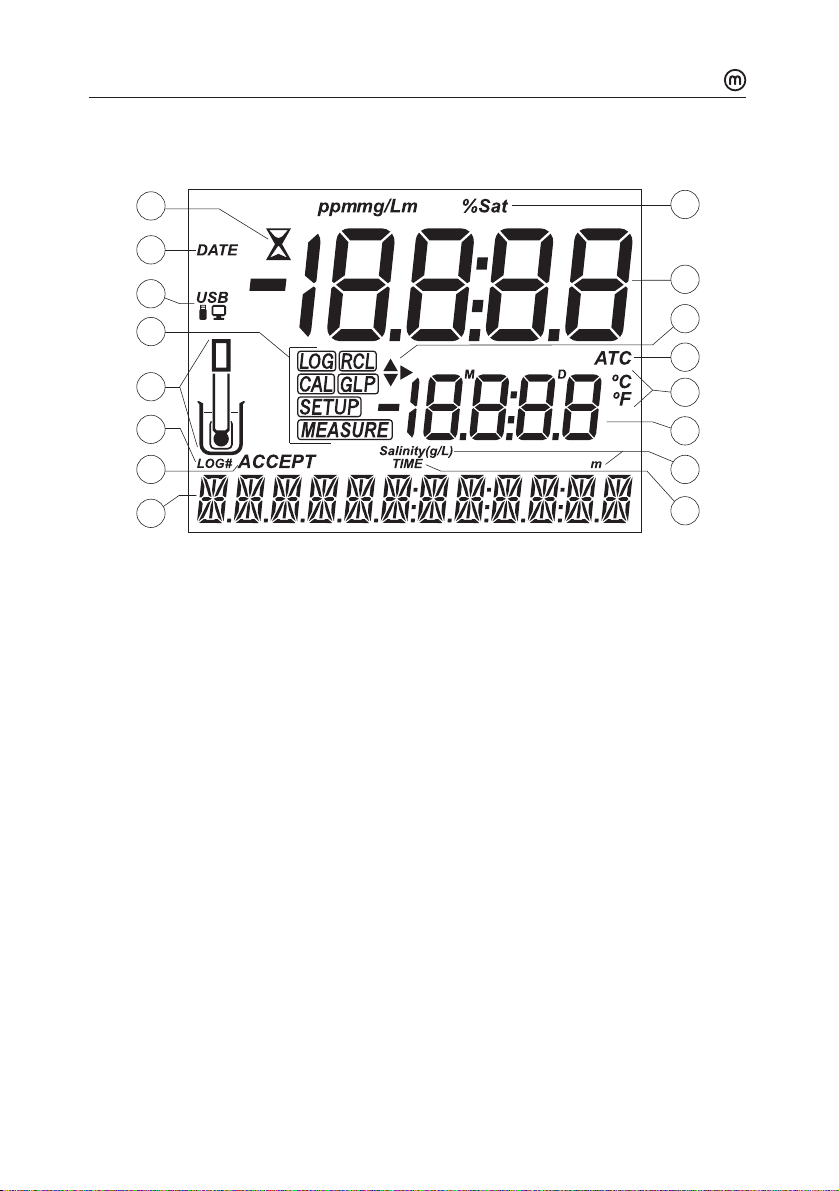
4. FUNCTIONAL & DISPLAY DESCRIPTION............................................................................................................8
5. MA845 PROBE DESCRIPTION.................................................................................................................................11
6. GENERAL OPERATIONS............................................................................................................................................. 12
6.1. POWER CONNECTION & BATTERY MANAGEMENT..........................................................................12
6.2. PROBE PREPARATION.....................................................................................................................................12
6.3. PROBE MAINTENANCE...................................................................................................................................14
7. SETUP..................................................................................................................................................................................15
7.1. SETUP OPTIONS...................................................................................................................................................15
8. ALTITUDE & SALINITY COMPENSATION..........................................................................................................21
9. CALIBRATION.................................................................................................................................................................22
10. MEASUREMENT..........................................................................................................................................................25
11. LOGGING.......................................................................................................................................................................... 27
11.1. TYPES OF LOGGING ......................................................................................................................................... 27
11.2. DATA MANAGEMENT......................................................................................................................................29
12. GLP....................................................................................................................................................................................36
12.1. DO INFORMATION............................................................................................................................................36
13. TROUBLESHOOTING................................................................................................................................................. 37
14. ACCESSORIES.............................................................................................................................................................. 37
CERTIFICATION..................................................................................................................................................................38
RECOMMENDATION........................................................................................................................................................38
WARRANTY..........................................................................................................................................................................38