manuals.online logo
Brands
  1. Home
  2. •
  3. Brands
  4. •
  5. MIMAKI
  6. •
  7. Plotter
  8. •
  9. MIMAKI TS34-1800A Reference guide

MIMAKI TS34-1800A Reference guide

Other manuals for TS34-1800A

4

This manual suits for next models

1

Other MIMAKI Plotter manuals

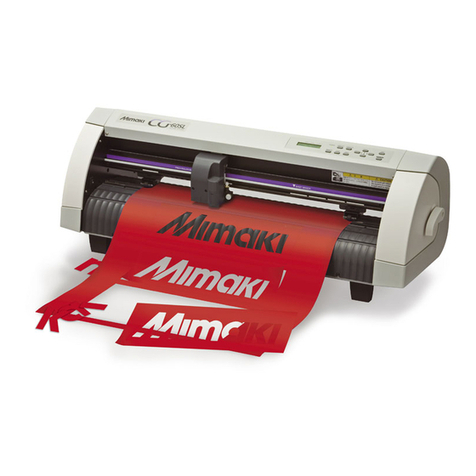
MIMAKI CG-60SL Assembly instructions

MIMAKI

MIMAKI CG-60SL Assembly instructions

MIMAKI ME-300STII User manual

MIMAKI

MIMAKI ME-300STII User manual

MIMAKI CF3-1631 User manual

MIMAKI

MIMAKI CF3-1631 User manual

MIMAKI UJF-7151 plus User manual

MIMAKI

MIMAKI UJF-7151 plus User manual

MIMAKI CG-60SL User manual

MIMAKI

MIMAKI CG-60SL User manual

MIMAKI TPC-1000 Installation instructions

MIMAKI

MIMAKI TPC-1000 Installation instructions

MIMAKI CG-60SRIII User manual

MIMAKI

MIMAKI CG-60SRIII User manual

MIMAKI JV3-75SPII User manual

MIMAKI

MIMAKI JV3-75SPII User manual

MIMAKI JV33-260 User manual

MIMAKI

MIMAKI JV33-260 User manual

MIMAKI DM3-1810S User manual

MIMAKI

MIMAKI DM3-1810S User manual

MIMAKI CG-AR Series Maintenance manual

MIMAKI

MIMAKI CG-AR Series Maintenance manual

MIMAKI CG-AR User manual

MIMAKI

MIMAKI CG-AR User manual

MIMAKI CFL-605RT User manual

MIMAKI

MIMAKI CFL-605RT User manual

MIMAKI DM3-1810S User manual

MIMAKI

MIMAKI DM3-1810S User manual

MIMAKI JFX 200-2513 Manual

MIMAKI

MIMAKI JFX 200-2513 Manual

MIMAKI CG-FX SERIES Technical manual

MIMAKI

MIMAKI CG-FX SERIES Technical manual

MIMAKI CG-75FXII User manual

MIMAKI

MIMAKI CG-75FXII User manual

MIMAKI GP-604D User manual

MIMAKI

MIMAKI GP-604D User manual

MIMAKI CJV150-75 User manual

MIMAKI

MIMAKI CJV150-75 User manual

MIMAKI DS-1600 User manual

MIMAKI

MIMAKI DS-1600 User manual

MIMAKI CJV150 series User manual

MIMAKI

MIMAKI CJV150 series User manual

MIMAKI JFX200-2513EX Maintenance manual

MIMAKI

MIMAKI JFX200-2513EX Maintenance manual

MIMAKI CJV30 Series User manual

MIMAKI

MIMAKI CJV30 Series User manual

MIMAKI CF-0912 User manual

MIMAKI

MIMAKI CF-0912 User manual

Popular Plotter manuals by other brands

MUTOH Kona 760 Service manual

MUTOH

MUTOH Kona 760 Service manual

HP 7475a Service manual

HP

HP 7475a Service manual

Vulcan-Hart FC-500VC user manual

Vulcan-Hart

Vulcan-Hart FC-500VC user manual

Roland TrueVIS VG-640 Supplemental manual

Roland

Roland TrueVIS VG-640 Supplemental manual

Roland VersaUv LEF - 12i troubleshooting guide

Roland

Roland VersaUv LEF - 12i troubleshooting guide

Roland VersaCamm SP-540V user manual

Roland

Roland VersaCamm SP-540V user manual

Seiko I Infotech LP-1020 user guide

Seiko I Infotech

Seiko I Infotech LP-1020 user guide

Ioline Summit Service manual

Ioline

Ioline Summit Service manual

HP 7470A Interfacing and programming manual

HP

HP 7470A Interfacing and programming manual

Roland VersaUV LEF-200 Tutorial

Roland

Roland VersaUV LEF-200 Tutorial

ENCAD T-200 Service manual

ENCAD

ENCAD T-200 Service manual

GRAPHTEC CE6000-120AP user manual

GRAPHTEC

GRAPHTEC CE6000-120AP user manual

HP Designjet 330 user guide

HP

HP Designjet 330 user guide

Furuno RP-17 Operator's manual

Furuno

Furuno RP-17 Operator's manual

HP 7470A Operator's manual

HP

HP 7470A Operator's manual

Skycut D Series user manual

Skycut

Skycut D Series user manual

Furuno GP-3500 installation manual

Furuno

Furuno GP-3500 installation manual

Great Computer JII-61 user manual

Great Computer

Great Computer JII-61 user manual

manuals.online logo
manuals.online logoBrands
  • About & Mission
  • Contact us
  • Privacy Policy
  • Terms and Conditions

Copyright 2025 Manuals.Online. All Rights Reserved.

TM
D202445-11-17032015
このたびは、TS34 用昇華オプションをお買い上げいただき誠にありがとうございます。
背面排気ファンを使用する場合は、装置の設定を行う必要があります。
取扱説明書 3章「マシン設定 -カンソウファンの設定」を参照して、設定を行ってください。
プリント品質の維持のため、背面排気ファンとダクトトレーのフィルターを定期的に交換してください。
背面排気ファンの交換の目安 :約1000m2プリント毎 (幅1800mm x 長さ 120m のロールメディア 5本相当 )
ダクトトレーの交換の目安 :約1000m2プリント毎 (幅1800mm x 長さ 120m のロールメディア 5本相当 )
背面排気ファンのフィルターを交換する
1背面排気ファンからフィルター ASSY を引き抜く
2フィルター押さえを取り外し、中のフィルターを交換
する
3フィルター ASSY を元の状態に戻し、背面排気ファンに差し込む
装置の設定を確認する
フィルターを交換する
•フィルターのご購入は、販売店または弊社営業所にお申し付けください。(フィルターは別売品
となります。)
背面排気ファン :A101437/BEMCOT M-3 (100 枚入り )
ダクトトレー :SPC-0734/ ダクトトレーフィルター (50 枚入り )
•フィルターの交換は、主電源を OFF にしてから行ってください。
フィルター ASSY
フィルター押さえ
ダクトトレーのフィルターを交換する
1ダクトトレー ASSY を取り外す
2吸収材とフィルターを取り外し、フィルターを交換す
る
3ダクトトレー ASSY を元の状態に戻す
•吸着材と新しいフィルターを取り付けて、ダクトトレー ASSY を元の状態に戻します。
•このとき、フィルターとダクトトレーの穴に隙間ができないようにご注意ください。
4ダクトトレー ASSY を装置本体に取り付ける
ダクトトレー ASSY
吸収材
隙間が無い状態 隙間
Thank you very much for your purchasing our sublimation option for TS34.
When you use the exhaust fan in the rear, it is required to perform setting of the machine.
Referring to the Chapter 3 “Machine Settings - Setting the DRYING FAN” in the Operation Manual, perform setting.
To maintain the printing quality, replace the filter of exhaust fan in the rear and duct tray periodically.
Rough standard for replacement of Exhaust fan in the rear:
Per 1000m2-printing (equivalent of five roll media of Width: 1,800mm x Length: 210m)
Rough standard for replacement of Duct tray:
Per 1000m2-printing (equivalent of five roll media of Width: 1,800mm x Length: 210m)
Replace the filter of Exhaust fan in the rear
1Pull out the filter ASSY from the exhaust fan in the rear.
2Remove the filter press and replace the filter inside.
3
Return the filter Assy to the original status and insert it into the exhaust fan in the rear.
• Then, replace the filter of the duct tray continuously.
Check the setting of the machine
Replace the filter
• For purchasing the filter, contact a distributor in your district or our office. (The filter is sold sepa-
rately.)
Exhaust fan in the rear :A101437/BEMCOT M-3 (100 pieces)
Duct tray :SPC-0734/Duct tray filter (50 pieces)
• Before replacing the filter, turn OFF the main power.
Procedure Manual for Replacing Filter
of Sublimation Option for TS34
Filter ASSY
Filter press
Replace the filter of Duct tray
1Remove the duct tray.
2Remove the absorber and filter and replace the filter.
3Return the duct tray ASSY to the original status.
• Attach the absorber and new filter, and return the duct tray ASSY to the original status.
• At this time, be careful not to make the gap between the filter and the duct tray hole.
4Attach the duct tray ASSY to the machine main body.
Duct tray ASSY
Absorber
No gap Gap