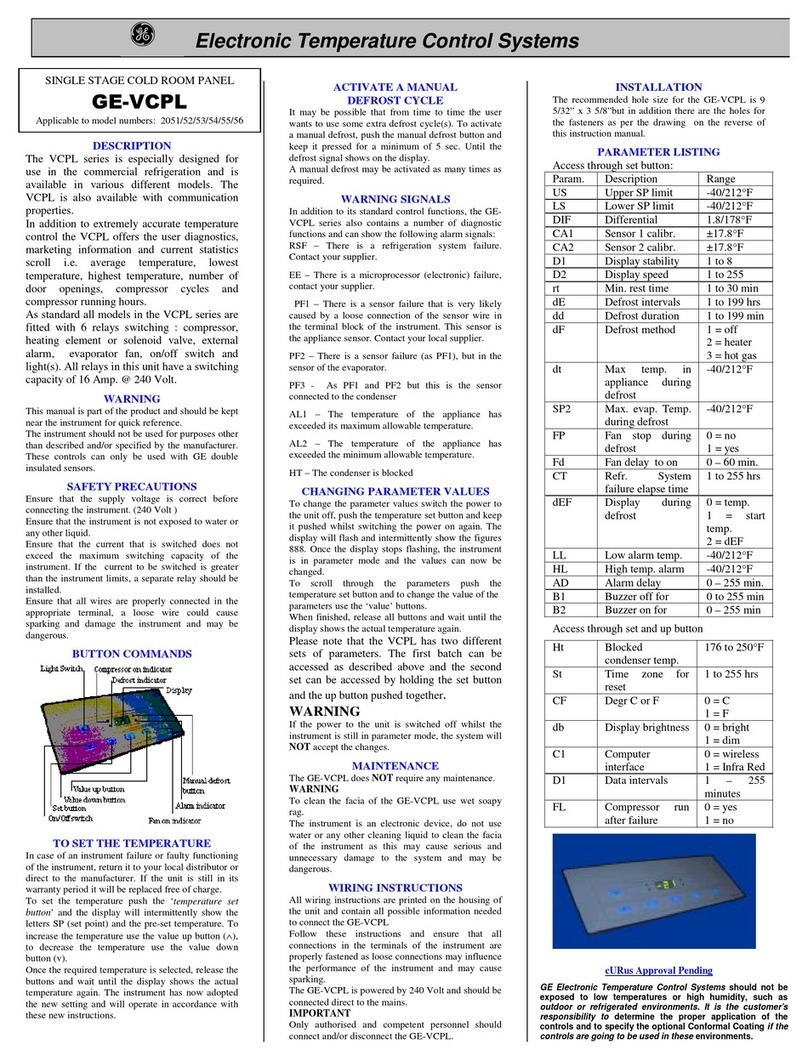
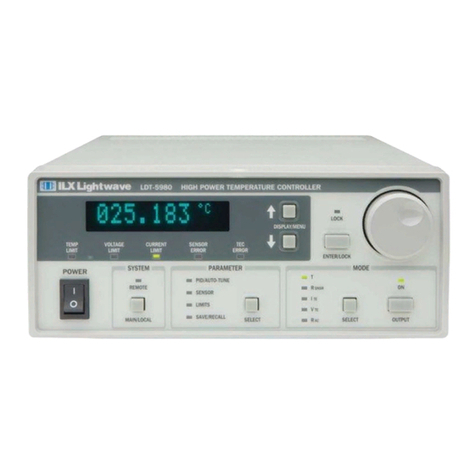
Minco CT124 User manual

MINCO CT124
8-Channel Temperature Monitor
INSTRUCTION MANUAL
When quality and performance are as important as price, call...
PRODUCTS, INC.
7300 Commerce Lane/Minneapolis, Minnesota 55432-3177 U.S.A.
Telephone:(763)571-3121 FAX:(763)571-0927
FORM#930616-1

This page left blank

CONTENTS
SAFETY ........................................ 2
GENERAL DESCRIPTION ........................... 3
INSTALLATION .................................. 4
MOUNTING ................................ 4
WIRING ................................... 5
CHANGING FRONT PANEL LABELS ............. 9
OPERATING INSTRUCTIONS ........................ 10
PROGRAMMING INSTRUCTIONS ..................... 12
TROUBLESHOOTING .............................. 18
ERROR MESSAGES .......................... 18
CALIBRATION .............................. 20
RETURN FOR REPAIR ........................ 21
SPARE PARTS LIST .......................... 21
SPECIFICATIONS ................................. 22
MODEL NUMBER CODING .......................... 23
Minco Products, Inc. CT124 Instruction Manual
1

SAFETY
1. Dangerous high voltages are present inside the case. Always cut
power to the controller before opening the front cover.
Installation of a nearby power cutoff switch is recommended.
2. Contact Minco before attempting any repairs.
3. Do not remove the CT124’s rear cover. Access the inside by
removing the front cover only.
4. Many components may be damaged by static discharge. Do not
touch electrical connections inside the case. Handle plug in cards
only by their edges or at a static-free workstation.
5. Never unplug the ribbon cable inside the enclosure while power
is applied. Permanent damage may result.
Minco Products, Inc. CT124 Instruction Manual
2

GENERAL
GENERAL DESCRIPTION
The CT124 8-Channel Temperature Monitor offers flexible protection and control of temperature-critical
equipment and processes. It scans up to eight RTD’s and activates four relays plus a built-in audible
alarm.
In a typical application, the CT124 provides early warning of possible large machine failure by monitoring
the temperature of bearings, stators, transformer coils, and oil outlets. You can configure the CT124 to
many other situations such as on/off control or under-temperature alarms. The CT124 can even monitor
and control several loops at one time since you can group input zones with output relays in any
combination.
Features:
•Protect motors, generators, transformers, and other equipment.
•Monitor 1 to 8 resistance temperature detectors (RTD’s).
•4 internal relays and audible alarm with independent trip points.
•Over-temperature or under-temperature protection.
•Microprocessor based; fully programmable.
•Large, bright LED display shows °F or °C.
•Stores high and low temperature peaks.
•Trip points, programs, and peaks stored in non-volatile memory.
•Programmable silence button.
•Versatile override switch permits manual relay toggling.
•Rugged enclosure with sealed front panel.
Minco Products, Inc. CT124 Instruction Manual
3

INSTALLATION
INSTALLATION INSTRUCTIONS
MOUNTING
1. Choose a mounting location which meets these conditions:
•Operating ambient temperatures must be within 0 to 55°C (32 to 131°F).
•Air must be free to circulate around the sides and rear of the case.
•The front panel is sealed against dust and moisture. The sides and rear must be protected
from water and excessive dust inside a suitable enclosure.
•Do not use the CT124 in hazardous (explosive) atmospheres.
•Do not expose the CT124 to continuous or excessive shock and vibration.
•Mount the CT124 at any angle.
2. Cut a rectangular hole in your panel according to the dimensions shown in Figure 1.
Figure 1 Panel Cutout Dimensions (in inches)
3. Place the controller into the panel hole. Using a Phillips screwdriver with a shaft diameter less
than ¼" (6.3 mm), tighten the four clamping screws shown in Figure 2.
Figure 2 Clamping Screw Access Locations
Minco Products, Inc. CT124 Instruction Manual
4

INSTALLATION
WIRING
Carefully read the following wiring instructions before routing the power and signal (RTD) wires to the
CT124. You must observe these guidelines in order to ensure safe, accurate, and stable operation.
No special terminals are required; just strip all wires 1/4". Maximum wire size is 14 AWG.
You may find it more convenient to unscrew the two connector boards from the rear of the case and
remove them while you are connecting the wires. In the event that the CT124 must be returned to Minco
for repair, simply disconnect the connector boards and leave the wires attached to the terminal blocks.
Power Supply Wiring
115/230 Volt Version (Standard):
The controller is factory set for 115 VAC operation. A switch inside the case cover selects optional 230
VAC. After reading the precautions on page 2, remove the front cover. Set the switch on the right most
circuit board to 230 VAC (see Figure 3). Replace the cover.
Installation of an external power switch or circuit breaker is strongly recommended for safety and
serviceability. To replace internal fuses the power must be turned off. Also, dangerous voltages are
within easy reach if the front panel is removed while power is on.
The CT124 is internally fused with two .315 amp fast-blow fuses (5 x 20 mm). External fusing is not
necessary. The fuses are located on the power supply board (rightmost circuit board). The board must
be removed to replace the fuses.
Connect power to the Line Input terminals of the power line filter on the back of the CT124. See
Figure 4 for details. Use the 1/4" quick connect terminals provided.
Figure 3 Switch Location for
115/230 VAC Operation Figure 4 AC Power Wiring Diagram
24 Volt DC Version:
As shown in Figure 5, connect the 24 volt positive lead to terminal 1 of the power terminal block, the
negative lead to terminal 2, and chassis ground to terminal 3.
Minco Products, Inc. CT124 Instruction Manual
5

INSTALLATION
An external power cut-off switch is not needed for safety, but would be useful if servicing inside is needed
at a later date.
The 24 VDC version is internally fused with a single .315 amp fast-blow fuse (5 x 20 mm). External
fusing is not necessary.
Figure 5 Relay Wiring Diagram
Relay Wiring
The relay connector board is labelled with normally open and normally closed contact symbols. This
corresponds to the unpowered or "normal" acting operating state of the relays.
In certain applications you may want the relays to be "reverse" acting. This means that if the CT124 loses
power, the relay(s) will de-energize into the tripped or alarm state. See Figure 6 for a summary of relay
states.
You can set any of the 4 relays for reverse action with dip switch S1 located on the top of the power
Figure 6 Relay States
Relay Actions Terminal Positions
1-2 2-3
NORMAL ACTING
Power on - untripped Closed Open
Power on - tripped Open Closed
Power off Closed Open
REVERSE ACTING
Power on - untripped Open Closed
Power on - tripped Closed Open
Power off Closed Open
supply (right-most) board inside the case (Figure 7). Read the safety precautions on page 2 before
removing the cover.
Minco Products, Inc. CT124 Instruction Manual
6

INSTALLATION
Figure 7 Dip Switch Location
RTD Wiring
Avoid routing RTD wires along with or near electrically noisy wires such as wiring to contactors, motors,
computers, etc. Electrical interference from these wires may cause instability or shifts in the CT124’s
readings. For best noise immunity, use twisted and shielded extension leadwire to the RTD’s.
The RTD wires and sensing element must be insulated from ground potential and all other voltages. Be
sure the dielectric strength rating of the RTD exceeds the voltage it will see in use, especially when
mounted in electric machinery.
Figure 8 shows RTD wiring. For 3-lead RTD’s, connect the 2 leads of the same color to TB2 and TB3,
the odd lead to TB1. Connect 2-lead RTD’s to TB1 and TB2 with a shorting jumper wire from TB2 to
TB3. Connect shields to TB4.
Secure all wires to the connector boards with nylon cable ties in the holes provided.
Figure 8 RTD Wiring Diagram
Minco Products, Inc. CT124 Instruction Manual
7

INSTALLATION
The CT124 will automatically cancel the effects of long lead wires with up to 10 ohms of leadwire
resistance when used with 3-lead RTD’s. Knowing the size and length of the RTD’s leads, we can
estimate the resistance. Figure 9 lists the size of wires, their resistance per foot at 25°C, and the
maximum length each leadwire can be for 10 ohms of resistance. For proper leadwire cancellation, each
lead must have exactly the same resistance. For example, a difference of 1 ohm can mean more than
2.5°C (4.6°F) error for a 100 Ωplatinum RTD, or more than 26°C (47°F) error for a 10 Ωcopper RTD.
Figure 9 Leadwire Resistance Chart
Leadwire
(AWG) Ohms/Foot
at 25°C Maximum Length
for 10 Ohms of Resistance
18 0.0065 Ω/ft. 1538 ft.
20 0.0103 Ω/ft. 971 ft.
22 0.0165 Ω/ft. 606 ft.
24 0.0262 Ω/ft. 382 ft.
26 0.0418 Ω/ft. 239 ft.
28 0.0666 Ω/ft. 150 ft.
Alternative RTD Wiring Options
For the best accuracy, all 3 leads of each RTD should be brought to the CT124 as shown in Figure 8.
However, with some high voltage electric motors, the RTD’s have been prewired to a terminal block with
one of the common leads for each RTD grounded. Unless required for safety reasons, this should be
rewired with 3 individual leads for each RTD to the CT124.
Figure 10 shows 2 alternative wiring methods. With either method, ground loop currents may cause
erratic readings. If so, remove the ground connection to the CT124’s power input terminal block. Note
that option B does not provide 3-lead compensation.
OPTION A OPTION B
Figure 10 Alternative RTD Wiring Options
Minco Products, Inc. CT124 Instruction Manual
8

INSTALLATION
CHANGING FRONT PANEL LABELS
If you wish, you can replace the zone and relay labels on the front panel of the CT124. Follow these
instructions:
1. Follow the safety precautions on page 2. Be sure power is off, then remove the CT124’s front
panel and disconnect the ribbon cable.
2. Remove the 2 spade lugs from the built-in alarm inside the front panel. Remove the 8 screws
holding the circuit board in place. To avoid damage from static electricity, do not to touch
conductors while handling the circuit board. Remove the circuit board.
3. Pull out the old zone and relay labels. Write your descriptions in the blank forms located in the
back of this manual. Cut out, fold, and insert into the slots in the CT124’s faceplate.
4. Replace the circuit board and screws, reconnect the alarm and ribbon cable, and reinstall the front
cover.
Minco Products, Inc. CT124 Instruction Manual
9

OPERATION
OPERATING INSTRUCTIONS
GENERAL OPERATION
The CT124 Multi-Zone Temperature Monitor continuously scans temperature input from 1 to 8 RTD’s
(Resistance Temperature Detectors). It compares each reading to 5 separate trip points and activates relays
and a built-in alarm when any RTD senses an over- or undertemperature condition. The audible alarm
may be set to go off when any of the four relays are tripped, and/or independently at its own trip point.
Setting up the trip point temperatures and the actions of the relay and alarm outputs to input conditions
is covered in the Programming Instructions (see page 12). The following instructions describe the general
operation after programming is completed. We recommend that the operator have a copy of the completed
CT124 Setup Worksheet at hand for a complete description of the programmed operation.
Note: Viewing the zone, peak, or trip temperatures will not interrupt input scanning. However, input
scanning is interrupted and outputs remain unchanged while in the test and programming modes.
ZONE TEMPERATURES
Depending on its program, the CT124 normally displays:
•The highest temperature sensed by an RTD, or
•The lowest temperature sensed by an RTD, or
•Any zone temperature selected for display.
To view zone temperatures:
Press . The red light at the upper left corner of the button comes on.
Press or to see different zones. The light beside each zone comes on as it is displayed.
indicates the CT124 is not programmed to scan that zone.
example: with zone 2 lit indicates that input RTD 2 is sensing 128°C.
PEAK TEMPERATURES
The CT124 stores both high and low peak temperatures in each monitored zone.
To view peak temperatures:
Press . The red light at the upper left comes on.
Press or to see alternate high-low peaks for each zone.
example: with zone 3 lit indicates a low point of -32°F sensed by input RTD 3.
indicates a high peak of 150°F.
To clear peak temperatures:
Press while viewing a peak temperature to clear it. The current temperature in that zone becomes
the new peak and the display advances.
Minco Products, Inc. CT124 Instruction Manual
10

OPERATION
TRIP TEMPERATURES
The CT124’s four relays and single audible alarm may be programmed to trip on either overtemperature
or undertemperature conditions.
To view trip temperatures:
Press . The red light at the upper left of the button comes on.
Press or to cycle through the relays and alarm. The specific relay or alarm light will blink
to show which trip temperature is displayed. All zones tied to that relay will also light.
example: with relay 3 blinking indicates relay 3 will trip when any zone it monitors
goes over 70°C.
with the red alarm light on indicates the audible alarm will sound when
any zone it monitors drops under 0°C.
TEST FUNCTION
The test button is used to check input, output, and display operation. It is also used to restore operation
of inputs which had faulty wiring that has now been corrected. See Troubleshooting on page 18.
Test Sequence:
1. When the test button is first pressed, all the display lamps will light and the alarm will sound for
a couple seconds.
2. The inputs are automatically tested next. The display will read , ,
, or for zone 1.
To view the status of other inputs/zones, press or .
3. If programmed, pushing the test button again will trip specified output relays to test remote alarms
or annunciators. Otherwise, it will return the CT124 to normal operation.
Pushing test again will return the CT124 to normal operation. If you forget to push test, the
CT124 will automatically resume normal operation in about 60 seconds.
SILENCE FUNCTION
If the alarm is sounding, push the SILENCE button to quiet the alarm. The alarm may sound again later
if the alarm condition still exists after Time of Silence has expired (see the CT124 Setup Worksheet). Any
new alarm conditions will override the silence function. Depending on your application, pushing
SILENCE may also turn off selected output relays to quiet remote alarms or turn off annunciators.
OVERRIDE FUNCTION
Depending upon your application, this button can be used to force any output relay(s) either on or off,
including unused relays. Refer to the Setup Worksheet filled out for your application.
Minco Products, Inc. CT124 Instruction Manual
11

PROGRAMMING
PROGRAMMING INSTRUCTIONS
Before you begin programming the CT124, fill out a blank copy of the CT124 Setup Worksheet included
with this manual. You will then have a detailed description of the program parameters of your CT124
for use as a reference in programming and operation.
ENTERING AND LEAVING THE PROGRAM MODE
The CT124 requires a special sequence of keystrokes to enter the program mode. This prevents
unauthorized changes to trip points and other functions.
To enter the program mode:
1. Press . You will see .
2. Press and at the same time. The CT124 will beep three times and display:
.
3. Press once to begin programming.
To exit the program mode:
1. Press or repeatedly until you see .
2. Press . The display will return to zone temperature.
GENERAL PROGRAMMING INSTRUCTIONS
Program Display:
The CT124 display will show an operation code at the left and the selected parameter at the right. Zone,
relay, and alarm lights indicate which input or output you are currently programming.
examples: with the alarm light on, this programs the alarm to trip at 110°C.
with zone 1 and relay 3 LED’s lit, this programs relay 3 to respond to
inputs from zone 1.
Changing Program Choices:
•Press or to cycle among the various choices at each programming step.
When the program requires a number input (e.g. a trip temperature), press the arrow buttons to raise and
lower the displayed temperature. If you desire as a choice, press until
appears below -40°.
Storing Program Choices:
•Press to store the current choice and advance to the next step. The order of steps follows
the Setup Worksheet: Left to right, top to bottom.
Minco Products, Inc. CT124 Instruction Manual
12

PROGRAMMING
Backing Up:
•Press to cancel your current choice and back up to the previous step. Press it repeatedly
to move backward through all previous program steps.
Note: The button only cancels the most recent program step. Any steps previous to that are already
stored in the CT124’s memory. Pressing while programming relays or zones returns you a step at
a time to the front of the line you are on. When at the beginning of a line, will move you to the
beginning of the previous line. The button always moves you forward in single steps.
PROGRAMMING STEPS
The first letter of code below indicates: d = Display, r = Relay, A = Alarm
Display:
Code Choices Description
dS °C or °F Display Scale: Set the temperature scale to degrees Celsius or
degrees Fahrenheit. Trip points automatically convert to the
new scale.
dC HI
LO
AnY
Display Channel: If the keyboard has been untouched for 15
seconds, the CT124 will switch to display the highest or lowest
temperature being sensed, or any (last) selected zone.
Relays and Alarms:
Each step is repeated for each relay and the alarm.
rt or
At -40 to 250°C
-40 to 492°F
(to 530°C or 986°F with
platinum RTD)
OFF
Relay or Alarm Trip Temperature: Set the trip point
temperature for the indicated relay or alarm. Select "OFF"
(below 40°) to lock out the output. Subsequent programming
steps will skip a locked-out relay or alarm.
rH or
AH 2 to 20°C
2 to 20°F Relay or Alarm Hysteresis: Set the hysteresis (deadband) for
the indicated relay or alarm.
rP or
AP HI or Lo Relay or Alarm Trip mode: Set the relay or alarm to trip on
overtemperature (HI) or undertemperature (Lo).
rA YES or no Relay Alarm: Sound alarm when the indicated relay trips?
rS YES or no Relay Silence: Untrip this relay (return to normal) when
Silence is pressed?
AS 1to60
or--- Alarm Silence: Set the duration of alarm silence in minutes.
Select "- - -" (above 60) if the silence is not to be timed. Any
new alarms will cause the alarm to sound.
rd YES or no Relay Diagnostic Test: Should the indicated relay trip when
the test button is pressed?
ro or
Ao no
On
OFF
Relay or Alarm Override: Select effect of override on alarm
or relay. Select "no" for no effect.
Minco Products, Inc. CT124 Instruction Manual
13

PROGRAMMING
Input Zones:
Each step is repeated for each temperature input zone.
Code Choices Description
Sc YES or no Scan: Select if the indicated zone is to be scanned or locked
out.
r or A YES or no Relay or Alarm: For each scanned zone, select whether the
indicated relay or alarm will respond to that zone.
Calibration:
CAL YES or no Press , unless you want to recalibrate. Calibration
instructions are on page 20.
SAMPLE WORKSHEET DESCRIPTIONS
On the following pages are three sample CT124 Setup Worksheets. These will demonstrate the types of
functions the CT124 can perform and how to code them into the worksheet.
Worksheet 1:
1. Monitor a transformer with three RTD’s in the phase windings.
2. Relay 1 is connected to cooling fans and trips at 110°C.
3. Relay 2 is connected to an external alarm, and trips at 140°C. The built-in alarm also goes off.
4. Relay 3 shuts the transformer down at 155°C.
5. The override button manually turns on the fans.
6. The silence button turns off both the internal and external alarms.
Worksheet 2:
1. Monitor a motor with three RTD’s in the stator windings and two in the bearings.
2. If the stators reach 140°C, sound the alarm. Trip relay 2 to shut the motor down if they reach
155°C.
3. Sound the alarm if the bearings reach 100°C and trip relay 4 to shut the motor down if they reach
110°C.
Worksheet 3:
1. Monitor seven pipes and room air temperature in a utility room.
2. Relay 1 acts as an on-off controller to run an auxiliary heater maintaining pipe temperature around
38°F.
3. Sound the alarm as a frost warning if any of the pipes drops below 35°F.
Minco Products, Inc. CT124 Instruction Manual
14

SAMPLE WORKSHEET 1 (see page 14)
CT124 SETUP WORKSHEET
Use this worksheet to describe the setup parameters for the desired operation of the CT124.
Fill in a short description of the location and purpose of each temperature sensor, and save the worksheet for future reference.
Basic function description:
Transformer temperature monitor and cooling fan controller
Description of Zones Description of Relay Functions Trip Temp.
Zone 1: Phase A winding Relay 1: Fans 110°C
Zone 2: Phase B winding Relay 2: External Alarm 140°C
Zone 3: Phase C winding Relay 3: Shutdown 155°C
Zone 4: --- Relay 4: ---
Zone 5: ---
Zone 6: --- Alarm only: ---
Zone 7: ---
Zone 8: --- Completed by: BFJ Date: 9/87
Circle the option desired. If the box is empty, fill in a number within the range given at the left. If shaded, there is no option to choose.
DISPLAY
Code Description
dS Temperature scale °F, °C
dC Zone to be displayed during normal operation: Highest zone
Lowest zone
Any selected zone
HI
LO
AnY
OUTPUTS - RELAYS AND ALARM Relay 1 Relay 2 Relay 3 Relay 4 Alarm
rt or At Trip temperature: -40 to 482°F, -40 to 250°C (to 530°C or 986°F
with Platinum RTD) or "OFF" if the output will not be used 110 140 155 OFF OFF
rH or AH Hysteresis (deadband): 2 to 20 °C or °F 2 2 2
rP or AP Trip on overtemperature (HI)
or undertemperature (LO) HI
LO HI
LO HI
LO HI
LO HI
LO
rA Sound audible alarm when this relay trips? YES no YES no YES no YES no
rS Return this relay to normal when silence is pressed? YES no YES no YES no YES no
AS Length of alarm silence: 1 to 60 minutes, "---" for stays off. 60
rd or Ad Trip this output during diagnostic test? YES no YES no YES no YES no
ro or Ao Effect of override button on output: No effect
Trip
Untrip
no
On
OFF
no
On
OFF
no
On
OFF
no
On
OFF
no
OFF
INPUT ZONES Zone Scan Relay 1 Relay 2 Relay 3 Relay 4 Alarm
Sc. First Column:
Zones to be scanned:
YES = scanned
no = locked out
Remaining columns:
Outputs which respond to each zone:
YES = Output will trip on zone temperature
no = Output not tied to that zone
1 YES no YES no YES no YES no YES no YES no
r. or A.
2 YES no YES no YES no YES no YES no YES no
3 YES no YES no YES no YES no YES no YES no
4 YES no YES no YES no YES no YES no YES no
5 YES no YES no YES no YES no YES no YES no
6 YES no YES no YES no YES no YES no YES no
7 YES no YES no YES no YES no YES no YES no
8 YES no YES no YES no YES no YES no YES no
CALIBRATION
CAL. Press DONE unless you wish to recalibrate. See p. 20 of the Instruction Manual.
Minco Products, Inc. CT124 Instruction Manual
15

SAMPLE WORKSHEET 2 (see page 14)
CT124 SETUP WORKSHEET
Use this worksheet to describe the setup parameters for the desired operation of the CT124.
Fill in a short description of the location and purpose of each temperature sensor, and save the worksheet for future reference.
Basic function description: Monitor motor windings & bearings
Description of Zones Description of Relay Functions Trip Temp.
Zone 1: Stator #1 Relay 1: Stator overtemp alarm 140°C
Zone 2: Stator #2 Relay 2: Stator shutdown 155°C
Zone 3: Stator #3 Relay 3: Bearing overtemp alarm 100°C
Zone 4: Bearing #1 Relay 4: Bearing shutdown 110°C
Zone 5: Bearing #2
Zone 6: --- Alarm only: ---
Zone 7: ---
Zone 8: --- Completed by: BFJ Date: 9/87
Circle the option desired. If the box is empty, fill in a number within the range given at the left. If shaded, there is no option to choose.
DISPLAY
Code Description
dS Temperature scale °F, °C
dC Zone to be displayed during normal operation: Highest zone
Lowest zone
Any selected zone
HI
LO
AnY
OUTPUTS - RELAYS AND ALARM Relay 1 Relay 2 Relay 3 Relay 4 Alarm
rt or At Trip temperature: -40 to 482°F, -40 to 250°C (to 530°C or 986°F
with Platinum RTD) or "OFF" if the output will not be used 140 155 100 110 OFF
rH or AH Hysteresis (deadband): 2 to 20 °C or °F 2 2 2 2
rP or AP Trip on overtemperature (HI)
or undertemperature (LO) HI
LO HI
LO HI
LO HI
LO HI
LO
rA Sound audible alarm when this relay trips? YES no YES no YES no YES no
rS Return this relay to normal when silence is pressed? YES no YES no YES no YES no
AS Length of alarm silence: 1 to 60 minutes, "---" for stays off. 10
rd or Ad Trip this output during diagnostic test? YES no YES no YES no YES no
ro or Ao Effect of override button on output: No effect
Trip
Untrip
no
On
OFF
no
On
OFF
no
On
OFF
no
On
OFF
no
OFF
INPUT ZONES Zone Scan Relay 1 Relay 2 Relay 3 Relay 4 Alarm
Sc. First Column:
Zones to be scanned:
YES = scanned
no = locked out
Remaining columns:
Outputs which respond to each zone:
YES = Output will trip on zone temperature
no = Output not tied to that zone
1 YES no YES no YES no YES no YES no YES no
r. or A.
2 YES no YES no YES no YES no YES no YES no
3 YES no YES no YES no YES no YES no YES no
4 YES no YES no YES no YES no YES no YES no
5 YES no YES no YES no YES no YES no YES no
6 YES no YES no YES no YES no YES no YES no
7 YES no YES no YES no YES no YES no YES no
8 YES no YES no YES no YES no YES no YES no
CALIBRATION
CAL. Press DONE unless you wish to recalibrate. See p. 20 of the Instruction Manual.
Minco Products, Inc. CT124 Instruction Manual
16

SAMPLE WORKSHEET 3 (see page 14)
CT124 SETUP WORKSHEET
Use this worksheet to describe the setup parameters for the desired operation of the CT124.
Fill in a short description of the location and purpose of each temperature sensor, and save the worksheet for future reference.
Basic function description: Monitor pipe temps, control auxiliary heater, frost alarm
Description of Zones Description of Relay Functions Trip Temp.
Zone 1: Pipe #1 Relay 1: Auxiliary heat control 38°F
Zone 2: Pipe #2 Relay 2: ---
Zone 3: Pipe #3 Relay 3: ---
Zone 4: Pipe #4 Relay 4: ---
Zone 5: Pipe #5
Zone 6: Pipe #6 Alarm only: Frost warning 35°F
Zone 7: Pipe #7
Zone 8: Room temp (monitor only) Completed by: BFJ Date: 9/87
Circle the option desired. If the box is empty, fill in a number within the range given at the left. If shaded, there is no option to choose.
DISPLAY
Code Description
dS Temperature scale °F, °C
dC Zone to be displayed during normal operation: Highest zone
Lowest zone
Any selected zone
HI
LO
AnY
OUTPUTS - RELAYS AND ALARM Relay 1 Relay 2 Relay 3 Relay 4 Alarm
rt or At Trip temperature: -40 to 482°F, -40 to 250°C (to 530°C or 986°F
with Platinum RTD) or "OFF" if the output will not be used 38 OFF OFF OFF 35
rH or AH Hysteresis (deadband): 2 to 20 °C or °F 4 2
rP or AP Trip on overtemperature (HI)
or undertemperature (LO) HI
LO HI
LO HI
LO HI
LO HI
LO
rA Sound audible alarm when this relay trips? YES no YES no YES no YES no
rS Return this relay to normal when silence is pressed? YES no YES no YES no YES no
AS Length of alarm silence: 1 to 60 minutes, "---" for stays off. 30
rd or Ad Trip this output during diagnostic test? YES no YES no YES no YES no
ro or Ao Effect of override button on output: No effect
Trip
Untrip
no
On
OFF
no
On
OFF
no
On
OFF
no
On
OFF
no
OFF
INPUT ZONES Zone Scan Relay 1 Relay 2 Relay 3 Relay 4 Alarm
Sc. First Column:
Zones to be scanned:
YES = scanned
no = locked out
Remaining columns:
Outputs which respond to each zone:
YES = Output will trip on zone temperature
no = Output not tied to that zone
1 YES no YES no YES no YES no YES no YES no
r. or A.
2 YES no YES no YES no YES no YES no YES no
3 YES no YES no YES no YES no YES no YES no
4 YES no YES no YES no YES no YES no YES no
5 YES no YES no YES no YES no YES no YES no
6 YES no YES no YES no YES no YES no YES no
7 YES no YES no YES no YES no YES no YES no
8 YES no YES no YES no YES no YES no YES no
CALIBRATION
CAL. Press DONE unless you wish to recalibrate. See p. 20 of the Instruction Manual.
Minco Products, Inc. CT124 Instruction Manual
17

TROUBLESHOOTING
TROUBLESHOOTING INSTRUCTIONS
ERROR MESSAGES
The alarm will sound at the same time these messages are displayed. Push silence to quiet the alarm and
acknowledge the problem. These messages indicate that some or all of the protection of your associated
equipment has been interrupted.
: OPEN: There is a break in the indicated input RTD wiring or the resistance represents
a temperature higher than the temperature range of the CT124.
: SHORT: There is a short in the indicated input RTD wiring or the resistance represents
a temperature lower than the temperature range of the CT124.
: FAULT: The RTD for the indicated input zone has an intermittent problem. This
message will also appear after a "short" or "open" has been fixed. To restore operation
of that zone, perform the test sequence described on page 11.
: ERROR 1: This indicates that the CT124’s non-volatile memory has been corrupted. The
message may flash slowly while sounding the alarm (see below).
Recovering From Error 1
If the memory test fails when the CT124 is powered up, Error1 is displayed. This is designed to occur
when the useful life of the non-volatile memory has expired (typically greater than 10 years). Extreme
power line transients may also corrupt the memory. You may or may not be able to restore operation.
Perform the following steps to attempt recovery:
1. Disconnect or shutdown any equipment connected to the output relays. The following steps may
have an unpredictable effect on the outputs.
2. Enter programming mode (see page 12). The display should read .
3. Push twice. The display should read again.
4. Push . If the display begins to read normal temperatures, go to step 6.
5. If the display reads , push .
If the display begins to read normal temperatures, go to step 6.
If it still reads , your CT124 has permanently lost the factory calibration data stored
inside. You may be able to recalibrate using the calibration instructions (see page 20), but you
will not be able to restore factory calibration in the future unless the unit is returned to the factory
(see page 21).
6. Double check the CT124’s program against the setup worksheet for your application. Follow the
programming instructions on page 12.
7. Cycle the CT124’s power OFF and ON once to see that normal operation is restored.
Minco Products, Inc. CT124 Instruction Manual
18
Table of contents
Other Minco Temperature Controllers manuals
Popular Temperature Controllers manuals by other brands
Fidelix
Fidelix FX-WMBUS-O-T quick start guide
Winext
Winext AN-303 user manual
Daikin
Daikin FWEC2 Installation and operation manual
Vaillant
Vaillant VRC 470 Installation insrtuctions
domat
domat HYGRASGARD RFF Series Operating Instructions, Mounting & Installation
Munters
Munters Smart A Manual for use and maintenance

