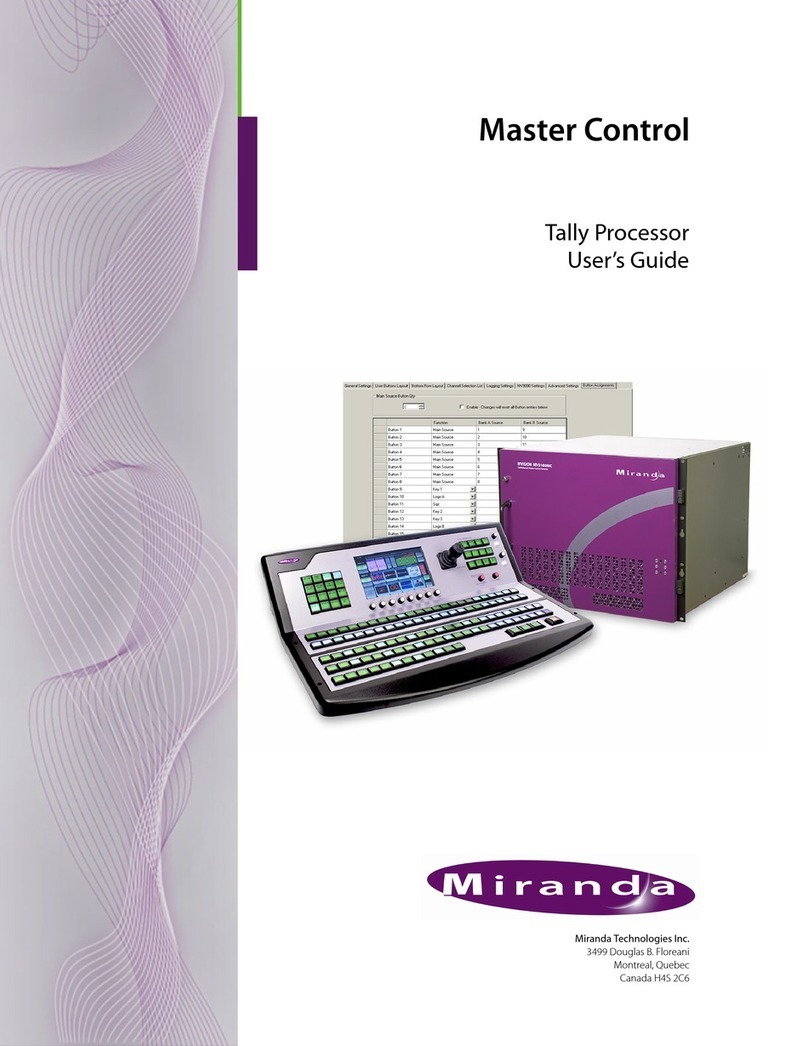
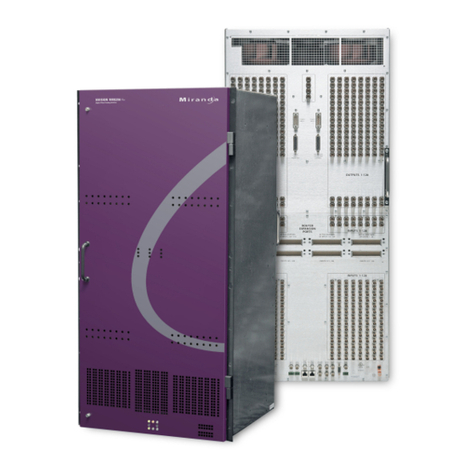
Miranda NV5100MC Master Control User manual

QuickStart Guide
Product Number: QG0012-04 Revision: A0; Date: 2/17/11 1
NV5100MC Master Control
and NV9000 Connections
Frame(s)...
Local
devices
Routers...
MCPMs and MCEs
Config
Master Control Panels (and GUIs)...
E CPs...
Channel 1
Channel 2
NV9000
1
2
Automation
Tally
Ethernet
Video Audio
[Ctrl and I/O]
Dev. Control
Xmedia
Int. XG
Product Summary
Your master control shipment contains one or more master
control products, power cords, miscellaneous cabling, a soft-
ware and documentation CD (SB0221) and this printed
Quickstart Guide. Depending on you order options, the ship-
ment might also include a GUI CD (SB0222).
Frames ship with the I/O cards and master control processors
you ordered already installed and tested.
You should, of course, inspect the shipment for content and
damage. You should also copy all the documentation from
the SB0221 CD to a secure place in your facility’s file system.
It is to your advantage to become familiar with the documen-
tation at an early point in your system development.
In addition to this Quickstart Guide, there are several manu-
als and user’s guides in the NV5100MC documentation set:
QuickStart Roadmap
The goal of this Quickstart Guide is for you to be able to
hookup everything in your Master Control system and get it
to the point where you can start configuring and cabling.
One of the major hurdles you are facing is that to be able to
set up and configure any one portion of master control, you
must understand everything about master control and (possi-
bly) much about NV9000 router control systems.
Survey the documentation to become acquainted with all the
concepts and then focus on individual tasks.
Topics covered here, in order, are
1 Master control feature set.
What the Master Control devices are, where the connec-
tors are and what they do, etc.
2 Hardware connections.
How to make control and network connections and how
to make I/O connections.
3 Software installation.
How to install the software and documentation.
4 Configuration software.
A brief survey of what the configuration applications do.
5 Details.
More detail about master control features.
Master Control Features
A master control system is moderately complex, involving a
number of hardware components, software applications,
documentation, computers, networks, and several options.
Figure 1 represents the principal components of an
NV5100MC master control system.
Master Control Processors
Master control processors are the heart of the master control
system. There are two broad categories:
•MCPMs—master control processing modules.
•MCEs—master control engines.
Each MCPM or MCE is considered a channel. The main out-
put of a channel is called “program output.”
Frames
MCPMs and MCEs reside in a master control frame. A master
control system can include one or more master control
Configuration Guides and Technical Information
UG0008 MasterConfig User’s Guide
UG0009 MasterDiag User’s Guide
UG0010 MasterLogo User’s Guide
UG0011 Master Control Installation Guide
UG0013 Master Control Reference Manual
UG0029 MCS Panel Configuration Editor User’s Guide
UG0036 Tally Processor User’s Guide
UG0038 Device Controller User’s Guide
Panel Operators’ Guides
UG0016 SCP Operator’s Guide
UG0026 CECP GUI Operator’s Guide
UG0027 CECP Operator’s Guide
UG0028 FECP Operator’s Guide
UG0052 Aux/Preview GUI Operator’s Guide
Figure 1. An NV5100MC Master Control System

2Product Number: QG0012-04 Revision: A0; Date: 2/17/11
NV5100MC Master Control
frames. The two types of frames, NV5100MC and the older
NV5128-MC, look the same except for the door legends. Each
frame has 8 input card slots, 8 output card slots, and two con-
trol card slots. MCPMs and MCEs occupy output card slots.
Master control frames can also contain relatively small multi-
format routers (MFRs).
A master control frame has an I/O backplane. Each input card
and output card has a corresponding backplane module that
provides 16 signal connections. MCPMs and MCEs also have
backplane modules.
The backplane can receive inputs from (1) local devices such
as VTRs and DVDs, (2) routers controlled by an NV9000 sys-
tem, or (3) from an MFR (multi-format router) in the master
control frame, or a combination of all of these types of input.
Panels
Master control operators use control panels to control
MCPMs and MCEs. The MCPMs, MCEs, and control panels
communicate on an Ethernet LAN. Hardware control panels
and software control panels (GUIs) are available.
MCPMs and MCEs can also be controlled by an automation
system.
NV9000
A master control system can operate in the context of a
NV9000 router control system The routers in the NV9000
system supply inputs to the master control system.
The NV9000 control system communicates with the control
card(s) in the master control frame. An NV9000 must be con-
nected if the frame contains an MFR. The NV9000 system
provides 2 services important to master control: execution of
salvos and routing of video and audio signals.
Emergency Bypass
All MCPMs and MCEs have an emergency bypass capability.
This mechanism route alternate programming to program
output when the MCPM or MCE detects a critical problem.
The product line includes an emergency bypass control panel
(EBCP) that can be used to force an emergency switch.
Machine Control and Pre-Roll
MCEs can perform machine control and pre-roll operations.
(Other MCPMs do not.) Control panels correspondingly have
several machine control and pre-roll button functions.
Machine control and pre-roll functions are carried out by a
DC21 Device Controller on the master control network. Each
device controller can control up to 4 VTRs (or similar devices)
with a serial protocol (Sony, Odetics, or VDCP) and has the
capability of controlling up to 16 other devices with start and
stop pulses.
Any main source can be assigned pre-roll and machine con-
trol characteristics. Any squeeze source that is also a main
source can have assigned pre-roll and machine control char-
acteristics.
When not used for master control, the DC21’s 32 GPIs and 32
GPOs can be used for other purposes.
Intuition XG
Miranda’s Intuition XG system, and its associated Vertigo XG
graphics processor and Xmedia software can be integrated
with the Master Control system. Although Intuition XG
stands alone on its own merits, it can also be used as a master
control subsystem. It includes a graphics processor that
stores, and plays out, video keys. It can access “live” data
including feeds from wire services and data bases.
The Intuition XG processor can deliver one or two keys simul-
taneously to an MCE. An Intuition XG key is processed by
one of the MCE’s keyers. The Intuition XG processor can also
control an MCE’s squeezeback, audio overs, and main source.
Additional Intuition XG subsystems might be required for
multiple MCEs.
The newer control panels may have “XG layer” buttons in
addition to their other video effects buttons.
Installation Process in Brief
The installation process follows these basic steps:
1 Unpack your master control equipment, checking for con-
tents, damage, or defects. Gather together all your other
equipment, software, and tools.
2 Load the configuration software onto your configuration
PC(s). If you have GUI software, load that onto one or
more GUI PCs.
3 Establish how you want to connect everything. This means
compiling a very detailed list. Included in the list are
•Relevant NV9000 sources, destinations, and salvos.
•Which signals use which master control port numbers.
Do not neglect this step. Refer to the Reference Manual.
4 Put master control frame(s) and control panels in place.
5 Connect your MCPMs, MCEs, control panels, and PCs on
a master control LAN. Assign IP addresses to all the devices
on the LAN. (Connect NV9000 controllers to the LAN if
the NV9000 and master control will communicate.)
6 Connect video and audio cabling at the back of the master
control frame.
7 Create a configuration file for each MCPM and MCE and
upload it.
8 Create a configuration file for each control panel and
upload it. (The upload for hardware control panels is dif-
ferent from the upload for software control panels.)
9 Power up the equipment. Test your setup.

Product Number: QG0012-04 Revision: A0; Date: 2/17/11 3
NV5100MC Master Control
10 Adjust and complete your configurations as required.
You do not have to specify a complete configuration to get
started. You can always add to, or change, configurations any
time. Leave yourself the option to expand or change.
Making Control Connections
At the rear of the master control frame are a variety of control
and status connectors. The control connectors are at the left
at the rear of the frame:
Most of the connectors are used only when a router is present
in the frame.
The master control frame has one or two control cards. They
are at the right if you are viewing the frame from the front.
The second control card is for redundancy. A control card can
be either an EM0374 router control card or an EM0414 clock
card. The EM0374 is required if the frame contains an MFR.
Otherwise, a clock card is sufficient.
SThe control cards have switch settings. See the Reference
Manual for how to set the switches.
If the frame contains an MFR, an external router control sys-
tem will communicate with the router through its control
card(s). A third-party control system (or automation system)
will generally communicate with the router control card
using Miranda’s NVISION serial protocol.
If the router control system is an NV9000, it can use
Miranda’s NVISION Ethernet protocol (NVEP).
Serial Control Ports
At the top left portion of the rear of the frame are 6 serial con-
nectors, and below that are 2 Ethernet connectors. If you are
connecting an NV9000 control system, Ethernet control is
preferable.
The CTRL1 and CTRL2 ports are DE9, RS-422.
Use these connectors for control using a serial protocol from
(1) a primary or secondary NV9000 router control system, (2)
a primary or secondary third-party router control system, or
(3) a router automation system.
These connection uses straight-through serial cable.
Cases:
1 NV9000 system controller with a serial protocol.
Connect the primary CTRL1 port to a COM port on the
system controller. Connect the secondary CTRL1 port to
another COM port of the system controller if your frame
has a secondary control card.
2 Third-party control system (that is not an SMS7000)
Connect the primary CTRL1 port to a COM port of that
device. If your frame has a secondary control card, connect
the secondary CTRL1 port to a COM port of the device.
(SMS7000 systems connect at the ‘Aux’ ports.)
3 Redundant NV9000 (with a serial protocol)
Connect the primary CTRL2 port to a COM port on the
redundant system controller. Also connect the secondary
CTRL2 port if your frame has a secondary control card.
4Automationsystem.
Connect the primary CTRL1 or CTRL2 port to a COM port
of the automation system. Similarly connect the second-
ary CTRL1 or CTRL2 port if your frame has a secondary
control card.
113-128
12
97-112
11
81-96
10
65-80
9
INP
U
CTRL 1
CTRL 2
DIAG
CTRL 1
CTRL 2
DIAG
VIDEO
REF 1
VIDEO
REF 2
ALARMS
TIMECODE
AES
REF
1
NVISION
AUX US
LOOP
THRU
(2)
10/100 T 10/100 T
CONTROL N O. 9K50
PROFESSIONAL
VIDEO/AUDIO
AES
REF
2
PRI CTRL SEC CTRL
PRI CTRL SEC CTRL
10 210 2
LOOP THRU
LOOP
THRU
SDI
OUTPUT
SDI
OUTPUT
1
2
3
4
5
6
7
8
9
10
11
12
13
14
15
16
SDI
OUTPUT
SDI
OUTPUT
1
2
3
4
5
6
7
8
9
10
11
12
13
14
15
16
Y PASS IN
PGM MON
PVW OUT
CLNFD OUT
10 ASE T
10/100 T
LOOP
ANALOG
AUDIO
OUT
METER &
MONITOR
VID REF
RS-422
AUX
PGM OUT PGM OUT 1/2
Y PASS IN 1/2
PGM OUT 3/4
Y PASS IN 3/4
PGM OUT 5/6
Y PASS IN 5/6
PGM OUT 7/8
Y PASS IN 7/8
SDI
NV5000-XP-SD
AES
Serial Control
Diagnostic
AES Reference
Video Reference
Time-Code Reference
(Aux Bus)
(ignore)
Ethernet Control (RJ-45)
(System Alarms)
for Primary
Control Card
for Secondary
Control Card
CTRL 1
CTRL 2
Diagnostic
COM A
COM B
COM A
COM B
MC Frame with MFR
Primary
Secondary
CTRL1
CTRL1
CTRL2
CTRL2
NV9000
Primary
NV9000
Secondary
Stand-Alone Serial
Control System
Redundant Serial
Control System
COM A
COM B
MC Frame with MFR
Primary
Secondary
CTRL2
CTRL2
CTRL1
CTRL1
NV9000
Stand-Alone

4Product Number: QG0012-04 Revision: A0; Date: 2/17/11
NV5100MC Master Control
Diagnostic Ports
The DIAG ports are DE9, either RS-232 or RS-422 (selectable
in UniConfig). These ports are for configuration, firmware
uploads, and testing.
The ports are typically used with UniConfig to initialize the
primary and secondary control cards for routing. The DIAG
ports are not used during normal operation. See UniConfig.
Ethernet Control Ports
The Ethernet connectors are used when you have an NV9000
router control system connected over Ethernet.
The Ethernet connectors (RJ-45) are needed only when a
router is present in the frame and an Ethernet control proto-
col is in use.
SBefore you can use the Ethernet ports, the control card(s)
must be assigned IP addresses in UniConfig. See UniCon-
fig for details.
Use CAT5 Ethernet cable to make Ethernet connections.
Cases:
1 NV9000 control system with Ethernet protocol.
Connect the primary Ethernet port to one of the “Panel/
Router” network switches connected to the NV9000 sys-
tem controller. Similarly connect the secondary Ethernet
port of your MC frame if it has a secondary control card.
2 Automation system (in addition to the NV9000).
Connect a COM port of the automation system to either
primary serial port, CTRL1 or CTRL2. Similarly connect a
COM port to either secondary serial port if your frame has
a secondary control card.
Note that a crossover cable is required between the two Ether-
net switches in the redundant connections.
See Details for information about the NV9000 connectors.
AES Reference
AES reference connectors allow you to sync AES audio in the
master control frame to your house reference. If you do not
supply an external AES reference, the control card itself will
generate its own 48kHz reference.
There are two pairs of connectors for AES reference —one for
the primary control card and one for the secondary control
card. Each control card can use either (but not both):
•BNC —unbalanced signals.
•A 3-pin Phoenix quick-release connector for STP connec-
tions (balanced signals).
Both accept AES audio signals at a 48kHz sample rate (3.072
MHz bit rate).
The master control frames support “near-sync” operation.
That is, an unlocked 48kHz AES source can be routed by a
synchronous AES input/output module pair.
An acceptable reference is any 48 kHz AES signal. Typically,
digital silence is used as a house AES reference.
SAt software revision 6.1.0, MCEs derive AES reference from
the video reference.
Aux Bus
SThere is no relation between this “aux” bus and the aux bus
of an MCE, the aux buttons of certain control panels, or
the aux audio inputs of an MCPM or MCE.
At the middle left portion of the rear of the frame are 2 ‘NVI-
SION Aux Bus’ (BNC) connectors:.
If (and only if) you are using an SMS7000 router control sys-
tem with the master control system, connect the SMS7000 to
the NVISION aux bus connector.
for Primary
Control Card
for Secondary
Control Card
Ethernet
Panel/Router
Net 1
Panel/Router
Net 1
Control Net
(crossover
cable)
Router
MC Frame with MFR
Primary
Secondary
Ethernet
Ethernet
NV9000
Primary
Secondary
NV9000
COM1
COM1
RS-232
Ethernet
Panel/Router
Net 1
MC Frame with MFR
Primary
Secondary
Ethernet
Ethernet
NV9000
Stand-Alone
Router
Stand-Alone Control System
Redundant Control System
for Primary
Control Card
for Secondary
Control Card
BNC
Phoenix
SMS7000 Connectors
(BNC, 50Ω)

Product Number: QG0012-04 Revision: A0; Date: 2/17/11 5
NV5100MC Master Control
The frame has two aux bus connections. The connection is
loop-through: you can pass the SMS7000 “node bus” control
signals on to another device. You can connect a redundant
control system on the “node bus.”
If you are using an SMS7000 control system, terminate the
“node bus” with a 50Ωterminator.
SUsing an SMS7000 requires an SMS7000 mezzanine card
installed on each router control card. See the Reference
Manual.
Video Reference
At the lower left portion of the rear of the frame are 4 video
reference (BNC) connectors:
These references affect only the MFR, if present, not the
MCPM and MCEs in the frame. Each MCPM or MCE also
requires a video reference.
If there is no video reference, the control card’s front red LED
remains lit and takes within the MFR will not occur at defined
switch points.
Four video reference connections (Video Ref 1 and Video Ref
2) are provided —two for each control card. Each connection
is “loop-through.” One connector receives the reference sig-
nal; the other feeds it to another device.
Acceptable reference signals include NTSC analog, PAL ana-
log, or HD tri-level analog signals. External 75Ωtermination
is required on the frame if you do not feed the reference to
another device. You can feed multiple MCPM references from
these connectors, but only one MCE reference.
SSome MCEs and MCPMs support Dolby E audio. Dolby E
requires a non-interlaced video reference format. Dolby E
works with 720p video sources when the reference is 525i,
625i, or 1080i.
SMCEs have only one video reference connection and that
is internally terminated. If you have more than one MCE
in a frame, you will need some means (perhaps a DA) to
distribute video reference to each MCE.
In the case of composite reference signals, only the sync por-
tion is used. Reference signals may be single, redundant (same
video standard and rate) or different (dual-standard mode, dif-
ferent rates).
SThe choice between redundant and dual modes is made in
UniConfig. If you have only a single reference signal, these
modes do not apply.
Single Reference Signals
There is one reference input, possibly “daisy chained” to ref-
erence inputs on other devices.
Redundant Reference Signals
In this mode, both reference inputs are driven with identical
but separate reference signals in case one fails.
Dual-Standard Reference Signals
In this mode, the reference inputs are driven with different
signals. An example might be NTSC analog black on refer-
ence input 1 and HD tri-level sync on reference input 2.
This mode allows the use of both SD and HD video, each with
video reference.
SRemember that the EM0414 clock-generator cards do not
accept video reference signals. Video reference to the
frame is not needed if there is no MFR present.
Making I/O Connections
Determine all your cabling connections before actually mak-
ing any connections. There are many trade-offs to make.
See Card Slots on page 19.
Important Points to Remember
The frame’s inputs must be shared by all the MCPMs and
MCEs in the frame.
Each input card provides 16 inputs. (Each audio input is a sig-
nal pair.)
The various MCPMs allow different numbers of main sources.
(Main sources generally use more than one input.)
The various MCPMs and MCEs impose these limits on video
effects and audio overs:
(There are 4 audio overs, with up to 8 channels each on
MCPMs and up to 16 channels each on MCEs.)
Intuition XG connections require either 2 or 4 BNCs of an
SWB backplane (and at least one MCE in the frame).
You can mix MCPMs and MCEs in a frame. The following
points affect where you place MCPMs and MCEs.
•An MCE, MCPM-HD, -HD2, or MCPM-SDHD expect video
inputs in the range 1–64 (i.e, input slots 5–8).
•In the same vein, an MCE, MCPM-HD, -HD2, MCPM-MK-
HD, or MCPM-SDHD will not allow audio inputs in the
range 1–64 (i.e, slots 5–8).
•The MCPM-SD and MCPM-MK-SD allow video or audio
inputs in any position in any slot.
Video Reference Connectors
(BNC, 75Ω)
MCPM-SD 128 MCPM-HD, -HD2 64 MCPM-SDHD 64
MCPM-MK-SD 128 MCPM-MK-HD 16 MCE 64
Key fill 8 Squeeze background 32 Over channels, MCPM 32
Key cut 8 Squeeze image 2 32 Over channels, MCE 64

6Product Number: QG0012-04 Revision: A0; Date: 2/17/11
NV5100MC Master Control
•The MCPM-MK-SD and -MK-HD do not have squeeze
generators.
Note also that the 16 inputs for the MCPM-MK-HD are on its
own backplane module. They are not routed through the
frame’s motherboard. These inputs are HD only, and not SWB.
These inputs are not accessible by other MCPMs or MCEs.
DB25 connectors (analog audio) require breakout cable.
Miranda’s WC0053 is a suitable cable.
MCEs do not accept analog video or analog audio inputs.
Connecting (Local) Main Sources
Local main sources are those connected directly at the master
control backplane. You have 2 choices: video alone or video
with embedded audio and/or discrete audio.
Video
For MCPMs, video can be analog, SD, or HD. MCEs do not
accept analog video input.
Connect your analog video source to a BNC of one of your
analog video input backplane modules.
Connect your SD video source to a BNC of one of your SD
input backplane modules.
Connect your HD video source to a BNC of one of your HD
input backplane modules or to the backplane of an MCPM-
MK-HD.
Discrete Audio
Discrete audio can be analog or AES. Dolby E audio is possi-
ble. An MCPM can accept up to 8 individual channels (or 4
channel pairs) for each main source. An MCE can accept up
to 16 individual channels (or 8 channel pairs) for each main
source.
Connect an analog audio source to a set of DB25 terminals
using a breakout cable such as the WC0053. An analog audio
input card and backplane are required. Each DB25 supports 8
individual channels. See the Reference Manual for pinouts.
Connect an AES source to a BNC or Phoenix connector. An
AES input card and backplane are required. See the Reference
Manual for Phoenix pinouts.
Embedded Audio
Video for embedded audio is either SD or HD. Its audio is
either AES or Dolby E. MCPMs accept up to 4 AES pairs (8
channels) for each main source. MCEs accept up to 16 chan-
nels (8 pairs) for each main source.
If a main source has only embedded audio, then only the
video connector is required.
Connecting (Local) Key Sources
Local key sources are those connected directly at the master
control backplane.
For MCPMs, keys can be analog, SD, or HD. MCEs do not
accept analog keyer inputs. You cannot mix an SD key with
HD program output or vice versa.
Connect your analog key source to a BNC of one of your ana-
log video input backplane modules.
Connect your SD key source to a BNC of one of your SD (or
SWB) input backplane modules.
Connect your HD key source to a BNC of one of your SWB
input backplane modules or to the backplane of an MCPM-
MK-HD.
Connecting (Local) Squeeze Background
Sources
Local squeeze background sources are those connected
directly at the master control backplane.
For MCPMs, local squeeze backgrounds can be analog, SD, or
HD. MCEs do not accept local squeeze background sources.
Squeeze backgrounds in MCEs can be main sources or inter-
nal black.
Connect your analog squeeze source to a BNC of one of your
analog video input backplane modules.
Connect your SD squeeze source to a BNC of one of your SD
(or SWB) input backplane modules.
Connect your HD squeeze source to a BNC of one of your
SWB input backplane modules or to the backplane of an
MCPM-MK-HD.
SYou cannot mix an SD squeeze background with HD pro-
gram output or vice versa.
SSqueeze image 2 sources are taken from the set of main
sources and do not have separate connections.
Connecting (Local) Over Sources
Local audio over sources are those connected directly at the
master control backplane.
For MCPMs, an audio over source is a set of up to 8 discrete
AES inputs. For MCEs, an audio over source is a set of up to 16
discrete AES inputs. In either case, Dolby is not supported.
Connect each over source input to a BNC or Phoenix connec-
tor of a suitable backplane.
Connecting (Local) Audio Sources
Local audio sources are auxiliary audio signals that may be
directed to the audio meters or monitors. They are not acces-
sible by the processing buses of an MCPM or MCE.

Product Number: QG0012-04 Revision: A0; Date: 2/17/11 7
NV5100MC Master Control
Each MCPM or MCE can direct two auxiliary audio inputs to
audio monitors or audio meters. These sources are called,
respectively, “off-air” and “aux in.” Each MCPM source uses a
set of up to 8 AES inputs. Each MCE source uses a set of up to
16 AES inputs.
Connect each audio source input to a BNC or Phoenix con-
nector of a suitable backplane.
Connecting Intuition XG Sources
Vertigo XG processors produce one or two key channels. Each
channel comprises fill and cut video streams (with embedded
audio). The fill and cut sources originate at an 8-BNC break-
out connector at the rear of the Vertigo XG processor.
Connect these 2 (or 4) cables at SWB inputs at the master con-
trol backplane.
SA tri-level video reference must be connected to the Ver-
tigo XG reference input also on the breakout connector.
NV9000 Sources
There are two ways for master control to access NV9000
sources: router pre-select and external router sources. Router pre-
select applies to main sources and audio over sources. Exter-
nal router sources may be main sources, key sources, squeeze
sources, and over sources. The behavioral difference between
router pre-select and external router sources is described in
the Reference Manual. In brief:
•Router pre-select sources are explicitly selected by the
operator by browsing NV9000 device categories.
There is no real limit to the number of these sources.
•External router sources are preselected during configura-
tion. The operator needs no knowledge of which sources
are external and which are not.
The number of these sources is limited to the number of
sources that can be configured. These sources all use the
same connectors.
In most if not all cases, a source from a router connects at the
master control backplane as do local sources. However, the
other ends of the cables connect to router outputs.
NV9000 Connection
A requirement for router sources is a connection between the
NV9000 controller(s) and the master control system:
The connection is fairly simple: it is just an Ethernet cable
from each NV9000 controller’s master control port to the
master control Ethernet switch. If you have a stand-alone
NV9000 system, make only one such connection.
Router Pre-Select
Router pre-selection applies to main sources and over sources.
At least one main source button must be “operator modifi-
able” (in MasterConfig). At least one over source button must
be “operator modifiable.” A control panel configuration spec-
ifies the NV9000 device categories that a connected MCPM
or MCE can use. Over sources and main sources share the
same NV9000 device categories.
Under router pre-select, the MCPM or MCE configuration
specifies the router destination to which NV9000 sources are
routed. A destination is a logical, not physical entity, belong-
ing to a level set (NV9000 term). The level set determines
what signals are routed. Generally, a level set includes one
video level (SD, for example) and one or more audio levels
(AES 1/2, AES 3/4, etc.). Video with embedded audio is consid-
ered just one level. To make this work, you must perform appro-
priate configuration settings in NV9000-SE Utilities.
To connect the destination to the master control backplane
implies connecting one video cable and one or more audio
cables. This example shows the cabling for a destination that
has 3 levels: SD, AES 1/2, and AES 3/4:
The router destination ID is specified, during MCPM or MCE
configuration, for the main or over source.
The illustration above shows a main source. Over sources are
similar, but all the connections are audio.
It is possible to have more than one router pre-select source
“button” defined for an MCE or MCPM. If you have more
than one MCPM or MCE in a frame, they may use the same or
different router pre-select destinations.
External Router Sources
The connection of external router sources is different:
Ethernet
M.C. GUI
Control
Net
Master
Control Net
Master
Control
Net
MCE
MCPM
NV9000
Primary
Secondary
NV9000
M.C. Panel
Config PC
(optional)
SD Router
AES Router
AES 3/4
SD Router
Dest 372
MC ackplane
AES 1/2
SD
SD
SD Router
AES Router
AES 3/4
SD Router
A = Dest 133 MC ackplane
AES 1/2
Source 56
SD
AES 3/4
AES 1/2
B = Dest 16

8Product Number: QG0012-04 Revision: A0; Date: 2/17/11
NV5100MC Master Control
External main sources require 2 connections, A and B, where
the A and B form a resource pool from which the available
resource is selected. The A and B connections must be equiva-
lent, albeit on different connectors.
Similarly, external keyer sources require a pool of 3 connec-
tions. The connections in this pool must be identical, albeit
on different connectors. And similarly, over sources require a
pool of 2 identical connections, A and B.
Excternal squeeze image sources do not require a pool of con-
nectors. A single connector suffices for each.
For MCEs, a set of external router connections can be defined
for the program and preset buses and for the preview and aux
buses.
These connections support all the external sources you
might define. The limit to the number of external sources is
in the configuration software: you may define up to 128 (or
64, or 16) main sources any or all of which may be external,
up to 8 keyer sources any or all of which may be external, or
up to 4 over sources, any or all of which may be external.
The effect is that the operator selects the external router
source without knowing whether the source is external. Dur-
ing MCPM or MCE configuration, it is the router source ID
that is specified for the source.
(The NV9000 control system and master control cooperate to
cause the switch to occur in the router.)
Creating a Master Control Network
The master control network connects MCPMs, MCEs, master
control panels, and (optionally) configuration PCs and tally
processors. If you are using an NV9000 control system, it is
also connected on the master control network. Notably, the
master control frame is not on the network.
Before you connect MCPMs or MCEs to the Ethernet switch
of the network, use MasterDiag to assign (through their diag-
nostic ports) their IP addresses.
Before you connect hardware control panels to the Ethernet
switch of the network, assign their IP addresses. Use their
menu system to do so.
Software control panels (GUIs) and master control configura-
tion software execute on PCs which connect on the master
control network. Ensure that the PCs have IP addresses on the
master control network.
This is a sketch:
SImportant: All MCPM and MCEs ship with the same
default IP address. All control panels ship with the same
default IP address. If you have purchased more than one
MCPM or MCE or more than one control panel, do not
connect and power them on all at the same time until you
have configured unique IP addresses for all devices.
Run MasterDiag
Before you can place an MCPM or MCE on the master control
network, you must assign it an IP address with MasterDiag.
MCPM Setup
Follow these steps:
1 Connect a straight-through serial cable from a COM port
of your PC to the diagnostic port at the front of the
MCPM. The diagnostic port is a female DE9.
2 Launch MasterDiag. Choose serial mode from the ‘Com-
munications’ menu. Choose the COM port at this time if
necessary.
3 Choose the ‘Ethernet Settings’ tab. Click the “Read’ but-
ton first. Then enter the IP address and subnet mask
(255.255.255.0) for the MCPM. Click the ‘Write’ button.
4 You can disconnect the serial cable at this point, because
you can use Ethernet communication through the master
control network for all further modifications.
5 Repeat these steps for all MCPMs you want to be in your
master control network. Each device on the network must
have a unique IP address.
MCE Setup
The task is the same as for MCPMs, but the cable is different.
If you have not done so, obtain or fabricate a DE9-to-Phoenix
cable.
M.C. GUI
Ethernet
Master
Control Net
Master
Control
Net
MCE
MCPM
NV9000
Primary
Secondary
NV9000
M.C. Panel
Config PC
Dev. Control
Tally Proc.
Intuition XG
Tx
Rx
5
6
9
GND
1
Rx
Tx
5
6
9
GND
1
PC MCPM

Product Number: QG0012-04 Revision: A0; Date: 2/17/11 9
NV5100MC Master Control
Then, follow these steps:
1 Connect the DE9-to-Phoenix cable from a COM port of
your PC to the diagnostic port of the MCE. The diagnostic
port is the upper 3 pins of the 6-pin Phoenix connector.
2 Launch MasterDiag. Choose serial mode from the ‘Com-
munications’ menu. Choose the COM port at this time if
necessary.
3 Choose the ‘Ethernet Settings’ tab. Click the “Read’ but-
ton first. Then enter the IP address and subnet mask
(255.255.255.0) for the MCE. Click the ‘Write’ button.
You can disconnect the serial cable at this point, because
you can use Ethernet communication through the master
control network for all further modifications.
4 Repeat these steps for all other MCEs you want in your
master control network. Each must have a unique IP
address.
Making MCPM/MCE Connections
The various MCPM and MCE backplane modules have some-
what different connectors. MCEs in particular use 1.0/2.3 Din
connectors for video and audio signals. Other MCPMs use
BNC connectors.
SDIN-to-BNC conversion panels (1RU) are available.
What is important during the “quickstart” period are the
video reference, Ethernet, and possibly automation connec-
tions. Other connections you can make later include audio
monitor, GPI, emergency bypass, and Dolby metadata.
Ethernet
Use a CAT5 Ethernet cable to connect each MCPM and MCE
to an Ethernet switch that supports the master control net-
work. You will have previously used MasterDiag to assign
each MCPM and MCE an IP address on that network.
Video Reference
Connections differ for MCPMs and MCEs.
Connect an MCPM’s video reference (BNC) to a suitable
video reference signal. An MCPM’s reference can be daisy-
chained to other reference inputs. Terminate the reference
chain with a 75Ωterminator.
Connect an MCE’s video reference (BNC) to a suitable video
reference signal. An MCE’s reference is internally terminated
and cannot be daisy-chained to other reference inputs. If you
have multiple MCEs, use a DA or similar device to send a ref-
erence signal to each MCE.
Automation
Each MCPM and MCE has an automation port (DE9, RS-422):
This guide does not address automation. But if you are plan-
ning master control automation, this is where to make the
connection. Use a suitable serial cable.
Hardware Control Panels
Power up your hardware control panels. Each panel accepts
two power sources for redundancy. Only one is required.
Ethernet
First, enter the IP address and subnet address in the appropri-
ate submenu of the panel’s menu system. This step will vary
from panel to panel. For most panels, choose the ‘Panel’ but-
ton from the menu, then choose ‘IP Setup’ from the resulting
submenu and proceed. Some panels might have a “LAN 2”
option. Use LAN 1 and ignore LAN 2.
(The SCP’s menu is on its lower left 8 buttons and might be
difficult to understand at first. Consult the SCP operator’s
guide if you need instructions.)
SIt is not necessary to restart the panel.
Then, using an Ethernet cable, connect the panel to the
Ethernet switch of the master control network. Some panels
have one Ethernet port; others have two. Use “LAN1” if a
panel has two.
Make sure that each panel has a unique IP address.
Mounting
The SCP is a 3RU control panel that is meant to be rack-
mounted. A CFCP could also be rack-mounted because it has
rails that are designed for it.
The FFCP and CFCP may be recessed in a console surface.
Each of these devices has a lid that you can open to service
internal components. The movement of the lid is not inhib-
ited when the device is recessed. There are panel cutout dia-
grams in the Reference Manual.
The FECP, CECP, and CECP M1 simply rest on a console sur-
face.
GPI
All hardware panels have GPI/Alarms connectors that sup-
port 2 optically isolated GPI inputs and 2 GPI relay outputs.
GND (6)
Rx (5)
Tx (4)
MCE
D
I
A
G
MCE
CORE
C
O
N
S
5
6
9
GND
1
2
3
Rx
Tx
PC
5
1
6
9
n.c.
Rx Com
Rx +
Tx
Gnd
n.c.
Rx
Tx +
Tx Com

10 Product Number: QG0012-04 Revision: A0; Date: 2/17/11
NV5100MC Master Control
Alarm signals on the connector represent the health of the
panel. You can connect these to circuits of your own.
GUI and Configuration PCs
Windows users’ accounts must be set to ‘Standard User’ or
better. Master control software does not function properly
when users have ‘Restricted User’ access or less.
Your GUI PCs and configuration PCs must reside on the mas-
ter control network. (Your PCs can belong to more than one
Ethernet LAN.) Follow these steps to configure IP addresses
on each PC.
1 Using the Windows Start menu on the Configuration PC,
choose Settings > Network Connections > Local Area Con-
nection.
2 Set the IP address and subnet as shown. Each PC on the
master control network must have a unique address on the
network.
The subnet address should be 255.255.255.0.
3 Click ‘Advanced’. Choose the DNS tab and ensure the set-
tings appear as shown here:
These values are the same for all PCs in the network.
4 Choose the WINS tab and ensure the settings appear as
shown here:
These values are the same for all PCs in the network.
SOther than the IP address, the settings are typical Win-
dows®XP default selections.
SImportant: DNS, WINS, or any other form of name resolu-
tion are not required and should not be enabled.
Tally Processors
The tally processor is slightly different because it is a third-
party device.
First, connect the tally processor to the master control Ether-
net switch. Use the front panel “menu” of the tally processor
to define its IP address (which must be unique on the master
control network).
You will eventually have to fabricate cables to the tally pro-
cessor’s 32 GPIs and 32 GPOs connecting them to the appro-
priate switches and circuits at your facility.
You can connect the GPIs of control panels, MCPMs, and
MCEs to the tally processor.
Configuration and wiring of the Tally Processor is well
beyond the scope of this guide. Refer to the Installation Guide
and the Tally Processor User’s Guide.
Device Controllers
Like the tally processor, the DC21 device controller is a third-
party device. It has 4 serial ports supporting machine control
protocols (Sony, Odetics, or VDCP) and 16 pairs of GPO relay
outputs that carry 100 ms start and stop pulses.
First, connect the device controller to the master control
Ethernet switch. The port is ‘E-net #1’ on the device control-
ler. Use the front panel “menu” of the device controller to
define its IP address (which must be unique on the master
control network). You’ll enter the IP address of the device
controller in the configuration of each MCE that uses it.
DNS Tab
WINS Tab

Product Number: QG0012-04 Revision: A0; Date: 2/17/11 11
NV5100MC Master Control
Then connect the serial ports to VTRs and other devices you
want to control. You might have to make custom cables
depending on the serial connectors of your devices.
Determine the pre-roll and device latency timing values for
the device. Include the pre-roll time in the configuration of
the main source that represents the device. Include the
device latency value in the port configuration of the DC21.
It is possible to use the GPOs (in pairs) for machine control.
You can use the GPIs and you can use GPOs for other pur-
poses. This guide cannot address those connections.
Refer to the Installation Guide and the Device Controller User’s
Guide.
Intuition XG
Connect the Vertigo XG processor to the master control
Ethernet switch. (It has only one Ethernet port.)
You must enter the IP address of the Vertigo XG processor in
the configuration of each MCE that uses it. You may change
the IP address of the Vertigo XG processor using Windows
tools. Refer to Miranda’s Vertigo XG documentation.
Software Installation
The software and documentation CD is SB0221. The SB0222
CD provides the optional CECP GUI.
We recommend you copy all the documentation from the
CD to your file system, print it, and read it.
Preliminary Steps
Obtain and set up a Windows PC (XP or Vista) for configura-
tion. If you intend to use a software control panel (GUI),
obtain and set up a Windows PC (XP or Vista) for the GUI. It
can be the same PC.
The PC(s) you use must be connected on the master control
network.
If your master control system is part of an NV9000 control
system, you are advised to enter the IP addresses of the
NV9000 controller(s)—stand-alone, primary or secondary —
during installation.
You might need to pre-configure the NV9000 controller(s) to
change the IP addresses of their master control ports.
One or more of your configuration PCs should be connected
on the NV9000’s house network.
The NV9000 router software and documentation CD is
SB0033. It contains the NV9000-SE Utilities installer and the
UniConfig installer. Both are requirements for configuring an
NV9000 router control system.
Installing Configuration Applications
Follow these steps to install master control configuration
software on the configuration PC:
1 Insert the software and documentation CD (SB0221) in
your CD-ROM drive. The CD will “auto-play.” The master
control software and documentation screen displays:
Click the ‘Installer’ button. The installer will launch.
2 IF you already have MC software installed, you will see an
add/remove message screen:
Click ‘OK’ and go to the Windows “control panel.”
Choose ‘Add or Remove Programs’. Select and delete ‘NVI-
SION Master Control Configuration SW’.
Then click the ‘Installer’ button again, as in step 1, and
proceed to step 3.
3 The Welcome screen displays:
Click ‘Next’ to proceed.

12 Product Number: QG0012-04 Revision: A0; Date: 2/17/11
NV5100MC Master Control
4 The NV9000 Integration screen displays:
If you are integrating an NV9000 router control system
with your master control system, enter the IP address of
the NV9000’s primary system controller (and secondary
system controller, if applicable). A stand-alone system
controller is considered the primary, in this instance.
If your NV9000 system uses a virtual IP address (specified
in NV9000-SE Utilities) it is preferable to use that instead
of the primary address.
This integration lets you configure router pre-select, exter-
nal router sources, and salvos.
If you do not have an NV9000, leave these fields empty.
Click ‘Next’ to proceed.
5 The “Select Installation Folder” screen displays:
The default folder for the installation is C:\Program
Files\NVISION\Master Control\. Browse to choose another
folder. We recommend that you select “Everyone” so that
everyone who uses the PC can access the software.
Click ‘Disk Cost’ if you wish to see how much disk space
you need.
Click ‘Next’ to proceed.
6 The confirmation screen displays:
Click ‘Next’ to proceed. Click ‘Cancel’ to cancel the instal-
lation. Click ‘Back’ to change your installation parameters.
7 When the actual installation begins, a progress indicator
displays:
Click ‘Cancel’ to terminate the installation before it com-
pletes or wait for the installation to complete. (The instal-
lation takes only a few seconds.)
8 The completion notice displays. Click ‘Done.’ You will be
returned to the main CD screen.
Barring errors, the installation is complete. The installer has
created a master control folder, with entries in the Windows
Start menu. The Start menu path is:
Start > Programs > Miranda > Master Control > ...
These are the default pathnames of the four configuration
programs:
C:\Program Files\Miranda\Master Control\bin\MasterConfig.exe
C:\Program Files\Miranda\Master Control\bin\MasterDiag.exe
C:\Program Files\Miranda\Master Control\bin\MasterLogo.exe
C:\Program Files\Miranda\Master Control\bin\MCSPanelConfig.exe
We recommend that you create shortcuts on your PC’s desk-
top. To launch any of the applications, (1) choose the appli-
cation from the Start menu, (2) double-click the application
in its folder, or (3) double-click its desktop shortcut.
You may make copies of the installation files (as a folder) and
any other files (including documentation) in your file sys-
tem. (To do so, open the CD as a folder and browse.)

Product Number: QG0012-04 Revision: A0; Date: 2/17/11 13
NV5100MC Master Control
Installing Documentation
Miranda provides several user’s guides, operator’s guides, and
reference manuals (including this one) on the software and
documentation CD (SB0221). Follow these steps to install
documentation:
1 Insert the CD in your CD drive. When the CD “auto-
plays,” click the ‘Documentation’ button.
2 The Documentation screen displays:
Click any of the document names to open the document.
They are searchable PDF documents and you must have
some form of Acrobat running on your computer to do so.
(Acrobat Reader is free software.)
When you have opened a document, you can save it on
your computer or print it as you wish.
You can also simply browse the installation disk to locate
files in which you might be interested.
Installing the GUI
Miranda provides the GUI software, as a separate purchase
item, on the GUI CD (SB0222). The GUI operator’s guide,
however, is on the software and documentation CD (SB0221).
Ensure that your PC is running Windows®XP Professional®or
Vista.®
For optimal GUI performance, your PC should have a video
card capable of 1280×1024 (or better) resolution. The GUI is
optimized for a touchscreen, but you can use a conventional
monitor, keyboard, and mouse if you want.
SThe GUI will not run properly until you have connected
your PC on the master control network.
Follow these steps to install the GUI software:
1 Insert the GUI CD in your CD-ROM drive. The CD will
“auto-play.”
Click the ‘Installer’ button. The GUI installer will launch.
2 IF you already have the GUI software installed, you will see
an add/remove message screen:
Click ‘OK’ and go to the Windows “control panel.”
Choose ‘Add or Remove Programs’. Select and delete ‘NVI-
SION Master Control GUI SW’.
Then click the ‘Installer’ button again, as in step 1, and
proceed to step 3.
3 The Welcome screen displays:
Click ‘Next’ to proceed.

14 Product Number: QG0012-04 Revision: A0; Date: 2/17/11
NV5100MC Master Control
4 The “Select Installation Folder” screen displays:
The default folder for the installation is C:\Program
Files\NVISION\Master Control\. Browse if you want to
choose another folder. We recommend that you select
“Everyone” so that everyone who uses the PC can access
the software.
Click ‘Disk Cost’ if you wish to see how much disk space
you need:
Finally, click ‘Next’ in the “Select Installation Folders”
window to proceed.
5 The confirmation screen displays:
Click ‘Next’ to proceed. Click ‘Cancel’ to cancel the instal-
lation. Click ‘Back’ to change your installation parameters.
6 When the installation begins, a progress indicator dis-
plays:
Click Cancel to terminate the installation before it com-
pletes or wait for the installation to complete.
7 The completion notice displays:
Click ‘Done’.
The installation is complete. The installer has placed the GUI
software in the master control folder, with an entry in the
Windows Start menu. The Start menu path is:
Start>Programs>Miranda>Master Control>Master Control CECP GUI
The default pathname is:
C:\Program Files\Miranda\Master Control\bin\cecp_gui.exe
NVISION recommends that you create a shortcut on your
PC’s desktop.
To launch the GUI, (1) choose the application from the Start
menu, (2) double-click the application in its folder, or (3)
double-click its desktop shortcut.
Other Software
NV9000-SE Utilities and UniConfig are available on the
router configuration and documentation CD (SB0033). Con-
tact Miranda if you need to obtain that CD.
The SB0033 CD also contains compact router configuration
software and documentation. If compact routers are
deployed in your system, this software and documentation
will be useful.
The Tally Processor’s configuration application is self-con-
tained. The Device Controller’s configuration application is
also self-contained.
The Intuition XG software is extensive. Some of it is configu-
ration software, some of it is image management software,
and some of it is creative software. Some of it is loaded in the
Vertigo XG processor. Contact Miranda to obtain the soft-
ware (and documentation) that you need and do not have.
Configuration
The configuration phase follows the “quickstart” phase but
we’ll address some points. If you read this section, you’ll be
more prepared to use the configuration tools.
Configuration applies to control panels, to MCPMs and
MCEs, and to tally processors.
NV9000 system configuration is far outside the scope of this
guide.

Product Number: QG0012-04 Revision: A0; Date: 2/17/11 15
NV5100MC Master Control
The tally processor is third-party equipment and comes with
its own built-in configuration utility that runs in a browser
on a connected PC. Refer to the Tally Processor’s User’s Guide.
Other third-party equipment (e.g., automation systems, or
router control systems) are also outside the scope of this
guide.
All configuration requires a connected configuration PC. GUI
configuration files require special handling.
Configuration Tools
Master control includes 4 applications:
The tally processor’s configuration application is built-in.
We recommend that you read the configuration guides care-
fully. You need to read only the portions you want to under-
stand.
MasterConfig
When approaching MCPM and MCE configuration you
should keep in mind that the different MCPM and MCE mod-
els are in fact different, sometimes in subtle ways. Features
available in one might not be available in others. All MCPMs
and MCEs are independent.
MCEs are “next generation” master control processors and
differ from MCPMs in these major areas:
•MCEs support 16-channel audio. MCPMs support 8 audio
channels.
•MCEs have preview and aux buses. MCPMs do not. These
buses allow panel operators to view and compose effects
with affecting on-air content.
Your master control software comes with several default con-
figurations. In fact, every MCPM or MCE that ships has some
configuration.
MCPM and MCE Characteristics
MCPMs and MCEs have some characteristics of interest dur-
ing initial setup.
Assumption of Source Buttons
MCPMs and MCEs assume that a control panel has 16 main
source buttons. Some have fewer, but all have 16 “virtual but-
tons.” It is in MasterConfig that you specify how the main
source buttons are used. Similarly, MasterConfig specifies
how over source buttons are used.
Router Sources
MCPMs and MCEs support two concepts: (1) external router
sources and (2) router pre-selection.
Router pre-selection relies on control panel configuration.
Router pre-selection requires that at least one main source
button (or at least one over button) being configured in Mas-
terConfig as “operator-modifiable.”
External router sources require nothing of the operator or of a
control panel. However, external router sources are limited in
number.
Automation
MasterConfig presents a few minor automation options. The
term “system modifiable” applies to source buttons that can
be controlled by automation.
Preview and Aux
MCEs have 2 aux buses and might have a preview bus (if a pre-
view board is present). MCPMs do not have these buses.
The aux bus can be put to use in several very different ways.
Only new control panels support the aux buses: the CECP,
CECP M1, CECP GUI, Aux/Preview GUI, and FECP. These
panels also support the MCE’s preview bus, except for the
CECP M1.
General Settings
There is a ‘General Settings’ page in which you define funda-
mental characteristics (such as the number of audio chan-
nels) of the MCE or MCPM you are configuring.
Certain general settings enable (or disable) configuration
pages. For example, its “Enable External Router Source”
checkbox option enables the ‘ExtRtrSrc’ page. Unless you
check that box, you will not see an ‘ExtRtrSrc’ page.
Certain general settings enable (or disable) options in the
configuration pages. For example, the “Enable AutoRestore of
Audio Mixer Settings” checkbox option causes an ‘Auto
Restore’ checkbox option to appear on the main and over
source configuration pages.
Source Limits
SD MCPMs allow 128 video and/or audio inputs.
HD MCPMs allow 64 video inputs in the range 1–64 and 64
audio inputs in the range 65–128.
The -MK-HD allow 16 video inputs, from its own backplane,
and 64 audio inputs in the range 65–128. These video inputs
cannot be used by any other MCPMs or MCEs.
MCEs allow 64 video inputs in the range 1–64 and 64 audio
inputs in the range 65–128.
MasterConfig Configures master control processors (MCPMs
and MCEs).
MasterDiag Sets up MCPMs and MCEs. MasterDiag is also
used for software uploads.
MasterLogo Converts logo artwork to the internal format
required by MCPMs and MCEs. (MasterLogo
performs the upload of logos to the MCPM’s or
MCE’s logo store.)
MCS Panel Con-
figuration Editor
Configures master control panels.

16 Product Number: QG0012-04 Revision: A0; Date: 2/17/11
NV5100MC Master Control
Each of an MCPM’s video sources can be configured with up
to 8 audio sources. Options include embedded audio, discrete
audio, analog audio, and Dolby E encoding. Each of an MCE’s
video sources can be configured with up to 16 audio sources.
An MCPM’s over sources can be configured with up to 8
audio inputs. An MCE’s over sources can be configured with
up to 16 audio inputs.
Misc.
The MCPM-MK-SD and MCPM-MK-HD have no squeezeback
generator, only one logo, and no analog audio outputs. The
MCEs have no analog audio or analog video.
Choosing an MCE or MCPM
There is a list of MCPMs and MCEs at the left side of the Mas-
terConfig window. Click to choose (or redefine or delete) any
entry in this list. (This list is shared by MasterConfig, Master-
Diag, and MasterLogo.)
You can also enter the IP address of an MCPM or MCE directly
at any time:
It is not necessary to select an existing MCPM or MCE to cre-
ate a configuration. After you create a configuration, you can
associate it with any of the MCPMs or MCEs in the list.
SBe careful, when writing data, not to load a configuration
into an MCPM of the wrong type. There are some safe-
guards, but they are not fool-proof.
Editing
A new configuration starts with a dialog asking what MCPM
type you want to configure and for what video standard:
MasterDiag
MasterDiag is a relatively small utility program, but nonethe-
less important. It is not a configuration program. With Mas-
terDiag, you can do the following:
•Set the IP addresses of MCPMs and MCEs.
•Update MCPM and MCE firmware. There are two cases:
MCPMs. At times, you will be directed by tech support to
update firmware in an MCPM. The firmware files are not
directly available. You must obtain them from tech sup-
port.
MCEs. Use the file MCESoftwarePackage_6_1_0.nvz in the
‘setup’ subfolder of the master control installation folder.
If it becomes necessary—as when you receive new firm-
ware —you can load this firmware in an MCE. The single
.nvz file is appropriate for all MCEs.
•Use the Timing page to view timing characteristics of
video and audio inputs of MCEs.
•Use the System Status page to set the time and date.
MasterLogo
MasterLogo is a utility program that supports the use of
logos. Like MasterDiag, it is not a configuration program.
MasterLogo converts graphic files (.TIF, .BMP, .JPG, .TGA,
.PNG, .GIF) to the internal form (10-bit YCrCb) required by
Master Control.
Logos may be static or animated.
It is MasterLogo that executes the upload of logos to MCPM
or MCE when MasterConfig writes configuration to an
MCPM or MCE. (The upload is an option. Logo upload can
take a long time and MCEs don’t generally need it beyond the
first upload.)
There are constraints on logo usage that are described in the
Reference Manual.
Logo Limits
MCPMs
MCPMs have up to 128 MB or up to 512MB of RAM in which
to store logos, depending on the model. HD MCPMs have the
larger memory. The maximum number of logos of any type is
64.
MCEs
MCEs have up to 2GB (or more) of memory in which to store
logos. The maximum number of logos of any type is presently
400.
All logos in an MCE reside in non-volatile storage. It is not
necessary to reload logos at every restart.
MCS Panel Configuration Editor
The MCS Panel Configuration Editor (the “panel editor,” for
short) configures all control panels, hardware and software.
A panel configuration does the following:
•Defines what channels (MCPMs or MCEs) a master control
operator can select.
•Selects the NV9000 source categories the operator can use
(if an NV9000 system is present).
•Defines configurable button functions.
A panel might support features not available in an MCPM.
For example: the squeezeback button is disabled on a panel

Product Number: QG0012-04 Revision: A0; Date: 2/17/11 17
NV5100MC Master Control
that controls an MCPM-MK-SD or -MK-HD. These MCPMs
have no squeeze function.
A panel might lack support for MCPM or MCE features. For
example: the aux bus or preview bus in an MCE cannot be
accessed from an FFCP, CFCP, PC GUI, or SCP. Automation
can do so, however, because it is not limited by any panel fea-
tures.
The SCP has menu pages that are not present for any other
panel. Some panels (CECP for instance) have “virtual button”
assignment pages.
With the panel editor, you can, of course, save and re-open
configuration files in your PC’s file system. You can manage
configuration files any way you’d like.
You can develop configuration files “off-line.” It is not actu-
ally necessary to select a panel unless you want to read (or
write) its configuration.
You can start with a new “empty” configuration, use a default
configuration, or use an existing configuration as the basis
for a new one.
Panel Characteristics
Master control panels have some characteristics of interest
during initial setup. The SCP is quite different from other
panels.
GPI
All hardware panels have 2 GPI inputs and 2 GPI outputs. A
hardware control panel can control and sense MCPM and
MCE GPIs as well as its own GPIs.
The GUIs (software control panels) do not have GPIs but they
can control and sense MCPM and MCE GPIs.
Button Sets
Some control panel have 16 physical main source buttons.
Some panels have fewer, but have 16 “virtual source buttons”
that can be selected with a “bank select” button. The button
switches the “bank” that appears on the physical buttons.
(Some panels have a fixed set of video effect and audio over
buttons. Some panels have a configurable set.)
Router Sources
Panel configurations support router pre-selection. It is in the
panel configuration that you specify (1) the NV9000 control
system with which the panel communicates to obtain router
sources, and (2) the source categories to which the panel has
access.
For router pre-selection to work, main source buttons and
over source buttons must be configured—in MasterConfig—
as “operator-modifiable” or “system-modifiable.”
Automation
Control panels are not automated. However, all panels have a
configurable button function that enables or disables auto-
mation temporarily.
Preview and Aux
MCEs have 2 aux buses and might have a preview bus (if a pre-
view board is present). MCPMs do not have these buses.
The newer control panels (CECP, CECP GUI, and FECP) have
an aux button row and a preview button row. The CECP M1
has aux buttons but does not have preview buttons.
The aux buttons can be assigned quite different functions.
The preview buttons simply allow experimentation with
video effects and does not affect (or interfere with) program
content.
Configuration Files
Configuration files for GUIs are handled differently from
configuration files for hardware control panels.
To take effect, a GUI’s configuration file must be placed in the
same folder as the GUI’s executable file and must be named
cecp_gui.uicfg (for the CECP GUI).
For a hardware panel, you must write the configuration file to
the panel from the panel editor. Use the ‘Write Config to
Panel’ command from the ‘File’ menu.
You can also read GUI configuration files and hardware panel
configuration files. Use the ‘File >Open’ command to read a
GUI file. Use the ‘File >Read Config from File’ command to
read a hardware panel’s configuration.
Choosing a Panel
There is a panel list at the left side of the panel editor window.
You can select (or define or delete) any entry in this list. If you
want to choose a panel, it must be in this list. If the list is
empty, create a panel definition (name and IP address) by
clicking the word ‘Panels’ at the top of the list.
It is not necessary to select an existing panel to create a panel
configuration. After you create a configuration, you can asso-
ciate it with any of the panels in the list.
Editing
A new configuration starts with a dialog asking what panel
type you want to configure:

18 Product Number: QG0012-04 Revision: A0; Date: 2/17/11
NV5100MC Master Control
Tally Processor
The master control tally processor is third-party equipment.
Its configuration application is built-in and requires no sepa-
rate installation. It communicates with a designated MCPM
or MCE using NVEP. It senses and controls a certain set of
master control events.
Prior to configuration, you must have assigned the tally pro-
cessor an IP address on the master control network. That
assignment is made through the tally processor’s front panel.
Once you have made that assignment, you can use any
browser application (such as Internet Explorer) on your con-
figuration PC to configure the tally processor. To access the
configuration application, type the IP address of the tally
processor in the URL field of the browser.
When you launch the internal DNF configuration tool in
your browser, its initial screen is this:
The main page presents 9 options (sub-pages) listed across
the top in the yellow region. Seven of them are applicable:
Protocol assignment GPI
Remote events GPO
Combinational events Event monitoring
System
Each sub-page manages a configuration table. Configuration
tables can be saved and retrieved for fast setups and quick
changes during a broadcast or production.
Summary
The tally processor can be configured to respond to master
control events such as source or keyer presses and can be con-
figured to trigger events such as source or keyer presses.
The tally processor also has 32 GPI inputs and 32 GPI out-
puts. These can be connected to master control GPIs and to
other GPI devices in your facility.
Read the Tally Processor User’s Guide for further information.
Device Controller
The master control device controller is third-party equip-
ment. Its configuration application is built-in and requires no
separate installation. It receives machine control commands
from an MCE through NVEP over the master control net-
work.
Prior to configuration, you must have assigned the device
controller an IP address on the master control network. That
assignment is made through the device controller’s front
panel.
Once you have made that assignment, you can use any
browser application (such as Internet Explorer) on your con-
figuration PC to configure the tally processor. To access the
configuration application, type the IP address of the tally
processor in the URL field of the browser.
When you launch the internal DNF configuration tool in
your browser, its initial screen is this:
The main page presents 7 options (sub-pages) listed across
the top in the yellow region. Five of them are applicable:
Protocol assignment GPI
Event monitoring GPO
System
Each sub-page manages a configuration table. Configuration
tables can be saved and retrieved for fast setups and quick
changes during a broadcast or production.
You may ignore the ‘Event Monitoring’ table unless you want
to trigger GP outputs based on certain inputs. This table is
not used for master control.
It is in the ‘Protocol Assignment’ table that you define the
serial port connections.
Summary
The device controller issues machine control commands to
various devices in the protocol (Sony, Odetics, VDCP) appro-
priate to the device. It does so when an MCE configured for
machine control or pre-roll sends it a machine control “com-
mand.”
The device controller also has 32 GPI inputs and 32 GPI out-
puts. These can be connected to various devices in your facil-
ity. It is theoretically possible to use the GPOs for machine
control.
Read the Device Controller User’s Guide for further informa-
tion.

Product Number: QG0012-04 Revision: A0; Date: 2/17/11 19
NV5100MC Master Control
Misc. Topics
Restarting an MCPM or MCE
MCPM and MCEs restart, or reset, after you (1) press the reset
switch at the front of the module, (2) reinsert the module in
the frame, or (3) cycle power to the module.
At reset, the MCPM enters bypass mode (wherein the emer-
gency bypass relay routes bypass signals to the program out-
put and inhibits MCPM output), the red bypass LED comes
on, the red alarm LED comes on, and the MCPM initializes.
After a few seconds, the heart beat LED comes on. Soon the
red alarm light goes out, and the green LED (health) comes
on and the amber light comes on (active). If the MCPM is
functioning properly, the bypass light will have gone out.
Put simply: if the green LED turns on, the MCPM has
restarted successfully. Otherwise, it remains in bypass mode.
If it has reset properly, the MCPM configuration will have
been copied from flash to RAM.
For MCPMs, any logos previously in RAM will have been lost,
and must be reloaded from the configuration PC. For MCEs,
logos are not lost because they remain in flash memory.
MCPM and MCE Health
At the front of an MCPM or MCE, there is a green LED labeled
“HEALTH” and a red LED labeled “ALARM.” Any of the fol-
lowing conditions can cause the MCPM to be “unhealthy”:
1 A problem with video reference (e.g., reference not present
or video not locked).
2 The FPGAs are not loaded properly.
3 The application is missing or not loaded properly (e.g., an
application for the MCPM-SD is loaded in the MCPM-MK-
SD).
4AproblemwithMCPMconfiguration (e.g., it is missing,
corrupt, or of the wrong type for this type of MCPM).
5 A problem with AES clocks (received on the backplane
from the control card or clock card).
Restarting a Control Panel
A control panel restarts when you reconnect power or after
you press ‘Update Config’ or ‘Restart Panel’ from the Panel
Status submenu.
As the control panel restarts, the user-definable buttons dis-
play a cycling pattern and the LCD is kept off until the panel’s
main processor has booted. When the pattern stops cycling
and the LCD lights up, the panel has reset. The LCD touch-
screen will display a warning or error message (e.g., Panel Not
Connected) if something is wrong.
The cyclic pattern displays the message “Master Control
Panel Starting” on the upper row of user-definable buttons
and turns the lower row of buttons red, one by one.
Put simply: when the red buttons go out and the menu lights
up, the control panel has restarted successfully. You should
check the messages on the menu.
Panel Shutdown
Be careful not to cycle power until an control panel has shut-
down completely.
Control Panel Health
The control panel has alarm outputs (relays) which can be
used to signal problems:
•Major alarm:
A failure of any circuit board.
Failure of both power supplies.
•Minor alarm:
Failure of one power supply.
Fan failure or over temperature.
Details
Frames
The master control frame is a metal case that has the follow-
ing functions:
•It holds MCPMs, MCEs, and I/O cards.
•It communicates with the NV9000 (if present).
•It provides a place to connect inputs and outputs.
•It distributes those input signals to the outputs, MCPMs,
and MCEs.
The two frames available (NV5100MC and NV5128-MC) are
nearly identical. Both are 8RU (14″) and approximately 18.75″
deep. Each has 16 slots for I/O, MCPMs, and MCEs. Each has 2
control card slots. The NV5100MC frame, however, is newer
and provides greater throughput for master control.
You can use a router control card (EM0374) or a simple clock
card (EM0414) in either or both of the control card slots. A
router control card is required if the frame hosts a router (an
MFR). Use 2 control cards (or clock cards) for redundancy. If
one fails, the other takes over.
Each frame has control system connectors (Ctrl1, Ctrl2, Diag)
and AES reference, video reference, system alarm, and power
supply alarm connectors. They also have connectors that are
used when the frame is controlled by an SMS7000 system.
The frame’s time-code reference connector does not apply
under master control, but might be used by the MFR.
SAn SMS7000 requires a mezzanine addition to the router
control card.
Each frame has two power supply bays. One power supply is
sufficient. Use two for power supply redundancy.
Card Slots
Frames have 8 input slots and 8 output slots. The input slots
occur in the middle of the frame. The output slots are divided
into two groups of four. Each I/O slot handles 16 I/Os.

20 Product Number: QG0012-04 Revision: A0; Date: 2/17/11
NV5100MC Master Control
The numbering of the slots is sequential, from 1 to 16:
Be aware the connector numbers in slots 13–16 are in reverse
order. For details regarding the connector numbers, see the
Reference Manual.
Some backplane modules use DB25 connectors, some use
Phoenix 3-pin quick-release connectors, and some use BNCs.
Each DB25 handles 8 signals (4 audio pairs).
MCPMs and MCEs have a variety of connector types, includ-
ing coaxial (1.0/2.3 DIN), RJ-45, and D-type connectors. A 16-
signal DIN-to-BNC converter panel is available for systems
that cannot use DIN connectors.
Motherboard
The motherboard distributes the 128 input signals from the
backplane to the router output cards (if any) and to the
MCPMs and MCEs. This is a simplified block diagram of a
typical master control frame:
Master control’s input signal formats can be a mix of AES
audio, analog audio, analog video, SD video, and HD video.
The MFR can route time-code signals and machine-control
signals, although the master control (MC) system does not
recognize signals of these types. (MCEs do not accept analog
audio or video input.)
All I/O modules, MCPMs, and MCEs, and their backplanes
are “hot-swappable.”
Master Control Processors
All MCPMs and MCEs have common characteristics, such as
audio meter/monitor outputs, general-purpose I/O, and
emergency bypass capability. There are several different mod-
els. This is a summary:
MCEs
MCEs perform all the functions of the (earlier) MCPMs and
provide additional capabilities. The most prominent new fea-
tures are the preview bus, the aux bus, and 16-channel audio.
The preview bus and aux bus give an operator freedom to
experiment without affecting the delivered program output.
MCEs are also modular, comprising from 1 to 3 circuit boards
and a number of optional daughter cards. There are 5 mod-
ules in the MCE card set:
•MCE-CORE. The minimum MCE comprises this single
(full-size) card that performs core master control functions.
•MCE-PVW. The preview module supports the preview bus.
•MCE-AXM. The audio expansion module provides Dolby E
decoders for the program, preset, and preview buses and
presents Dolby E metadata and AES output at its back-
plane.
•MCE-DVE. The digital video effect cards are small mezza-
nine cards that can be added to the core and to the preview
boards for video effects.
•Dolby E. Up to 8 third-party Dolby cards mount on the
MCE-AXM board, depending on your needs.
MCEs have features that work in conjunction with the “next
generation” control panels: the CECP, CECP M1, CECP GUI,
113-128
12
49-64
8
33-48
7
17-32
6
1-16
5
97-112
11
81-96
10
65-80
9
INPUTS
CTRL 1
CTRL 2
DIAG
CTRL 1
CTRL 2
DIAG
VIDEO
REF 1
VIDEO
REF 2
ALARMS
TIMECODE
AES
REF
1
NVISION
AUX US
LOOP
THRU
(2)
10/100 T 10/100 T
AES
REF
2
PRI CTRL SEC CTRL
PRI CTRL SEC CTRL
10 210 2
LOOP THRU
LOOP
THRU
Input Slots
(12–5)
Output Slots
(4–1)
Output Slots
(16–13)
Motherboard
Router Output Module
128
Inputs
Input Module
16
MCPM
MCE
16
16
16
16
Input Module
16
Input Module
16
Input Module
16
Input Module
16
Input Module
16
Input Module
16
Input Module
16
MCPM-SD SD video. 3 keyers, 2 logos, 1 squeezeback genera-
tor, 2 slots.
MCPM-HD,
MCPM-HD2
HD video. 3 keyers, 2 logos, 1 squeezeback genera-
tor, 4 slots. Supports 2 wing output cards.
MCPM-SDHD HD or SD video, field-programmable. 3 keyers, 2
logos, 1 enhanced squeezeback generator, 4 slots.
Supports 1 wing output card.
MCPM-MK-SD SD video. 3 keyers, 1 logo, no squeezeback, 1 slot.
These modules are also called “mixer/keyers” or
“branding engines.”
MCPM-MK-HD HD video. 3 keyers, 1 logo, no squeezeback, 2 slots.
These modules are also named “mixer/keyers” or
“branding engines.”
MCE HD or SD video, field-programmable. 3 keyers, 2
logos, squeezeback, 1–3 slots. The availability of
“next generation” features depend on the number
of modules present.
Other manuals for NV5100MC Master Control
6
Other Miranda Control System manuals
Popular Control System manuals by other brands

CYP
CYP CVW-9000W Operation manual

Kemper
Kemper KHS MASTER 2.1 I SLAVE Installation and operating instructions

Invacare
Invacare LiNX REM110 user manual

Jamesway
Jamesway Sentry Guide

Airzone
Airzone VAF BLUEFACE Quick installation guide

BFT
BFT XPASS B 275/800C L Instructions for installation, use and maintenance