MOB MO9588 User manual

USER MANUAL
Hereby, MOB, declares that item MO9588 is in Compliance with
the essential requirements and other relevant conditions of
Directive 2014/30/EU. A copy of the DOC (Declaration of
Conformity) is available at: DOC@reclamond.com or
MOB, PO BOX 644, 6710 BP (NL).
PO: 41-xxxxxx
Made in China

MO9588
EN
LED clock with wireless charger
1. The display & buzzer will power on whilst connect to the power
cable. The wireless charge green indicator will also light up.
2. Touch the “” button with short press to adjust clock back light
(high bright –medium bright –low bright –turn off)
3. Touch the “☽”button with short press to adjust night light (high
bright –medium bright –low bright –turn off)
4. Time setting: Press “M” and hold for 3 sec into time setting
mode: 12 HR/24HR, hour/min/year/month/date/ day, press “˅”
and “˄” button to adjust it.
5. Alarm setting: Press “S” and hold for 3 sec, into alarm setting
mode, press “˄” button to activate or disarm alarm, “ ” alarm
signal will be on or off. The alarm will last 2 min, then will turn off
automatically. By pressing “˅” or “˄” can turn off alarm.
6. Temperature C/F setting. Press “˅” to choose C or F.
7. Snooze: when alarm on, press the top panel, it will enter snooze
mode “Zz” flashing. The alarm will repeat every 5 min. The
alarm will turn off after 2 minutes.
8. Wireless charge mode: green light is power on indicator. When
charging, red light is on. If red/green light is blinking, this means
it is not in charging mode.
9. Power back up (for the clock only): Use 1x CR2032 battery to
keep the clock running during power failure. No need to reset
the clock after power on again.
Product specifications:
Input: DC 9V/1.5A
Output: DC 5V/1A
Charging efficiency: 75%
Precaution!
Metal object placed on top of charging devices might result in the
product malfunctioning and damage caused to the charging
device.
Do not operate the item on top of any metal table or surface.

DE
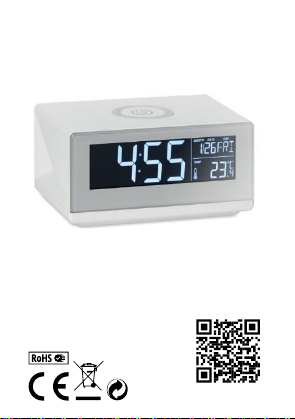
LED-Uhr mit induktiver Ladestation
1. Display und Summer sind eingeschaltet, sobald das Produkt an
das Netzkabel angeschlossen wird. Die grüne Anzeige für die
kabellose Aufladung leuchtet ebenfalls auf.
2. Tippen Sie mit kurzen Druck auf die seitliche Taste“ ” , um das
Gegenlicht der Uhr einzustellen (sehr hell - mittelhell - gedimmt -
aus).
3. Tippen Sie mit kurzen Druck auf die seitliche Taste "☽", um das
Nachtlicht einzustellen.
4. Einstellen der Uhrzeit: Drücken Sie "M" und halten Sie diese
Taste 3 Sekunden lang gedrückt, um in den Zeiteinstellmodus
zu gelangen: 12 HR/24HR,
Stunde/Minute/Jahr/Monat/Datum/Tag, drücken Sie die Taste
"˅" und "˄", um dies jeweils einzustellen.
5. Alarmeinstellung: Drücken Sie "S" und halten Sie diese Taste 3
Sekunden lang gedrückt, um die Weckzeit durch Drücken der
Tasten "˅" und "˄" einzustellen. Mit der Taste „˄“ aktivieren bzw.
deaktivieren Sie den das Alarm. Das Zeichen erscheint. Der
Alarm ertönt 2 Minuten und wird dann automatisch ausgeschaltet.
Durch Drücken von "˅" oder "˄" kann der Alarm ausgeschaltet
werden.
6. Einstellung der Temperatur C/F. Drücken Sie "˅", um C oder F zu
wählen.
7. Schlummerfunktion: Wenn der Alarm eingeschaltet ist, drücken
Sie leicht auf die obere Abdeckung, die Uhr wechselt in den
Schlummerfunktionsmodus, "Zz" blinkt. Der Alarm wird alle 5
Minuten wiederholt. Der Alarm wird nach 2 Minuten
ausgeschaltet.
8. Kabellose Lademodus: Grünes Licht zeigt an, dass das Gerät in
Betrieb ist. Während des Ladevorgangs leuchtet das Licht rot.
Wenn das Licht abwechselnd rot/grün blinkt, befindet es sich
nicht im Lademodus.
9. Power back up (nur für die Uhr): Verwenden Sie 1x CR2032
Batterie, um den Betrieb der Uhr bei Stromausfall zu sichern. Es
ist kein Reset der Uhr nach dem Einschalten erforderlich.
Technische Daten:
Eingangsleistung: DC 9V/1.5A

Ausgangsleistung: DC 5V/1A
Ladeeffizienz: 75%.
Vorsicht!
Metallgegenstände, die sich auf den Ladegeräten befinden, können
zu Fehlfunktionen des Produkts führen und das Ladegerät
beschädigen.
Betreiben Sie das Gerät nicht auf einem Metalltisch oder einer
Metalloberfläche.
FR
Horloge réveil LED avec fonction chargeur sans fil
1. L’affichage de l’horloge s’allumera lors du branchement au câble
d’alimentation. Le voyant vert du chargeur sans fil s'allumera
également.
2. Appuyer brièvement sur le bouton “ ” pour ajuster l’intensité
d’éclairage de l’horloge (luminosité forte, moyenne, faible ou
désactivée)
3. Appuyer brièvement sur le bouton “☽”” pour régler l’intensité
d’éclairage de la veilleuse (luminosité forte, moyenne, faible ou
désactivée)
4. Réglage de l'heure : appuyez sur “M” pendant 3 secondes en
entrer en mode de réglage de l'heure. Ensuite appuyez sur les
boutons “˅” et “˄” pour régler: format 12 HR / 24HR, heure /
minute / année / mois / date / jour.
5. Réglage du réveil : appuyez sur “S” pendant 3 secondes pour
entrer en mode de réglage de l’alarme. Ensuite appuyer sur le
bouton “˄” pour activer ou désactiver l’alarme, le signal “ ”
sera allumé ou éteint. L’alarme sonnera pendant 2 min puis
s’éteindra automatiquement. L’alarme peut être désactivée en
appuyant sur les boutons “˅” ou “˄”.
6. Réglage de la température appuyer sur “˅” pour sélectionner °C
ou °F.
7. Fonction Snooze: lorsque l’alarme retentit, appuyez sur le
dessus du réveil pour activer la fonction « snooze » . Le mode
de répétition d’alarme “Zz” clignotera. L'alarme se répètera alors
toutes les 5 min.
8. Chargeur sans fil par induction : le voyant vert indique la mise
sous tension. Pendant le chargement de votre téléphone, un

voyant rouge est allumé. Si le voyant clignote rouge / vert, cela
signifie que l’appareil n'est pas en mode charge.
9. Utilisez une pile CR2032 pour garder l’horloge en
fonctionnement en cas de panne de courant. Il n’y aura pas
besoin de refaire tous les réglages de l’horloge après la remise
sous tension.
Spécifications du produit :
Entrée: DC 9V/1.5A
Sortie: DC 5V/1A
Efficacité de chargement: 75%
Attention !
Un objet métallique placé sur le chargeur peut entraîner un
dysfonctionnement du produit et endommager le chargeur.
N'utilisez pas l'objet sur une table ou une surface en métal.
ES
Reloj LED con cargador inalámbrico
1. La pantalla y el timbre se encenderán mientras el cable de
alimentación esté conectado. La luz verde indicadora del
cargador inalámbrico también se encenderá.
2. Pulse brevemente el botón " " para ajustar la retroiluminación
del reloj (brillo alto –brillo medio –brillo bajo –apagado)
3. Pulse brevemente el botón "☽" para ajustar la luz nocturna (brillo
alto –brillo medio –brillo bajo –apagado)
4. Configuración de la hora: Mantenga pulsado el botón "M"
durante 3 segundos en el modo de configuración de hora:
12 h/24 h, hora/minuto/año/mes/fecha/día, pulse los botones "˅"
y "˄" para ajustarlo.
5. Configuración de la alarma: Mantenga pulsado el botón "S"
durante 3 segundos. En el modo de configuración de alarma,
pulse el botón "˄" para activar o desactivar la alarma. La señal
de alarma " " estará activada o desactivada. La alarma durará
2 minutos y luego se apagará automáticamente. Puede apagar
la alarma pulsando los botones "˅" o "˄".
6. Configuración de la temperatura en ºC o ºF. Pulse "˅" para
seleccionar ºC o ºF.
7. Repetición: cuando la alarma esté sonando, presione el panel

superior con fuerza. La alarma se pospondrá y la señal "Zz"
parpadeará. La alarma volverá a sonar cada 5 minutos y se
apagará pasados 2 minutos.
8. Modo de carga inalámbrica: la luz verde indica que se está
cargando. Durante la carga, la luz roja está encendida. Si las
luces roja o verde parpadean, significa que la alarma no se está
cargando.
9. Alimentación de emergencia (solo para el reloj): Utilice una pila
CR2032 para mantener el reloj en funcionamiento si hay un fallo
en la alimentación. No es necesario reiniciar el reloj cuando se
restablece la corriente.
Características del producto:
Entrada: DC 9 V/1,5 A
Salida: DC 5 V/1 A
Eficiencia de carga: 75 %
Precauciones:
Un objeto metálico encima de los dispositivos de carga puede
provocar el mal funcionamiento del producto y dañar el dispositivo
de carga.
No utilice este producto sobre una placa o superficie metálica.
IT
Orologio da tavolo/stazione meteo con carica wireless
1. Il display e il segnale acustico si accendono quando il
dispositivo è collegato al cavo di alimentazione. Si accenderà
anche l'indicatore verde di carica wireless.
2. Toccare il pulsante " " con una breve pressione per regolare
la retroilluminazione dell'orologio (alta luminosità - mediamente
luminosa - bassa luminosità - spegni)
3. Toccare il pulsante "☽" con breve pressione per regolare la luce
notturna (alta luminosità - mediamente luminosa - bassa
luminosità - spegni)
4. Impostazione dell'ora: premere "M" e tenere premuto per 3
secondi nella modalità di impostazione dell'ora: 12 ore / 24 ore
al giorno, ora / min / anno / mese / data / giorno, premere "˅" e
"" per regolarlo.
5. Impostazione della sveglia: premere "S" e tenere premuto per 3

secondi, in modalità impostazione sveglia premere il tasto " ˄"
per attivare o disattivare " " il segnale della sveglia sarà
attivato o disattivato. La sveglia suona 2 minuti, quindi si
interromperà automaticamente.
6. Premendo "˅" o "" è possibile disattivare la sveglia.
Impostazione temperatura C / F. Premere "˅" per selezionare C
o F.
7. Snooze: quando la sveglia è attiva, premere a fatica il pannello
superiore, entrerà in modalità snooze "Zz". La sveglia si ripeterà
ogni 5 minuti. Si spegnerà dopo 2 minuti.
8. Modalità di ricarica wireless: la luce verde indica l’accensione,
Durante la ricarica, la luce rossa è accesa. Se la luce rossa /
verde lampeggia, significa che non è in modalità di ricarica.
9. Ripristino alimentazione (solo per l'orologio): utilizzare una
batteria CR2032 1x per mantenere l'orologio in funzione durante
un'interruzione di corrente. Non è necessario reimpostare
l'orologio dopo l'accensione di nuovo.
Specifiche del prodotto:
Input: DC 9V/1.5A
output: DC 5V/1A
Efficienza di carica: 75%
Avvertenze!
Oggetti metallici posti sopra il dispositivo possono causare
malfunzionamenti dello stesso. Non utilizzare su superfici
imetalliche.
NL
LED-klok met draadloze oplader
1. Het display en de zoemer worden ingeschakeld terwijl ze op het
netsnoer worden aangesloten. De groene indicator voor
draadloos opladen gaat ook branden.
2. Raak de knop " " aan met kort indrukken om het achtergrond
licht van de klok aan te passen (hoog helder - gemiddeld helder
- laag helder - uitzetten)
3. Raak de knop "☽" aan met kort indrukken om het nachtlicht aan
te passen (hoog helder - gemiddeld helder - laag helder -
uitzetten)

4. Tijdinstelling: druk op "M" en houd gedurende 3 sec in de
tijdinstellingsmodus: 12 HR / 24HR, uur / min /jaar / maand /
datum / dag, druk op "˅" en "" om het in te stellen.
5. Alarminstelling: Druk "S" en houd deze 3 seconden vast, in de
alarminstellingsmodus, druk op de " ˄" knop om het alarm te
activeren of te deactiveren, het " " alarmsignaal zal aan of uit
zijn. Het alarm duurt 2 minuten en gaat vervolgens automatisch
uit. Door op "˅" of "" te drukken, kan het alarm worden
uitgeschakeld.
6. Temperatuur C / F instelling. Druk op "˅" om C of F te kiezen.
7. Snooze: als het alarm aan staat, druk je hard op het
bovenpaneel, het gaat naar de sluimermodus "Zz" knippert. Het
alarm wordt om de 5 minuten herhaald. Het alarm is na 2
minuten uitgeschakeld.
8. Draadloze laadmodus: groen lampje is aan / uit-lampje. Tijdens
het opladen brandt het rode lampje. Als het rode / groene
lampje knippert, betekent dit dat deze zich niet in de
oplaadmodus bevindt.
9. Back-up van voeding (alleen voor de klok): Gebruik 1x CR2032-
batterij om de klok te laten werken tijdens stroomuitval. U hoeft
de klok niet opnieuw in te stellen nadat de stroom weer is
ingeschakeld.
Product specificaties:
Ingang: DC 9V / 1.5A
uitgang: DC 5V / 1A
Opladen efficiëntie: 75%
Voorzorgsmaatregel!
Metalen voorwerpen die bovenop oplaadapparaten worden
geplaatst, kunnen ertoe leiden dat het product niet goed
functioneert en het oplaadapparaat beschadigen.
Bedien het voorwerp niet op een metalen tafel of oppervlak.
PL
Zegar LED z bezprzewodową ładowarką
1. Po podłączeniu do zasilania usłyszysz dźwięk oraz wyświetlacz
włączą się. Wskaźnik zielonego ładowania bezprzewodowego
również zaświeci się.

2. Dotknij i przyciśnij przycisk " ", aby wyregulować
podświetlenie zegara (bardzo jasny - średnio jasny -
przyciemniony - wyłącz).
3. Przyciśnij "☽", aby ustawić światło nocne (bardzo jasny -
średnio jasny - przyciemniony - wyłącz).
4. Ustawienie czasu: Naciśnij "M" i przytrzymaj przez 3 sekundy
aby wejść w tryb ustawiania czasu: 12 HR / 24HR, godzina / min
/ rok / miesiąc / dzień / dzień, naciśnij przycisk "˅" i “˄”, aby
ustawić.
5. Ustawienie alarmu: Naciśnij "S" i przytrzymaj przez 3 sekundy,
aby przejść do trybu ustawień alarmu, naciśnij przycisk “˄”, aby
włączyć lub wyłączyć alarm, “ ” sygnał alarmu będzie
włączony lub wyłączony. Alarm będzie trwał 2 minuty, a
następnie wyłączy się automatycznie. Przez naciśnięcie "˅" lub
“˄” można wyłączyć alarm.
6. Ustawienie temperatury C / F. Naciśnij "˅", aby wybrać C lub F.
7. Drzemka: gdy alarm jest włączony, naciśnij przedni panel,
przejdzie on w tryb drzemki miga "Zz". Alarm będzie się
powtarzać co 5 minut. Alarm wyłączy się po 2 minutach.
8. Tryb ładowania bezprzewodowego: zielone światło to wskaźnik
zasilania. Podczas ładowania świeci się czerwone światło. Jeśli
miga czerwone / zielone światło, oznacza to, że nie znajduje się
w trybie ładowania.
9. Zasilanie awaryjne (tylko dla zegara): Użyj 1x baterii CR2032, aby
zegar działał podczas awarii zasilania. Nie ma potrzeby
resetowania zegara po ponownym włączeniu zasilania.
Specyfikacja produktu:
Wejście: DC 9V / 1,5A
Wyjście: DC 5V / 1A
Wydajność ładowania: 75%
UWAGA!
Metalowy przedmiot umieszczony na górze ładowarki może
spowodować wadliwe działanie urządzenia i uszkodzenie
ładowarki.
Nie używaj przedmiotu na metalowym stole lub powierzchni.
Table of contents
Languages:
Other MOB Clock manuals
Popular Clock manuals by other brands

Renesas
Renesas VersaClock 6E Series Register Descriptions and Programming Guide

Colorado time systems
Colorado time systems Counting Clock Pro user guide

KARE design
KARE design Table Clock Versailles Chrome instructions

American Time
American Time Global Series Quick start installation guide

TFA
TFA UMIO PLUS 60.2553 instruction manual

Dakota Digital
Dakota Digital VLK-57C Installation