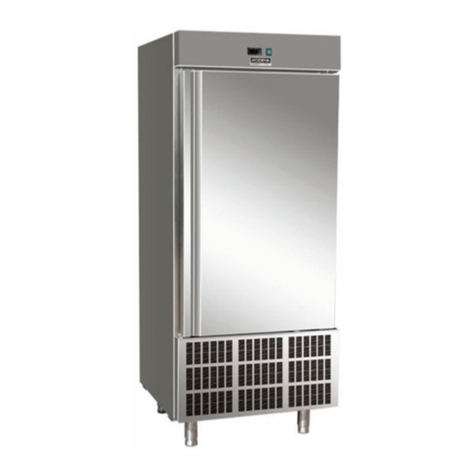
Modena UC Series User manual

UC Series
BUKU PETUNJUK PENGGUNAAN
LEMARI PENDINGIN
DAN KARTU GARANSI
UPRIGHT CHILLER
MANUAL BOOK
AND
WARRANTY CARD
01/16
www.modena.co.id


Bahasa Indonesia 1
Yang terhormat Pelanggan & Pengguna,
Terima kasih telah menjatuhkan pilihan kepada produk MODENA dalam memenuhi kebutuhan bisnis
Anda. Paduan apik antara penggunaan material serta fitur profesional yang dibenamkan pada produk
dari kategori komersial ini ditujukan guna hasilkan performa serta durabilitas perangkat yang
mumpuni untuk menunjang aktivitas dan kinerja usaha.
Arahan lengkap yang disediakan dalam buku manual ini berisi informasi serta panduan yang telah
diselaraskan dengan peraturan keselamatan standar, tahap pemasangan teknis terbaru, serta
keahlian dan pengalaman yang telah kami kembangkan selama bertahun-tahun.
Untuk produk dengan model khusus, terdapat kemungkinan perbedaan informasi terkait deskripsi dan
ilustrasi dalam panduan ini. Ketentuan ini juga berlaku bagi pemesanan khusus atau produk
modifikasi yang disesuaikan dengan teknologi baru.
Guna menjamin keamanan serta efisiensi dalam pengoperasian, sangat direkomendasikan untuk
terlebih dahulu membaca manual ini dengan teliti dan seksama sebelum mulai menggunakan
perangkat. Pastikan juga pemasangan produk sudah sesuai dengan panduan yang diberikan serta
aturan-aturan terkait lainnya.
Perhatian: MODENA tidak bertanggung jawab atas kerusakan atau tidak berfungsinya
perangkat akibat tidak mengikuti petunjuk penggunaan.
Manual ini agar disimpan dekat dengan perangkat agar mudah diakses siapa saja yang ingin
menggunakannya. MODENA berhak melakukan perubahan teknis untuk tujuan pengembangan serta
peningkatan kinerja perangkat.
Apabila ada pertanyaan lebih lanjut silakan hubungi pusat layanan MODENA untuk mendapatkan
informasi selengkapnya.
INSTRUKSI DAN PETUNJUK PENGGUNAAN LEMARI PENDINGIN MODENA

Bahasa Indonesia 2
DAFTAR ISI HLM.
- Kata Pengantar 1
- Bagian 1 : Nama-nama Bagian 3
- Bagian 2 : Instalasi 3
- Bagian 3 : Cara Penggunaan 4
- Bagian 4 : Pemeliharaan 5
- Bagian 5 : Spesifikasi 6

Bahasa Indonesia 3
* Gambar adalah gambaran secara umum dan belum tentu sama dengan produk yang anda terima.
* Fitur dan kelengkapan tergantung pada tipe produk.
Petunjuk penting tentang keamanan
1. Untuk mendapatkan penggunaan kabinet secara maksimal, kami sarankan untuk membaca
instruksi panduan ini.
2. Menjadi tanggung jawab pengguna untuk mengoperasikan alat sesuai dengan instruksi yang
diberikan.
3. Segera hubungi pusat layanan Modena jika terjadi kerusakan.
4. Tempatkan kabinet di tempat yang kering dan berventilasi.
5. Jauhkan kabinet dari sumber panas sangat memancar dan jangan terkena sinar matahari secara
langsung.
6. Selalu diingat bahwa semua perangkat listrik merupakan sumber potensi bahaya.
7. Jangan menyimpan bahan mudah terbakar seperti thinner, bensin dll di kabinet.
8. Kami menyatakan bahwa tidak ada asbes atau CFC apapun yang digunakan dalam konstruksi
pembuatan.
9. Minyak di dalam kompresor tidak mengandung PCB.
Bongkar Pasang
Lepaskan palet kayu dan kemasan. Permukaan luar dilengkapi dengan foil pelindung, yang harus
dilepas sebelum dipasang.
Untuk memastikan dapat berfungsi dengan benar adalah penting untuk memastikan cabinet dalam
posisi rata.
Jika Anda ingin merakit kabinet Anda, mohon perhatikan hal berikut:
3Harus ada ruang minimal 15 cm bebas di atas kabinet agar sistem pendingin dapat bekerja secara
memuaskan.
Harus ada ruang yang cukup di sisi engsel untuk membersihkan dan mengganti rak dan
membersihkan di sekitar engsel.
Bagian 1: Nama-nama Bagian
Bagian 2: Instalasi

Bahasa Indonesia 4
Koneksi listrik
Kabinet beroperasi pada 230 V / 50 Hz.
Stop kontak harus mudah diakses.
Semua persyaratan grounding yang ditetapkan oleh kantor listrik setempat harus diperhatikan. Steker
kabinet dan stop kontak dinding harus dibuat grounding yang benar. Jika ragu, hubungi pemasok
setempat atau ahli listrik yang berwenang.
Kabel fleksibel yang dipasang pada alat ini memiliki tiga inti untuk digunakan dengan steker 3-pin 13-
Amp atau 3-pin 15- Amp. Jika B.S. 1363 (13- Amp) yang bergabung dengan steker digunakan, harus
dilengkapi dengan sekering 13-Amp.
Kawat di dalam kabel utama diwarnai sesuai dengan kode berikut:
Hijau / Kuning: Bumi/Earth, Biru: Netral, Brown: Hidup/Live.
Sambungan listrik utama harus dilakukan oleh ahli listrik yang terampil.
Memulai kabinet
Sebelum digunakan, sebaiknya kabinet dibersihkan, lihat di bagian
pemeliharaan dan pembersihan.
Penting!
Jika kabinet telah ditempatkan secara horisontal selama
pengangkutan, tunggu 2 jam sebelum memasang kabinet.
Ingatlah untuk melepas perangkat keselamatan transportasi pada
kompresor. Lepas seluruh bar seperti yang ditunjukkan pada gambar.
1.8.
Hubungkan kabinet ke soket dan nyalakan saklar pada panel kontrol, lihat
gambar. 1.9.
Termostat
Termostat ditempatkan di panel kontrol, lihat gambar. 2.0.
Termostat telah di pra-set dan dalam kebanyakan kasus tidak diperlukan untuk penyesuaian
pengaturan.
Ketika menyalakan kabinet layar akan menampilkan suhu saat ini di kabinet.
Tampilan pengaturan suhu:
Tekan tombol ini dan akan muncul tampilan suhu yang disetel. Tekan tombol lagi untuk
kembali ke bacaan normal
Mengatur suhu baru:
Tekan tombol ini terus menerus selama lebih dari 3 detik dan layar akan menunjukkan suhu
yang disetel.
Tekan tombol ini untuk menaikkan suhu yang disetel.
Bagian 3: Cara Penggunaan

Bahasa Indonesia 5
Tekan tombol ini untuk menurunkan suhu yang disetel.
Tekan tombol ini untuk menyimpan pengaturan baru. Layar akan berkedip dengan nilai yang
baru dan kemudian akan kembali ke bacaan normal.
Kode Alarm:
“P1” Berkedip pada layar: menunjukkan bahwa sensor kabinet rusak.
Kabinet akan berusaha untuk menjaga suhu yang telah disetel sampai diperbaiki.
“P2” Berkedip pada layar: menunjukkan bahwa evaporator sensor telah rusak.
Ini tidak akan mempengaruhi pengoperasian kabinet, tetapi harus diperbaiki secepat
mungkin.
Pencairan bunga es
Kabinet mencairkan bunga es secara otomatis dengan interval pra-set. Jika pintu kabinet dibuka atau
isi kabinet berubah sering kali maka perlu untuk mencairkan bunga es cabinet secara manual.
Tekan tombol ini terus menerus selama lebih dari 3 detik akan memulai pencairan secara
manual dan kemudian kembali berfungsi normal.
Air yang mencair masuk ke wadah yang ditempatkan di kompartemen kompresor dan akan menguap.
Pemeliharaan dan pembersihan
Lepastkan kabel power pendingin dari stop kontak.
Kabinet harus secara berkala dibersihkan. Bersihkan permukaan luar dan dalam kabinet dengan
larutan sabun yang ringan dan kemudian dilap kering. Permukaan luar dapat dirawat dengan
menggunakan minyak baja.
Lepaskan filter kondensor (lihat gbr. 2.1), dan bersihkan dengan
penyedot debu dan jika perlu dengan larutan sabun ringan.
JANGAN gunakan pembersih yang mengandung klorin atau pembersih
keras lainnya, karena ini dapat merusak permukaan stainless steel dan
sistem pendingin internal.
Bersihkan kondensor dan kompartemen kompresor dengan
menggunakan penyedot debu dan sikat yang kaku.
JANGAN menyemprot kompartemen kompresor dengan air karena hal
ini dapat menyebabkan terjadinya sirkuit pendek dan kerusakan pada
bagian listrik.
Layanan
Sistem pendingin adalah sistem yang tertutup rapat dan tidak memerlukan pengawasan, hanya perlu
dibersihkan.
Jika kabinet gagal untuk mendinginkan, periksa apakah alasannya adalah karena listrik padam.
Jika Anda tidak dapat menemukan alasan kerusakan kabinet, silakan hubungi pemasok Anda. Harap
informasikan model dan nomor seri dari kabinet. Anda dapat menemukan informasi ini di label yang
ditempatkan di sisi kanan atas di dalam kabinet.
Pembuangan
Pembuangan kabinet harus dilakukan dengan cara yang tepat untuk lingkungan. Harap diperhatikan
peraturan yang ada di pembuangan. Mungkin ada persyaratan dan kondisi yang harus secara khusus
diperhatikan.
Bagian 4: Pemeliharaan

Bahasa Indonesia 6
UPRIGHT CHILLER UC 4130M
UPRIGHT CHILLER UC 2070M
Lemari Pendingin
Lemari Pendingin
Sistem pendingin Berfentilasi
Defrost Otomatis (No Frost)
Struktur Interior Stainless steel 304
Struktur Ekterior Stainless steel 304
4 Pintu
2 Pintu
6 buah rak
3 buah rak
Termostat Electronik
Disply Suhu LED Digital
Self-closing door
Self-closing door
Gasket agnetik mudah dilepas
Evaporasimandiri
Evaporasimandiri
Kompresor mudah dilepas
Roda dengan stoper
Roda dengan stoper
Kunci pintu
Kunci pintu
Kapastitas: 1173 liter
Kapasitas : 537 liter
Daya : 700 W
Daya : 350 W
Tegangan/Frekuensi : 230 V / 50 Hz
Temperatur : -2°C ~ +10°C
Refrigrant R134a 320 gram
Refrigrant R134a 300 gram
Dimensi Internal: 1220X570X1380 mm
Dimensi Internal: 560X570X1380mm
Dimensi Produk : 1340X845X2000mm
Dimensi Produk: 680X845X2000mm
Temperatur pendinginan adalah untuk lingkungan normal. Temperatur tersebut berbeda antar daerah.
Untuk meningkatan kualitas produk, desain dan spesifikasi diatas dapat berubah setiap saat tanpa pemberitahuan.
Gambar pada buku ini bersifat skematis dan bisa saja tidak tepat sama dengan produk aktual. Nilai yang tercantum pada
label atau dalam dokumentasi yang menyertainya diperoleh di laboratorium sesuai dengan standar yang relevan. Nilai-
nilai dapat bervariasi tergantung pada kondisi operasional dan lingkungan dari unit.
Bagian 5: Spesifikasi


English 8
Dear Client & User,
Thank you for choosing MODENA products to meet your business needs. A sophisticated
combination of the using of high quality materials and professional features applied in this commercial
appliances are intended to give the best performance and durability of the device in order to support
business activities.
All the information and instructions in this manual take into account standard safety regulations,
current levels of technical engineering as well as the expertise and experience that have been
developed over the years.
If the delivery consists of a special model, the actual scope of delivery may differ from the descriptions
and illustrations in this manual. This is also the case for special orders or when the device has been
modified in line with new technology.
For safety purpose and efficient operation, it is highly recommended to read the manual thoroughly
before any operation of the appliance, especially before starting up the device. Install the machine in
accordance with this manual and the local related rules.
Notice: MODENA is not responsible for any damage or malfunction of the device resulting
from not following the instructions for use.
The instruction manual should be kept near the device, to be easily accessible to anyone who working
with or using it. MODENA reserves the right to make technical changes for purposes of developing
and improving the device performance.
Should there be any further queries, please contact MODENA Call Center to gain more detailed
information.
INSTRUCTION AND GUIDE TO USING MODENA UPRIGHT CHILLER

English 9
CONTENTS PAGE
- Introduction 7
- Part 1 : Name of Parts 9
- Part 2 : Installation 9
- Part 3 : How to Use 10
- Part 4 : Maintenance 11
- Part 5 : Specification 12

English 10
* The image is a general overview and is not necessarily the same as the product you receive.
* Features and completeness depends on the type of products
Important safety instructions
1. To obtain full use of the cabinet, we recommend reading this instruction manual.
2. It is the user‟s responsibility to operate the appliance in accordance with the instructions given.
3. Contact Modena service center immediately in case of any malfunctions.
4. Place the cabinet in a dry and ventilated place.
5. Keep the cabinet away from strongly heat-emitting sources and do not expose it to direct sunlight.
6. Always keep in mind that all electrical devices are sources of potential danger.
7. Do not store inflammable material such as thinner, gasoline etc. in the cabinet.
8. We declare that no asbestos nor any CFC are used in the construction.
9. The oil in the compressor does not contain PCB.
Unpacking and installation
Remove the wooden pallet and the packing. External surfaces are supplied with a protection foil,
which must be removed before installation.
To ensure correct function it is important that the cabinet is level.
If you want to build in your cabinet please note the following:
There must be at least 15 cm free space above the cabinet in order for the cooling system to work
satisfactorily.
There must be sufficient space at the hinge side to clean and replace the shelves and clean around
the hinge.
Part 1: Name of Parts
Part 2: Installation

English 11
Electrical connecting
The cabinet operates on 230 V/50 Hz.
The wall socket should be easily accessible.
All earthing requirements stipulated by the local electricity authorities must be observed. The cabinet
plug and wall socket should then give correct earthing. If in doubt, contact your local supplier or
authorized electrician.
The flexible cord fitted to this appliance has three cores for use with a 3-pin 13-Amp or 3-pin 15- Amp
plug. If a B.S. 1363 (13-Amp) fused plug is used, it should be fitted with a 13-Amp fuse.
The wires in this mains lead are colored in accordance with the following code:
Green/Yellow: Earth, Blue: Neutral, Brown: Live.
The main electrical connections must be done by skilled electricians.
Start-up of the cabinet
Before use, we recommend that the cabinet is cleaned, see the
section on maintenance and cleaning.
Important!
If the cabinet has been horizontally placed during transport, please
wait 2 hours before starting up the cabinet.
Remember to remove the transport safety device on the compressor.
Remove the whole bar as shown in fig. 1.8.
Connect the cabinet to a socket and turn on the switch on the control
panel, see fig. 1.9.
Thermostat
The thermostat is placed in the control panel, see fig. 2.0.
The thermostat has been pre-set and in most cases it is not necessary to adjust the settings.
When turning on the cabinet the display will show the current temperature in the cabinet.
Display set temperature:
Press this key and the display will show the set temperature. Press the key again to return to
normal reading
Set new temperature:
Press this key continuously for more than 3 seconds and the display shows the set
temperature.
Press this key to increase the set temperature.
Part 3: How to Use

English 12
Press this key to lower the set temperature.
Press this key to save the new settings. The display will flash with the new value and will then
return to normal reading.
Alarm codes:
„P1‟ Flashing in the display: indicates that the cabinet sensor is defective.
The cabinet will strive to keep the set temperature until it has been repaired.
„P2‟ Flashing in the display: indicates that the evaporator sensor is defective.
This does not influence the operation of the cabinet, but should be repaired as soon as
possible.
Defrosting
The cabinet defrosts automatically with pre-set intervals. If the door to the cabinet is opened or the
contents of the cabinet are changed frequently it may become necessary to defrost the cabinet
manually.
Pressing this key continuously for more than 3 seconds will start a manual defrosting and
then return to normal operation.
Defrosted water runs to a container placed in the compressor compartment and evaporates.
Maintenance and cleaning
Switch the cooler off at the socket.
The cabinet must be periodically cleaned. Clean the external and internal surfaces of the cabinet with
a light soap solution and subsequently wipe dry. External surfaces can be maintained using steel oil.
Remove the condenser filter (see fig. 2.1), and clean it with a vacuum
cleaner and if necessary a light soap solution.
Do NOT use cleansers containing chlorine or other harsh cleansers, as
these can damage the stainless steel surfaces and the internal cooling
system.
Clean the condenser and the compressor compartment using a
vacuum cleaner and a stiff brush.
Do NOT hose the compressor compartment with water as this can
cause short circuits and damage on the electrical parts.
Service
The cooling system is a hermetically sealed system and does not require supervision, only cleaning.
If the cabinet fails to cool, check if the reason is a power cut.
If you cannot locate the reason to the failure of the cabinet, please contact your supplier. Please
inform model and serial number of the cabinet. You can find this information on the rating label which
is placed inside the cabinet in the top right hand side.
Disposal
Disposal of the cabinet must take place in an environmentally correct way. Please note existing
regulation on disposal. There may be special requirements and conditions which must be observed.
Part 4: Maintenance

English 13
UPRIGHT CHILLER UC 4130M
UPRIGHT CHILLER UC 2070M
Upright Chiller
Upright Chiller
Ventilated cooling system
Automatic Defrost (No Frost)
Interior structure in Stainless steel 304
Exterior structure in Stainless steel 304
4 Doors
2 Doors
6 pcs removable shelves
3 pcs removable shelves
Electronic thermostat
Digital LED temperature display
Self-closing door
Self-closing door
Replaceable magnetic gasket
Self evaporation
Self evaporation
Removable compressor
Wheels with stopper
Wheels with stopper
Lock & Key
Lock & Key
Capacity : 1173 liters
Capacity : 537 liters
Power : 700 W
Power : 350 W
Voltage / Frequency : 230 V / 50 Hz
Temperature : -2°C ~ +10°C
Refrigrant R134a 320 gram
Refrigrant R134a 300 gram
Internal dimension: 1220X570X1380 mm
Internal dimension: 560X570X1380mm
Product dimension: 1340X845X2000mm
Product dimension 680X845X2000mm
The refrigeration temperatures is for the normal environment. They are different from region to region.
Specifications of this appliance may change without notice to improve the quality of the product. Figures in
this manual are schematic and may not match your product exactly.
Values stated on the machine labels or in the documentation accompanying it are obtained in laboratory in
accordance with the relevant standards. Depending on operational and environmental conditions of the
appliance, values may vary.
Part 5: Specification

This manual suits for next models
1
Table of contents
Languages:
Other Modena Chiller manuals
Popular Chiller manuals by other brands

Acson international
Acson international A5ACV 30 CR manual

Johnson Controls
Johnson Controls YORK YVAM 0350 operation & maintenance

teca
teca RLC-1400HC Product information packet

Royal-Kincool
Royal-Kincool GLACIAN HPB1152 operating instructions

McQuay
McQuay 5ACV 30 CR installation manual

IKA
IKA RC 2 basic operating instructions