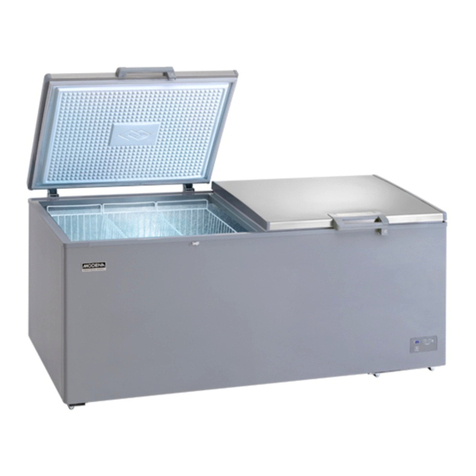
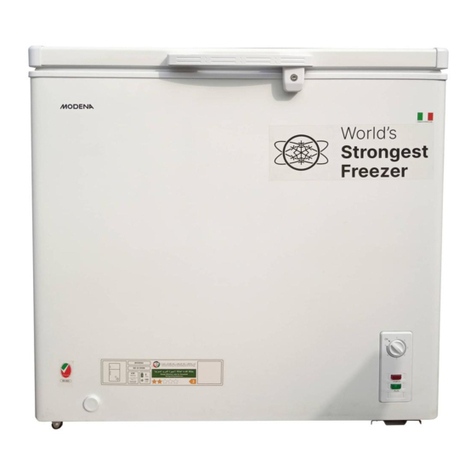
Modena MX 0310 Owner's manual

User
Manual Book
Dual Chamber Chest Freezer
Conserva Series
MX 0310, MX 0600

Thank you for your trust in choosing MODENA products for your
household needs. With your satisfaction as our priority, we constantly
aim to deliver stylishly designed products equipped with state-of-the-
art technology to assist you in your daily activities.
This is your guidebook containing everything you need to know about
our product. Please reach out to us if you need further assistance or
other information via our Customer Care or our official website
www.modena.com.

3
TABLE OF CONTENT PAGE
Introduction 2
Part 1: Safety Information 4
Part 2: Name of Parts 6
Part 3: Quick Start Guide 7
Part 4: Maintenance 11
Part 5: Troubleshooting 13
Part 6: Specification 15

4
READ THIS INSTRUCTION MANUAL CAREFULLY!
•WARNING! Keep ventilation openings, in the appliance enclosure or in
the built-in structure, clear of obstruction.
•WARNING! Do not use mechanical devices or other means to
accelerate the defrosting process, other than those recommended by the
manufacturer.
•WARNING! Do not use electrical appliances inside the food storage
compartments of the appliance, unless they are of the type
recommended by the manufacturer.
•WARNING! Do not damage the refrigerant circuit.
•WARNING! When positioning the appliance, ensure the supply cord is
not trapped or damaged.
•WARNING! The refrigerant and insulation blowing agent inside the
refrigerator need special disposal procedure. Consult the disposal
method with related department
•WARNING! Your freezer contains iso-butane refrigerant
(R600a/R290R134a) in small quantities. Make sure there is no damage
or leakage. Refrigerant leak may result in fire or damage to your eyes. If
a leakage is detected, move the refrigerator away from fire sources or
any other potential sources which can cause fire. To reduce fire risk,
electric shock risk, or injuries when using the product, follow the safety
instructions carefully. Read the instructions before using the product
•WARNING! Do not locate multiple portable socket-outlets or portable
power supplies at the rear of the appliance. Do not use plug adapter.
•WARNING! To avoid hazard due to instability of the appliance, it must
be fixed in accordance with the instructions.
•ATTENTION! Opening the door for long periods of time can cause a
significant increase of the temperature in the compartment of the
appliance
•ATTENTION! Clean the surfaces that come in contact with food and
accessible drainage systems regularly
•ATTENTION! Do not store hot foods into the freezer. Wait until it cools
down to room temperature.
•ATTENTION! Store foods in suitable containers in the refrigerator, so
that is is not in contact with or drip onto other foods.
Part 1: Safety Information

5
•ATTENTION! If power outage occurs, unplug the power cord. Wait at
least 10 minutes before starting the appliance to avoid damage to the
compressor.
•ATTENTION! If the refrigerating appliance is left empty for a long period
of time; switch it off, defrost, clean, dry, and leave the door open to
prevent mould from developing within the appliance
•ATTENTION! While carrying and positioning the fridge, do not damage
the cooler gas circuit.
•WARNING! Do not store explosive substances such as aerosol cans
with a flammable propellant in this appliance.
•WARNING! If the socket does not match the refrigerator plug, it must be
replaced by the manufacturer, a service agent or similarly qualified
persons in order to avoid a hazard.
•WARNING! If the supply cord is damaged, it must be replaced by the
manufacturer, an authorized service agent or similar qualified persons,
in order to avoid a hazard.
•WARNING! Children aged 8 years or older, people with limited physical,
sensory, mental capabilities, and people who have no experience, can
use the appliance safely after they have been given the appropriate
supervision or instruction concerning use of the appliance.
•ATTENTION! This Freezer can be used for household or similar
applications such as:
oStaff kitchen areas in shops, offices, and other working
environments
oFarm houses and by clients in hotels, motels, and other residential
environtments
oBed & breakfast type environments
oCatering and similar non-retail environments

6
1. Handle
2. Door
3. Freezer
4. Refrigerator
5. Lock
6. Control panel
7. Castor wheels
*Above picture is for reference only. Difference between the picture and actual product may
occur
**Feature and equipments differ by each product
Part 2: Name of Parts
1
2
4
3
5
7
6

7
PRODUCT INSTALLATION
•Install the freezer on even and sturdy surface. Uneven surface may
cause objects in it to fall.
•Provide adequate space for air circulation between the freezer and the
wall or other objects. Back and side clearance is 10 cm, and top
clearance is 70 cm.
•Do not put freezer near heat sources such as stove, ovens, boilers, etc.
•Do not put freezer under direct sunlight or exposed to rainwater to avoid
electrical current leakage
•Ensure that the voltage and frequency match the freezer specification,
which are 220 V and 50 Hz.
•Do not use cord extension or branched outlet since it poses risks of
shortage, overheating and fire.
•If the unit must be installed in a humid environment, make sure to install
a circuit breaker to avoid shortage.
FIRST TIME USE
Before using the freezer for the first time, clean the interior and accessories
using lukewarm water and neutral soap to eliminate bad odor typical from
newly manufactured product. After that, dry before use.
Part 3: Quick Start Guide
WARNING! The power plug must be easily accessed and unplugged
after installation
WARNING! Do not use detergent or abrasive cleaners as it will
damage the product finishing

8
INITIAL USE
1. Open the freezer door for a while to provide good air circulation before
use
2. Clean the inner cabinet before use
3. Please wait 30 minutes before turning on the freezer. Oil in the
compressor may circulate to the refrigerant system during the
transportation or distribution process
4. When turning the freezer for the first time, cabinet may become warm
and the compressor will operate in a very long time to achieve ideal
temperature. Upon reaching the ideal temperature, the thermostat will
stop the compressor and the freezer will operate normally
5. Do not put foods into the freezer before the ideal temperature is reached
CONTROL PANEL AND THERMOSTAT DISPLAY
*Control panel shape and display can be different depending on the product type
•Red light indicates POWER. If the power cord is plugged to the power
source, the red light will turn on
•Green light indicates OPERATION. If the compressor is operating, the
green light will turn on
NOTE: Do not set the thermostat to “Max” or “Fast Freezing” position
for a long period of time as it can cause damage to the compressor and
reduce its lifetime. This position may only be used to freeze foods
quickly. After the food is frozen, set the thermostat back to the desired
setting.

9
•Check the temperature after 4 (four) hours. If the temperature has
reached the desired level, you may use start using the freezer.
•The temperature will be affected by:
oAmbient/room temperature
oDoor open frequency
oQuantity of food stored inside
•To reach the desired temperature, all the above factors must be
considered, and a few adjustments may be needed.
FREEZING FRESH FOOD
Freezer is suitable for freezing fresh food and storing frozen food for a long
period of time. Place fresh foods on the bottom of the compartment.
STORING FROZEN FOOD
When you want to start the freezer after a long time, adjust the thermostat to
highest level and wait until 2 (two) hours before storing anything inside the
freezer.
THAWING
Frozen food can be thawed in a fridge compartment or at room temperature.
Small pieces of frozen food may be cooked directly, but the cooking time will
increase.
TIPS ON FREEZING FOODS
•The freezing process takes 24 hours. Do not add foods into the freezer
during this period.
•Freeze top quality, fresh, and thoroughly cleaned foods.
IMPORTANT! If accidental defrosting occurs (for example in power
outage), defrosted foods must be consumed or cooked immediately.
Cooked foods can be re-frozen.

10
•Prepare the foods in small portions to make it freeze faster and can be
thawed in the required quantity.
•Wrap the foods with aluminum foil or polyethylene and make sure it is
airtight.
•Do not allow fresh unfrozen food to touch other frozen food. This is to
avoid a rise of temperature of the frozen foods.
•Lean foods freeze better and can be stored longer than fatty foods. Salt
can help preserve the foods.
•Consuming ice cubes immediately from the freezer may result in frost
burns.
•It is recommended to label each individual package with storing date to
keep tab of the storage period.
TIPS ON STORING FROZEN FOODS
•Make sure that the commercially frozen foods were adequately stored
by the retailer.
•Be sure that the frozen food is quickly transferred to the chest freezer in
the shortest amount of time.
•Do not open the door too frequently or leave it open for a long period of
time.
•Do not exceed the storage period indicated by the food manufacturers.
CLEANING THE FREEZER
To make sure that the freezer is in optimum condition, the interior and
accessories must be cleaned regularly.
Part 4: Maintenance
WARNING! Freezer may not be connected to the main electrical
socket during cleaning! Risk of electric shock!

11
•Before performing cleaning activity, switch off the freezer and unplug the
power cord.
•Do not clean the freezer using steam cleaner. Moisture from the steam
may damage the electrical components and cause electric shock. Hot
steam may damage plastic components. Freezer must be dried
completely before use.
•Do not allow such substances to come in contact with the appliances.
•Do not use abrasive cleaners.
•Remove the foods from the freezer and store in a cool and well covered
place.
•Clean the interior and accessories using cloth and lukewarm water. After
that, clean with clean water and dry completely.
•Dust can accumulate on the condenser and cause performance drop.
Clean the freezer condenser at least once a year using soft brush or
vacuum cleaner.
•After everything is dried completely, install the accessories and freezer
to the initial position.
DEFROSTING
Freezer will become progressively covered with frost and must be cleaned.
Do not use sharp metal objects to scrape the frost because it can damage
the freezer. Use plastic scraper.
If the accumulated frost becomes very thick, complete defrosting should be
performed as follows:
•Unplug the unit. Remove the inner drain plug. Open the door and let it
open to accelerate the defrost process. Defrosting usually takes a few
hours.
•To collect the defrost water, place a tray beneath the outer drain hole.
IMPORTANT! Essential oils and organic solvent may damage plastic
components. For example lemon water, orange water, butyric acid,
cleaner that contains acetic acid.

12
•Pull the outer drain dial and rotate 180°. The defrost water will flow out
of the freezer.
•When finished, push the outer drain plug back to its place. Reinstall the
inner drain plug. Monitor the water level in the tray to avoid overflow.
•Clean the interior of the freezer and plug the power cord.
•Adjust the thermostat knob to the desired position.
LED LAMP REPLACEMENT
If your freezer is equipped with LED lamp, contact Service Center for lamp
replacement. LED lamp replacement must be performed by qualified
technician.
ENVIRONMENTAL NOTICE
The packaging material used is recyclable. We recommend that
you separate plastic, paper and cardboard and give them to
recycling agents. To help preserve the environment, the
refrigerant used in this product is R600a/R290/R134a
(Hydrofluorocarbon - HFC), which does not affect the ozone
layer and has little impact on the greenhouse effect. According
to WEEE (Waste of Electrical and Electronic Equipment) guidelines, waste
from electrical and electronic devices should be collected separately. If you
need to remove of this appliance in the future, do not throw it away with the
rest of your domestic garbage. Instead, please take the appliance to the
nearest WEEE collecting agents, where available.

13
Check the following before contacting our Service Center in the event of
malfunction
Problem
Possible Cause
Recommended Action
Appliance does
not work
•Power cord is
unplugged or loose
•Blown fuse or
damaged fuse
•Defective socket
•Insert power cord
correctly
•Check the fuse,
replace if needed
•Malfunction must be
repaired by qualified
electrician
Appliance is
not cold
•Thermostat not
properly adjusted
•Too much food
•Door is opened
frequently
•Freezer is placed in
hot area
•Bad ventilation
•Frost accumulated
inside the freezer
•Adjust the thermostat
until it’s cold
•Rearrange or reduce
the food
•Do not open the door
too frequent
•Place freezer in a cool
and dry place
•Ensure adequate
ventilation
•Defrost and clean the
freezer
Part 5: Troubleshooting
WARNING! Before troubleshooting, unplug the unit from power source.
Only a qualified technician is allowed to perform troubleshooting not
stated in this manual.
IMPORTANT! There are some normal sounds during use (compressor
sound, circulating refrigerant sounds)

14
Problem
Possible Cause
Recommended Action
Appliance is
too cold
•Thermostat adjusted
to maximum position
•Adjust the thermostat
with lower setting
Dew outside of
freezer
•Ambient temperature
and humidity too high
•Place freezer in a cool
and dry place
Loud noise
•Freezer is touching
the wall or other
object
•Freezer pipe is
touching other parts
•Reposition the freezer
and follow the
minimum distance
•If needed, bend the
pipe to avoid touching
with other objects

15
MODEL
MX 0310
MX 0600
Total Capacity (Liter)
310
600
Freezer Capacity (Liter)
178
402
Refrigerator Capacity (Liter)
132
198
Power Input (Watt)
310
600
Freezer temperature (°C)
2 to -26
2 to -26
Refrigerator temperature (°C)
10 to -3
10 to -3
Color
White
White
Door with lock
Yes
Yes
Wheels
Yes
Yes
Control panel
Analog
Analog
Defrost drain hole
Yes
Yes
Basket (pcs)
1
1
Refrigerant
R600a
R290
Rated Voltage (V)
220-240
220-240
Rated Frequency (Hz)
50
50
Product dimension (WxDxH)(mm)
1329x575x832
1540x845x932
Product weight (kg)
53
72
*) S = Stainless, R = Red, C = Cream, O = Orange, N = Green, U = Blue,
W = White, V = Silver, G = Grey, L = Black
Design and specification can change without prior notice to improve the
quality of the product. The illustration in this manual is schematic and can be
different with your actual product. The values on label or in other documents
are according to laboratory test and relevant standards. Values can vary
depending on the actual operational and environmental condition of the
product.
Part 6: Specification

11/20
PT MODENA INDONESIA
Jl. Industri Raya I Blok D-8,
Jatiuwung, Tangerang 15135
This manual suits for next models
2
Table of contents
Other Modena Freezer manuals

Modena
Modena SC 1303 Owner's manual

Modena
Modena MD 0110 MLWH Owner's manual

Modena
Modena MD WH Series User manual

Modena
Modena MC 0160 W Owner's manual

Modena
Modena MC Series User manual

Modena
Modena SC Series User manual

Modena
Modena MD Series User manual

Modena
Modena VM Series User manual

Modena
Modena SC Series User manual

Modena
Modena MD 15 WWM Owner's manual