manuals.online logo
Brands
  1. Home
  2. •
  3. Brands
  4. •
  5. modway
  6. •
  7. Indoor Furnishing
  8. •
  9. modway EEI-1321 User manual

modway EEI-1321 User manual

Customer Service 908-368-1025︱www.modwayfurniture.com Page 1 of 8
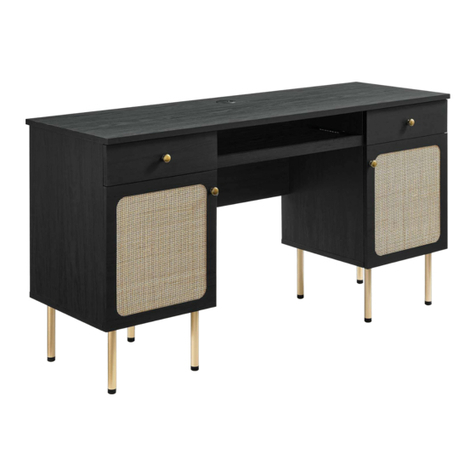
EEI -1321 DESK
Hardware:
Thank you for purchasing the MODWAY DESK!
Before you start, here is some helpful advice:
1.We suggest you spend a short time reading through this leaflet and then follow the simple step by step
instructions.
2.Owing to the size and weight of the desk, we recommend that it is assembled by two adults, on a carpeted or
padded area, in the room that it is intended for. Approximate assembly time: 45 minutes.
3.Please do not use any tools other than those provided or recommended in these instructions.
4.Please do not throw away any of the packaging or instructions until you have checked all the components and
hardware and the furniture is fully assembled.
5.Assemble all components loosely until advised to tighten. Depending on use, it may be necessary to tighten the
components from time to time, so please save the tools that have been provided.
6.Please keep all pieces out of reach of small children.
a Cam x18 b Cam Post x18
c Screw M4x35mm x12 d Pull Screw M4x18mm x6
e Pull x3 f Drawer Guides x3 sets
g Screw M4x14mm x24 h Dowel x29
j Bolt M5x55mm x12 k Bolt M6x12mm x10
m Nut x1 n Bolt M6x35mm x4
o Plastic Pad x4 p Connect Metal Plate x4
q Allen Wrench x1 r Open Wrench x1
Customer Service 908-368-1025︱www.modwayfurniture.com Page 2 of 8
EEI -1321 DESK
Component:
A1 Center Top Panel x1 A2 Side Top Panel x2
A1 A2
A2
B
C
D
E
E
F F
F
G
H
J
K
L
M
N5
N2
N1
N3
N4 N4
N1
N2
N5
N3
L1
L5
L2 N4
N3
B Bottom Panel x1 C Left Side Panel x2
D Right Side Panel x1 E Left Divide Panel x2
F Right Divide Panel x2 G Back Panel x1
H Left Side Leg x1 J Right Side Leg x1
K Top Rail x1 L Support Rail x1
M Bottom Rail x1 N1 Side Drawer Front x2
N2 Side Drawer Back x2 N3 Drawer Left Side x3
N4 Drawer Right side x3 N5 Side Drawer Bottom x2
L1 Center Drawer Front x1 L2 Center Drawer Back x1
L5 Center Drawer Bottom x1
Customer Service 908-368-1025︱www.modwayfurniture.com Page 3 of 8
EEI -1321 DESK
HOW TO USE CAN AND CAM POST HARDWARE
STEP 1:
1. 2.
3. 4.
Note cam arrow
direction
Note cam arrow
direction
Turn cam clockwise
1/2 turn
5.
Place 1pc Side Drawer Front (N1),1pc Side Drawer Back,1pc Left Drawer Side (N3), 1pc Right Drawer Side (N4) and 1pc
Side Drawer Bottom (N5) together as shown.
Attach them by 2pcs Cam Post (a), 2pcs Cam (b), 4pcs Screw (c), tighten the Screws (c) and Cam (b)
Attach 1pc Pull (e) to the Side Drawer Front (N1) by using 2pcs Pull Screw (d).
Fully tighten Cams (b), Screws (c), Pull Screws (d) with Phillips Head Screw Driver (not included).
Repeat the same steps and hardware for the other Side Drawer and Centre Drawer as shown.
N5
N3
N2
N1
N4
a
a
b
c
c
d e
N3
N4
c
c
b
b
d
e
L1
L2
L5
ax6 bx6 cx12
dx6
ex3
Phillips Head Screwdriver
( not included) Hardware & Tools required
c
a
a
Customer Service 908-368-1025︱www.modwayfurniture.com Page 4 of 8
EEI -1321 DESK
STEP 2:
STEP 3:
Place the Side Panels (C&D), Divide Panels (E&F) upside down on a carpeted or padded surface.
Attach the 3 sets Drawer Guides (f) to the Side Panels (C&D) and Divide Panels (E&F) by using 12pcs Screw (g) as shown.
Use Phillips Head Screwdriver (not included) to tighten the Screws (g) clockwise until secure.
Insert 12pcs Cam Post (a) into the corresponding holes on the Top Panels (A1&A2) as shown.
Insert 14pcs Dowel (h) into the corresponding holes on the Top Panels (A1&A2) as shown.
ax12 hx14 Phillips Head Screwdriver
( not included) Hardware & Tools required
D
f
F
C
A2
F E
g
g
g
g
g
g
g
g
g
g
Hardware & Tools required
fx3 gx12 Phillips Head Screwdriver
( not included)
A1
f
f
h
h
f
f
h
h
f
f f
f
h
h h h
h
h
E
Customer Service 908-368-1025︱www.modwayfurniture.com Page 5 of 8
EEI -1321 DESK
hx15 Phillips Head Screwdriver
( not included)
STEP 4:
STEP 5:
Please put the Top Panels(A1&A2)) upside down on a carpeted or padded surface.
Place the Side Panels (C&D), Divide Panels (E&F) to the Top Panels (A1&A2) as shown.
Attach them by using 12pcs Cam (b).
Use Phillips Head Screwdriver (not included) to tighten the Cams (b) clockwise until secure.
Place the Back Panel (G) to the Top Panels (A1&A2) as shown.
Insert 15pcs Dowel (h) into the corresponding holes on the Side Panel (C&D), Divide Panels (E&F) and Back Panel (G).
Hardware & Tools required
bx12 Phillips Head Screwdriver
( not included)
A1
h
A2 A2
E
E F
F
G
h
h
h h
h h
h h
h h
h
h h
A1
A2 A1
D C
F E
E
F
b
b
b
b
b
b
b
b
b b
b
b
b
a
a a
a a
a
a
a
h
h
h
h
h
h
h
h
h h h
Customer Service 908-368-1025︱www.modwayfurniture.com Page 6 of 8
EEI -1321 DESK
STEP 6:
STEP 7:
Please put Assembled Top Panel(A1&A2) upside down on a carpeted or padded surface.
Place the Bottom Panel (B) to the assembled Side Panels (C&D), Divide Panels (E&F) and Back Panel (G) as shown.
Attach them by using 12pcs Bolt (j).
Use Allen Wrench (q) to tighten the Bolts (j) clockwise until secure.
Pull out the 3 sets metal drawer guides of Drawer Guides (f).
Attach the Side Drawers and Center Drawer to the Drawer Guides (f) by using 12pcs Screws (g).
Use Phillips Head Screw Driver (not included) to tighten the Screws (g) clockwise until secure.
gx12 Phillips Head Screwdriver
( not included) Hardware & Tools required
A1
Hardware & Tools required
jx12 qx1
C
j
g
g
A2
A1
A2
N1
L1
N1
A2 A2
G
B j
j
j
j
j
j
j
j
q
C
D
E F F
E
Customer Service 908-368-1025︱www.modwayfurniture.com Page 7 of 8
EEI -1321 DESK
STEP 8:
STEP 9:
Place the Top Rail (K), Bottom Rail (M) and Support Rail (L) as shown.
Attach the Support Rail (L) to the Top Rail (K) by using 4pcs Bolt (h).
Use Allen Wrench (q) to tighten the Bolts (k) clockwise until secure.
Attach the Support Rail (L) to the Bottom Rail (M) by using 1pc Nut (m) as shown.
Use Open Wrench (r) to tighten the Nut (m) clockwise until secure.
Place the assembled Top Rail (K) and Bottom Rail (M) as shown.
Attach the Left Side Leg (H) and Right Side leg (J) to the assembled Top Rail (K) and Bottom Rail (M) by using 4pcs Bolt (h).
Use Allen Wrench (q) to tighten the Bolts (n) clockwise until secure.
Lock 4pc Plastic Pad (h) to the Left Side Leg (H) and Right Side leg (J) as shown.
Hardware & Tools required
kx2 mx1 qx1
rx1
Hardware & Tools required
nx4 hx4 qx1
q
J
H
K
L
M
h
h
h
h
h
H
n
n
n
n
n
J
K
k
L
M
k
m
m
r k
q
Customer Service 908-368-1025︱www.modwayfurniture.com Page 8 of 8
EEI -1321 DESK
STEP 10:
Please put the assembled desk’s top upside down on a carpeted or padded surface as shown .
Attach assembled Left Side Leg (H) and Right Side Leg (J) into the bottom of Bottom Panel (B) by using 4pcs Connect Metal
Plat (p) and 8pcs Blot (k).
Use Allen Wrench (q) to tighten the Bolts (k) clockwise until secure.
B
Hardware & Tools required
kx8 px4 qx1
STEP 11:
Carefully turn over the desk.
Assembly is completed. The desk is ready to enjoy now!
k
H
J
k
k
k
k
J
k
p
p
p
p
p
q

Other modway Indoor Furnishing manuals
modway EEI-5567 User manual

modway

modway EEI-5567 User manual

modway MOD-5467 User manual

modway

modway MOD-5467 User manual

modway EEI-2530 User manual

modway

modway EEI-2530 User manual

modway EEI-5878 User manual

modway

modway EEI-5878 User manual

modway BBT 6575 KING HB User manual

modway

modway BBT 6575 KING HB User manual

modway MOD-6249 User manual

modway

modway MOD-6249 User manual

modway MOD-6706 User manual

modway

modway MOD-6706 User manual

modway 2DRW User manual

modway

modway 2DRW User manual

modway Transmit EEI-2528 User manual

modway

modway Transmit EEI-2528 User manual

modway EEI-6355 User manual

modway

modway EEI-6355 User manual

modway EEI-4209 User manual

modway

modway EEI-4209 User manual
modway EEI-3147 User manual

modway

modway EEI-3147 User manual

modway EEI –3040 User manual

modway

modway EEI –3040 User manual

modway EEI-3053 User manual

modway

modway EEI-3053 User manual
modway SUNBED EEI-2250 User manual

modway

modway SUNBED EEI-2250 User manual

modway Plywood EEI-509 User manual

modway

modway Plywood EEI-509 User manual

modway 6120 User manual

modway

modway 6120 User manual

modway Prospect EEI-813 User manual

modway

modway Prospect EEI-813 User manual

modway Stance EEI-3019 User manual

modway

modway Stance EEI-3019 User manual

modway EEI-3691-NAT-TAU User manual

modway

modway EEI-3691-NAT-TAU User manual

modway MOD-5428 User manual

modway

modway MOD-5428 User manual

modway EEI-2285 User manual

modway

modway EEI-2285 User manual

modway EEI-6057 User manual

modway

modway EEI-6057 User manual

modway EEI-5079 User manual

modway

modway EEI-5079 User manual

Popular Indoor Furnishing manuals by other brands

Gautier BRABANT S20 manual

Gautier

Gautier BRABANT S20 manual

Office Star Products 108 operating instructions

Office Star Products

Office Star Products 108 operating instructions

Whittier Wood 1524AEGAC Assembly instructions

Whittier Wood

Whittier Wood 1524AEGAC Assembly instructions

Homelegance SH2212-4 Assembly instruction

Homelegance

Homelegance SH2212-4 Assembly instruction

Ropox Medi 2 User Manual, Mounting Instructions

Ropox

Ropox Medi 2 User Manual, Mounting Instructions

Habitat Roulette manual

Habitat

Habitat Roulette manual

Made+ BUREN manual

Made+

Made+ BUREN manual

Woodream TRANO ROA Assembly instruction

Woodream

Woodream TRANO ROA Assembly instruction

Renz C 07 Assembly instruction

Renz

Renz C 07 Assembly instruction

Lennox ENXS821 Assembling Instruction

Lennox

Lennox ENXS821 Assembling Instruction

Whitewood Furniture 265-30 Assembly instructions

Whitewood Furniture

Whitewood Furniture 265-30 Assembly instructions

Runfine RFVA0069B Operator's manual

Runfine

Runfine RFVA0069B Operator's manual

Whitewood VERSAILLES S-9212 Assembly instructions

Whitewood

Whitewood VERSAILLES S-9212 Assembly instructions

hygena Amparo 600/1443 Assembly instruction

hygena

hygena Amparo 600/1443 Assembly instruction

Gami RAFAEL J1X manual

Gami

Gami RAFAEL J1X manual

BRC NoLita installation guide

BRC

BRC NoLita installation guide

swissflex uni 14 95RF bridge operating instructions

swissflex

swissflex uni 14 95RF bridge operating instructions

Argos Arvika 355/7794 Assembly instructions

Argos

Argos Arvika 355/7794 Assembly instructions

manuals.online logo
manuals.online logoBrands
  • About & Mission
  • Contact us
  • Privacy Policy
  • Terms and Conditions

Copyright 2025 Manuals.Online. All Rights Reserved.