manuals.online logo
Brands
  1. Home
  2. •
  3. Brands
  4. •
  5. modway
  6. •
  7. Indoor Furnishing
  8. •
  9. modway MOD-5365 User manual

modway MOD-5365 User manual

Customer Service 908-368-1025︱
︱︱
︱www.modwayfurniture.com Page 1 of 6
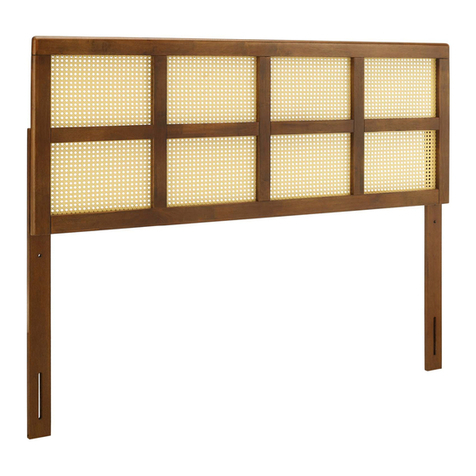
MODWAY HEADBOARD
Hardware:
Component:
A Bolt M8x45mm x4
B Flat Washer M8xD22mm x4
C Allen Wrench M5 x1
1 Headboard x1 2 Low Post x2
Thank you for purchasing the MOD-5365/5366/5367/5368/5369/5370/5371/5372/5373/5374/5375/5376/5377/
5378/5379/5380/5381/5382/5383/5384/5385/5386/5387/5388/5389/5390/5391/5392/5393/5394/5395/5396/5397/
5398/5399/5400/5401/5402/5403/5404/5405/5406/5407/5408 HEADBOARD!
!!
!
Before you start, here is some helpful advice:
1.We suggest you spend a short time reading through this leaflet and then follow the simple step by step
instructions.
2.Owing to the size and weight of the headboard, we recommend that it is assembled by two adults, on a carpeted
or padded area, in the room that it is intended for. Approx assembly time: 30 minutes.
3.Please do not use any tools other than those provided or recommended in these instructions.
4.Please do not throw away any of the packaging or the instruction until you have checked all the components and
hardware and the furniture is fully assembled. Please ensure that the packaging is disposed of in a safe
environmentally friendly way.
5.Assemble all components loosely until advised to tighten. Depending on use, it may be necessary to tighten the
components from time to time, so please save the tools that has been provided.
6.Please keep all fitting out of reach of children.
1
2
2
(Style may vary)
Customer Service 908-368-1025︱
︱︱
︱www.modwayfurniture.com Page 2 of 6
Ax4 Bx4 Cx1
STEP 1:
Put the Headboard (1) upside down on a carpeted or padded area by two adults
Then insert the Low Posts (2) into the bottom of Headboard (1) and align pre-drilled Low Post (2) holes to the pre-
drilled Headboard (1) Holes according to your desired headboard height.
Attach each of Low Post (2) by using 2 piece of Flat Washer (B) and 2 pieces of Bolt (A) from the holes on the back
of Low Post (2) and Headboard (1). Tighten with Allen Wrench (C).
Hardware & Tool required
STEP 2:
2
Assembly is completed. The headboard is ready to use now!
NOTE: Hardware may loosen over time. Periodically check that all connections are tight.
Carefully turn up the assembled Headboard (1) by two adults.
2
1 1
2
2
A
B
C
Back Back
MODWAY HEADBOARD
Customer Service 908-368-1025︱
︱︱
︱www.modwayfurniture.com Page 3 of 6
MODWAY CONNECTING HEADBOARD TO BED FRAME
A Bolt M6x45mm x4
C Flat Washer M6xD22mm x8
F Allen Wrench M4 x1
B Bolt M6x65mm x4
D Spring Washer M6 x4
E Hex Nut M6 x4
OPTION 1
Hardware:
1 2 Bed Frame x1
Headboard x1
(Style may vary)
OPTION 1
1
2
Component:
ASSEMBLY INSTRUCTIONS
OPTION 1
Customer Service 908-368-1025︱
︱︱
︱www.modwayfurniture.com Page 4 of 6
A or Bx4 Cx8 Fx1
Ex4
Dx4
STEP 1:
Line up the Bed Frame (2) board’s pre-drilled holes to match those of the Headboard (1) .
Secure the Headboard (1) to the Bed Frame (2) by using 2 pieces of Bolt (B) for the thicker Bed Frame (2), and 2 pieces
of Bolt (A) for the thinner Bed Frame (2).
Before inserting each bolt, place 1 piece of Spring Washer (D) and Flat Washer (C) on each bolt. Then fit 1 piece of Flat
Washer (C) on the bolt as it protrudes through the other side of the Bed Frame (2).
Place 1 piece of Hex Nut (E) after the Flat Washer (C) at the end of each bolt. Then tighten the Bolts (A or B) by
using the Allen Wrench (F).
Repeat the same procedure for each bolt and each side of the Bed Frame (2).
Hardware & Tool required
STEP 2:
2
Assembly is completed. The bed is ready to use now!
NOTE: Hardware may loosen over time. Periodically check that all connections are tight.
Carefully position the assembled bed to the desired location by four adults.
1
Note: Extra hardware were provided for attaching the headboard to your Bed Frame (use is optional).
1
2
F
E
C
B
C
D
MODWAY CONNECTING HEADBOARD TO BED FRAME
Customer Service 908-368-1025︱
︱︱
︱www.modwayfurniture.com Page 5 of 6
A Bolt M6x45mm x4
C Flat Washer M6xD22mm x4
F Allen Wrench M4 x1
D Spring Washer M6 x4
OPTION 2
Hardware:
1 2 Bed Frame x1
(Style may vary)
Headboard x1
(Style may vary)
OPTION 2
1
2
Component:
Note: This is assembly instruction for Headboard connect to MODWAY Bed Frame MOD-5347/5348/5349/
5350/5351/5352/5353/5354/5357/5358/5359/5360/5361/5362/5363/5364.
ASSEMBLY INSTRUCTIONS
OPTION 2
MODWAY CONNECTING HEADBOARD TO BED FRAME
B Bolt M6x65mm x4
Customer Service 908-368-1025︱
︱︱
︱www.modwayfurniture.com Page 6 of 6
A or Bx4 Cx4 Dx4 Fx1 Hardware & Tool required
STEP 2:
2
Assembly is completed. The bed is ready to use now!
NOTE: Hardware may loosen over time. Periodically check that all connections are tight.
1 1
2
A
D
C
F
Line up the Bed Fame (2) board’s pre-drilled holes to match those of the Headboard (1).
Secure the Headboard (1) to the Bed Frame (2) by using 2 pieces of Bolt (B) with 2 pieces of Spring Washer (D), 2 pieces
of Flat Washer (C) for the thicker Bed Frame (2), and 2 pieces of Bolt (A) with 2 pieces of Spring Washer (D), 2 pieces of
Flat Washer (C) for the thinner Bed Frame (2).
Then tighten the Bolts (A or B) by using the Allen Wrench (F).
Repeat the same procedure for each bolt and each side of the Bed Frame (2).
STEP 1:
MODWAY CONNECTING HEADBOARD TO BED FRAME
Carefully position the assembled bed to the desired location by four adults.
MOD-5359/5360/5361/5362 FULL/QUEEN BED FRAME
are
Short Board x2
Leg I x2
Long Board x2
Leg II x2
Center Rail
Roll Slats x13
x1 Support Leg x4
Components:
WWW.MODWAY.COM
Put 1 piece of Short Board (1) upside down on a carpeted or padded area by two adults.
Insert 1 piece of Leg II (6) and 1 piece of Leg I (5) into the Short Board (1) as shown. Please note the
numbers shown on Legs and Short Board must match.
Secure them by using 4 pieces of Bolt (B), 4 pieces Spring Washer (C) and 4 pieces of Flat Washer (D).
Use Allen Wrench (F) to tighten the Bolts (B) clockwise until secure.
Repeat the same steps for the remaining 1 piece of Short Board (1), 1 piece of Leg I (5) and 1 piece
of Leg II (6).
Place 1 piece of Long Board (2) to the assembled 2 pieces Short Board (1) by two adults.
Attach them by using 4 pieces of Bolt (A) as shown.
Use Allen Wrench (G) to tighten the Bolts (A) clockwise until secure.
Repeat the same steps for the remaining 1 piece of Long Board (1).
WWW.MODWAY.COM
F
B
C
D
B x 8 C x 8 D x 8 F x 1
G
A x 8 G x 1
Insert Center Rail (3) to the bracket (provided) on Short Board (1) and then secure with 1 piece Screw
(E) per each side end. Tighten the Screws (E) with Phillips Head Screw Driver (not provided).
WWW.MODWAY.COM
Secure 4 pieces of
Support leg (4) clockwise until secure.
Support Leg (4) to the Center Rail (3) with pre-set T-nut as shown. Tighten the
E
E x 2
Hardware may loosen over time. Periodically check that all connections are tight.
Assembly is complete. The bed frame is ready to use now!
WWW.MODWAY.COM
E
E
E
E x 8
E
E
E
E x 4
CONNECTING BED FRAME TO HEADBOARD
Reminder: All the hardware packed in the
Headboard you bought. Please use only the above
hardware from Headboard Hardware Package to
assemble the Bed Frame and Headboard.
WWW.MODWAY.COM
CONNECTING BED FRAME TO HEADBOARD
WWW.MODWAY.COM

This manual suits for next models

43

Other modway Indoor Furnishing manuals
modway MOD-5538 User manual

modway

modway MOD-5538 User manual

modway EEI-6353 User manual

modway

modway EEI-6353 User manual

modway EEI-3452 User manual

modway

modway EEI-3452 User manual

modway Shore EEI-2255 User manual

modway

modway Shore EEI-2255 User manual

modway MOD-6218 User manual

modway

modway MOD-6218 User manual

modway MOD-6967-WAL User manual

modway

modway MOD-6967-WAL User manual

modway MOD-6031 User manual

modway

modway MOD-6031 User manual

modway EEI-1804 User manual

modway

modway EEI-1804 User manual

modway MOD-6251 User manual

modway

modway MOD-6251 User manual

modway EEI-2707 User manual

modway

modway EEI-2707 User manual

modway Adept Performance EEI-3059 User manual

modway

modway Adept Performance EEI-3059 User manual

modway EEI-1525 User manual

modway

modway EEI-1525 User manual

modway MOD-6303 User manual

modway

modway MOD-6303 User manual

modway EEI-3460 User manual

modway

modway EEI-3460 User manual

modway EEI-3801 User manual

modway

modway EEI-3801 User manual

modway EEI-2577 User manual

modway

modway EEI-2577 User manual

modway EEI-5009 User manual

modway

modway EEI-5009 User manual

modway EEI-3404 User manual

modway

modway EEI-3404 User manual

modway EEI-3303 User manual

modway

modway EEI-3303 User manual

modway EEI-3302 User manual

modway

modway EEI-3302 User manual

modway MOD-7079 User manual

modway

modway MOD-7079 User manual

modway EEI-2072 User manual

modway

modway EEI-2072 User manual

modway MOD-7080 User manual

modway

modway MOD-7080 User manual

modway MOD-5427 User manual

modway

modway MOD-5427 User manual

Popular Indoor Furnishing manuals by other brands

U-Line H-5831 quick start guide

U-Line

U-Line H-5831 quick start guide

Medifab Gravity Chair Installation and user manual

Medifab

Medifab Gravity Chair Installation and user manual

Seconique Corona 4 Door 1 Drawer Sideboard Assembly instructions

Seconique

Seconique Corona 4 Door 1 Drawer Sideboard Assembly instructions

Kesseböhmer DISPENSA-SWING Assembly instructions

Kesseböhmer

Kesseböhmer DISPENSA-SWING Assembly instructions

ACTIU STAY FOLL-1421 Assembly instructions

ACTIU

ACTIU STAY FOLL-1421 Assembly instructions

Wren Kitchens Vogue TOWER UNIT 600 2 Door Fridge / Freezer Assembly guide

Wren Kitchens

Wren Kitchens Vogue TOWER UNIT 600 2 Door Fridge / Freezer Assembly guide

Grohe Axor Citterio 39133XX1 Specification sheet

Grohe

Grohe Axor Citterio 39133XX1 Specification sheet

Pfister UFFICIO 90686 manual

Pfister

Pfister UFFICIO 90686 manual

El Corte Inglés 124-00248 Assembly instructions

El Corte Inglés

El Corte Inglés 124-00248 Assembly instructions

Lightolier Calculite ProSpec Linear Downlight PB4T4 Specifications

Lightolier

Lightolier Calculite ProSpec Linear Downlight PB4T4 Specifications

Unfinished Furniture of Wilmington TUSCANY S-293 Assembly instructions

Unfinished Furniture of Wilmington

Unfinished Furniture of Wilmington TUSCANY S-293 Assembly instructions

Castleton Home DD-KB1262 quick start guide

Castleton Home

Castleton Home DD-KB1262 quick start guide

Merax PP198292 Operation instructions

Merax

Merax PP198292 Operation instructions

Ballard Designs Original Home Office MO239 Assembly instructions

Ballard Designs

Ballard Designs Original Home Office MO239 Assembly instructions

Costway JV10439 user manual

Costway

Costway JV10439 user manual

Maintal Newport EB SH51 Assembly instructions

Maintal

Maintal Newport EB SH51 Assembly instructions

Easy Track RB1448 Assembly instructions

Easy Track

Easy Track RB1448 Assembly instructions

Forte TRONDHEIM TDHK221 Assembling Instruction

Forte

Forte TRONDHEIM TDHK221 Assembling Instruction

manuals.online logo
manuals.online logoBrands
  • About & Mission
  • Contact us
  • Privacy Policy
  • Terms and Conditions

Copyright 2025 Manuals.Online. All Rights Reserved.