manuals.online logo
Brands
  1. Home
  2. •
  3. Brands
  4. •
  5. modway
  6. •
  7. Indoor Furnishing
  8. •
  9. modway MOD-6168 User manual

modway MOD-6168 User manual

Customer Service 609-256-9000︱www.modway.com Page 1 of 6
MOD-6168/ 6169/ 6170/ 6171/ 6172/ 6173/ 6174/ 6175/6176/ 6177/
6178/
617
9
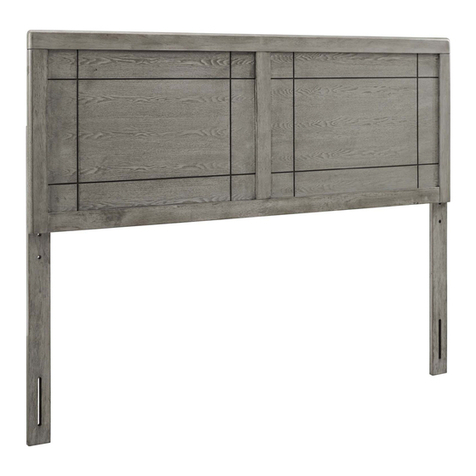
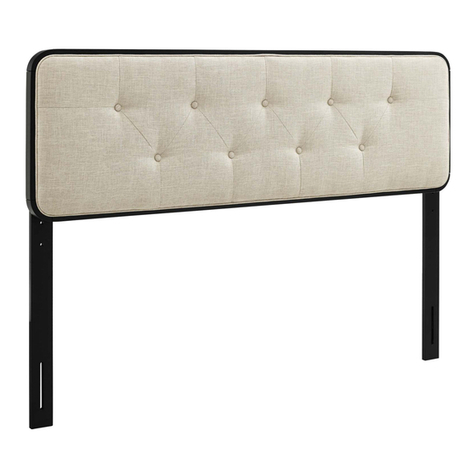
HEADBOARD
Thank you for purchasing the MODWAY HEADBOARD!
Before you start, here are some helpful advice:
1. We suggest you spend a short time reading through this leaflet and then follow the simple step-by-step
instructions.
2.Owing to the size and weight of the headboard, we recommend that it is assembled by two adults, on a
carpeted or padded area, in the room that it is intended for. Approximate assembly time: 30 minutes.
3.Please do not use any tools other than those provided or recommended in these instructions.
4.Please do not throw away any of the packaging or the instruction until you have checked all the components
and hardware and the furniture is fully assembled. Please ensure that the packaging is disposed of in a safe
and environmentally friendly way.
5.Assemble all components loosely until advised to tighten. Depending on use, it may be necessary to tighten
the components from time to time, so please save the tools that have been provided.
6.Please keep all fitting out of reach of children.
Hardware:
Components:
1. Headboard x1 2. Low post x2
(Style may vary)
STEP 1:
1. Insert Low Post (2) into the Headboard (1) as shown.
Allen Wrench x1
Bolt M6x15mm x6
C.
A.
Arc Washer M6 x6
B.
Customer Service 609-256-9000︱www.modway.com Page 2 of 6
MOD-6168/ 6169/ 6170/ 6171/ 6172/ 6173/ 6174/ 6175/6176/ 6177/
6178/
617
9
HEADBOARD
2. Attach by using Arc Washer (B) and Bolt (A) from the holes on the back of Low Post (2) and Headboard (1).
3. Use Allen Wrench (C) to tighten all Bolts (A) clockwise until secure at this step.
STEP 2:
Carefully turn up the assembled Headboard (1) by two adults.
Assembly is completed. The headboard is ready to use now!
NOTE: Hardware may loosen over time. Periodically check that all connections are tight.
ASSEMBLY INSTRUCTIONS
Customer Service 609-256-9000︱www.modway.com Page 3 of 6
MOD-6168/ 6169/ 6170/ 6171/ 6172/ 6173/ 6174/ 6175/6176/ 6177/
6178/
617
9
HEADBOARD
OPTION 1
Option 1 Hardware:
Components:
Note: Extra hardware were provided for attaching the headboard to your Bed Frame (use is optional).
STEP 1:
1. Line up the Bed Frame (2) board’s pre-drilled holes to match those of the Headboard (1).
2. Secure the Headboard (1) to the Bed Frame (2) by using 2 pieces of Bolts (B) for the thicker
Bed Frame (2), and 2 pieces of Bolts (A) for the thinner Bed Frame (2).
3. Before inserting each bolt, place 1 piece of Spring Washer (D) and Flat Washer (C) on each bolt. Then
Bolt
M6x
45
mm
x4
A.
Bolt
M6x
65
mm
x
4
B.
Flat
Washer
M6
x8
C.
Spring
Washer
M6
x
4
D.
Nut
M6
x
4
E.
Allen
Wrench
x1
F.
G.
Spanner
Wrench
x
1
1. Headboard x1 2. Bed frame x1
Customer Service 609-256-9000︱www.modway.com Page 4 of 6
MOD-6168/ 6169/ 6170/ 6171/ 6172/ 6173/ 6174/ 6175/6176/ 6177/
6178/
617
9
HEADBOARD
fit 1 piece of Flat Washer (C) and Nut (E) on the bolt as it protrudes through the Bed Frame (2) and the
Headboard (1) as shown.
4. Repeat the same procedure for each bolt and each side of the Bed Frame (2).
5. Use Allen Wrench (F) and Spanner Wrench (G) to tighten all Bolts (A or B) and Nut (E)
clockwise as shown.
STEP 2:
Carefully position the assembled bed to the desired location by four adults.
Assembly is completed. The bed is ready to use now!
NOTE: Hardware may loosen over time. Periodically check that all connections are tight.
ASSEMBLY INSTRUCTIONS
OPTION 2
Customer Service 609-256-9000︱www.modway.com Page 5 of 6
MOD-6168/ 6169/ 6170/ 6171/ 6172/ 6173/ 6174/ 6175/6176/ 6177/
6178/
617
9
HEADBOARD
Note: This is assembly instruction for Headboard connect to MODWAY Bed Frame.
Option 2 Hardware:
Components:
STEP 1:
1. Line up the Headboard (1) board’s pre-drilled holes to match those of the Bed Frame (2).
2. Secure the Headboard (1) to the Bed Frame (2) by using 2 pieces of Bolts (B) for the thicker
Bed Frame (2), and 2 pieces of Bolts (A) for the thinner Bed Frame (2).
3. Attach the Headboard (1) to the Bed Frame (2) by using 2 pieces of Bolts (B) with 2 pieces of Spring
Washers (D) and 2 pieces of Flat Washers (C) for the thicker Bed Frame (2) as shown.
4. Repeat the same procedure for each bolt and each side of the Bed Frame (2).
5. Use Allen Wrench (E) to tighten all Bolts (A or B) clockwise as shown.
Bolt
M6x
45
mm
x4
A.
Bolt
M6x
65
mm
x
4
B.
Flat
Washer
M6
x4
C.
Spring
Washer
M6
x
4
D.
Allen
Wrench
x1
E.
1. Headboard x1 2. Bed frame x1
Customer Service 609-256-9000︱www.modway.com Page 6 of 6
MOD-6168/ 6169/ 6170/ 6171/ 6172/ 6173/ 6174/ 6175/6176/ 6177/
6178/
617
9
HEADBOARD
STEP 2:
Carefully position the assembled bed to the desired location by four adults.
Assembly is completed. The bed is ready to use now!
NOTE: Hardware may loosen over time. Periodically check that all connections are tight.

This manual suits for next models

11

Other modway Indoor Furnishing manuals

modway EEI-5150 User manual

modway

modway EEI-5150 User manual

modway EEI -1199 User manual

modway

modway EEI -1199 User manual

modway Origin EEI-2995 User manual

modway

modway Origin EEI-2995 User manual

modway MOD-6207 User manual

modway

modway MOD-6207 User manual

modway EEI-3342 User manual

modway

modway EEI-3342 User manual

modway Vigor EEI-4213 User manual

modway

modway Vigor EEI-4213 User manual

modway EEI-3403 User manual

modway

modway EEI-3403 User manual

modway EEI-3700-NAT User manual

modway

modway EEI-3700-NAT User manual

modway EEI-6226 User manual

modway

modway EEI-6226 User manual

modway EEI-6278 User manual

modway

modway EEI-6278 User manual

modway EEI-3461 User manual

modway

modway EEI-3461 User manual

modway EEI-5560 User manual

modway

modway EEI-5560 User manual

modway EEI-6024 User manual

modway

modway EEI-6024 User manual

modway EEI-3335 User manual

modway

modway EEI-3335 User manual

modway Parsons EEI-3333 User manual

modway

modway Parsons EEI-3333 User manual

modway RENDER MOD-7071 User manual

modway

modway RENDER MOD-7071 User manual

modway EEI-1053 User manual

modway

modway EEI-1053 User manual

modway EEI-6275 User manual

modway

modway EEI-6275 User manual

modway Valour EEI-4004 User manual

modway

modway Valour EEI-4004 User manual

modway QUEEN BED FRAME MOD-5432 User manual

modway

modway QUEEN BED FRAME MOD-5432 User manual

modway MOD-6031 User manual

modway

modway MOD-6031 User manual

modway MOD-7079 User manual

modway

modway MOD-7079 User manual

modway MOD-6107 User manual

modway

modway MOD-6107 User manual

modway MOD-6047 User manual

modway

modway MOD-6047 User manual

Popular Indoor Furnishing manuals by other brands

Montana Woodworks Montana Series Assembly instructions

Montana Woodworks

Montana Woodworks Montana Series Assembly instructions

SEI KA981500TX Assembly instructions

SEI

SEI KA981500TX Assembly instructions

HJH office RACER VINTAGE IV Assembly instructions

HJH office

HJH office RACER VINTAGE IV Assembly instructions

Manhattan Comfort UTOPIA 89300 Assembly instructions

Manhattan Comfort

Manhattan Comfort UTOPIA 89300 Assembly instructions

Furniture of America CM-CR150 Assembly instructions

Furniture of America

Furniture of America CM-CR150 Assembly instructions

Thomasville Summer Silhouette 12255-011 Assembly instructions

Thomasville

Thomasville Summer Silhouette 12255-011 Assembly instructions

Pedrali Nemea 2825 manual

Pedrali

Pedrali Nemea 2825 manual

VEVOR YX-K450-100 manual

VEVOR

VEVOR YX-K450-100 manual

convenience concepts 111288 Assembly instructions

convenience concepts

convenience concepts 111288 Assembly instructions

Cooper Lighting INVUE VXS Specification sheet

Cooper Lighting

Cooper Lighting INVUE VXS Specification sheet

Style selections LWSGDS quick start guide

Style selections

Style selections LWSGDS quick start guide

HARTO Camille manual

HARTO

HARTO Camille manual

Rauch M2431 Assembly instructions

Rauch

Rauch M2431 Assembly instructions

Baxton Studio FMA0298COATHANGER Assembly instructions

Baxton Studio

Baxton Studio FMA0298COATHANGER Assembly instructions

BRIO 93HSB quick start guide

BRIO

BRIO 93HSB quick start guide

BLACK RED WHITE Natalia III Komoda 150/3s Assembly manual

BLACK RED WHITE

BLACK RED WHITE Natalia III Komoda 150/3s Assembly manual

Acme Furniture 27330Q-HB Assembly instruction

Acme Furniture

Acme Furniture 27330Q-HB Assembly instruction

Panorama Moveis Rack Denver 0671 Assembly instructions

Panorama Moveis

Panorama Moveis Rack Denver 0671 Assembly instructions

manuals.online logo
manuals.online logoBrands
  • About & Mission
  • Contact us
  • Privacy Policy
  • Terms and Conditions

Copyright 2025 Manuals.Online. All Rights Reserved.