manuals.online logo
Brands
  1. Home
  2. •
  3. Brands
  4. •
  5. modway
  6. •
  7. Indoor Furnishing
  8. •
  9. modway MOD-6278 User manual

modway MOD-6278 User manual

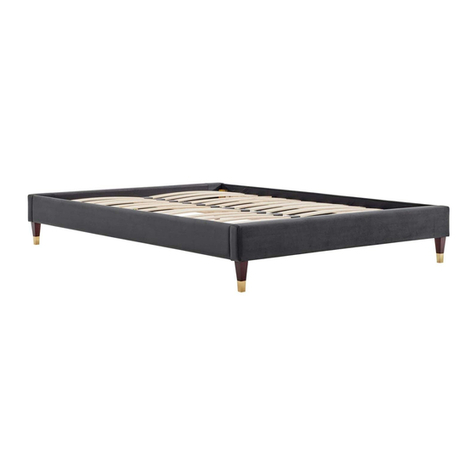
Thank you for purchasing the MODWAY BED!
Before you start, here are some helpful advice:
1. We suggest you spend a short time reading through this leaflet and then follow the simple step instructions.
2. Owing to the size and weight of the bed, we recommend that it is assembled by two adults, on a carpeted or
padded area, in the room that it is intended for. Approximate assembly time: 20 minutes.
3. Please do not use any tools other than those provided or recommended in these instructions.
4. Please do not throw away any of the packaging or the instruction until you have checked all the components and
hardware and the furniture is fully assembled. Please ensure that the packaging is disposed of in a safe
environmentally friendly way.
5. Assemble all components loosely until advised to tighten. Depending on use, it may be necessary to tighten the
components from time to time, so please save tools that have been provided.
6. Please keep all fitting out of reach of children.
Component:
MOD-6278
01 of 03
Customer Service 609-256-9000 www.modway.com
HEADBOARD
SUPPORT WOOD
BED FRAME
(DOES NOT INCLUDE
WITH THE PURCHASE)
1 PC
2 PCS
A
B
C-
02 of 03
Customer Service 609-256-9000 www.modway.com
STEP 1
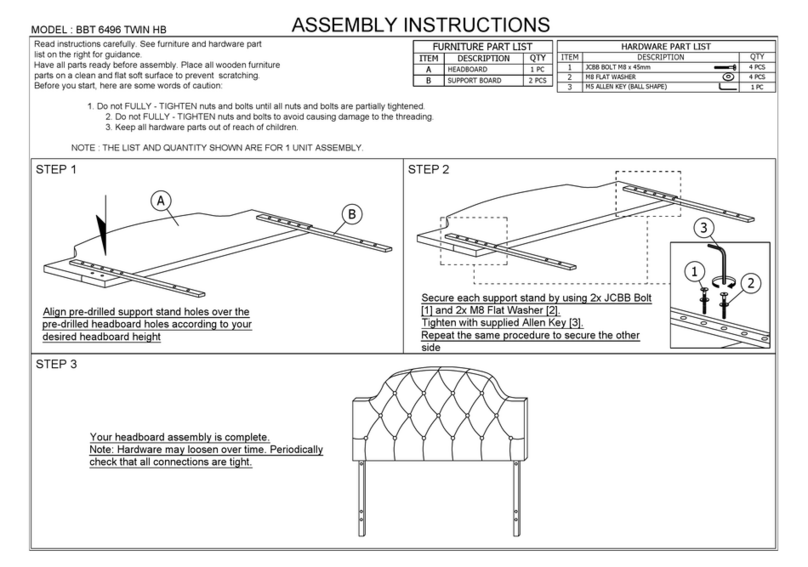
1.1 Open the zip at the headboard backing and take out all the parts.
1.2 Align pre-drilled support stand holes over the pre-drilled headboard holes according to your
desired headboard height
1.3 Secure each support stand by using 2x JCBB Bolt (1) and 2x M8 Flat Washer (2).
Tighten with supplied Allen Key (3).
Repeat the same procedure to secure the other side.
JCBB BOLT M8 x 60mm
M8 FLAT WASHER
M5 ALLEN KEY
JCBB BOLT M6 x 60mm
4 PCS
4 PCS
1 PC
JCBB BOLT M6 x 35mm
M6 FLAT WASHER
M6 SPRING WASHER
M6 HEX NUT
M4 ALLEN KEY
4 PCS
4 PCS
8 PCS
4 PCS
4 PCS
1 PC
HARDWARE BED FRAMEHARDWARE HEADBOARD
4
5
6
7
8
9
1
2
3
Note: Hardware may loosen over time.
Periodically check that all connections are tight.
A
B
3
1
2
MOD-6278
03 of 03
Customer Service 609-256-9000 www.modway.com
STEP 2
2.1 Line up the bed frame board's
pre-drilled holes to match those of
the headboard.
2.2 Secure the headboard to the
bed frame by using 2x bolt (4) for
the thicker bed frame, and 2x bolt
(5) for the thinner bed frame. Before
inserting each bolt, place a spring
washer (7) and flat washer (6) on
each bolt. Then fit a flat washer (6)
on the screw as it protrudes through
the other side of the bed frame.
2.3 Place a Hex Nut (8) after the
flat washer (6) at the end of each
screw. Then tighten by using the
Allen key (9).
2.4 Repeat the same procedure for
each screw and each side of the
bed frame.
B8
STEP 3
6
6
7
4
9
C
MOD-6278
Thank you for purchasing the MODWAY BED!
Before you start, here are some helpful advice:
1. We suggest you spend a short time reading through this leaflet and then follow the simple step instructions.
3. Please do not use any tools other than those provided or recommended in these instructions.
4. Please do not throw away any of the packaging or the instruction until you have checked all the components and
hardware and the furniture is fully assembled. Please ensure that the packaging is disposed of in a safe
environmentally friendly way.
5. Assemble all components loosely until advised to tighten. Depending on use, it may be necessary to tighten the
components from time to time, so please save tools that have been provided.
6. Please keep all fitting out of reach of children.
Hardware:
Component:
A. HEADBOARD
C. SIDE RAIL (L/R)
D. CENTER RAIL
E. CENTER RAIL LEG
F. CENTER RAIL SUPPORT
G. BED SLAT
H. BED LEG
01 of 05
MOD - 6307
x 1
x 2
x 2
x 6
x 3
x 39
x 4
B. FOOTBOARD x 1
G
E
FA
B
C
H
D
1WOOD SCREW M4 x 20mm 4 PCS
2WOOD SCREW M4 x 25mm 12 PCS
3
4JCBB BOLT M8 x 30mm 4 PCS
5
M8 SPRING WASHER
4 PCS
6
M8 FLAT WASHER
4 PCS
BED SLAT CENTER FITTER
726 PCS
WOOD SCREW M3.5 x 16mm 12 PCS
BED SLAT CENTER FITTER
826 PCS
M5 ALLEN KEY (BALL SHAPE)
9 1 PC
2. Owing to the size and weight of the bed, we recommend that it is assembled by two adults, on a carpeted or
padded area, in the room that it is intended for. Approximate assembly time: 35 minutes.
STEP 1
02 of 05
MOD - 6307
STEP 2
A
B
D
E
2. WOOD SCREW M4 x 25mm x 12pcs
H
5649
2
STEP 1.1
STEP 1.2
4. JCBB BOLT M8 x 30mm x 4pcs 5. M8 FLAT WASHER x 4pcs
6. M8 SPRING WASHER x 4pcs 9. M5 ALLEN KEY (BALL SHAPE) x 1pcs
Screw Driver
2.1 Fasten Center Rail Leg (E) to Center Rail (D) attach by screwing the protruding nut
into the corresponding holes.
1.1 Insert and secure the Bed Leg (H) to the Headboard (A) and Footboard (B) using hardware
parts Wood Screw (2), Bolt (4), Flat Washer (5), Spring Washer (6) and Allen Key (9).
STEP 3
03 of 05
STEP 4
A
C
CA
B
MOD - 6307
9
9. M5 ALLEN KEY (BALL SHAPE) x 1pcs
9
A
B
4.1 Attach the Side Rails (C) to the Headboard (A) & Footboard (B) using hardware part
Allen Key (9).
3.1 Loosen the pre-inserted bolt on the Headboard (A) & Footboard (B) using hardware part
Allen Key (9).
STEP 5
STEP 6
04 of 05
3. WOOD SCREW M3.5 x 16mm x 12pcs
1. WOOD SCREW M4 x 20mm x 4pcs
D
A
F
C
3
x 4
D
A
x 2
1
A
Screw Driver
Screw Driver
B
D
MOD - 6307
B
C
F
D
A
6.1 Locate Center Rail (D) into the corresponding brackets inside of Headboard (A) and
footboard (B) using hardware parts Wood Screw (1) .
5.1 Locate Center Rail (D) into the corresponding brackets inside of Headboard (A) and
Footboard (B).
5.2 Insert and secure the Center Rail Support (F) to the Center Rail (D) & Side Rail (C) using
hardware parts Wood Screw (3).
05 of 05
STEP 7
G
Assembly is complete. The bed is ready to use now!
NOTE: Hardware may loosen over time. Periodically check that all connections are tight.
STEP 8
8.1 Carefully position the assembled bed to the desired location by four adults.
4. BED SLAT SIDE FITTER x 26pcs 5. BED SLAT CENTER FITTER x 26pcs
Palm
Palm
G
7
G
G
8
STEP 7.2
STEP7.1
8
7
7
G8
G
MOD - 6307
7.1 Insert the Slats (G) into the end slat cap (7) & (8) and fix it to the corresponding holes
on the Side Rail (C) .

Other modway Indoor Furnishing manuals
modway EEI-6730 User manual

modway

modway EEI-6730 User manual

modway EEI-3270 User manual

modway

modway EEI-3270 User manual

modway EEI-3044 User manual

modway

modway EEI-3044 User manual

modway EEI-4208 User manual

modway

modway EEI-4208 User manual

modway EEI-5877 User manual

modway

modway EEI-5877 User manual

modway EEI-5875 User manual

modway

modway EEI-5875 User manual

modway Raleigh EEI-3575 User manual

modway

modway Raleigh EEI-3575 User manual

modway EEI-2611 User manual

modway

modway EEI-2611 User manual

modway MOD-6304 User manual

modway

modway MOD-6304 User manual

modway EEI-3195 User manual

modway

modway EEI-3195 User manual

modway EEI-2547 User manual

modway

modway EEI-2547 User manual

modway EEI-1798 User manual

modway

modway EEI-1798 User manual

modway EEI-1109 User manual

modway

modway EEI-1109 User manual

modway EEI-3881 User manual

modway

modway EEI-3881 User manual

modway EEI-4453 User manual

modway

modway EEI-4453 User manual

modway Silas EEI-6580 User manual

modway

modway Silas EEI-6580 User manual

modway EEI-4411 User manual

modway

modway EEI-4411 User manual

modway EEI-3424-NAT User manual

modway

modway EEI-3424-NAT User manual

modway EEI-2813 User manual

modway

modway EEI-2813 User manual

modway EEI-5675 User manual

modway

modway EEI-5675 User manual

modway Vitality EEI-4893 User manual

modway

modway Vitality EEI-4893 User manual

modway EEI-5568 User manual

modway

modway EEI-5568 User manual

modway EEI-1180 User manual

modway

modway EEI-1180 User manual

modway EEI-2920 User manual

modway

modway EEI-2920 User manual

Popular Indoor Furnishing manuals by other brands

hygena 833/4455 Assembly instructions

hygena

hygena 833/4455 Assembly instructions

Living Spaces Sedona 7030-01250 KIT manual

Living Spaces

Living Spaces Sedona 7030-01250 KIT manual

Cooper Lighting PORTFOLIO 843 Specification sheet

Cooper Lighting

Cooper Lighting PORTFOLIO 843 Specification sheet

Ameriwood HOME 5278296PCOM manual

Ameriwood HOME

Ameriwood HOME 5278296PCOM manual

IKEA BESTA BURS Assembly instructions

IKEA

IKEA BESTA BURS Assembly instructions

Whalen Industrial Metal and Wood Workbench instruction manual

Whalen

Whalen Industrial Metal and Wood Workbench instruction manual

Madeli B200-60-002-XX Specification and installation guide

Madeli

Madeli B200-60-002-XX Specification and installation guide

Elements Roman mantel M600-60-ES Assembly instructions

Elements

Elements Roman mantel M600-60-ES Assembly instructions

miseno MM4026SLED user guide

miseno

miseno MM4026SLED user guide

Royalcraft FARO-01 Assembly instructions

Royalcraft

Royalcraft FARO-01 Assembly instructions

Allen + Roth LG-2156-3001 manual

Allen + Roth

Allen + Roth LG-2156-3001 manual

Homelegance 1957-13 Assembly instructions

Homelegance

Homelegance 1957-13 Assembly instructions

DRIFT DR250 RUBIUS Assembly instructions

DRIFT

DRIFT DR250 RUBIUS Assembly instructions

Instant Comfort Q5 Assembly instructions

Instant Comfort

Instant Comfort Q5 Assembly instructions

Donco 2009 TWIN Assembly instructions

Donco

Donco 2009 TWIN Assembly instructions

Next 524060 Assembly instructions

Next

Next 524060 Assembly instructions

Triarch 32766-15 Assembly instructions

Triarch

Triarch 32766-15 Assembly instructions

Duscholux SHOWERbox installation instructions

Duscholux

Duscholux SHOWERbox installation instructions

manuals.online logo
manuals.online logoBrands
  • About & Mission
  • Contact us
  • Privacy Policy
  • Terms and Conditions

Copyright 2025 Manuals.Online. All Rights Reserved.