5
Deutsch
•
Vermeiden Sie es, die Verstärkeranlage bei
starkem Regen zu verwenden und achten Sie
immer darauf, dass keine Feuchtigkeit in die
Anlage gelangt.
Verwenden Sie das Ladegerät nur im In-
nenbereich. Schützen Sie es vor Tropf- und
Spritzwasser sowie vor hoher Luftfeuchtigkeit.
Der zulässige Einsatztemperaturbereich für
die Geräte beträgt 0–40°C.
•
Stellen Sie keine mit Flüssigkeit gefüllten
Gefäße, z.B. Trinkgläser, auf das Ladegerät.
•
Nehmen Sie die Geräte nicht in Betrieb und
ziehen Sie sofort den Netzstecker des Lade-
geräts aus der Steckdose,
1.
wenn sichtbare Schäden an den Geräten
oder am Netzkabel vorhanden sind,
2.
wenn nach einem Sturz oder Ähnlichem der
Verdacht auf einen Defekt besteht,
3. wenn Funktionsstörungen auftreten.
Geben Sie die Geräte in jedem Fall zur Repa-
ratur in eine Fachwerkstatt.
•
Ziehen Sie den Netzstecker des Ladegeräts
nie am Kabel aus der Steckdose, fassen Sie
immer am Stecker an.
•
Ein beschädigtes Netzkabel darf nur durch
eine Fachwerkstatt ersetzt werden.
•
Verwenden Sie für die Reinigung nur ein tro-
ckenes oder leicht angefeuchtetes, weiches
Tuch, auf keinen Fall Chemikalien oder ag-
gressive Reinigungsmittel.
•
Werden die Geräte zweckentfremdet, nicht
richtig angeschlossen, falsch bedient oder
nicht fachgerecht repariert, kann keine Haf-
tung für daraus resultierende Sach- oder Per-
sonenschäden und keine Garantie für die Ge-
räte übernommen werden. Ebenso kann keine
Haftung für durch Fehlbedienung oder durch
einen Defekt entstandene Datenverluste und
deren Folgeschäden übernommen werden.
Sollen die Geräte endgültig aus dem
Betrieb genommen werden, übergeben
Sie sie zur umweltgerechten Entsorgung
einem örtlichen Recyclingbetrieb.
3 Einsatzmöglichkeiten
undZubehör
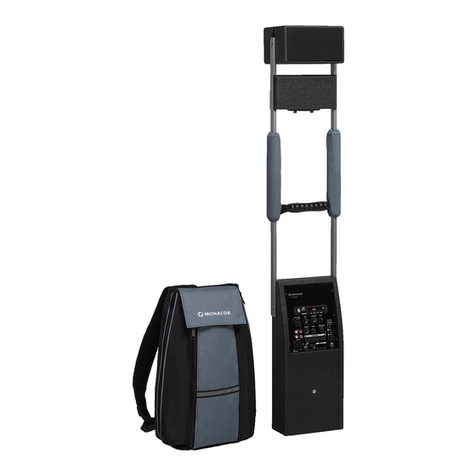
Die PAS-250D ist eine akkubetriebene Ver-
stärkeranlage, die (z. B. bei Prozessionen) als
Rucksack getragen werden kann. Über dem
Verstärker befindet sich ein Gestell mit zwei
Druckkammerlautsprechern, die sich unabhän-
gig nach vorn oder hinten ausrichten lassen. Der
Verstärker verfügt über mischbare Eingänge für
ein Mikrofon und eine (Stereo-)Tonquelle, wie
z.B. CD-Spieler, sowie über einen Empfänger
für ein Funkmikrofon. Zusätzlich lassen sich
Audiodateien von einem USB-Speicherstick,
einer SD/MMC-Speicherkarte oder über den
eingebauten Bluetooth-Empfänger (z.B. von
einem Smartphone) wiedergeben. Dabei kann,
während über ein Mikrofon gesprochen wird,
automatisch z.B. Musik ausgeblendet werden.
Die Verstärkeranlage kann mit voll geladenem
Akku bis zu 7Stunden netzunabhängig einge-
setzt werden.
Ein zweiter, separat erhältlicher Akku
(NPA-12/7) ermöglicht eine Verlängerung der
Betriebsdauer. In den seitlichen Fächern des
Rucksacks lassen sich z.B. Mikrofone und An-
schlusskabel verstauen.
Für den Funkempfänger passende Mikro-
fone oder Taschensender sind z. B. TXS-821HT,
TXS-820HSE, TXS-820LT oder TXS-820SX. Für
die Beschallung größerer Bereiche kann das
Funksignal eines dieser Mikrofone auch gleich-
zeitig von mehreren PAS-250D empfangen
werden.
3.1 Konformität und Zulassung
Hiermit erklärt MONACOR INTERNATIONAL,
dass der Funkempfänger der PAS-250D der
Richtlinie 2014/53/EU entspricht. Die EU-Kon-
formitätserklärung ist im Internet verfügbar:
www.monacor.com
Das Funksystem ist für den Betrieb in den EU-
und EFTA-Staaten allgemein zugelassen und
anmelde- und gebührenfrei.


