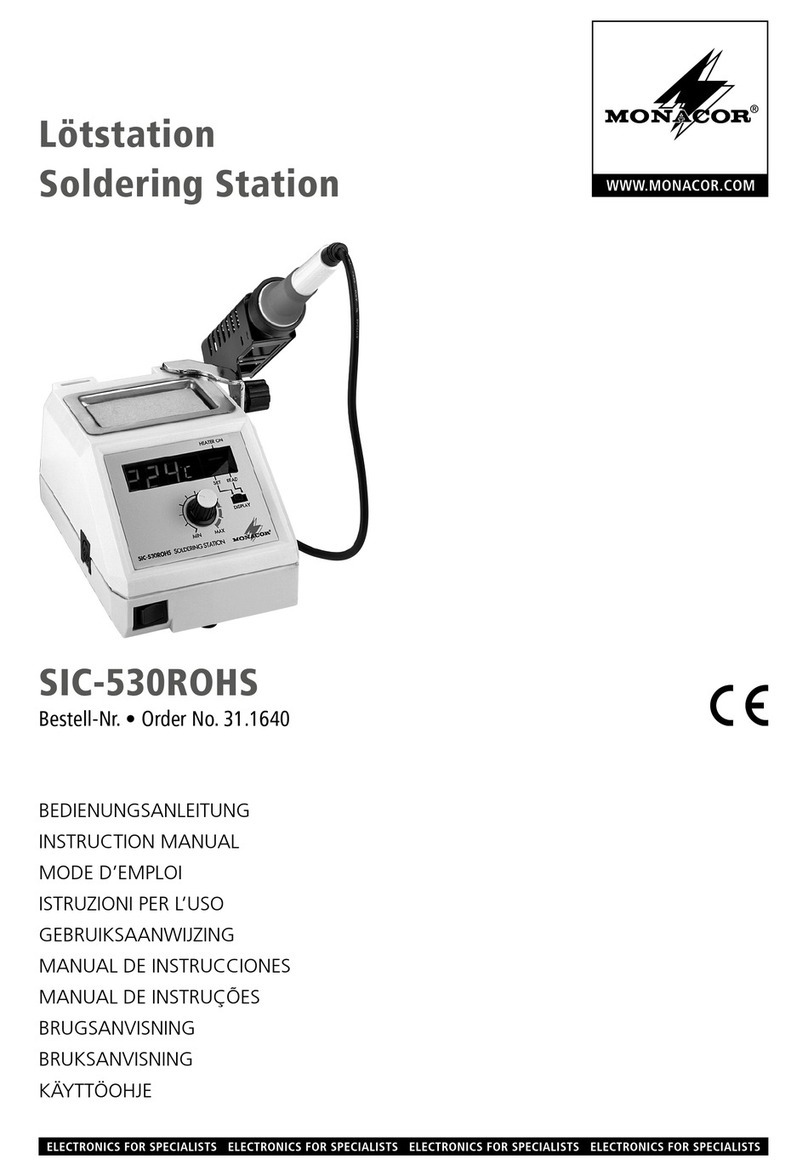
Monacor SIC-540 User manual

BEDIENUNGSANLEITUNG
INSTRUCTION MANUAL
MODE D’EMPLOI
ISTRUZIONI PER L’USO
MANUAL DE INSTRUCCIONES
INSTRUKCJA OBSŁUGI
VEILIGHEIDSVOORSCHRIFTEN
SIKKERHEDSOPLYSNINGER
SÄKERHETSFÖRESKRIFTER
TURVALLISUUDESTA
LÖTSTATION
SOLDERING STATION
SIC-540
Best.-Nr. 31.1780

2
Ennen virran kytkemistä ...
Toivomme Sinulle paljon miellyttäviä hetkiä uuden
MONACOR laitteen kanssa. Ennen laitteen käyttöä
pyydämme Sinua huolellisesti tutustumaan turvallisuu-
sohjeisiin. Näin vältyt vahingoilta, joita virheellinen lait-
teen käyttö saattaa aiheuttaa. Ole hyvä ja säilytä käyt-
töohjeet myöhempää tarvetta varten.
Turvallisuusohjeet löytyvät sivulta 17.
FIN
Bevor Sie einschalten ...
Wir wünschen Ihnen viel Spaß mit Ihrem neuen Gerät
von MONACOR. Bitte lesen Sie diese Bedienungsan-
leitung vor dem Betrieb gründlich durch. Nur so lernen
Sie alle Funktionsmöglichkeiten kennen, vermeiden
Fehlbedienungen und schützen sich und Ihr Gerät vor
eventuellen Schäden durch unsachgemäßen Gebrauch.
Heben Sie die Anleitung für ein späteres Nachlesen auf.
Der deutsche Text beginnt auf Seite 4.
D
A
CH
Avant toute mise en service ...
Nous vous souhaitons beaucoup de plaisir à utiliser cet
appareil MONACOR. Lisez ce mode d'emploi entière-
ment avant toute utilisation. Uniquement ainsi, vous pour-
rez apprendre l’ensemble des possibilités de fonctionne-
ment de l’appareil, éviter toute manipulation erronée et
vous protéger, ainsi que l’appareil, de dommages éven-
tuels engendrés par une utilisation inadaptée. Conservez
la notice pour pouvoir vous y reporter ultérieurement.
La version française commence à la page 8.
Antes de cualquier instalación ...
Le deseamos una buena utilización para su nuevo apa-
rato MONACOR. Por favor, lea estas instrucciones de
uso atentamente antes de hacer funcionar el aparato.
De esta manera conocerá todas las funciones de la uni-
dad, se prevendrán errores de operación, usted y el
aparato estarán protegidos en contra de todo daño
causado por un uso inadecuado. Por favor, guarde las
instrucciones para una futura utilización.
La versión española comienza en la página 12.
Inden De tænder for apparatet ...
God fornøjelse med dit nye MONACOR produkt. Læs
venligst sikkerhedsanvisningen nøje, før du tager pro-
duktet i brug. Dette hjælper dig med at beskytte produk-
tet mod ukorrekt ibrugtagning. Gem venligst denne
betjeningsvejledning til senere brug.
Sikkerhedsoplysningerne finder De på side 16.
DK
Before you switch on ...
We wish you much pleasure with your new MONACOR
unit. Please read these operating instructions carefully
prior to operating the unit. Thus, you will get to know all
functions of the unit, operating errors will be prevented,
and yourself and the unit will be protected against any
damage caused by improper use. Please keep the op-
erating instructions for later use.
The English text starts on page 6.
Voordat u inschakelt ...
Wij wensen u veel plezier met uw nieuwe apparaat van
MONACOR. Lees de veiligheidsvoorschriften grondig
door, alvorens het apparaat in gebruik te nemen. Zo
behoedt u zichzelf en het apparaat voor eventuele
schade door ondeskundig gebruik. Bewaar de handlei-
ding voor latere raadpleging.
De veiligheidsvoorschriften vindt u op pagina 16.
E
GB
I
S
Prima di accendere ...
Vi auguriamo buon divertimento con il vostro nuovo
apparecchio MONACOR. Leggete attentamente le istru-
zioni prima di mettere in funzione l'apparecchio. Solo così
potete conoscere tutte le funzionalità, evitare comandi
sbagliati e proteggere voi stessi e l'apparecchio da even-
tuali danni in seguito ad un uso improprio. Conservate le
istruzioni per poterle consultare anche in futuro.
Il testo italiano comincia a pagina 10.
Förskrift
Vi önskar dig mycket glädje med din nya MONACOR
produkt. Läs igenom säkerhetsföreskrifterna noga in-
nan enheten tas i bruk. Detta kan förhindra att problem
eller fara för dig eller enheten uppstår vid användning.
Spara instruktionerna för framtida användning.
Du finner säkerhetsinstruktionerna på sidan 17.
F
B
CH
NL
B
Przed uruchomieniem …
Życzymy zadowolenia z nowego produktu MONACOR.
Dzięki tej instrukcji obsługi będą państwo w stanie
poznać wszystkie funkcje tego urządzenia. Stosując się
do instrukcji unikną państwo błędów i ewentualnego
uszkodzenia urządzenia na skutek nieprawidłowego użyt-
kowania. Prosimy zachować instrukcję.
Tekst polski zaczyna się na stronie 14.
PL

3
34251
910 11
67
8

D
A
CH
4
Auf der ausklappbaren Seite 3 finden Sie alle be-
schriebenen Bedienelemente und Anschlüsse.
1 Einsatzmöglichkeiten
Die 48-W-Lötstation SIC-540 mit einem Regelbereich
von 150 – 450 °C ist sowohl für professionelle Lötarbei-
ten als auch für Hobby-Anwendungen geeignet. Das Ge-
rät verfügt über eine digitale Temperaturanzeige
(LC-Display) mit gleichzeitiger Darstellung des Soll- und
Istwerts. Die Temperatur lässt sich über zwei Tasten in
1°- oder 10°-Schritten einstellen. Der Lötkolbenhalter
kann getrennt von der Lötstation platziert werden.
2 Hinweise für den sicheren Gebrauch
Die Lötstation entspricht allen erforderlichen Richtlinien
der EU und ist deshalb mit gekennzeichnet.
Beachten Sie auch unbedingt die folgenden Punkte:
GSetzen Sie das Gerät nur innen ein. Schützen Sie es
vor Tropf- und Spritzwasser, hoher Luftfeuchtigkeit und
Hitze (zulässiger Einsatztemperaturbereich 0 – 40 °C).
GStellen Sie keine mit Flüssigkeit gefüllten Gefäße, z. B.
Trinkgläser, auf das Gerät.
GDas Gerät gehört nicht in Kinderhände!
GVerwenden Sie die Lötstation auf keinen Fall zum Er-
hitzen von Flüssigkeiten oder Kunststoffen.
GVorsicht Brandgefahr: Legen Sie den heißen Lötkol-
ben nur im Lötkolbenhalter oder auf einer feuerfesten
Unterlage ab. Die Lüftungsöffnungen an der Lötstation
und am Lötkolbenhalter dürfen nicht abgedeckt wer-
den.
GNehmen Sie das Gerät nicht in Betrieb oder ziehen Sie
sofort den Netzstecker aus der Steckdose:
1. wenn sichtbare Schäden am Gerät oder an der
Netzanschlussleitung vorhanden sind,
2. wenn nach einem Sturz oder Ähnlichem der Ver-
dacht auf einen Defekt besteht,
3. wenn Funktionsstörungen auftreten.
Geben Sie das Gerät in jedem Fall zur Reparatur in
eine Fachwerkstatt.
GEin beschädigtes Netzkabel darf nur durch eine Fach-
werkstatt ersetzt werden.
GZiehen Sie den Netzstecker nie an der Zuleitung aus
der Steckdose, fassen Sie immer am Stecker an.
GWird das Gerät zweckentfremdet, falsch angeschlos-
sen, nicht richtig bedient oder nicht fachgerecht repa-
riert, kann keine Haftung für daraus resultierende
Sach- oder Personenschäden und keine Garantie für
das Gerät übernommen werden.
3 Inbetriebnahme
1) Die Lötstation und der Lötkolbenhalter können ent-
weder getrennt oder miteinander verbunden aufge-
stellt werden. Zum Verbinden der Teile den Lötkol-
benhalter über seine drei Rastnasen (9) seitlich an
der Lötstation befestigen.
2) Der beiliegende Schwamm dient zum Säubern der Löt-
spitze (7) vor dem Löten. Den Schwamm anfeuchten
und in die Schublade (10) des Lötkolbenhalters legen.
3) Den Stecker (11) des Lötkolbenkabels in die Buchse
(5) der Lötstation stecken und die Verbindung durch
Festdrehen seiner Rändelmutter verriegeln. Den Löt-
kolben in die Lötkolbenablage (6) stecken.
4) Den Stecker des Netzkabels (1) an eine Steckdose
(230 V~/50 Hz) anschließen.
5) Das Gerät mit dem Netzschalter (3) einschalten. Auf
dem Display (2) erscheinen zwei Temperaturangaben:
– in der unteren Zeile (SET) wird der Sollwert ange-
zeigt, d. h. die zuletzt eingestellte Löttemperatur;
– in der oberen Zeile (TEMP.) wird der Istwert ange-
zeigt, d. h. die aktuelle Lötspitzentemperatur.
Weitere Displayangaben:
HEAT ON während des Aufheizens eingeblendet
WAIT wird so lange eingeblendet, bis der Istwert
sich bis auf 10° an den Sollwert angenä-
hert hat
ERROR wird blinkend bei einer Betriebsstörung,
eingeblendet (z. B. bei defektem Tempe-
ratursensor oder bei unterbrochener Ver-
bindung zum Lötkolben), zusätzlich ertönt
ein Warnsignal
6) Mit den Tasten SET (4) die Löttemperatur einstellen:
Taste zum Erhöhen der Temperatur
Taste zum Herabsetzen der Temperatur
Mit jedem Tastendruck erhöht/reduziert sich die Tem-
peratur um 1°. Bei Gedrückthalten einer Taste wird die
Temperatur in 10°-Schritten erhöht/reduziert. Die op-
timale Löttemperatur liegt für die meisten Lötarbeiten
im Bereich 300 – 380 °C.
Beim ersten Aufheizen des Lötkolbens muss die
Lötspitze ausreichend mit Lötzinn benetzt werden.
7) Nach dem Betrieb das Gerät mit dem Netzschalter
ausschalten.
Hinweise zum richtigen Löten
– Vor dem Betrieb den festen Sitz der Lötspitze kon-
trollieren.
– Vor dem Löten die zu lötenden Teile von Schmutz,
Öl und Oxiden säubern.
– Die Lötspitze immer sauber halten und, besonders
in Lötpausen und vor dem Ausschalten der Lötsta-
tion, darauf achten, dass sie mit ausreichend Lötzinn
versehen ist.
WARNUNG Das Gerät wird mit lebensgefährlicher
Netzspannung (230 V~) versorgt. Nehmen
Sie deshalb niemals selbst Eingriffe am
Gerät vor und stecken Sie nichts durch die
Lüftungsöffnungen! Es besteht die Gefahr
eines elektrischen Schlages.
Soll die Lötstation endgültig aus dem Betrieb
genommen werden, übergeben Sie sie zur um-
weltfreundlichen Entsorgung einem örtlichen
Recyclingbetrieb.
Achtung: Betreiben Sie den Lötkolben nie ohne
Lötspitze, da sonst das Heizelement und der Tem-
peratursensor beschädigt werden können.
VORSICHT Berühren Sie nicht die Metallteile des hei-
ßen Lötkolbens – Verbrennungsgefahr!
Lassen Sie ihn nach Beendigung der Ar-
beit nur an der Luft abkühlen, schrecken
Sie ihn auf keinen Fall mit Wasser ab.

D
A
CH
5
4 Lötspitze ersetzen
1) Vor dem Auswechseln der Lötspitze das Gerät aus-
schalten und den heißen Kolben auf Raumtemperatur
abkühlen lassen.
2) Die Schraubhülse (8) mit den Fingern vom Kolben-
rohr abschrauben.
3) Das Kolbenrohr von eventuellen Oxid-Rückständen
säubern. Beim Herausblasen der Oxid-Teilchen für
entsprechenden Augenschutz sorgen.
4) Die Lötspitze (7) ersetzen (passende Ersatz-Lötspit-
zen, siehe Kap. 5) und die Schraubhülse mit den Fin-
gern festdrehen. Um das Heizelement nicht zu
beschädigen, darf die Schraubhülse nicht zu fest an-
gezogen werden.
5 Ersatzteile
Aus dem Sortiment von MONACOR sind folgende Er-
satzteile für die Lötstation erhältlich:
6 Reinigung der Lötstation
Das Gehäuse der Lötstation und der Kolbengriff können
mit einem leicht angefeuchteten Tuch und einer kleinen
Menge flüssigen Reinigungsmittels gesäubert werden.
Aggressive Reinigungsmittel oder Chemikalien dürfen
nicht verwendet werden. Beim Reinigen darauf achten,
dass keine Flüssigkeit in das Gerät eindringt!
7 Technische Daten
elektron. Temperaturregelung:. . 150 – 450 °C
Stromversorgung: . . . . . . . . . . . 230 V~/50 Hz
Leistungsaufnahme: . . . . . . . . . 90 VA
Temperaturanzeige:. . . . . . . . . . 3-stellig, LCD,
5 % Genauigkeit
Lötkolben: . . . . . . . . . . . . . . . . . 24 V/48 W
Einsatztemperatur: . . . . . . . . . . 0 – 40 °C
Abmessungen (H × B × T)
Lötstation (ohne Netzkabel): . 93 × 115 × 158 mm
Lötkolbenhalter:. . . . . . . . . . . 100 × 72 × 163 mm
Gewicht:. . . . . . . . . . . . . . . . . . . 1,6 g
Änderungen vorbehalten.
Diese Bedienungsanleitung ist urheberrechtlich für MONACOR
®
INTERNATIONAL GmbH & Co. KG geschützt.
Eine Reproduktion für eigene kommerzielle Zwecke – auch auszugsweise – ist untersagt.
Artikel
Lötspitze SIT-543, beidseitig abgeflacht,
Spitzenbreite 2 mm
Lötkolben SIA-540
31.1810
Lötspitze SIT-545, um 45° abgeschrägt,
Spitzendurchmesser 3 mm
31.1820
Lötspitze SIT-541, bleistiftspitz
Bestell-Nr.
31.1790
31.1800

GB
6
All operating elements and connections described
can be found on the fold-out page 3.
1 Applications
The 48 W soldering station SIC-540 with a temperature
range of 150 – 450 °C is suitable both for professional
and DIY soldering applications. The unit has a digital
LCD temperature readout displaying the desired temper-
ature and the actual temperature at the same time. The
temperature is adjustable in steps of 1° or 10° via two
buttons. The soldering iron stand can be placed sepa-
rately from the soldering station.
2 Safety Notes
The soldering station corresponds to all required direc-
tives of the EU and is therefore marked with .
Please observe the following items in any case:
GThe unit is suitable for indoor use only. Protect it against
dripping water and splash water, high air humidity, and
heat (admissible ambient temperature range 0 – 40 °C).
GDo not place any vessel filled with liquid on the unit,
e. g. a drinking glass.
GThis unit is unsuitable for children!
GNever use the soldering station for heating any fluids or
plastics.
GCaution! Fire hazard: Always put the hot soldering
iron into its holder or on a fire-proof surface. Never
cover the air vents on the soldering station or on the
soldering iron stand.
GDo not operate the unit and immediately disconnect
the mains plug from the socket
1. in case of visible damage to the unit or to the mains
cable,
2. if a defect might have occurred after the unit was
dropped or suffered a similar accident,
3. if malfunctions occur.
In any case the unit must be repaired by skilled per-
sonnel.
GA damaged mains cable must be replaced by skilled
personnel only.
GNever pull the mains cable for disconnecting the mains
plug from the socket, always seize the plug.
GNo guarantee claims for the unit and no liability for any
resulting personal damage or material damage will be
accepted if the unit is used for other purposes than
originally intended, if it is not correctly connected, op-
erated, or not repaired in an expert way.
GImportant for U. K. Customers!
The wires in this mains lead are coloured in accord-
ance with the following code:
green/yellow = earth, blue = neutral, brown = live
As the colours of the wires in the mains lead of this ap-
pliance may not correspond with the coloured mark-
ings identifying the terminals in your plug, proceed as
follows:
1. The wire which is coloured green and yellow must
be connected to the terminal in the plug which is
marked with the letter E or by the earth symbol ,
or coloured green or green and yellow.
2. The wire which is coloured blue must be connected
to the terminal which is marked with the letter N or
coloured black.
3. The wire which is coloured brown must be con-
nected to the terminal which is marked with the letter
L or coloured red.
Warning – This appliance must be earthed.
3 Operation
1) The soldering station and the soldering iron stand can
either be set up separately or connected with each
other. To connect the parts, fix the soldering iron stand
to the side of the soldering station via its three latches
(9).
2) A sponge is supplied for cleaning the soldering tip (7)
prior to soldering. Wet the sponge and put it into the
drawer (10) of the soldering iron stand.
3) Connect the plug (11) of the cable of the soldering iron
to the jack (5) on the soldering station and lock the
connection by tightening its knurled nut. Put the sol-
dering iron into its holder (6).
4) Connect the plug of the mains cable (1) to a socket
(230 V~/50 Hz).
5) Switch on the unit with the mains switch (3). Two tem-
perature indications will appear on the display (2):
– in the lower line (SET), the desired value is indi-
cated, i. e. the last soldering temperature adjusted;
– in the upper line (TEMP.), the actual value is indi-
cated, i. e. the current temperature of the soldering
tip.
Further indications on the display:
HEAT ON displayed while the unit heats up
WAIT displayed while the actual temperature ap-
proaches the desired temperature; will dis-
appear once the difference between the
two values is reduced to 10°
ERROR keeps flashing in case of malfunction (e. g.
defective temperature sensor or discon-
Attention: Never operate the soldering iron without
a soldering tip, otherwise the heating element and
the temperature sensor may be damaged.
CAUTION
Never touch the metal parts of the hot sol-
dering iron – risk of burning! After oper-
ation, allow the soldering iron to cool by
air only, never use water to quench it.
If the soldering station is to be put out of oper-
ation definitively, take it to a local recycling plant
for a disposal which is not harmful to the envi-
ronment.
WARNING The unit is supplied with hazardous mains
voltage (230 V~). Leave servicing to skilled
personnel only and never insert anything
into the air vents! This may result in an
electric shock hazard.

nection from the soldering iron); in addi-
tion, an alarm signal will sound
6) Adjust the soldering temperature with the buttons SET
(4):
button to increase the temperature
button to reduce the temperature
Each time a button is pressed, the temperature will be
increased/reduced by 1°. When keeping a button
pressed, the temperature will be increased/reduced
in steps of 10°. The optimum temperature range for
most soldering applications is 300 – 380 °C.
When heating up the soldering iron for the first
time, apply a sufficient quantity of soldering tin to the
soldering tip.
7) After operation, switch off the unit with the mains
switch.
4 Replacing the Soldering Tip
1) Prior to replacing the soldering tip, switch off the unit
and allow the hot soldering iron to cool to ambient
temperature.
2) Unscrew the screw sleeve (8) from the soldering iron
tube with your fingers.
3) Remove any oxide residues from the soldering iron
tube. When blowing out the oxide particles, protect
your eyes accordingly.
4) Replace the soldering tip (7) [suitable replacement
tips see chapter 5] and fasten the screw sleeve with
your fingers. To prevent damage to the heating ele-
ment, do not fasten the screw sleeve too tightly.
5 Replacement Parts
The following replacement parts for the soldering station
are available from the MONACOR product range:
6 Cleaning the Soldering Station
The housing of the soldering station and the handle of
the soldering iron may be cleaned with a damp cloth and
a small quantity of cleaning fluid. Do not use any ag-
gressive detergents or chemicals. When cleaning, make
sure that no fluid will penetrate the unit!
7 Specifications
Electronic temperature control: . 150 – 450 °C
Power supply: . . . . . . . . . . . . . . 230 V~ / 50 Hz
Power consumption: . . . . . . . . . 90 VA
Temperature display: . . . . . . . . . 3 digits, LCD,
5 % accuracy
Soldering iron: . . . . . . . . . . . . . . 24 V/ 48 W
Ambient temperature: . . . . . . . . 0 – 40 °C
Dimensions (W × H × D)
Soldering iron
(w / o mains cable): . . . . . . . . 93 × 115 × 158 mm
Soldering iron stand: . . . . . . . 100 × 72 × 163 mm
Weight: . . . . . . . . . . . . . . . . . . . 1.6 g
Subject to technical modification.
Correct Soldering – Please note!
– Prior to operation, ensure a tight fit of the soldering tip.
– Prior to soldering, remove any impurities, oil, and ox-
ides from the parts to be soldered.
– Always keep the soldering tip clean and make sure
that sufficient soldering tin is applied to the tip, es-
pecially in intervals between soldering and before
switching off the soldering station.
GB
7
All rights reserved by MONACOR
®
INTERNATIONAL GmbH & Co. KG. No part of this instruction manual may
be reproduced in any form or by any means for any commercial use.
Item
Soldering iron SIA-540
Soldering tip SIT-541, pointed
Order No.
31.1790
31.1800
Soldering tip SIT-543, flattened on both sides,
width of tip 2 mm
31.1810
Soldering tip SIT-545, bevelled by 45°,
tip diameter 3 mm
31.1820

Vous trouverez sur la page 3, dépliable, les éléments
et branchements décrits.
1 Possibilités dʼutilisation
La station de soudure 48 W SIC-540, avec plage de ré-
glage de 150 à 450 °C est adaptée aussi bien pour des
travaux professionnels de soudure que des utilisations
en hobby. Lʼappareil dispose dʼun affichage digital de
température (affichage LCD) avec visualisation simulta-
née de la valeur exigée et de la valeur réelle. La tempé-
rature est réglable par palier de 1° ou 10° via deux
touches. Le support de fer peut être séparé de la station
de soudure.
2 Conseils dʼutilisation et de sécurité
La station de soudure répond à toutes les directives né-
cessaires de lʼUnion Européenne et porte donc le sym-
bole .
Respectez scrupuleusement les points suivants :
GCet appareil nʼest conçu que pour une utilisation en in-
térieur. Protégez-le de tout type de projections dʼeau,
des éclaboussures, dʼune humidité élevée et de la cha-
leur (plage de température de fonctionnement autori-
sée : 0 – 40 °C).
GEn aucun cas, vous ne devez poser dʼobjet contenant
du liquide ou un verre sur lʼappareil.
GTenir lʼappareil hors de portée des enfants!
GEn aucun cas, nʼutilisez la station de soudure pour
chauffer des liquides ou plastiques.
GAttention ! Risque dʼincendie ! Posez le fer chaud
uniquement sur son support ou sur une surface ignifu-
gée. Les ouïes de ventilation sur la station de soudure
et le support du fer ne doivent en aucun cas être ob-
turées.
GNe faites pas fonctionner lʼappareil et débranchez-le
immédiatement du secteur lorsque :
1. des dommages apparaissent sur lʼappareil ou sur le
cordon secteur,
2. après une chute ou un cas similaire, vous avez un
doute sur lʼétat de lʼappareil,
3. des défaillances apparaissent.
Dans tous les cas, faites effectuer les réparations de
lʼappareil par un technicien spécialisé.
GTout cordon secteur endommagé doit être remplacé
impérativement par un technicien spécialisé.
GNe débranchez jamais lʼappareil en tirant sur le cordon
secteur ; retirez toujours le cordon secteur en tirant la
fiche.
GNous déclinons toute responsabilité en cas de dom-
mages matériels ou corporels résultants si lʼappareil
est utilisé dans un but autre que celui pour lequel il a
été conçu, sʼil nʼest pas correctement branché, utilisé
ou nʼest pas réparé par une personne habilitée.
3 Fonctionnement
1) La station de soudure et le support du fer à souder
peuvent être posés séparément ou reliés entre eux.
Pour relier les éléments, fixez le support du fer à sou-
der via ses trois encoches (9) sur le côté de la station
de soudure.
2) Lʼéponge livrée sert à nettoyer la panne (7) avant de
souder. Humidifiez lʼéponge et mettez-la dans le tiroir
(10) du support du fer.
3) Reliez la fiche (11) du cordon du fer à souder à la
prise (5) de la station de soudure et verrouillez la
connexion en tournant son écrou moleté. Placez le fer
à souder dans son support (6).
4) Reliez la fiche du cordon secteur (1) à une prise
230 V~/50 Hz.
5) Allumez lʼappareil avec lʼinterrupteur secteur (3). Sur
lʼaffichage (2) apparaissent deux données de tempé-
rature :
– dans la ligne inférieure (SET), la valeur exigée , cʼest-
à-dire la dernière température de soudure réglée
– dans la ligne supérieure (TEMP.), la valeur réelle,
cʼest-à-dire la valeur actuelle de la panne
Autres données de lʼaffichage :
HEAT ON sʼaffiche pendant la chauffe
WAIT sʼaffiche jusquʼà ce que la valeur réelle
sʼapproche à 10° de la valeur exigée
ERROR sʼaffiche en clignotant en cas de dysfonc-
tionnement (par exemple si le capteur de
température est défectueux ou si la con-
nexion au fer à souder est interrompue) ; un
signal dʼalarme est émis en complément.
6) Avec les touches SET (4), réglez la température de
soudure :
touche : pour augmenter la température
touche : pour diminuer la température
A chaque pression sur la touche, la température aug-
mente ou diminue de 1°. Si une touche est maintenue
enfoncée, la température augmente ou diminue par
palier de 10°. La température optimale de soudure se
situe dans la plage 300 à 380 °C pour la plupart des
travaux de soudure.
Lors de la première chauffe du fer, la panne doit
être suffisamment recouverte dʼétain à souder.
7) Après le fonctionnement, éteignez lʼappareil avec lʼin-
terrupteur secteur.
Lorsque la station de soudure est définitive-
ment retirée du service, vous devez la déposer
dans une usine de recyclage adaptée pour
contribuer à son élimination non polluante.
Attention : Ne faites jamais fonctionner le fer à sou-
der sans panne sinon lʼélément chauffant et le cap-
teur de température pourraient être endommagés.
ATTENTION Ne touchez pas les éléments métal-
liques du fer à souder chaud – risque de
brûlure ! Une fois le travail terminé, lais-
sez-le refroidir à lʼair libre, en aucun cas
nʼutilisez dʼeau pour le refroidir.
AVERTISSEMENT Lʼappareil est alimenté par une
tension dangereuse 230 V~. Ne
touchez jamais lʼintérieur de lʼap-
pareil et nʼinsérez rien dans les
ouïes de ventilation; vous pourriez
subir une décharge électrique.
F
B
CH
8

4 Remplacement de la panne
1) Avant de remplacer la panne, éteignez lʼappareil et
laissez refroidir le fer chaud à température ambiante.
2) Dévissez lʼembout (8) avec les doigts sur le tube du fer.
3) Nettoyez éventuellement le tube du fer de tout résidu
dʼoxydes. Faites attention à vos yeux lorsque vous
soufflez sur les résidus dʼoxyde.
4) Remplacez la panne (7) [pannes de rechange corres-
pondantes, voir chapitre 5] et tournez fermement lʼem-
bout avec les doigts. Pour ne pas endommager
lʼélément de chauffe, il ne faut pas visser lʼembout trop
fermement.
5 Eléments de remplacement
Les éléments de remplacement suivants sont dis-
ponibles, pour la station de soudure, dans la gamme
MONACOR :
6 Nettoyage de la station de soudure
Le boîtier de la station de soudure et la poignée du fer
peuvent être nettoyés avec un chiffon légèrement humi-
difié et une faible quantité de détergent liquide. En aucun
cas nʼutilisez de détergents abrasifs ou de produits chi-
miques. Lors du nettoyage, veillez à ce quʼaucun liquide
ne pénètre dans lʼappareil.
7 Caractéristiques techniques
Régulation électronique
de température : . . . . . . . . . . . . 150 – 450 °C
Alimentation :. . . . . . . . . . . . . . . 230 V~/50 Hz
Consommation : . . . . . . . . . . . . 90 VA
Affichage température : . . . . . . . 3 positions, LCD,
5 % précision
Fer à souder : . . . . . . . . . . . . . . 24 V/48 W
Température fonc. : . . . . . . . . . . 0 – 40 °C
Dimensions (L × H × P)
Station de soudure
(sans cordon) : . . . . . . . . . . . 93 × 115 × 158 mm
Support fer à souder : . . . . . . 100 × 72 × 163 mm
Poids : . . . . . . . . . . . . . . . . . . . . 1,6 g
Tout droit de modification réservé.
Conseils pour souder correctement
–
Avant le fonctionnement, vérifiez que la panne est
solidement fixée.
– Avant de souder, nettoyez les éléments à souder de
toute salissure, huile ou oxydes.
– Maintenez la panne toujours propre et assurez-vous
quʼelle est toujours suffisamment recouverte dʼétain
à souder, plus particulièrement entre chaque sou-
dure et avant dʼéteindre la station.
F
B
CH
9
Notice dʼutilisation protégée par le copyright de MONACOR
®
INTERNATIONAL GmbH & Co. KG. Toute repro-
duction même partielle à des fins commerciales est interdite.
Article
Panne SIT-543, plate des deux côtés,
largeur pointe 2 mm
Fer à souder SIA-540
31.1810
Panne SIT-545, coupée à 45°,
diamètre pointe 3 mm
31.1820
Panne SIT-541, pointue
Ref.Num.
31.1790
31.1800

A pagina 3, se aperta completamente, vedrete sem-
pre gli elementi di comando e i collegamenti de-
scritti.
1 Possibilità dʼimpiego
La stazione di saldatura SIC-540 a 48 W con possibilità
di regolazione fra 150 – 450 °C è adatta sia per lavori
professionali che per applicazioni hobbistiche. Lo stru-
mento dispone di indicazione digitale della temperatura
(display a LC) con rappresentazione contemporanea del
valore attuale e di quello impostato. La temperatura può
essere impostata con lʼaiuto di due tasti a passi di 1° o di
10°. Il portasaldatore può essere sistemato in modo se-
parato dalla stazione.
2 Avvertenze di sicurezza
La stazione di saldatura è conforme a tutte le direttive ri-
chieste dellʼUE e pertanto porta la sigla .
Si devono osservare assolutamente anche i seguenti
punti:
GFar funzionare lʼapparecchio solo allʼinterno di locali.
Proteggerlo dallʼacqua gocciolante e dagli spruzzi
dʼacqua, da alta umidità dellʼaria e dal calore (tempe-
ratura dʼimpiego ammessa fra 0 e 40 °C).
GNon depositare sullʼapparecchio dei contenitori riem-
piti di liquidi, p. es. bicchieri.
GTenere lo strumento lontano dalla portata dei bambini!
GNon usare in nessun caso la stazione di saldatura per
riscaldare liquidi o materie plastiche.
GAttenzione pericolo dʼincendio: Depositare il salda-
tore caldo solo nellʼapposito supporto oppure su una
base resistente al fuoco. Non coprire le fessure di ae-
razione sulla stazione di saldatura e sul portasaldatore.
GNon mettere in funzione lʼapparecchio e staccare su-
bito la spina rete se:
1. lʼapparecchio o il cavo rete presentano dei danni vi-
sibili;
2. dopo una caduta o dopo eventi simili sussiste il so-
spetto di un difetto;
3. lʼapparecchio non funziona correttamente.
Per la riparazione rivolgersi sempre ad unʼofficina com-
petente.
GIl cavo rete, se danneggiato, deve essere sostituito
solo da un laboratorio specializzato.
GStaccare il cavo rete afferrando la spina, senza tirare
il cavo.
GNel caso dʼuso improprio, di collegamenti sbagliati,
dʼimpiego scorretto o di riparazione non a regola dʼarte
dellʼapparecchio, non si assume nessuna responsabi-
lità per eventuali danni consequenziali a persone o a
cose e non si assume nessuna garanzia per lʼapparec-
chio.
3 Messa in funzione
1) La stazione e il supporto possono essere collocati in
modo separato o unito. Per unire le parti fissare il sup-
porto al lato della stazione per mezzo delle tre lin-
guette (9).
2) La spugnetta in dotazione serve per pulire la punta
(7) prima della saldatura. Inumidire la spugna e inse-
rirla nel cassetto (10) del supporto.
3) Inserire la spina (11) del supporto nella presa (5) della
stazione e bloccare il collegamento stringendo il dado
zigrinato. Inserire il saldatore nel suo supporto (6).
4) Collegare la spina del cavo rete (1) con una presa di
rete (230 V~/50 Hz).
5) Accendere lʼapparecchio con lʼinterruttore di rete (3).
Sul display (2) si vedono due indicazioni di tempera-
tura:
– alla riga inferiore (SET) è indicato il valore deside-
rato ovvero lʼultima temperatura impostata;
– alla riga superiore (TEMP.) è indicato il valore at-
tuale ovvero la temperatura attuale della punta.
Altre indicazioni sul display:
HEAT ON si vede durante il riscaldamento
WAIT si vede finché il valore attuale si è avvici-
nato al valore impostato fino al 10°
ERROR lampeggia in caso di guasto (p. es. con il
sensore termico difettoso o in caso di col-
legamento interrotto con il saldatore), in
più viene emesso un segnale acustico
6) Impostare la temperatura per la saldatura con i tasti
SET (4):
Tasto per aumentare la temperatura
Tasto per abbassare la temperatura
Con ogni pressione del tasto, la temperatura au-
menta/si abbassa di 1°. Tenendo premuto un tasto,
lʼaumento/la riduzione della temperatura si fa a passi
di 10°. Per la maggior parte dei lavori, la temperatura
ottimale oscilla fra 300 – 380 °C.
Se si desidera eliminare lʼapparecchio definiti-
vamente, consegnarlo per lo smaltimento ad
unʼistituzione locale per il riciclaggio.
Attenzione: Non usare mai il saldatore senza la
punta per non danneggiare la termocoppia e il sen-
sore termico.
ATTENZIONE
Non toccare le parti metalliche del sal-
datore caldo – pericolo di ustione! Dopo
lʼimpiego, farlo raffreddare solo allʼaria,
in nessun caso con acqua fredda.
AVVERTIMENTO Lʼapparecchio funziona con peri-
colosa tensione di rete (230 V~).
Non intervenire mai al suo interno
e non inserire niente nelle fessure
di aerazione! Esiste il pericolo di
una scarica elettrica pericolosa.
I
10

Al primo riscaldamento del saldatore, la punta
deve essere ricoperta in modo sufficiente di stagno
da brasare.
7) Dopo lʼuso spegnere lʼapparecchio con lʼinterruttore
di rete.
4 Sostituzione della punta
1) Prima di sostituire la punta spegnere lʼapparecchio e
lasciare raffreddare il saldatore fino a temperatura
ambiente.
2) Svitare il supporto punta (8) dal corpo del saldatore
con le mani.
3) Eliminare eventuali resti di ossidazione dal corpo del
saldatore. Se si cerca di eliminarli soffiando, proteg-
gere gli occhi.
4) Sostituire la punta (7) [per le punte di ricambio vedi
cap. 5] e avvitare il supporto punta con le mani. Per
non danneggiare la termocoppia non stringere troppo
il supporto punta.
5 Pezzi di ricambio
Dal programma di MONACOR sono disponibili i seguenti
pezzi di ricambio per la stazione di saldatura:
6 Pulizia della stazione
Il contenitore della stazione e il corpo del saldatore pos-
sono essere puliti con un panno leggermente inumidito e
con una piccola quantità di detersivo liquido. Non si de-
vono usare detersivi aggressivi o prodotti chimici. Fare
attenzione a non fare entrare del liquido allʼinterno del-
lʼapparecchio!
7 Dati tecnici
Regolazione elettronica
della temperatura: . . . . . . . . . . . 150 – 450 °C
Alimentazione:. . . . . . . . . . . . . . 230 V~/50 Hz
Potenza assorbita:. . . . . . . . . . . 90 VA
Indicazione della temperatura: . a 3 cifre, LCD,
precisione 5 %
Saldatore: . . . . . . . . . . . . . . . . . 24 V/48 W
Temperatura dʼesercizio: . . . . . . 0 – 40 °C
Dimensioni (h × l × t)
Stazione (senza cavo rete):. . 93 × 115 × 158 mm
Porto saldatore:. . . . . . . . . . . 100 × 72 × 163 mm
Peso: . . . . . . . . . . . . . . . . . . . . . 1,6 g
Con riserva di modifiche tecniche.
Consigli per saldare correttamente
–
Controllare per prima cosa che la punta sia fissata
bene.
– Prima della saldatura pulire le parti da saldare elimi-
nando sporco, oli e ossidi.
– Tenere sempre pulita la punta e applicarvi sempre una
quantità sufficiente di stagno, specialmente durante gli
intervalli della saldatura e prima di spegnere.
I
11
La MONACOR
®
INTERNATIONAL GmbH & Co. KG si riserva ogni diritto di elaborazione in qualsiasi forma delle
presenti istruzioni per lʼuso. La riproduzione – anche parziale – per propri scopi commerciali è vietata.
Articolo
Punta da saldare SIT-543, appiattita su en-
trambi i lati, larghezza punta 2 mm
Saldatore SIA-540
31.1810
Punta da saldare SIT-545, un lato obliquo di
45°, diametro punta 3 mm
31.1820
Punta da saldare SIT-541, punta tipo matita
N. d’ordine
31.1790
31.1800

Puede encontrar todos los elementos de funciona-
miento y las conexiones que se describen en la pá-
gina 3 desplegable.
1 Usos
La estación soldadora SIC-540 de 48 W, con un margen
de temperatura de 150 – 450 °C, está indicada para un
uso profesional y para aplicaciones de soldadura DIY. El
aparato tiene un indicador de temperatura digital LCD
que muestra la temperatura deseada y la temperatura
real al mismo tiempo. La temperatura es ajustable a tra-
vés de dos botones por pasos de 1° o de 10°. El soporte
del soldador se puede poner por separado de la esta-
ción soldadora.
2 Notas de seguridad
La estación soldadora responde a todas las Directivas
requeridas por la CEE y por lo tanto está marcada
con .
Por favor, tenga en cuenta los puntos siguientes en todo
caso:
GEste aparato está indicado sólo para interior. Protéjalo
de todo tipo de proyecciones de agua, salpicaduras,
humedad elevada del aire y calor (temperatura am-
biente admisible 0 – 40 °C).
GNo ponga recipientes con líquido sobre el aparato, por
ejemplo vasos con bebidas.
G¡Este aparato no está indicado para niños!
GNo use nunca la estación soldadora para calentar lí-
quido o plástico.
GPrecaución: Peligro de incendio. Ponga siempre el
soldador en su soporte o en una superficie resistente
al fuego. No tape nunca las aberturas de ventilación
de la estación soldadora o del soporte del soldador.
GNo ponga el aparato en marcha, y desconecte inme-
diatamente el enchufe de la toma:
1. en caso de daños visibles en el aparato o en el
cable de red,
2. si aparecen daños después de una caída o acci-
dente similar,
3. si surge un mal funcionamiento.
La unidad debe ser reparada en cualquier caso por
personal cualificado.
GUn cable de corriente dañado sólo puede repararse
por el personal cualificado.
GNo tire nunca del cable para desconectar el enchufe
principal de la toma, agárrelo siempre por el enchufe.
GNo se asumirá ninguna garantía para el aparato ni se
aceptará ninguna responsabilidad en caso de daños
personales o materiales si el aparato es usado para
fines distintos a aquellos para los que fue concebido,
si no es correctamente conectado o utilizado, o si no
es reparado de manera adecuada.
3 Utilización
1) La estación soldadora y el soporte del soldador se
pueden instalar por separado o conectar el uno con el
otro. Para conectar las piezas, fije el soporte del sol-
dador al lado de la estación soldadora mediante sus
tres cierres (9).
2) Se entrega una esponja para limpiar la punta del sol-
dador (7) antes de empezar a soldar. Moje la esponja
y métala en el cajón (10) del soporte del soldador.
3) Conecte el enchufe (11) del cable del soldador a la
toma (5) en la estación soldadora y cierre la conexión
apretando su conector con rosca. Ponga el soldador
en su soporte (6).
4) Conecte el enchufe del cable principal (1) a una toma
(230 V~/50 Hz).
5) Encienda el aparato con el interruptor principal (3).
Aparecerán dos indicaciones de temperatura en la
pantalla (2):
– en la línea más baja (SET), se indica el valor de-
seado, es decir, la última temperatura de soldadura
regulada;
– en la línea más alta (TEMP.), se indica la tempera-
tura actual, es decir, la temperatura actual de la
punta soldadora.
Otras indicaciones en la pantalla:
HEAT ON aparece mientras el aparato se calienta
WAIT aparece mientras la temperatura actual se
aproxima a la temperatura deseada; des-
aparecerá cuando la diferencia entre los
dos valores se reduce a 10°
ERROR en caso de funcionamiento incorrecto (por
ejemplo en caso de un sensor de tempe-
ratura defectuoso o conexión interrumpida
soldador) aparece un parpadeo continuo;
además, sonará una alarma
6) Ajuste la temperatura del soldador con los botones
SET (4):
Botón para incrementar la temperatura
Botón para reducir la temperatura
Cada vez que se presiona un botón, la temperatura
se incrementará/disminuirá en 1°. Cuando se man-
tenga presionado un botón, la temperatura se incre-
mentará/disminuirá por pasos de 10°. El campo de
temperatura óptima para la mayoría de los usos del
soldador es de 300 – 380 °C.
Si el aparato se retira definitivamente del fun-
cionamiento, llévelo a un centro de reciclaje
para su eliminación no contaminante para el
medio ambiente.
ATENCIÓN: No utilice nunca el soldador sin la
punta soldadora, de otro modo el elemento calen-
tador y el sensor de temperatura podrían dañarse.
PRECAUCIÓN No toque nunca las partes metálicas
del soldador caliente, existe riesgo de
quemadura. Tras la utilización, permita
que el soldador se enfríe sólo con aire,
no use nunca agua para enfriarlo.
ADVERTENCIA El aparato está alimentado por una
corriente peligrosa (230 V~). Deje su
mantenimiento sólo en manos de
personal especializado y no intro-
duzca nunca nada en las aberturas
de ventilación. Esto puede causar un
riesgo de descarga eléctrica.
E
12

Cuando caliente el soldador por primera vez, apli-
que una cantidad suficiente de estaño en la punta del
soldador.
7) Tras la utilización, apague el aparato con el interrup-
tor principal.
4 Cambio de una punta
1) Antes de efectuar el cambio de una punta, apague el
aparato y permita que el aparato se enfríe hasta al-
canzar la temperatura ambiente.
2) Desenrosque con los dedos el capuchón (8) del tubo
del soldador.
3) Quite cualquier residuo de óxido del tubo del solda-
dor. Proteja sus ojos adecuadamente cuando quite
las partículas de óxido.
4) Cambie la punta soldadora (7) [para conocer puntas
de recambio adecuadas, consulte el capítulo 5] y
apriete el tubo del soldador con los dedos. Para evi-
tar daños al elemento calentador, no enrosque el tubo
del soldador demasiado fuerte.
5 Piezas de recambio
Las siguientes piezas de recambio para la estación sol-
dadora se encuentran disponibles en la gama de pro-
ductos de MONACOR:
6 Limpieza de la estación soldadora
La caja de la estación soldadora y el mango del soldador
pueden limpiarse con un paño húmedo y una pequeña
cantidad de líquido limpiador. No use ningún detergente
o sustancias químicas agresivas. Cuando limpie, asegú-
rese de que no entra líquido dentro del aparato.
7 Características técnicas
Control electrónico
de temperatura: . . . . . . . . . . . . . 150 – 450 °C
Alimentación:. . . . . . . . . . . . . . . 230 V~/50 Hz
Consumo: . . . . . . . . . . . . . . . . . 90 VA
Pantalla para la temperatura: . . 3-dígitos, LCD,
5 % precisión
Soldador: . . . . . . . . . . . . . . . . . . 24 V/48 W
Temperatura ambiente: . . . . . . . 0 – 40 °C
Dimensiones (B × H × P)
Estación soldadora
(sin cable principal): . . . . . . . 93 × 115 × 158 mm
Pie del soldador: . . . . . . . . . . 100 × 72 × 163 mm
Peso: . . . . . . . . . . . . . . . . . . . . . 1,6 g
Sujeto a modificaciones técnicas.
Soldadura correcta: ¡Tome nota!
–
Antes de la utilización, asegúrese de que la punta
del soldador esté bien sujeta.
– Antes de soldar, retire cualquier impureza, aceite, y
óxidos de las partes que deben ser soldadas.
– Mantenga la punta del soldador siempre limpia y cer-
ciórese de que hay suficiente estaño en la punta del
soldador, especialmente en intervalos entre solda-
duras y antes de apagar la estación soldadora.
E
13
Manual de instrucciones protegido por el copyright de MONACOR
®
INTERNATIONAL GmbH & Co. KG.
Toda reproducción mismo parcial con fines comerciales está prohibida.
Artículo
Punta soldadora SIT-543, aplanada a ambos
lados, anchura de la extremidad 2 mm
Soldador SIA-540
31.1810
Punta soldadora SIT-545, biselada a 45°,
diámetro de la punta 3 mm
31.1820
Punta soldadora SIT-541, puntiaguda
Referencia No.
31.1790
31.1800

Proszę otworzyć niniejszą instrukcję na stronie 3.
Pokazano tam rozkład elementów operacyjnych i złą-
czy.
1 Zastosowanie
Stacja lutownicza 48-W SIC-540 z zakresem temperatur
od 150 do 450 °C znajduje zastosowanie zarówno w pro-
fesjonalnej technice pomiarowej, jak i DIY. Urządzenie jest
wyposażone w cyfrowy wyświetlacz LCD z jednoczesnym
wskazaniem temperatury wymaganej oraz aktualnej. Pię-
ciostopniowa regulacja wysokości temperatury od 1° do
10° za pomocą dwóch przycisków. Możliwość odłączenia
obudowy kolby lutowniczej od stacji.
2 Bezpieczeństwo użytkowania
Ponieważ urządzenie spełnia wymogi obowiązujące w
Unii Europejskiej, jest oznaczone symbolem .
Należy przestrzegać następujących zasad:
GUrządzenie przeznaczone jest do użytku tylko we-
wnątrz pomieszczeń. Należy chronić je przed działa-
niem wody, wilgoci oraz wysokiej temperatury
(dopuszczalna temperatura otoczenia pracy to 0 –
40 ºC).
GNie wolno umieszczać na urządzeniu pojemników z
cieczą (np. szklanek).
GUrządzenie należy przechowywać w miejscu niedo-
stępnym dla dzieci.
GNie wolno używać stacji lutowniczej do podgrzewania
płynów ani przedmiotów wykonanych z tworzywa
sztucznego.
GUwaga! Niebezpieczeństwo wybuchu pożaru: Za-
wsze należy umieszczać nagrzaną kolbę lutowniczą w
obudowie lub na powierzchni ognioodpornej. Nie
wolno zakrywać otworów wentylacyjnych w stacji lu-
towniczej ani w obudowie kolby.
GNie wolno używać urządzenia, oraz należy natychmiast
odłączyć główną wtyczkę zasilającą z gniazda jeśli:
1. widoczne jest uszkodzenie urządzenia lub kabla za-
silającego.
2. po upadku urządzenia mogło nastąpić jego uszko-
dzenie
3. urządzenie działa nieprawidłowo.
Należy wówczas oddać urządzenie do punktu serwi-
sowego.
GWymianę uszkodzonego kabla zasilającego należy
zlecić specjaliście.
GNie wolno ciągnąć za kabel zasilający, chcąc go odłą-
czyć należy trzymać za wtyczkę.
GNie ponosi się odpowiedzialności za wynikłe uszko-
dzenia sprzętu lub obrażenia użytkownika w przy-
padku, gdy urządzenie jest wykorzystywane w innych
celach niż to się przewiduje, lub jeśli jest niewłaściwie
zainstalowane, użytkowane lub naprawiane.
3 Obsługa urządzenia
1) Stacja lutownicza i obudowa na kolbę lutowniczą
mogą być połączone lub stać oddzielnie. Aby połą-
czyć obie części, należy przymocować obudowę do
bocznej ścianki stacji lutowniczej za pomocą trzech
zatrzasków (9).
2) W zestawie znajduje się gąbka do czyszczenia grotu
(7) przed lutowaniem. Należy zwilżyć gąbkę i włożyć
ją do szufladki (10) w obudowie kolby lutowniczej.
3) Należy podłączyć wtyk (11) na kablu kolby lutowniczej
do gniazda (5) w stacji lutowniczej i zablokować po-
łączenie za pomocą nakrętki radełkowanej. Następ-
nie należy umieścić kolbę w uchwycie (6).
4) Należy podłączyć wtyk kabla zasilającego (1) do sieci
(230 V~/50 Hz).
5) Należy uruchomić urządzenie za pomocą włącznika
(3). Na wyświetlaczu (2) pojawią się dwa wskazania
wartości temperatury:
– w dolnym rzędzie (SET) wymagana wartość tem-
peratury, np. ostatnie ustawienie temperatury luto-
wania;
– w górnym rzędzie (TEMP.), aktualna wartość tem-
peratury, np. aktualna temperatura grotu.
Pozostałe wskazania na wyświetlaczu:
HEAT ON pojawia się, gdy urządzenie się nagrzewa
WAIT pojawia się, gdy aktualna wartość tempe-
ratury zbliża się do wartości wymaganej;
zniknie, gdy różnica między dwoma war-
tościami zmniejszy się do 10°
ERROR miga w przypadku wadliwego działania
urządzenia (np. uszkodzenie czujnika tem-
peratury lub odłączenie od kolby); dodat-
kowo pojawi się dźwiękowy sygnał
alarmowy
6) Należy ustawić żądaną temperaturę lutowania za po-
mocą przycisków SET (4):
przycisk podwyższenie temperatury
przycisk obniżenie temperatury
Po każdym naciśnięciu przycisku temperatura zosta-
nie podwyższona/ obniżona o 1°. Jeśli przycisk jest
cały czas naciśniety, temperatura będzie stopniowo
podwyższona/obniżona o 10°. Optymalny zakres
temperatur w większości przypadków wynosi od 300
do 380 °C.
Jeśli kolba jest nagrzewana po raz pierwszy, na-
leży nałożyć na grot wystarczającą ilość cyny.
Jeśli urządzenie ma zostać ostatecznie wyco-
fane z użycia, należy przekazać je do punktu
utylizacji odpadów, aby uniknąć zanieczyszc-
zenia środowiska.
Uwaga: Nie wolno pracować z kolbą lutowniczą bez
grotu, w przeciwnym wypadku może ulec zniszcze-
niu element grzejny oraz czujnik temperatury.
UWAGA Nie wolno dotykać metalowych części kolby
nagrzanego urządzenia – istnieje niebez-
pieczeństwo poparzenia! Po zakończeniu
pracy należy odczekać aż ostygnie kolba lu-
townicza; nie wolno używać wody do schło-
dzenia kolby.
UWAGA Urządzenie jest zasilane niebezpiecznym
dla życia napięciem zmiennym 230 V~. Na-
prawą urządzenia powinien zajmować się
jedynie przeszkolony personel. Nie wolno
blokować otworów wentylacyjnych, ponie-
waż istnieje niebezpieczeństwo porażenia
elektrycznego!
PL
14

7) Po zakończeniu pracy należy wyłączyć urządzenie za
pomocą wyłącznika.
4 Wymiana grotu
1) Przed wymianą grotu należy wyłączyć urządzenie i
odczekać aż ostygnie nagrzana kolba.
2) Należy zdjąć z grotu osłonę izolującą (8).
3) Należy usunąć z grotu pozostałości tlenku. Podczas
usuwania cząsteczek tlenku należy chronić oczy.
4) Należy wymienić grot (7) [wskazówki dotyczące czę-
ści zamiennych – zob. rozdz. 5], następnie założyć
osłonę izolującą. Aby uniknąć uszkodzenia elementu
grzejnego nie należy dokręcać osłony izolującej zbyt
mocno.
5 Części zamienne
W ofercie produktów firmy MONACOR dostępne są na-
stępujące części zamienne do stacji lutowniczej:
6 Czyszczenie urządzenia
Stację lutowniczą i obudowę kolby można czyścić za po-
mocą wilgotnej tkaniny z dodatkiem niewielkiej ilości
środka czyszczącego. Nie wolno używać silnych deter-
gentów czy substancji chemicznych. Podczas mycia na-
leży uważać, aby do środka urządzenia nie dostał się
płyn!
7 Dane techniczne
Elektroniczna
regulacja temperatury:. . . . . . . . 150 – 450 °C
Zasilanie: . . . . . . . . . . . . . . . . . . 230 V~/50 Hz
Pobór mocy: . . . . . . . . . . . . . . . 90 VA
Wyświetlacz temperatury: . . . . . 3-cyfry, LCD, dokład-
ność 5 %
Kolba lutownicza:. . . . . . . . . . . . 24 V/48 W
Temperatura otoczenia pracy: . . 0 – 40 °C
Wymiary (szer. × wys. × głęb.)
Kolba lutownicza
(bez kabla zasilającego):. . . . 93 × 115 × 158 mm
Obudowa kolby lutowniczej: . 100 × 72 × 163 mm
Waga: . . . . . . . . . . . . . . . . . . . . 1,6 g
Z zastrzeżeniem możliwości zmian.
Uwaga – zasady bezpieczeństwa
– Przed rozpoczęciem pracy należy się upewnić czy
grot jest mocno osadzony.
– Przed rozpoczęciem lutowania należy usunąć wszel-
kie zanieczyszczenia, olej, tlenki z elementów, które
mają zostać zlutowane.
– Zawsze należy dbać o czystość grotu oraz aplikować
wystarczającą ilość cyny na grot, zwłaszcza podczas
przerw w lutowaniu i przed wyłączeniem stacji
lutowniczej.
PL
15
Instrukcje obsługi są chronione prawem copyright for MONACOR
®
INTERNATIONAL GmbH & Co. KG. Prze-
twarzanie całości lub części instrukcji dla osobistych korzyści finansowych jest zabronione.
Nazwa produktu
Grot lutowniczy SIT-543, spłaszczona na bokach,
szerokość końcówki grotu 2 mm
Kolba lutownicza SIA-540
31.1810
Grot lutowniczy SIT-545, ścięty o 45°, średnica
końcówki grotu 3 mm
31.1820
Grot lutowniczy SIT-541, ostro zakończona
Numer zam.
31.1790
31.1800

Soldeerstation
Lees aandachtig de onderstaande veiligheidsvoorschriften,
alvorens het toestel in gebruik te nemen. Mocht u bijko-
mende informatie over de bediening van het toestel nodig
hebben, lees dan de Engelse tekst in deze handleiding.
Veiligheidsvoorschriften
Dit toestel is in overeenstemming met alle vereiste EU-
Richtlijnen en is daarom gekenmerkt met .
GHet toestel is enkel geschikt voor gebruik binnenshuis.
Vermijd druip- en spatwater, plaatsen met een hoge
vochtigheid en uitzonderlijk warme plaatsen (toegestaan
omgevingstemperatuurbereik: 0 – 40 °C).
GPlaats geen bekers met vloeistof zoals drinkglazen etc.
op het toestel.
GHoud het toestel buiten het bereik van kinderen.
GGebruik het soldeertoestel in geen geval om vloeistoffen
of kunststoffen op te warmen.
GOpgelet! Brandgevaar: Plaats de hete soldeerbout uit-
sluitend in de betreffende houder of op een vuurvaste
ondergrond. De ventilatieopeningen van het soldeertoe-
stel en de soldeerbouthouder mogen niet zijn afgedekt.
GRaak de metalen delen van de hete soldeerbout niet aan
– Gevaar voor brandwonden! Laat de soldeerbout na
het solderen uitsluitend met lucht afkoelen. Giet er om
af te koelen in geen geval water op.
GGebruik de soldeerbout nooit zonder soldeerstift; zo kunt
u het verwarmingselement en de temperatuursensor im-
mers beschadigen.
GSchakel het toestel niet in resp. trek onmiddellijk de stek-
ker uit het stopcontact,
1. wanneer het toestel of het netsnoer zichtbaar bescha-
digd is,
2. wanneer er een defect zou kunnen optreden nadat
het toestel bijvoorbeeld is gevallen,
3. wanneer het toestel slecht functioneert.
Het toestel moet in elk geval hersteld worden door een
gekwalificeerd vakman.
GEen defect snoer mag enkel door een gekwalificeerd
persoon hersteld worden.
GTrek de stekker nooit met het snoer uit het stopcontact,
maar steeds met de stekker zelf.
GGebruik voor de reiniging geen agressieve detergenten
of chemicaliën. Dompel het toestel zeker niet in vloeistof
en laat geen vloeistof in het toestel lopen.
GIn geval van ongeoorloofd of verkeerd gebruik, ver-
keerde aansluiting, foutieve bediening of van herstelling
door een niet-gekwalificeerd persoon vervalt de garantie
en de verantwoordelijkheid voor hieruit resulterende ma-
teriële of lichamelijke schade.
Wanneer het toestel definitief uit bedrijf wordt ge-
nomen, bezorg het dan voor milieuvriendelijke
verwerking aan een plaatselijk recyclagebedrijf.
WAARSCHUWING
De netspanning (230 V~) van het toestel is le-
vensgevaarlijk. Open het toestel niet, en zorg
dat u niets in de ventilatieopeningen steekt!
U loopt het risico van een elektrische schok.
16
Loddestation
Læs nedenstående sikkerhedsoplysninger opmærksomt
igennem før ibrugtagning af enheden. Bortset fra sikker-
hedsoplysningerne henvises til den engelske tekst.
Vigtige sikkerhedsoplysninger
Denne enhed overholder alle de påkrævede EU direktiver,
og er derfor mærket med .
GEnheden er kun beregnet til indendørs brug. Beskyt den
mod vanddråber og -stænk, høj luftfugtighed og varme
(tilladt omgivelsestemperatur 0 – 40 °C).
GUndgå at placere væskefyldte genstande, som f. eks.
glas, ovenpå enheden.
GSørg for, at enheden er utilgængelig for børn!
GBrug aldrig loddestationen til at opvarme nogen former
for flydende vædsker og plastik.
GForsigtig! Brandfare: Sæt altid loddekolben på plads i
holderen eller læg den på en ikke brandbar overflade.
Dæk aldrig for ventilationshullerne på loddestationen.
GRør aldrig ved metallet på loddekolben, da der er risiko
for at blive forbrændt. Efter brug skal selv loddekolben
køle ned ved hjælp af luft, brug aldrig vand til afkøling.
GTænd aldrig for loddestationen, hvis der ikke er monte-
ret en loddespids på kolben. Varmelegmedet og tempe-
ratur sensoren kan tage skade.
GTag ikke enheden i brug og tag straks stikket ud af stik-
kontakten i følgende tilfælde:
1. hvis der er synlig skade på enheden eller netkablet,
2. hvis der kan være opstået skade, efter at enheden er
tabt eller lignende,
3. hvis der forekommer fejlfunktion.
Enheden skal altid repareres af autoriseret personel.
GEt beskadiget netkabel må kun repareres af forhandleren
eller autoriseret personel.
GTag aldrig netstikket ud af stikkontakten ved at trække i
kablet, tag fat i selve stikket.
GTil rengøring må der ikke benyttes skrappe rengørings-
midler eller kemikalier. Enheden må under ingen om-
stændigheder nedsænkes i vand; undgå ligeledes, at der
kommer vand ind i enheden.
GHvis enheden benyttes til andre formål, end den oprin-
deligt er beregnet til, hvis den ikke er tilsluttet korrekt,
hvis den betjenes forkert, eller hvis den ikke repareres af
autoriseret personel, omfattes eventuelle skader ikke af
garantien.
Hvis enheden skal tages ud af drift for bestandigt,
skal den bringes til en lokal genbrugsstation for
bortskaffelse.
ADVARSEL
Dette produkt benytter 230 V~. Udfør aldrig
nogen form for modifikationer på produktet og
indfør aldrig genstande i ventilationshullerne,
da du dermed risikere at få elektrisk stød.
NL
B
DK

17
S
Lödstation
Innan enheten tas i bruk, läs först igenom säkerhetsföre-
skrifterna. Om ytterligare information önskas, läs igenom
den engelska texten som medföljer.
Säkerhetsföreskrifter
Enheten uppfyller samtliga EG-direktiv och har därför
märkts med symbolen .
GEnheten är endast avsedd för inomhusbruk. Skydda en-
heten mot vätskor, hög luftfuktighet och hög värme (till-
låten omgivningstemperatur 0 – 40 °C).
GPlacera inte föremål innehållande vätskor, t. ex. dricks-
glas, på enheten.
GHåll apparaten borta för barn.
GAnvänd aldrig lödstationen till att värma vätskor eller
smälta plast.
GVarning! Brandrisk! Ställ alltid lödpennan i sin hållare
eller på ett eldfast underlag. Täck aldrig över luftspal-
terna på stationen eller hållaren till lödpennan.
GRör aldrig metalldelarna på lödstationen då denna an-
vänds. Risk för brännskador föreligger. Låt lödpennan
kallna genom luftkylning enbart. Kyl aldrig ner den med
vatten.
GLödpennan får inte användas utan att en lödspets är
monterad då detta skadar värmepaketet och tempera-
turgivaren i lödpennan.
GAnvänd inte enheten och ta omedelbart kontakten ur
eluttaget om något av följande fel uppstår:
1. Enheten eller elsladden har synliga skador.
2. Enheten är skadad av fall e. d.
3. Enheten har andra felfunktioner.
Enheten skall alltid lagas på verkstad av utbildad perso-
nal.
GEn skadad elsladd skall bytas på verkstad.
GDrag aldrig ut kontakten genom att dra i elsladden utan
ta tag i kontaktkroppen.
GRengör endast med en svag rengöringsvätska på en fuk-
tad duk eller trasa. Lägg aldrig enheten i vatten eller
annan vätska. Låt inte flytande vätskor rinna in i enheten.
GOm enheten används för andra ändamål än avsett, om
den kopplas in felaktigt, om den används på fel sätt eller
inte repareras av auktoriserad personal upphör alla ga-
rantier att gälla och inget ansvar tas heller för uppkom-
men skada på person eller materiel.
Om enheten skall kasseras bör de lämnas in till
återvinning.
VARNING
Enheten använder hög spänning internt
(230 V~). Gör inga modifieringar i enheten
eller stoppa föremål i ventilhålen. Risk för el-
skador föreligger.
Juotosasema
Ole hyvä ja huomioi aina seuraavat turvallisuutta koskevat
ohjeet ennen laitteen käyttöön ottoa. Katso käyttöön liitty-
viä ohjeita Englannin kielisistä ohjeista, jos tarvitset lisää
tietoa laitteen käytöstä.
Turvallisuudesta
Tämä laite täyttää kaikki siihen kohdistuvat EU-direktiivit ja
sille on myönnetty hyväksyntä.
GTämä laite soveltuu vain sisätilakäyttöön. Suojele laitet-
ta kosteudelta, vedeltä ja kuumuudelta (sallittu ympä-
röivä lämpötila 0 – 40 °C).
GÄlä sijoita laitteen päälle mitään nestettä sisältävää,
kuten vesilasia tms.
GPidä laite poissa lasten ulottuvilta!
GÄlä käytä juotosasemaa lämmittääksesi mitään nesteitä
tai muovia.
GHuomio! Tulipalo vaara: säilytä kuumaa juotinta vain
sen telineessä tai tulenkestävällä alustalla. Älä peitä tuu-
letusaukkoja juotosasemassa tai juotin telineessä.
GÄlä koske juottimen metalli osiin juottimen olessa kuuma
– palovamma vaara! Käytön jälkeen anna juottimen
jäähtyä kunnolla. Älä käytä vettä sen jäähdyttämiseen.
GÄlä kytke laitteeseen virtaa mikäli juottimessa ei ole juo-
toskärki paikallaan. Juottimen lämmityselementti tai läm-
pötila-anturi saattavat vaurioitua.
GIrrota virtajohto pistorasiasta välittömästi, äläkä ota lai-
tetta käyttöön jos:
1. laitteessa tai virtajohdossa on näkyvä vaurio,
2. putoaminen tai vastaava vaurio on saattanut aiheut-
taa vian,
3. laitteessa on toimintahäiriöitä.
Laite täytyy kaikissa näissä tapauksissa huollattaa val-
tuutetussa huoltoliikkeessä.
GVahingoittuneen verkkojohdon saa korjata vain hyväk-
sytty huolto.
GÄlä koskaan irrota virtajohtoa pistorasiasta johdosta ve-
tämällä.
GLaitteen puhdistuksessa ei saa käyttää kiinteitä puhdis-
tusaineita tai kemikaaleja. Nestettä ei saa päästä laitteen
sisälle puhdistuksen aikana!
GLaitteen takuu raukeaa, eikä valmistaja, maahantuoja tai
myyjä ota vastuuta mahdollisista välittömistä tai välilli-
sistä vahingoista, jos laitetta on käytetty muuhun kuin al-
kuperäiseen käyttötarkoitukseen, laitetta on taitamat-
tomasti käytetty tai kytketty tai jos laitetta on huollettu
muussa kuin valtuutetussa huollossa.
Kun laite poistetaan lopullisesti käytösta, vie se
paikalliseen kierrätyskeskukseen jälkikäsittelyä
varten.
VAROITUS
Tämä laite toimii vaarallisella 230 V~ jännit-
teellä. Älä koskaan tee mitään muutoksia lait-
teeseen taikka asenna mitään ilmanvaihto
aukkoihin, koska siitä saattaa seurata säh-
köisku.
FIN

MONACOR INTERNATIONAL GmbH & Co. KG
•
Zum Falsch 36
•
28307 Bremen
•
Germany
Copyright ©by MONACOR INTERNATIONAL. All rights reserved. A-0500.99.02.12.2011
®
Table of contents
Languages:
Other Monacor Soldering Gun manuals