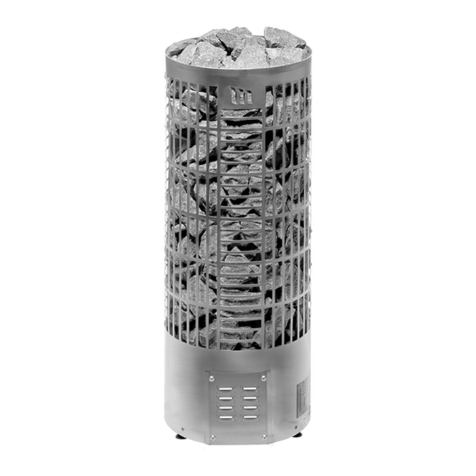
MONDEX Klapi User manual

INSTALLATION AND
OPERATING INSTRUCTIONS
Klapi heater
12/2017

2
Installation and Operating Instructions Klapi
Contents
1 General safety instructions 3
2 Klapi heater 4
Heater components 4
3 Technical specifications 5
Rated power, efficiency, emissions, average
temperature of combustion gases 5
Heater dimensions, weight and required quantity
of stones 5
4 Sauna room 6
Sauna room ventilation 6
Keeping the sauna room clean 6
Floor protection 6
Safety distances 7
Light protective material 8
5 Heater assembly and installation 9
Before installation 9
Preheating 9
Stacking the stones 10
Fuel 10
Connecting the heater to a brickwork flue via the
rear chimney duct opening 11
Connecting the heater to a brickwork flue via the
upper chimney duct opening 11
Changing the operating direction of the door 12
6 Use of Klapi heater 12
Warming up the heater 12
Adjusting the chimney draft 13
Checking the sweeping doors 13
Water thrown on heater 13
Chimney flue 14
Maintenance and service 14
Maintenance; spare parts 14
Warranty 14
Changing the heater stones 14
7 Troubleshooting 15
No draught in chimney, smoke enters the sauna 15
Sauna fails to heat 15
Heater stones fail to heat 15
Heater generates odour 15
Effect of heating on the sauna room 15
8 Service history 16

3
Installation and Operating Instructions Klapi
1. General safety information
Always check the adequacy of the fire protection distances!
Failure to observe the connection instructions may result in a risk of fire!
Always check the sauna room before operating the heater!
Due to the risk of fire, do not use the sauna to dry clothes or laundry.
Exercise caution with a hot heater, since the heater stones and metal parts become very hot
and can cause burns.
Steam from the heater is burning hot and may cause severe burns.
Children, disabled and ill persons who are using the sauna should be supervised.
Benches and floors may be slippery, therefore move in the sauna with caution.
Do not go to a hot sauna under the influence of narcotic substances (alcohol, drugs,
narcotics, etc.).
A stone compartment without stones or filled improperly will present a risk of fire!
Covering the heater is a fire hazard.
Extended periods in a hot sauna will raise the temperature of the body, which may be
dangerous.
Maritime and humid climates may corrode the metal surfaces of the heater.
To ensure safe use of the sauna, please read these safety instructions first!
This device is not intended for use by children or persons whose physical, sensory or mental
abilities or lack of experience and knowledge prevent them from using the device safely, without the
supervision of a person responsible for their safety or before they have been instructed on how to use
the device.
Children should be supervised to ensure that they do not play with the device.
All local regulations, including those referring to local and European standards, must be complied with
when installing a fireplace.
This device complies with the requirements of:
Mondex pursues an active policy of product development and continuous improvement. For this
reason, Mondex reserves the right to make changes relating to the design and technical specifications
of their products without prior notice.

4
Installation and Operating Instructions Klapi
2. Klapi heater
Klapi heater, steel Klapi heater, black
1
2
3
4
5
5
11
5
Klapi heater components
1) Firebox door (the operating
direction can be changed)
2) Ash pan
3) Upper chimney duct
4) Rear chimney duct
5) Sweeping doors (3)

5
Installation and Operating Instructions Klapi
Heater Klapi 16
Sauna size 8–16 m³
Rated power 13 kW
Efficiency 71%
CO content with an oxygen content of 13% 0.51%
Flue gas temperature 379 °C
Total amount of wood / fillings / heating time 9.5 kg / 3 / 90 min
Heater dimensions, weight and required quantity of stones
3. Technical specifications
Table 3.1
Type Height
(mm)
Diameter
(mm)
Firebox cover
thickness (mm)
Flue Ø
(mm)
Weight
without
stones (kg)
Stone
amount
(kg)
Klapi 16 750 460 8 115 52 70
Table 3.2
Rated power, efficiency, emissions, average temperature of flue gases*
750 mm
460 mm
Ø 115 mm
113.5 mm
* Mondex Klapi. The sauna heater has been tested in accordance with standard EN 15821. Test report No. VTT-S-01932-15.

6
Installation and Operating Instructions Klapi
4. Sauna room
Protecting the floor
Concrete floor without tiles (A)
The heater can be installed directly on a concrete floor if the concrete slab thickness is a minimum of 60
mm. Make sure that there are no electrical wires or water pipes in the concrete cast under the heater.
Combustible floor material (B)
Protect the floor with a concrete slab that is 60 cm thick, at a minimum, and extends at least 300 mm
around the heater on the sides and in the rear (unless the heater is by a wall) and at least 400 mm to
the front of the heater door. Ensure the slab is slightly elevated from the floor surface in order to keep
the floor material dry.
Tile floor (C)
Floor glues and plasters and waterproofing materials used under the tiles do not withstand thermal
radiation emitted by the heater. Protect the floor with a fireplace safety pad or equivalent protection
against thermal radiation.
300 mm
300 mm
300 mm
400 mm
60 mm 60 mm
A B C
Sauna room ventilation
Gravity ventilation
The fresh supply air is conducted to just above the floor level near the heater, and the exhaust air
exits as far as possible from the heater, near the ceiling. The heater circulates the air efficiently, so
the exhaust air opening is mainly tasked with removing moisture from the sauna after bathing. The
minimum diameter of the fresh supply air opening is 100 mm or equivalent.
Mechanical ventilation
The fresh supply air is conducted to approximately 500 mm above the heater and the exhaust air exits
near the floor, for example, under the benches. The minimum diameter of the fresh supply air opening
is 100 mm or equivalent.
Keeping the sauna room clean
We recommend that bench covers be used when bathing to prevent sweat from coming into contact
with the benches. We recommend that the sauna benches, walls, and floor be washed every six
months, at a minimum. The surfaces in the sauna should be washed with a scrubbing brush and a
cleaning agent specifically intended for washing the sauna.

7
Installation and Operating Instructions Klapi
Type on the sides in the front in the rear upward Sauna size
Klapi 16 250 500 250 1250 8–16 m³
Table 4.3 Safety distances to inflammable material (mm) The safety distances are measured from the outer
surfaces of the product.
Safety distances
Ceiling (A)
The minimum safety distance from the top
surface of the heater to the ceiling is 1250 mm.
Masonry walls (C)
Leave a 50 mm gap between the heater and the
wall. This requires that the front and one side of
the heater are unobstructed the air to circulate.
The space required for operation and main-
tenance (D). The user of the heater needs at least
1 m2 of space in front of the heater.
Heater in a recessed wall
If the heater is installed in a recessed wall, leave
a 100 mm gap between the heater and the walls.
The space required for operation and
maintenance (D). The user of the heater needs at
least 1 m2 of space in front of the heater.
Walls and benches made of inflammable
material (B)
The minimum safety distances between the
heater and inflammable materials: 250 mm to
the sides and rear, 500 mm to the front.
The space required for operation and main-
tenance (D). The user of the heater needs at least
1 m2 of space in front of the heater.
1250 mm
B
250 50
A
C
50
50
C
D
500
100
DB
C
100 100
D
B
250
250
250
500
B

8
Installation and Operating Instructions Klapi
Light protective material
Safety distances to inflammable materials may be reduced to a half by using a single layer of light
protective material and to a quarter by using a double layer.
A single layer of light protective material (1x) can consist of a non-flammable, fibre-reinforced cement
board (e.g. Minerit board) with thickness of at least 7 mm or a metal plate with thickness of at least 1
mm.
A double layer of light protective material (2x) can be made by using two boards of the above-
mentioned materials. The fastening points must be sufficiently close to each other in order to ensure a
stable structure.
Leave a gap of a minimum of 30 mm between the surface to be protected and the board(s). The light
protective material should extend at least 600 mm above the heater.
A single layer of light protective material equals to brickwork of at least 55 mm thick. A double layer of
light protective material equals to brickwork of at least 110 mm thick.
The brickwork must be open on the sides, and the distance to the surface being protected must be a
minimum of 30 mm.
Heater installation
The adjustable feet of the heater allow you to install the heater directly and firmly even on an inclined
floor surface. The adjustment range is 0–30 mm. Leave a generous gap between the heater and the
floor.
Screw the adjustable feet downwards so that you can rotate them with an open-end wrench, for
example, when the heater is in place.
NOTE! The adjustable feet may scratch the surface of the floor if the heater is moved on the floor.
600
1x
A
A
2x
30
30
30
A (min) B (min)
1x 125 250
2x 62.5 250
B
B

9
Installation and Operating Instructions Klapi
Storage
Store the heater in its original package in an upright position and in a
warm and dry location until it is installed.
Delivery content
The heater stones are not included in the delivery. Inspect the heater
components visually. If you notice any discrepancies or deficiencies,
please contact the store where you purchased the heater. Do not
expose heater parts to blows and denting when taking them out of the
package. The sauna’s floor surface should also be properly protected
before you begin the installation.
5. Heater assembly and installation
Before installation
1) Prior to installation, ensure that the safety distance requirements are met.
2) There should not be any electrical equipment or wires or inflammable materials within the safety
distances of the heater.
3) Please also note the safety distances of the chimney flue! If the safety distance requirements are not
met, additional protective materials must be used.
4) For more detailed instructions on fire safety provisions, please contact the fire authorities.
Preheating
Pre-heat the heater outdoors or in a well-ventilated area. The surface of the heater is painted. Some of
the paint will burn out during the first heating, which results in the heater body emitting smoke. When
no more smoke is emitted, the heater is ready for use.
If the heater is preheated outdoors, chimney pipes should be fitted to ensure a proper draught and to
burn off any protective coatings on them.
The surface treatment of the heater achieves its final strength during the first heating of the heater.
Avoid rubbing or wiping the painted surfaces of the heater before the first heating.
For the first heating, one load (about 5 kg) of wood is sufficient.
Pre-heat the heater without stones. Stack the stones into the heater only when the heater has cooled
down completely after the preheating.
Always keep the firebox door closed during the preheating!
Do not throw water on the heater during the preheating. Doing so may damage the paint coating.
Observe the safety distances between the heater and any inflammable material in accordance with the
instructions (see page 7) when installing the heater.

10
Installation and Operating Instructions Klapi
Stacking the stones
Only use stones intended for sauna heaters. Suitable stones include peridotite, olivine diabase, and
olivine. To ensure adequate circulation of air in the heater, the most suitable stone size to be placed on
top of the firebox is 10–15 cm in diameter. The size (Ø) of stones to be stacked between the body and
the firebox is 5–10 cm. You will need two boxes of both sizes.
Stones collected from the nature are not suitable as heater stones.
Rinse any dust off of the heater stones before stacking them in the heater. Stack bigger stones on the
bottom of the stone compartment and the smaller stones to the top. Ensure proper air circulation
between the stones by stacking them loosely.
Stacking the stones loosely ensures the ventilation in the heater remains unobstructed. Stacking the
stones in this manner also shortens the heating time. Continue stacking gradually in this manner until
all stones have been placed.
Dents caused by the user are not covered by Mondex’s warranty or other product liability. When
stacking the stones, be careful not to dent the heater’s metal surfaces to avoid damaging them. For
more information on the warranty and replacing stones, see page 14.
Fuel
Since the moisture of firewood significantly affects the cleanliness of combustion as well as the
efficiency of the heater, use only dry wood to fuel the heater. Logs are dry when they make a clinking
sound when they are knocked against each other.
Suitable kindling material includes bark or newspaper.
Store the fuel in the fuel storage. A small quantity of firewood can also be stored in the vicinity of the
heater, as long as the firewood temperature does not exceed 80 °C.
Do not burn the following materials in the heater:
- Chipboard, plastic, coal, briquettes, pellets, or other such fuels with a high calorific value.
- Painted or impregnated wood.
- Waste (for example, PVC plastics, textiles, leather, rubber, disposable diapers).
- Garden waste (for example, grass, leaves).

11
Installation and Operating Instructions Klapi
Connecting the heater to the brickwork flue via the rear chimney duct opening
Make a hole in the firewall for the flue connection. Note the height of any floor protection when
determining the height of the hole. The hole should be slightly larger than the chimney pipe. A suitable
gap around the chimney pipe is about 10 mm. The inner corners of the flue hole should be rounded so
that the flue gases can enter the flue unobstructed. It is not recommended that the heater be installed
in a split flue.
Attach the chimney pipe to the rear chimney duct opening of the heater. Make sure that the pipe
connection is tight and secure. If necessary, tap with a hammer.
Push the heater into place. Do not push the chimney pipe too far into the flue since it may obstruct
the flue. Shorten the pipe if necessary. Seal the chimney pipe to the hole in the firewall with fireproof
mineral wool, for example. Ensure that the chimney pipe connection is tight and, if necessary, add
more fire-resistant mineral wool.
Connecting the heater to a brickwork flue via the upper chimney duct opening
The chimney pipes used in the upper connection can be straight or in an angle of 45° or 90°. Move
the cover plate to the rear opening. Attach the chimney pipe to the upper chimney duct opening of the
heater. Make sure that the pipe connection is tight and secure. It is not recommended that the heater
be installed in a split flue.
Push the heater into place. Do not push the chimney pipe too far into the flue since it may obstruct the
flue. Shorten the pipe if necessary.
Seal the chimney pipe to the opening in the firewall with fireproof mineral wool, for example. Ensure
that the chimney pipe connection is tight and, if necessary, add more fire-resistant mineral wool.
613 mm
Straight 45° 90°

12
Installation and Operating Instructions Klapi
6. Use of Klapi heater
Warming up the heater
Before warming up the heater, ensure that there are no foreign objects that could create a fire hazard
in the sauna or within the safety distances of the heater.
Empty the ash pan to ensure efficient and clean combustion.
Stack the firewood in the firebox loosely to let combustion air reach between the logs. Place larger
logs on the bottom and the smallest one on top. Use logs with a diameter of about 8–12 cm. Fill
approximately 2/3 of the firebox with wood.
Place the kindling on top of the wood. Lighting the wood from the top generates the least emissions.
When lighting the wood, open the ash box door by 2–3 cm. Close the ash box door once ignition has
started.
The kindling should be lit from the top only. Close the door. Once the fire burns, close the ash pan.
The replacement air needed for combustion enters the top of the firebox through separate secondary
air channels. This ensures clean combustion and reduced wood consumption. If you leave the ash pan
open, smoke may enter the sauna. The door knob and the ash pan handle may become hot enough to
burn the skin when the heater is being heated. Use the tool supplied with the heater or equivalent for
handling the knob and the handle when the heater is hot.
Changing of the opening direction of the door
You can install the door of the firebox to open either to the right or to the left.
1) Remove the hinge shaft.
2) Lift the door off and turn it 180°.
3) Replace the hinge shaft.
1 2 3
Firewood
length approximately 33 cm First load 3 kg
Initial filling Approx. 4 kg Second load 2.5 kg

13
Installation and Operating Instructions Klapi
The draught control plate located under the
sweeping door can be used to either increase or
reduce draught.
A high chimney or other similar factors may
generate excessive draught, in which case the
draught control plate can be used to reduce the
opening.
Similarly, if the sauna is located in a hollow, for
example, better draught may be required, in
which case the opening of the draught control
plate should be made larger.
After the adjustment, make sure that the draught
control plate is tightened securely so that it
cannot move as a result of thermal expansion.
The draught
control plate is
located under the
sweeping door
Adjusting the draught
When you begin building a fire in the heater,
you may want to keep the ash pan slightly
ajar to achieve good draught, which improves
combustion.
During bathing and when the sauna room has
heated sufficiently, the ash pan can be closed.
Excessive draught will heat the body of the heater
all over until red-hot, which will considerably
reduce the service life of the heater. If you leave
the ash pan open, smoke may enter the sauna.
If necessary, add more wood in the firebox when
the embers start to fade. Use logs with a diameter
of about 10–15 cm.
To maintain suitable heat for bathing, adding a
couple of logs at a time is sufficient.
Prolonged intense heating may cause a fire
hazard!
As a rule of thumb, a temperature over 100 °C in
the sauna is excessive.
Follow the wood quantities given in the
instructions. Let the heater, flue and sauna cool
down, when necessary.
Checking the sweeping doors
Before starting to use the heater, ensure that the
sweeping doors on the sides are in the correct
position.
The braces of the sweeping doors must be
aligned with the direction of draught.
Water thrown on heater
Use clean drinking water to generate steam.
Make sure the quality of the water is high, as salty water or water containing lime, iron or humus may
corrode the heater fast! Using seawater corrodes the heater in an instant, so seawater or any other
saltwater may not be used.
Quality requirements of drinking water
Humus content < 12 mg/l Calcium content < 100 mg/l
Iron content < 0.2 mg/l Manganese content < 0.05 mg/l
Correct Incorrect

14
Installation and Operating Instructions Klapi
Chimney flue
The heater can be safely installed in a T600 temperature rated chimney flue, unless other instructions
have been given. The inside diameter of the flue chimney pipe must be 115 mm. The recommended
draught of the chimney flue is approximately -12 Pa.
The heater can be connected to the chimney flue either from the rear or top of the heater. The
unused opening in the heater is closed with the cover plate supplied. The heater also comes with a
short connection flue pipe for connecting the heater to the chimney flue from the rear.
The connection flue pipe must not be installed too deeply into the chimney flue because it will block
the draught. Leaks in the chimney flue also weaken the draught of the heater, and, therefore, the flue
connection must always be sealed with a fire-proof sealing material. If the flue connection leaks, the
flue gases produced by the heater may ignite in the chimney.
The chimney flue and the connection pipes must be swept regularly according to the instructions
provided by the law.
Maintenance and service
Always empty the ash pan of the heater before each new heating to enable the combustion air
conducted through the ash pan to cool off the grate and extend the service life of the grate. Use a
container made of metal, and preferably equipped with feet, for the ashes.
The ash container must not be stored in the vicinity of inflammable materials, as there may be
glowing embers in the ashes removed from the heater. They may cause a risk of fire.
In case of a chimney fire, close the doors of the heater ash pan and firebox and the smoke damper.
(If installed) The local fire authorities must be notified of a chimney fire. After a chimney fire, a chimney
sweeper must inspect the condition of both the heater and flue before the heater can be used again.
The soot and ash accumulated in the smoke ducts of the heater must be removed periodically
through the sweeping opening in the heater’s centre flue duct.
Due to the extensive thermal fluctuations, the heater stones erode and crumble during heater use.
Stack the stones again at least once a year and more frequently in heavy use. Also replace any eroded
stones. When replacing the sauna stones, also remove the stone debris accumulated in the stone
compartment.
Wipe the dust and dirt off of the heater with a damp cloth.
Do not alter the structure of the product. Use only accessories approved by the manufacturer.
Maintenance and spare parts
In case of a fault that cannot be solved, please contact the store where you purchased the heater or
email info@mondex.fi. Spare parts can be purchased from Mondex distributors and the manufacturer.
When purchasing spare parts, please refer to the name, power, serial number and manufacturing date
of the heater to ensure you receive the correct parts.
Warranty
In household use, the heater has one (1) year warranty. In commercial/professional use, the warranty
is three (3) months. Commercial use refers to facilities in which the heater is in use on a continuous
basis, such as fitness centres, swimming pools, housing companies etc. It is not recommended that
the heater is on for longer than six (6) hours at a time. Retain the sales receipt or warranty card. The
warranty does not cover external or internal mechanical damage caused by, for example, the impacts
of stones or the heater falling over. The warranty also does not cover defects caused by acts of nature.
Changing the heater stones
Re-stack the heater stones and replace any eroded stones annually (every three months in com-
mercial/professional use). A good condition and proper, spacious stacking of the stones on top of the
firebox inside the heater ensure sufficient air flow. If this is not carried out annually, the air flow may
be obstructed, resulting in the firebox burning out prematurely, which is not covered by the warranty.

15
Installation and Operating Instructions Klapi
7. Troubleshooting
No draught in chimney, smoke enters the sauna
- The flue connection leaks > Seal the connection.
- The brick chimney flue is cold.
- Underpressure in the apartment caused by a cooker hood, another furnace or other device >
Ensure the supply of replacement air.
- The ash pan is full or open although the fire is burning > Close the ash pan.
- The flue ducts of the heater are blocked.
- The flue connection pipe is too deep in the flue.
- The opening of the draught control plate is too small > Increase the opening.
Sauna fails to heat
- The sauna is too large for the heating capacity of the heater.
- There is a lot of uninsulated wall surface in the sauna.
- The wood used as fuel is wet or of low quality.
- The draught of the flue is poor.
- The flue ducts of the heater are blocked.
Heater stones fail to heat
- The sauna is too small for the heating capacity of the heater.
- The draught of the flue is poor.
- The wood used as fuel is wet or of low quality.
- The flue ducts of the heater are blocked.
- Check the placement of the stones. Remove the stone debris accumulated in the stone compartment
and stones that are too small (diameter less than 10 cm) from the top of the firebox. Replace any
eroded stones with larger, intact heater stones.
Heater generates odour
- A hot heater may intensify the odours mixed in the air; however, these do not originate from the
sauna or the heater. Examples include paints, glues, heating oils, spices.
Effect of heating on the sauna room
- Darkening of the wood surfaces due to the ashes, stone chippings and metal flakes from the heater
is normal. For this reason, we recommend that dark floor coatings and seam materials be used.
- Darkening can be intensified by direct sunlight, heat radiated by the heater to the wall surfaces,
protective materials intended for wall surfaces (poorly heat-resistant), fine stone aggregates
crumbling from stones, and smoke which enters the sauna when adding firewood, for example.
- When the installation instructions provided by the manufacturer are followed, the heater does not
cause the inflammable materials of the sauna room to become dangerously hot.

Heater maintenance history
We recommend changing the heater stones at one-year intervals.
Date Procedure
VTT-S-01932-15
Mondex Oy
15
EN 15821:2010
Multi-ring sauna stoves red by natural wood logs for space
heating in residential buildings
Mondex Klapi
Fire safety: (Ignition, re risk) Approved
- including the declared
safety distance to
combustible materials:
In the rear
To the sides
To the ceiling
250 mm
250 mm
1250 mm
Combustion emissions Approved
Surface temperature Approved
Release of hazardous substances NPD
Cleanability Approved
Flue gas temperature 379 °C
Mechanical strength Approved
Rated power and eciency, stated
- carbon monoxide emissions with 13 %
oxygen concentration (O2)
Approved
(0.51%)
- overall eciency Approved (71%)
- ue duct draught 12 Pa
- rated power 13 kW
- fuel increases 4.0 kg + 3.0 kg
2.5 kg
= 9.5 kg
Durability Approved
Technical support: info@mondex.fi
Premec Oy
Kettukallionkatu 4
84100 Ylivieska, Finland
info@mondex.fi
www.mondex.fi
Table of contents
Other MONDEX Heater manuals