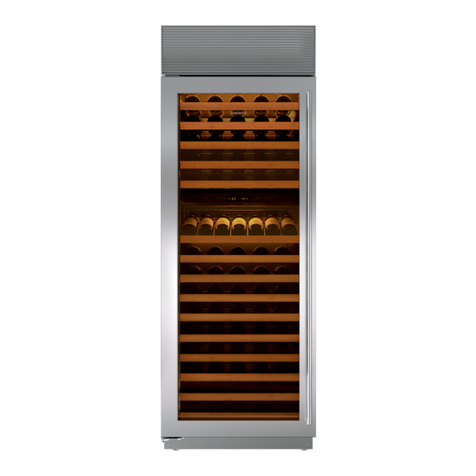
Monogram ZDWI240HII User manual

OWNER'S
MANUAL
Wine Reserve
MONOGRAM.COM

249-1000737
MODEL INFORMATION
WRITE DOWN THE MODEL AND SERIAL NUMBERS
These will be on a label on the ceiling inside the bar
refrigerator with icemaker
Use these numbers in any correspondence or service calls
concerning your appliance.
Please write these numbers here:
Model Number
Serial Number
MODEL NUMBERS
ZDWI240HII, ZDWR240NBS
TABLE OF CONTENTS
MODEL INFORMATION.....................................................................................2
CONSUMER SUPPORT.....................................................................................3
SAFETY INFORMATION ....................................................................................4
CONTROLS AND FEATURES................................................................................8
SABBATH MODE.........................................................................................11
CARE AND CLEANING ....................................................................................12
TROUBLESHOOTING .....................................................................................14
LIMITED WARRANTY .....................................................................................17

49-1000737 3
CONSUMER SUPPORT
MONOGRAM WEBSITE
Have a question or need assistance with your appliance? Try the Monogram website 24 hours a day, any day of the year! You can
also shop for more great Monogram products and take advantage of all our on-line support services designed for your convenience.
In the US: monogram.com
In Canada: monogram.ca
REGISTER YOUR APPLIANCE
Register your new appliance on-line at your convenience! Timely product registration will allow for enhanced communication and
prompt service under the terms of your warranty, should the need arise. You may also mail in the pre-printed registration card included
in the packing material. In the US: monogram.com/register
In Canada: Prodsupport.mabe.ca/crm/Products/ProductRegistration.aspx
SCHEDULE SERVICE
Expert Monogram repair service is only one step away from your door. Get on-line and schedule your service at your convenience any
day of the year.
In the US: monogram.com
In Canada: monogram.ca
REMOTE CONNECTIVITY
For assistance with wireless network connectivity (for models with remote enable),
visit our website at monogram.com/connect in the US only.
PARTS AND ACCESSORIES
Individuals qualified to service their own appliances can have parts or accessories sent directly to their homes
(VISA, MasterCard and Discover cards are accepted). Order on-line today 24 hours every day.
In the US: monogram.com/use-and-care/parts
Instructions contained in this manual cover procedures to be performed by any user. Other servicing generally should be
referred to qualified service personnel. Caution must be exercised, since improper servicing may cause unsafe operation.
Customers in Canada should consult the nearest MC Commercial service center or visit our website at monogram.ca.
CONTACT US
If you are not satisfied with the service you receive from Monogram, contact us on our website with all the details including your phone
number, or write to:
In the US: General Manager, Customer Relations | Monogram Appliances, Appliance Park | Louisville, KY 40225
monogram.com/contact

449-1000737
CAUTION To reduce the risk of injury when using your refrigerator, follow these basic safety
precautions.
Ŷ 'RQRWFOHDQJODVVVKHOYHVRUFRYHUVZLWKZDUPZDWHU
when they are cold. Glass shelves and covers may
break if exposed to sudden temperature changes
or impact, such as bumping or dropping. Tempered
glass is designed to shatter into many small pieces if it
breaks.
Ŷ Keep fingers out of the “pinch point” areas;
clearances between the doors and between the doors
and cabinet are necessarily small. Be careful closing
doors when children are in the area.
Ŷ This unit is designed for storing and cooling
beverages. Do not store perishable foods in this unit.
READ AND SAVE THESE INSTRUCTIONS
WARNING To reduce the risk of fire, explosion, electric shock, or injury when using your refrigerator,
follow these basic safety precautions:
Ŷ 8VHWKLVDSSOLDQFHRQO\IRULWVLQWHQGHGSXUSRVHDV
described in this Owner’s Manual.
Ŷ 7KLVUHIULJHUDWRUPXVWEHSURSHUO\LQVWDOOHGDQGORFDWHG
in accordance with the Installation Instructions before it
is used.
Ŷ 8QSOXJWKHUHIULJHUDWRUEHIRUHPDNLQJUHSDLUV
replacing a light bulb, or cleaning.
NOTE: Power to the refrigerator cannot be
disconnected by any setting on the control panel.
NOTE: Repairs must be performed by a qualified
Service Professional.
Ŷ 5HSODFHDOOSDUWVDQGSDQHOVEHIRUHRSHUDWLQJ
Ŷ .HHSIODPPDEOHPDWHULDOVDQGYDSRUVDZD\IURPWKH
appliance.
Ŷ 'RQRWVWRUHH[SORVLYHVXEVWDQFHVVXFKDVDHURVRO
cans with a flammable propellant in this appliance.
Ŷ 'RQRWXVHDQH[WHQVLRQFRUG
Ŷ 7RSUHYHQWVXIIRFDWLRQDQGHQWUDSPHQWKD]DUGVWR
FKLOGUHQUHPRYHWKHIUHVKIRRGDQGIUHH]HUGRRUVIURP
any refrigerator before disposing of it or discontinuing
its use.
Ŷ 7RDYRLGVHULRXVLQMXU\RUGHDWKFKLOGUHQVKRXOGQRW
stand on, or play in or with the appliance.
Ŷ &KLOGUHQDQGSHUVRQVZLWKUHGXFHGSK\VLFDOVHQVRU\
or mental capabilities or lack of experience and
knowledge can use this appliance only if they are
supervised or have been given instructions on safe
XVHDQGXQGHUVWDQGWKHKD]DUGVLQYROYHG
Ŷ 7KLVDSSOLDQFHLVLQWHQGHGWREHXVHGLQKRXVHKROG
and similar applications such as: staff kitchen areas in
shops, offices and other working environments; farm
houses; by clients in hotels, motels, bed
& breakfast and other residential environments;
catering and similar non-retail applications.
Ŷ 'RQRWDSSO\KDUVKFOHDQHUVWRWKHUHIULJHUDWRU
Certain cleaners will damage plastic, which may cause
parts such as the door or door handles to detach
unexpectedly. See the Care and Cleaning section for
detailed instructions.
IMPORTANT SAFETY INFORMATION
READ ALL INSTRUCTIONS BEFORE USING THE APPLIANCE
WARNING FIRE OR EXPLOSION HAZARD Flammable Refrigerant
This appliance contains isobutane refrigerant, also
known as R600a, a natural gas with high environmental
compatibility. However, it is also combustible. Adhere
to the warnings below to reduce the risk of injury or
property damage.
1. When handling, installing and operating the appliance,
care should be taken to avoid damage to the refrigerant
tubing.
2. 6HUYLFHVKDOORQO\EHSHUIRUPHGE\DXWKRUL]HGVHUYLFH
SHUVRQQHO8VHRQO\PDQXIDFWXUHUDXWKRUL]HGVHUYLFHSDUWV
3. Dispose of refrigerator in accordance with the Federal
and Local Regulations. The flammable refrigerant and
insulation material used in this product require special
disposal procedures. Contact your local authorities for the
environmentally safe disposal of your refrigerator.
4. Keep ventilation openings in the appliance enclosures or
in the built-in structure clear of obstruction.
5. To remove frost, scrape with a plastic or wood spatula or
scraper. Do not use an ice pick or a metal or sharp-edged
instrument as it may puncture the appliance liner and then
the flammable refrigerant tubing behind it.
6. Do not use electrical appliances inside the food storage
compartment of the appliance.
7. Do not use any electrical device to defrost your appliance.
8. Do not damage the refrigerant circuit.

49-1000737 5
WARNING Electrical Shock Hazard
Do not, under any circumstances, cut or remove
the third (ground) prong from the power cord. For
personal safety, this appliance must be properly
grounded.
The power cord of this appliance is equipped with a
3-prong (grounding) plug which mates with a standard
SURQJJURXQGLQJZDOORXWOHWWRPLQLPL]HWKHSRVVLELOLW\
RIHOHFWULFVKRFNKD]DUGIURPWKLVDSSOLDQFH
Have the wall outlet and circuit checked by a qualified
electrician to make sure the outlet is properly grounded.
Where a standard 2-prong wall outlet is encountered, it
is your personal responsibility and obligation to have it
replaced with a properly grounded 3-prong wall outlet.
The appliance should always be plugged into its own
individual electrical outlet which has a voltage rating
that matches the rating plate. This provides the best
performance and also prevents overloading house wiring
FLUFXLWVZKLFKFRXOGFDXVHDILUHKD]DUGIURPRYHUKHDWHG
wires.
Never unplug an appliance by pulling on the power cord.
Always grip the plug firmly and pull straight out from the
outlet.
Immediately discontinue use of a damaged supply cord.
If the supply cord is damaged, it must be replaced by a
TXDOLILHGVHUYLFHSURIHVVLRQDOZLWKDQDXWKRUL]HGVHUYLFH
part from the manufacturer.
When moving the appliance, be careful not to roll over or
damage the power cord.
READ AND SAVE THESE INSTRUCTIONS
CONNECTING ELECTRICITY
PROPER DISPOSAL OF YOUR OLD APPLIANCE
WARNING SUFFOCATION AND ENTRAPMENT HAZARD
Failure to follow these disposal instructions can result in death or serious injury
IMPORTANT: Child entrapment and suffocation are not
problems of the past. Junked or abandoned refrigerator/
IUHH]HUVDUHVWLOOGDQJHURXVHYHQLIWKH\ZLOOVLWIRU³MXVWD
few days.” If you are getting rid of your old refrigerator/
IUHH]HUSOHDVHIROORZWKHLQVWUXFWLRQVEHORZWRKHOS
prevent accidents.
Before You Throw Away Your Old Appliance
Ŷ7DNHRIIWKHGRRU
ŶLeave the shelves in place so that children may not
easily climb inside.
IMPORTANT SAFETY INFORMATION
READ ALL INSTRUCTIONS BEFORE USING THE APPLIANCE
WARNING FIRE OR EXPLOSION HAZARD
Keep flammable materials and vapors away from refrigerator. Failure to do so can result in fire, explosion, or death.
Refrigerant and Foam Disposal:
Dispose of appliance in accordance with Federal and Local Regulations. Flammable refrigerant and insulation
material used require special disposal procedures. Contact your local authorities for the environmentally safe disposal
of your appliance.

649-1000737
LEA Y GUARDE ESTAS INSTRUCCIONES
ATTENTION Pour réduire le risque de blessures lorsque vous utilisez votre réfrigérateurde , veuillez suivre ces
consignes de sécurité.
Ŷ 1HQHWWR\H]SDVOHVFOD\HWWHVRXOHVFRXYHUFOHVHQYHUUH
avec de l’eau tiède quand ceux-ci sont froids. Les clayettes
et couvercles en verre peuvent se casser s’ils sont exposés
à des changements soudains de température ou si vous les
FRJQH]RXOHVIDLWHVWRPEHU/HYHUUHWUHPSpHVWFRQoXSRXU
se briser en petits morceaux en cas de casse
Ŷ eORLJQH]OHVGRLJWVGHVSDUWLHVGXFRQJpODWHXURO¶RQ
peut facilement se pincer : les espaces entre les portes,
et entre les portes et les placards sont toujours étroits.
6R\H]SUXGHQWORUVTXHYRXVIHUPH]OHVSRUWHVHQSUpVHQFH
d’enfants.
Ŷ &HWDSSDUHLOPpQDJHUHVWFRQoXSRXUFRQVHUYHUHWUDIUDvFKLU
GHVERLVVRQV1HPHWWH]SDVGHELHQVSHULVVDEOHVGDQVFHW
appareil ménager.
AVERTISSEMENT 3RXUUpGXLUHOHULVTXHG¶LQFHQGLHG¶H[SORVLRQGHFKRFpOHFWULTXHRXGHEOHVVXUHVORUVTXHYRXVXWLOLVH]
YRWUHUpIULJpUDWHXUYHXLOOH]VXLYUHFHVFRQVLJQHVGHVpFXULWp
Ŷ 1¶XWLOLVH]O¶DSSDUHLOTXHSRXUVRQXVDJHSUpYXFRPPHGpFULW
dans le présent manuel.
Ŷ &HUpIULJpUDWHXUGRLWrWUHFRUUHFWHPHQWLQVWDOOpFRQIRUPpPHQW
aux instructions d'installation avant toute utilisation.
Ŷ 'pEUDQFKH]OHUpIULJpUDWHXUDYDQWG¶HIIHFWXHUXQHUpSDUDWLRQ
de remplacer une ampoule ou de le nettoyer.
Remarque :/¶DOLPHQWDWLRQGXUpIULJpUDWHXUQHSHXWrWUH
déconnectée par aucune des fonctions sur le panneau de
commande.
Remarque :/HVUpSDUDWLRQVGRLYHQWrWUHHIIHFWXpHVSDUXQ
professionnel qualifié.
Ŷ 5HPHWWH]WRXWHVOHVSLqFHVHWSDQQHDX[HQSODFHDYDQW
d’utiliser l’appareil.
Ŷ &RQVHUYH]OHVPDWpULDX[HWYDSHXUVLQIODPPDEOHVjO¶pFDUW
de votre réfrigérateur.
Ŷ 1¶HQWUHSRVH]SDVGDQVFHWpOHFWURPpQDJHUGHVVXEVWDQFHV
explosives telles que des bombes aérosols qui contiennent
XQJD]SURSXOVHXU
Ŷ 1¶XWLOLVH]SDVXQFRUGRQGHUDOORQJH
Ŷ $ILQGHSUpYHQLUOHVULVTXHVG¶DVSK\[LHHWG¶HQIHUPHPHQWGHV
HQIDQWVHQOHYH]OHVSRUWHVGHVFRPSDUWLPHQWVUpIULJpUDWHXU
et congélateur avant de mettre le réfrigérateur au rebut ou
d’en cesser l’usage.
Ŷ Afin de prévenir les accidents graves ou la mort, les enfants
ne doivent pas se tenir ni jouer dans ou sur l’électroménager.
Ŷ /HVHQIDQWVHWOHVSHUVRQQHVGRQWOHVFDSDFLWpVVRQWUpGXLWHV
sur le plan physique, sensoriel ou mental, ou qui manquent
d’expérience ou de connaissances, peuvent utiliser cet
électroménager seulement si elles sont surveillées ou ont
UHoXHVGHVFRQVLJQHVGHVpFXULWpVXUVRQXVDJHHWOHV
risques y sont associés.
Ŷ &HWpOHFWURPpQDJHUHVWFRQoXSRXUXQHXWLOLVDWLRQ
domestique et applications similaires : salle du personnel
dans une usine, un bureau ou d’autres lieux de travail;
PDLVRQGHIHUPHFOLHQWVGDQVXQK{WHOXQPRWHOXQJvWH
touristique et d’autres lieux résidentiels; approvisionnement
et applications similaires non reliées au commerce de détail.
Ŷ 1¶DSSOLTXH]SDVGHQHWWR\DQWVFRUURVLIVVXUOHUpIULJpUDWHXU
Certains nettoyants endommagent le plastique et peuvent
ainsi causer le détachement inopiné de pièces telles que
SRUWHRXSRLJQpHVGHSRUWH9R\H]ODVHFWLRQ(QWUHWLHQHW
nettoyage pour des instructions détaillées.
AVERTISSEMENT RISQUE D’INCENDIE OU D’EXPLOSION Réfrigérant inflammable
Cet appareil contient un gaz réfrigérant avec isobutane aussi connu sous R600a, un gaz naturel à compatibilité élevée
avec l’environnement. Il s’agit cependant d’un combustible. Observez les consignes de sécurité ci-dessous afin de réduire
le risque de blessure ou de dommage à la propriété.
1. Lors de la manipulation, de l’installation et de l’utilisation de
FHWDSSDUHLOSUHQH]VRLQGHQHSDVHQGRPPDJHUODWXEXOXUH
du réfrigérant.
2./¶HQWUHWLHQRXODUpSDUDWLRQGRLYHQWrWUHHIIHFWXpVSDUXQ
SHUVRQQHOGHVHUYLFHDXWRULVp8WLOLVH]VHXOHPHQWGHVSLqFHV
de rechange autorisées par le fabricant.
3.0HWWH]OHUpIULJpUDWHXUDXUHEXWFRQIRUPpPHQWDX[
réglementations fédérales et locales. /HJD]UpIULJpUDQW
inflammable et les matériaux d’isolation utilisés dans
ce produit requièrent des procédures de mise au rebut
spéciales.&RPPXQLTXH]DYHFOHVDXWRULWpVORFDOHV
compétentes pour la mise au rebut de votre réfrigérateur
sans danger pour l’environnement.
4.1¶REVWUXH]SDVOHVRULILFHVGHYHQWLODWLRQGDQVOHVHQFHLQWHV
ou la structure d’encastrement de l’appareil.
5.3RXUHQOHYHUOHJLYUHJUDWWH]jO¶DLGHG¶XQJUDWWRLURXG¶XQH
spatule en plastique ou en bois. 1¶XWLOLVH]SDVGHSLFjJODFH
ou un instrument métallique à bord tranchant pour éviter de
perforer la cuve interne du électroménager et la tubulure du
JD]UpIULJpUDQWGHUULqUHFHWWHGHUQLqUH
6.1¶XWLOLVH]SDVG¶DSSDUHLOVpOHFWULTXHVGDQVOHFRPSDUWLPHQWGH
rangement des aliments de cet appareil.
7.1¶XWLOLVH]DXFXQDSSDUHLOpOHFWULTXHSRXUGpJLYUHUYRWUH
électroménager.
8. 1¶HQGRPPDJH]SDVOHFLUFXLWGXUpIULJpUDQW
RENSEIGNEMENTS IMPORTANTS CONCERNANT LA SÉCURITÉ
LISEZ TOUTES LES INSTRUCTIONS AVANT D’UTILISER LE RÉFRIGÉRATEUR
49-1000737 7
LEA Y GUARDE ESTAS INSTRUCCIONES
AVERTISSEMENT Risque de choc électrique
Ne coupez ni retirez en aucun cas la troisième broche (mise
à la terre) de la fiche du cordon d’alimentation. Pour votre
sécurité, cet appareil doit être correctement mis à la terre.
Le cordon d’alimentation de cet appareil est muni d’une fiche à
3 broches (mise à la terre) qui se branche dans une prise mural
ordinaire à 3 alvéoles (mise à la terre) pour réduire au minimum
les risques du chocs électriques.
Faites examiner la prise de courant et le circuit par un
électricien qualifié pour vous assurer que la prise est
correctement mise à la terre.
Si la prise murale est du type standard à 2 alvéoles, il vous
incombe de la faire remplacer par une prise à 3 alvéoles
correctement mise à la terre.
/HDSSDUHLOGRLWWRXMRXUVrWUHEUDQFKpGDQVVDSURSUHSULVHGH
courant, dont la tension nominale est identique à celle indiquée
sur la plaque signalétique.
Cette précaution est recommandée pour garantir un rendement
optimum et éviter une surcharge des circuits électriques de
la résidence, ce qui pourrait créer un risque d’incendie par
surschauffe des fils.
1HGpEUDQFKH]MDPDLVO¶DSSDUHLOHQWLUDQWOHFRUGRQ
G¶DOLPHQWDWLRQ6DLVLVVH]IHUPHPHQWODILFKHGXFRUGRQHWWLUH]
droit pour la retirer de la prise.
5pSDUH]RXUHPSODFH]LPPpGLDWHPHQWWRXWFRUGRQpOHFWULTXH
XVpRXHQGRPPDJp1¶XWLOLVH]SDVXQFRUGRQILVVXUpRX
présentant des dommages dus aux frottements soit sur sa
longueur ou aux extrémités.
/RUVTXHYRXVGpSODFH]O¶DSSDUHLOGXPXUIDLWHVDWWHQWLRQGHQH
pas la faire rouler sur le cordon d’alimentation afin de ne pas
l’endommager.
BRANCHEMENTS ÉLECTRIQUES
AVERTISSEMENT RISQUE DE SUFFOQUER OU D’Y ÊTRE EMPRISONNÉ
/HQRQUHVSHFWGHFHVLQVWUXFWLRQVGpOLPLQDWLRQSHXWHQWUDvQHUODPRUWRXGHVEOHVVXUHVJUDYHV
IMPORTANT: Les enfants pris au piège ou morts d’asphyxie
sont toujours d’actualité. Les réfrigérateurs et congélateurs
DEDQGRQQpVVRQWWRXMRXUVDXVVLGDQJHUHX[PrPHVLRQ
n’attend que «quelques jours» pour s’en débarrasser. Si vous
QHJDUGH]SDVYRWUHDQFLHQUpIULJpUDWHXURXFRQJpODWHXU
YHXLOOH]VXLYUHOHVGLUHFWLYHVFLGHVVRXVDILQGHSUpYHQLUOHV
accidents.
Avant de vous débarasser de votre vieux appareil de
réfrigération :
'pPRQWH]OHVSRUWHV
/DLVVH]OHVFOD\HWWHVHQSODFHDILQG¶HPSrFKHUOHVHQIDQWVGH
grimper à l’intérieur.
AVERTISSEMENT RISQUE D’INCENDIE OU D’EXPLOSION
&RQVHUYH]OHVPDWpULDX[HWYDSHXUVLQIODPPDEOHVjO¶pFDUWGHYRWUHUpIULJpUDWHXU8QHH[SORVLRQXQLQFHQGLHYRLUHODPRUWSRXUUDLW
en résulter.
RENSEIGNEMENTS IMPORTANTS CONCERNANT LA SÉCURITÉ
LISEZ TOUTES LES INSTRUCTIONS AVANT D’UTILISER LE RÉFRIGÉRATEUR
Mise au rebut des produits réfrigérants et en mousse
0HWWH]O¶pOHFWURPpQDJHUDXUHEXWFRQIRUPpPHQWjODUpJOHPHQWDWLRQIpGpUDOHHWORFDOHLes réfrigérants inflammables et les
matériaux d’isolation utilisés nécessitent des procédures d’élimination spéciales&RPPXQLTXH]DYHFOHVDXWRULWpVORFDOHV
SRXUFRQQDvWUHODIDoRQGHPHWWUHYRWUHpOHFWURPpQDJHUDXUHEXWTXLVRLWUHVSHFWXHXVHGHO¶HQYLURQQHPHQW

849-1000737
Temperature Control
The temperature range of the wine reserve is from 40°F
(4.4°C) to 65°F (18.3°C).
Do not install the wine reserve where the temperature will
go below 55°F (12.8°C) or above 90°F (32.2°C).
The temperature display shows the actual temperature of
the wine reserve. The actual temperature may vary slightly
from the set temperature based on factors such as door
openings, amount of wine and room temperature. After
making adjustments, allow 12 to 24 hours for the wine
reserve to reach the temperature you have set and before
making any further adjustments. The factory setting is the
RED WINE setting (55°F [12.8°C]).
Note: On all three temperature selections, the light beside
the pad will remain lit, indicating the selection made.
The RED WINE setting will provide a storage temperature
of approximately 55ºF (12.8°C), which is optimum for the
storage of red wine. Press the RED WINE pad to display
55°F (12.8°C). Several seconds after the RED WINE
pad is pressed, the actual temperature will be displayed
while the wine reserve temperature moves toward 55°F
(12.8°C).
The WHITE WINE setting will provide a storage
temperature of approximately 45ºF (7.2°C), which is
optimum for white wine. Press the WHITE WINE pad
to display 45°F (7.2°C). Several seconds after the
WHITE WINE pad is pressed, the actual temperature will
be displayed while the wine reserve temperature moves
toward 45°F (7.2°C).
The CUSTOM TEMP. setting will provide a storage
temperature range of 40°F (4.4°C) to 65°F (18.3°C).. This
VHWWLQJSURYLGHVWKHDELOLW\WRFXVWRPL]HWKHWHPSHUDWXUH
to the optimum setting for the particular wine. To change
the temperature setting, press and hold the CUSTOM
TEMP. pad until the display begins to flash the set
temperature. Then press the +or –pads until you reach
the desired set temperature. Once you reach the desired
temperature, stop pressing the pads. After several
seconds, the display will return to the actual temperature.
The actual temperature will be displayed while the wine
reserve moves toward the set temperature.
In general, temperatures at the bottom of the cabinet will
be cooler than temperatures at the top of the cabinet.
Position your wine inventory accordingly (i.e., white wines
LQWKHFRROHU]RQHVDQGUHGZLQHVLQWKHZDUPHU]RQHV
Child control lockout
This child control lockout feature prevents unwanted
changes to your temperature settings.
After the desired temperature is set, the temperature can
be locked. To lock, press both the +and –pads at the
same time for five seconds. To unlock, press both +and –
pads for five seconds.
CUSTOM
TEMP.
PRESS +/- TO SET
WHITE
WINE
RED
WINE
CONTROLS AND FEATURES

49-1000737 9
Interior light and light pad
The interior light makes it easy to view your wine labels
and enhances the display of your collection.
When the light pad is pressed and the word ON is
displayed, the light will remain on for one hour before
automatically turning off. When the light pad is pressed
and the word OFF is displayed, the light will come on only
when the door is opened.
For best viewing, do not store a bottle on the top shelf
directly under the light. Remember to turn off the light
when it is no longer needed.
Removing full extension drawers
All of the full extension drawers pull out so bottles can be
conveniently added or removed.
Any of the full extension drawers can be removed to store
larger bottles.
To remove:
1. Pull the full extension drawer out to the STOP position.
2. Push the tab on right drawer guide down while pulling
the tab on left guide up, and pull the drawer out.
To replace:
1. Push the drawer slide arm back into the unit.
2. Pull the small slide sub-assembly completely forward.
3. Insert the sides of the drawer back into the guides.
4. Push until the tabs lock into place.
Tab (push tab down
on right drawer
guide, pull tab up on
left drawer guide)
NOTE: Make sure the tabs on the full
extension drawer guides are fully engaged
before loading any bottles. Pull the drawers
out all the way to the STOP position and push
back in several times to make sure locking
tabs are properly engaged.
To replace, push drawer
slide arm back into unit
Pull small slide sub-
assembly completely
forward
Appearance may vary
Sub-assembly Sub-assembly
LIGHT
CONTROLS AND FEATURES

10 49-1000737
Insert Wine Bottles
The top five full extension drawers each hold eight bottles,
two deep with the necks alternating front to back or nine
bottles, alternating with necks pointing inward.
The bottom two full extension drawers hold six bottles
each and are loaded with necks facing the rear. Tall bottles
should not be loaded on the bottom drawer because
they may prevent the door from closing.
8 bottle arrangement 9 bottle arrangement Bottom drawer
Loading Tips and Suggestions
•The bottles on the top full extension drawer, directly under
the light, will be exposed to a slightly higher temperature
when the light is on. Position your wines accordingly
and remember to turn off the light when it is no longer
needed.
•Keep wines that you plan to use for everyday drinking
and entertaining on the front half of the full extension
drawers where labels are completely visible. Place wines
for aging or longer term storage in the rear.
•Do not allow children to climb, stand or hang on the wine
reserve full extension drawers. They could seriously
injure themselves and possibly cause damage to the
wine reserve.
•In general, temperatures at the bottom of the cabinet will
be cooler than temperatures at the top of the cabinet.
•Position your wine inventory accordingly (i.e., white wines
LQWKHFRROHU]RQHVDQGUHGZLQHVLQWKHZDUPHU]RQHV
Wood Drawer Fronts
The full extension drawer fronts on the wine reserve are
unfinished cherry wood. During use, oil from hands may
accumulate and stain the wood.
•The drawer fronts may be stained and sealed to match
adjacent cabinetry. The tinted glass will make the stained
wood appear darker. A true color match can be seen
only when the door is opened.
•Apply the stain and sealer according to
the manufacturer’s instructions. To avoid unpleasant
odor, keep the door open to ventilate and allow the stain/
sealer to dry completely before using the product.
NOTE: Natural wood may vary slightly in grain and color.
CONTROLS AND FEATURES

49-1000737 11
Sabbath Mode
The Sabbath Mode was designed for use on the Jewish
Sabbath and Holidays. The Sabbath Mode feature makes
it possible for observant Jews to use the wine reserve
during the duration of the holiday.
The Sabbath Mode feature can be set to override typical
reactions caused by your interaction with the wine reserve.
While in the Sabbath Mode, your appliance will still
operate. However, it will not respond to your actions.
While in the Sabbath Mode, you may notice the fan
running when the door is opened, however, this is not a
result of your actions. The compressor and fan will operate
at predetermined times.
ON/OFF - To activate the Sabbath Mode, press and hold
down the RED WINE and LIGHT buttons on the control
panel for at least 7 seconds. SAb will be displayed on the
control. SAb will remain in the display and all the control
VHWWLQJVZLOOEHIUR]HQDQGVWD\RQWKHODVWPRGHEHIRUH
entering Sabbath Mode. Controls and lights will not work
until the RED WINE and LIGHT buttons are held again for
VHFRQGV7KHGLVSOD\ZLOOVKRZ³RXW´IRUVHFRQGDQG
then resume the last operating mode.
SABBATH MODE

12 49-1000737
Cleaning the Inside
Unplug the wine reserve before cleaning.
If the unit is in a built-in location, remove power at the
circuit breaker. Use a slightly damp cloth or sponge when
cleaning around switches, lights or controls.
Use warm water and baking soda solution— about a
tablespoon (15 ml) of baking soda to a quart (1 liter) of
ZDWHU7KLVERWKFOHDQVDQGQHXWUDOL]HVRGRUV7KRURXJKO\
rinse and
wipe dry.
Other parts of the wine reserve center unit—including the
door gaskets, and full extension drawers—can be cleaned
the same way.
WARNING 5LVNRI¿UHRUH[SORVLRQ
Flammable refrigerant used.
To remove frost, scrape with a plastic or wood spatula or
scraper. Do not use an ice pick or a metal or sharp-edged
instrument as it may puncture the appliance liner and then
the flammable refrigerant tubing behind it.
Do not use any electrical device to defrost your appliance.
AVERTISSEMENT Risque d’incendie et d’explosion.
&RQWLHQWXQÀXLGHIULJRULJqQHLQÀDPPDEOH
eOLPLQH]OHJLYUHHQJUDWWDQWDYHFXQHVSDWXOHHQSODVWLTXH
ou en bois ou un racloir. 1¶XWLOLVH]SDVGHSLFjJODFHRXXQ
instrument métallique à bord tranchant pour éviter de perforer la
cuve interne du électroménagerHWODWXEXOXUHGXJD]UpIULJpUDQW
derrière cette dernière.
1¶XWLOLVH]DXFXQDSSDUHLOpOHFWULTXHSRXUHIIHFWXHUOHGpJLYUDJHGH
votre congélateur.
Drain Hole
Periodically check the drain hole and channel for any
debris. If the drain is blocked, condensation will not drain
properly.
To check and clean the drain hole, remove the third and
fourth drawers (see instructions on Removing full extension
drawers). Sweep a damp cloth along the channel in the
back of the wine reserve. Use a finger to sweep away any
debris from the drain hole.
Drain hole
Appearance may vary
WARNING Electrical Shock Hazard.
Unplug the wine reserve before cleaning. If the unit is in a built-in location, remove power at the circuit breaker.
AVERTISSEMENT Risque de choc électrique.
Débranchez la réserve à vin avant le nettoyage. Si l’appareil est encastré, coupez le courant au disjoncteur.
CARE AND CLEANING
Cleaning the Outside
Directions for Cleaning Outside Surfaces, Door Handles, and Trim
DO USE DO NOT USE
Soft, clean cloth or sponge Abrasive cloths, scrubbing sponges (with or without soap),
scouring or steel wool pads
Mild detergent mixed with warm water
Approved stainless steel cleaners; Visit the Monogram
Appliances parts store for approved stainless steel
cleaners:
Monogram.com
Cleaners with oxalic acid such as Bar Keepers Friend Soft
Cleanser™ can be used to remove surface rust, tarnish and
small blemishes on stainless steel surfaces only
Abrasive powders or sprays
Window Sprays or Ammonia
Citrus or plant oil-based cleaners
Acidic or vinegar-based cleaners
Oven cleaners
Cleaners containing acetone (propanone)
Any cleaner with WARNING about plastic contact
NOTE: DO NOT allow stainless steel cleaner to come in contact with any plastic parts such as trim pieces, handle
hardware and liners. If unintentional contact of cleaners with plastic parts does occur, clean plastic part with a sponge
and mild detergent mixed with warm water.

49-1000737 13
Glass Door
Use a glass cleaner or mild soap and water and a soft
cloth to clean the glass door.
Do not use any abrasive powders.
CAUTION Do not clean glass shelves with warm
water when they are cold. Glass shelves may break if
exposed to sudden temperature changes or impact, such
as bumping or dropping. Tempered glass is designed to
shatter into many small pieces if it breaks.
ATTENTION 1HQHWWR\H]SDVOHVFOD\HWWHVHQ
verre avec de l’eau tiède quand ceux-ci sont froids. Les
clayettes en verre peuvent se casser s’ils sont exposés à
des changements soudains de température ou si vous les
FRJQH]RXOHVIDLWHVWRPEHU/HYHUUHWUHPSpHVWFRQoX
pour se briser en petits morceaux en cas de casse
Light Bulb Replacement
WARNING Electrical Shock Hazard.
Unplug the wine reserve before replacing the light
bulb. If the unit is in a built-in location, remove power
at the circuit breaker.
AVERTISSEMENT Risque de choc
électrique. Débranchez la réserve de vin avant de
remplacer l’ampoule. Si l’appareil est encastré, coupez
le courant au disjoncteur.
To remove the light shield, push in the tab on the left side
of the shield and lower it. Replace with a 15 watt appliance
bulb or 4.5 watt UL Listed LED Lamp or call 800.
GE.CARES (800.432.2737) during normal business hours
to order service parts.
In the Event of a Power Failure
If the power fails, open the door as infrequently as possible
to maintain the temperature. A gradual rise in temperature
should not have any adverse effect on the wine.
If it is extremely hot, you may want to move the wine to the
coolest location you can find until power is restored.
Preparing to move
Secure all loose items such as drawers by taping them
securely in place to prevent damage.
Be sure the wine reserve stays in an upright position
during moving.
Door Gasket
The vinyl gasket may be cleaned with mild soap and water,
a baking soda solution or
a mild scouring powder. Rinse well.
After cleaning the door gasket, apply a thin layer of paraffin
wax or petroleum jelly to the door gasket at the hinge side.
This helps keep the gasket from sticking and bending out
of shape.
CARE AND CLEANING

14 49-1000737
Newer appliances sound different from older appliances. Modern appliances have more features and use newer
technology.
Do you hear what I hear? These sounds are normal.
TROUBLESHOOTING
• You may hear clicking, cracking or popping sounds
when the appliance cools to the correct temperature or
immediately following defrost.
• The electronic control board may cause
a clicking sound when relays activate to control
appliance components.
• Expansion and contraction of cooling coils during and
after defrost can cause cracking or popping sounds.
• After an icemaking cycle, you may hear the ice cubes
dropping into the ice bucket.
7KHIORZRIUHIULJHUDQWWKURXJKWKHIUHH]HUFRROLQJFRLOV
may make a gurgling noise like boiling water.
• Water dropping on the defrost heater can cause a
VL]]OLQJSRSSLQJRUEX]]LQJVRXQGGXULQJWKHGHIURVW
cycle.
• A water dripping noise may occur during the defrost
cycle as ice melts from the evaporator and flows into
the drain pan.
• Closing the door may cause a gurgling sound due to
SUHVVXUHHTXDOL]DWLRQ
CLICKS, POPS,
CRACKS and CHIRPS
WATER SOUNDS
HUMMM...
WHOOSH...
• The new high efficiency compressor may run faster
and longer than your old appliance and you may hear
a high-pitched hum or pulsating sounds while it is
operating.
• Sometimes the appliance runs for an extended period,
especially when the doors are opened frequently.
• You may hear a whooshing sound when the doors
FORVH7KLVLVGXHWRSUHVVXUHHTXDOL]LQJZLWKLQWKH
appliance.
• The cabinet fan runs continuously except when the door
is opened.
• You may hear the fans spinning at
high speeds. This happens when the appliance is first
plugged in, when the door is opened frequently or when
a large amount of food is added to the appliance. The
fans help maintain desired temperatures.
• If the door is open for over 3 minutes, you may hear the
fans come on in order to cool the light bulbs.
• The fans change speeds in order to provide optimal
cooling and energy savings.

49-1000737 15
PROBLEM POSSIBLE CAUSE
APPLIANCE DOES NOT OPERATE • Appliance is so quiet that most of the time you will hear low or no operating
noise.
• Appliance may be in defrost cycle when compressor motor does not
operate for about 30 minutes.
• Controls are set to OFF. Press ON/OFF button on control panel.
• If interior light is not on, appliance may not be plugged in at electrical outlet.
Push the plug completely into the electrical outlet.
• The GFCI circuit breaker is tripped. Replace fuse or reset the breaker.
• The appliance is in showroom mode. Unplug it and plug it
back in.
VIBRATION OR RATTLING (Slight
vibration is normal.) • Adjust the leveling legs as shown in the Installation Instructions.
COMPRESSOR MOTOR OPERATES
FOR LONG PERIODS OR CYCLES
ON AND OFF FREQUENTLY
• Normal when appliance is first plugged in. Wait 24 hours for the appliance
to completely cool down.
• Often occurs when large amounts of beverages are placed in appliance.
This is normal.
• Door left open or package holding door open.
• Hot weather or frequent door openings. This is normal.
• Temperature control set at the coldest setting. See Temperature Control.
COMPARTMENT TOO WARM • Temperature control not set cold enough. See Temperature Control. Allow
24 hours for temperature to change.
• Warm weather or frequent door openings.
• Door left open for long time.
• Package may be holding door open.
• Thermistor may be blocked, which can affect the overall temperature. The
thermistor is located on the right-hand side, just above the third shelf.
APPLIANCE HAS ODOR • Interior needs cleaning. See Care and Cleaning.
• Keep open box of baking soda in appliance; replace every 3 months.
DOOR NOT CLOSING PROPERLY • Door gasket is sticking or folding over. Apply petroleum jelly or paraffin wax
to the face of the gasket.
• The door is hitting an internal component inside the appliance. Adjust
interior components to prevent interference.
MOISTURE FORMS ON OUTSIDE
OF APPLIANCE • Not unusual during periods of high humidity. If bothersome, wipe surface
dry; otherwise, moisture will evaporate in time.
• Door left open or package holding door open.
FROST OR MOISTURE COLLECTS
INSIDE • Too frequent or too long door openings.
• In humid weather, air carries moisture into appliance when door is opened.
• Temperature control set at coldest setting.
• Thermistor may be blocked, which can affect the overall temperature. The
thermistor is located on the right-hand side, just above the third shelf.
TROUBLESHOOTING

16 49-1000737
PROBLEM POSSIBLE CAUSE
INTERIOR LIGHT DOES
NOT WORK
• No power at outlet.
• Light bulb needs replacing. See Care and Cleaning.
• Controls are set to OFF. Press ON/OFF pad on control panel.
• The Sabbath Mode may be operating. Turn off Sabbath Mode.
HOT AIR FROM BOTTOM
OF APPLIANCE
• Normal air flow cools the motor. In the refrigeration process, it is normal that heat be
expelled in the area under the appliance. Some floor coverings are sensitive and will
even discolor at these safe and normal temperatures.
APPLIANCE NEVER
SHUTS OFF BUT
TEMPERATURES ARE OK
• Adaptive defrost keeps compressor running during door openings. This is normal.
The appliance will cycle off after the door remains closed for two hours.
• Normal operation in extreme temperatures.
ACTUAL TEMPERATURE
NOT EQUAL TO SET
TEMPERATURE
8QLWMXVWSOXJJHGLQ$OORZKRXUVIRUWKHV\VWHPWRVWDELOL]H
'RRURSHQIRUWRRORQJ$OORZKRXUVIRUWKHV\VWHPWRVWDELOL]H
• Warm contents added to appliance. Allow 24 hours for the system
'HIURVWF\FOHLVLQSURFHVV$OORZKRXUVIRUWKHV\VWHPWRVWDELOL]H
7KHUPLVWRUPD\EHEORFNHGZKLFKFDQDႇHFWWKHRYHUDOOWHPSHUDWXUH7KHWKHUPLVWRU
is located on the right hand side just above the third shelf.
TEMPERATURE WILL NOT
ADJUST
• Temperature may be in lockout mode. Press both +and –pads for 5 seconds to
unlock the temperature.
• Thermistor may be blocked, which can affect the overall temperature. The thermistor
is located on the right-hand side, just above the third shelf.
TROUBLESHOOTING

49-1000737 17
MONOGRAM LIMITED WARRANTY
• Service trips to your home to teach you how
to use the product.
• Replacement of house fuses or resetting of circuit breakers.
• Damage to the product caused by accident, fire, floods or acts
of God.
• Failure of the product if it is used for other than its intended
purpose or used commercially.
• Damage caused after delivery.
• Improper installation, delivery or maintenance.
If you have an installation problem, contact your dealer or
installer. You are responsible for providing adequate electrical,
plumbing and other connecting facilities.
• Replacement of the light bulbs, if included.
• Loss of food due to spoilage (in the USA only).
• Incidental or consequential damage caused by possible defects
with this appliance.
• Product not accessible to provide required service.
• Damage to finish, such as surface rust, tarnish, or small
blemishes not reported within 48 hours of delivery.
Monogram.com
$OOZDUUDQW\VHUYLFHLVSURYLGHGE\RXU)DFWRU\6HUYLFH&HQWHUVRUDQDXWKRUL]HG&XVWRPHU&DUH®technician. To schedule
service online, visit us at monogram.com/contact. In Canada, visit monogram.ca.
EXCLUSION OF IMPLIED WARRANTIES
Your sole and exclusive remedy is product repair as provided in this Limited Warranty. Any implied warranties, including the implied
warranties of merchantability or fitness for a particular purpose, are limited to one year or the shortest period allowed by law.
This limited warranty is extended to the original purchaser and any succeeding owner for products purchased for home use
ZLWKLQWKH86$,IWKHSURGXFWLVORFDWHGLQDQDUHDZKHUHVHUYLFHE\D0RQRJUDP$SSOLDQFHV$XWKRUL]HG6HUYLFHULVQRW
DYDLODEOH\RXPD\EHUHVSRQVLEOHIRUDWULSFKDUJHRU\RXPD\EHUHTXLUHGWREULQJWKHSURGXFWWRDQ$XWKRUL]HG0RQRJUDP
Appliances Service location for service. In Alaska, the limited warranty excludes the cost of shipping or service calls to your
home.
Some states do not allow the exclusion or limitation of incidental or consequential damages. This limited warranty gives
you specific legal rights, and you may also have other rights which vary from state to state. To know what your legal rights
are, consult your local or state consumer affairs office or your state’s Attorney General.
Warrantor: GE Appliances, aHaier company, Louisville KY,40225
Warrantor in Canada: MC Commercial, Burlington, ON, L7R 5B6
For the period of Monogram Appliances will replace
Limited two-year
warranty For two years from date of original purchase, we will provide, free of charge, parts and
service labor in your home to repair or replace any part of the unit that fails because of a
manufacturing defect.
Limited third through
fifth-year warranty For the third through fifth years from date of original purchase, we will provide, free of charge,
parts and service labor in your home to repair or replace any part of the sealed refrigerating
system (the compressor, condenser, evaporator and all connecting tubing) that fails because
of a manufacturing defect.
What Monogram will not cover:

18 49-1000737
NOTES

49-1000737 19
NOTES

49-1000737
07-23 GEA
Monogram.com
Printed in Serbia
Other manuals for ZDWI240HII
1
This manual suits for next models
2
Table of contents
Other Monogram Wine Cooler manuals

Monogram
Monogram ZDW24 User manual

Monogram
Monogram ZDWC240 User manual

Monogram
Monogram ZDBG240S User manual

Monogram
Monogram ZDWR240 User manual

Monogram
Monogram ZDWT240 User manual

Monogram
Monogram ZDWT240 User manual

Monogram
Monogram ZDW24 User manual

Monogram
Monogram ZDWG240 User manual

Monogram
Monogram ZDWC240NBS User manual

Monogram
Monogram ZDWR240 User manual