manuals.online logo
Brands
  1. Home
  2. •
  3. Brands
  4. •
  5. Morgan
  6. •
  7. Ventilation Hood
  8. •
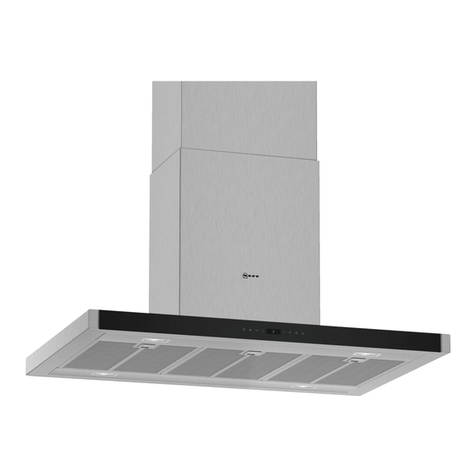
  9. Morgan MDH-921STOC User manual

Morgan MDH-921STOC User manual

USER MANUAL
Designer
Hood
MDH-921STOC
E-mail: electrical.appliance@dksh.com
www.morgan.my
Market Expansion
Services by
www.dksh.com.my
facebook.com/morganappliances
MCH-921STOC(IM)021115_Layo t 1 11/6/15 1:28 PM Page 1
3
IMPORTANT NOTES
Thank you for purchasing a quali y MORGAN range hood. We rus ha you will have a pleasan cooking
experience wi h your new produc . To guaran ee safe y and bes efficiency, please read his manual carefully
and keep a copy for fu ure reference.
ATTENTION
This user manual includes general instructions for the installation, use and maintenance of your range hood.
It will be extremely useful to know the operation of the appliance so that you will enjoy the benefits of it and assure you
the best results.
Keep this user manual handy.
SPECIFICATIONS
2
C O N T E N T S
3
3
4
5
5
6
7
IMPORTANT NOTES
SPECIFICATIONS
INSTALLATION
OPERATING INSTRUCTIONS
IMPORTANT
CONTROL PANEL
MAINTENANCE AND CLEANING
DIMENSIONS
WID H (CANOPY) 900mm
HEIGH (WI H CHIMNEY) 450+400mm
DEP H (CANOPY) 500mm
SPECIFICA IONS
MODEL MDH-921S OC
MA ERIAL Black Stainless Steel + Black empered
Glass
VOL AGE / FREQUENCY 240V~ 50Hz
RANSMISSION S YLE Single Motor
LED LIGH ING POWER (LAMP) 2 x 1.5W
CON ROL 3 Speed Digital ouch Switch
FIL ER 2 x Washable double Layers ower ype
Baffle Filter
MO OR SPEED (rpm) 3 Speed (H: 1300 Mid: 1100 Low: 950)
MO OR POWER 221W
EX RAC ION CAPACI Y 1300m³/hr
MCH-921STOC(IM)021115_Layo t 1 11/6/15 1:28 PM Page 2
5
OPERATING INSTRUCTIONS
4
INSTALLERS GUIDE
• The appliance must be installed by qualified professionals only.
• Before installing the range hood, ensure that the appliance is correctly preset for the local conditions (voltage and
power plug).
• For safety reasons, remove all packing materials (plastic bags, screws, metal strips etc.) and keep them away from the
reach of young children.
• Do not attempt to alter or modify the technical features of the range hood as this can pose a safety hazard. The
manufacturer will not responsible for eventual damages, due to failure to observe the above instructions.
• This range hood has been designed to be wall-mounted above a Gas stove/Hob. Before commencing installation,
consideration should be given to how the installation is to be carried out, and ensuring adequate space and
clearances above the Gas stove/Hob.
a) Position of the flue.
b) Availability of earthed power.
c) The mechanical strength of supporting structures.
• We will always supply the best quality materials and we are confident that you will be satisfied with our product.
INSTALLATION
1. Use an electrical drill a diameter of 8mm.
2. Locate the two screw holes for the mounting brackets. The screw holes must be perfectly horizontal, and the centre
hole must be aligned with the proposed centre of the range hood.
3. Drill the holes and insert the wall plugs.
4. Secure the wall bracket to the top two holes drilled in the previous step using the screws provided.
5. Rivet the flexible ventilation pipe to the cover with the screws to hang the main frame.
6. Install the flexible pipe. Ensure the pipe is kept in its natural state. Ensure the joint is air-proof. Minimize the number
of bends and elbows to maximize the efficiency of the appliance.
Notes:
• The wall shu er is no included in he car on.
• The range hood can be duc ed hrough a roof or hrough a wall.
INSTALLATION
FIRST TIME OPERATING INSTRUCTIONS
I is recommended o follow hese ins ruc ions before opera ing i for he firs ime:
1. Install the oil cup by inserting it from the back to the front.
2. Insert the power plug into the power supply. A beep will be heard when first switched on.
3. Press the power on. Press the lamp button lightly. Test to see if the lamp functions properly.
4. Press the lamp button to switch off.
5. Press the fan speed buttons to ensure that the motor functions properly.
IMPORTANT
Shu off power comple ely if he following abnormali ies are found during he above es :
1. Mainframe shakes
2. Inflated pipe becomes flexible
3. Motor makes an abnormal noise.
• Press the power switch to stop operations.
• Any repairs (including damage to main supply) should be repaired by an approved service technician. It is
IMP RTANT that only original parts should be used.
• Failure to follow the advice can affect the safety of your appliance.
IMPORTANT
1. Any installation work must be carried out by a qualified professional or competent person.
2. Install the side suction range hood on the wall above the Gas Stove/Hob firmly. Ensure a distance of at least 350mm
between the range hood and the Gas Stove/Hob. Install the top suction with curve glass. Ensure a distance of at least
700-900mm between the hood and hob.
3. Ensure that the ventilation pipe can reach the open air or enter into a cold air suction flue and check the joints are
airproof.
4. Earth the power supply (to be performed by a qualified electrician only).
5. The gas expelled from the range hood should not be discharged into the flue which is used to discharge the smoke
produced by burning coal gas or other fuels.
MCH-921STOC(IM)021115_Layo t 1 11/6/15 1:28 PM Page 3

7
MAINTENANCE & CLEANING
6
CONTROL PANEL
1. Clean the mainframe and the filters regularly.
2. There are two variations of inlet filters on these models. Both are removable by pulling the lever on the adage of the
filters and lifting them out of the slots which hold them.
3. Wash the filters in a dishwasher, or by hand using household dishwashing liquid and clean it with a soft brush.
4. Allow filters to dry thoroughly before reinstalling them.
5. When reinstalling, ensure the filters are inserted in their correct positions.
6. Wipe excess dirt on the mainframe with a wet cloth and mild detergent. Wipe dry using a clean towel.
7. Do not use abrasive cleaners or other harsh cleansing agents as these will damage the surface.
8. Commercial stainless steel cleaning products are available for cleaning stubborn stains.
9. Wash the grease filters on a regular basis. It is recommended to wear gloves during cleaning.
10. Empty the oil and wash it clear before the oil cup is full.
11. Empty excess oil when the oil reaches 2/3 inside the oil cup.
12. If the range hood is unused for a long period of time, unplug it from the power supply.
13. Ensure power is turned off when cleaning the range hood to prevent accidents.
FROM LEFT TO RIGHT KEYS:
K1 Power K2 +speed K3 -speed K4 Light
1. Connect the hood to electricity power, hood switch display zone will illuminate, and the buzzer will sound. After 5
seconds, the display light will be turned off and will be in standby mode.
2. K1 power: Press K1, the speed keys will be available. When the motor is running, press K1 and hold to select the delay
timer function. The timer can be adjusted from 0-99 minutes by pressing both K2 and K3 keys, either to fast add or
subtract selected times. After selecting the desired time, it will illuminate and enter into the delay timer mode.
Pressing K1 again will terminate the delay timer function.
3. K2 + speed: with power turned on, press K2 to increase the speed, from 00-F3 circularly.
4. K3 -speed: with power turned on, press K3 to decrease the speed, from 00-F3 circularly.
5. K4 Light: the light function works independently.
MCH-921STOC(IM)021115_Layo t 1 11/6/15 1:28 PM Page 4

Other Morgan Ventilation Hood manuals

Morgan MDH-922OC User manual

Morgan

Morgan MDH-922OC User manual

Morgan MDH-916 User manual

Morgan

Morgan MDH-916 User manual

Morgan MDH-PD60 User manual

Morgan

Morgan MDH-PD60 User manual

Morgan MDH-923STOC User manual

Morgan

Morgan MDH-923STOC User manual

Morgan MDH-930STOC User manual

Morgan

Morgan MDH-930STOC User manual

Morgan MCH-NC276(DM) User manual

Morgan

Morgan MCH-NC276(DM) User manual

Morgan MDH-996MHC User manual

Morgan

Morgan MDH-996MHC User manual

Morgan MDH-915ST User manual

Morgan

Morgan MDH-915ST User manual

Morgan MDH-936STHC User manual

Morgan

Morgan MDH-936STHC User manual

Morgan MDH-950ST User manual

Morgan

Morgan MDH-950ST User manual

Morgan MDH-912ST User manual

Morgan

Morgan MDH-912ST User manual

Popular Ventilation Hood manuals by other brands

Blanco BRS61X Instructions for the use and care and installation

Blanco

Blanco BRS61X Instructions for the use and care and installation

Blanco BRCE60X Use and care and installation instructions

Blanco

Blanco BRCE60X Use and care and installation instructions

Blanco BRU53X Instructions for the use and care and installation

Blanco

Blanco BRU53X Instructions for the use and care and installation

Zephyr Typhoon AK2100 Use, care and installation guide

Zephyr

Zephyr Typhoon AK2100 Use, care and installation guide

Zephyr Ombra ZOM-E30ABS Use, care and installation guide

Zephyr

Zephyr Ombra ZOM-E30ABS Use, care and installation guide

Electrolux DVK5510SW instruction manual

Electrolux

Electrolux DVK5510SW instruction manual

BOMANN DU 7605 G instruction manual

BOMANN

BOMANN DU 7605 G instruction manual

KitchenAid 30" Freestanding Range Installation Instructions and Use & Care Guide

KitchenAid

KitchenAid 30" Freestanding Range Installation Instructions and Use & Care Guide

Siemens LU10153EU instruction manual

Siemens

Siemens LU10153EU instruction manual

Exquisit FKH62-3BL instruction manual

Exquisit

Exquisit FKH62-3BL instruction manual

Smeg SA950CXA instruction manual

Smeg

Smeg SA950CXA instruction manual

Viking Range 5 Series Use & installation guide

Viking Range

Viking Range 5 Series Use & installation guide

Pyramis VIRAGGIO F122 SLIM 90 IDT Instruction on mounting and use

Pyramis

Pyramis VIRAGGIO F122 SLIM 90 IDT Instruction on mounting and use

AIRFORCE F129 60 TSL3 Instruction on mounting and use

AIRFORCE

AIRFORCE F129 60 TSL3 Instruction on mounting and use

ELICA Stripe Inox 60 Instruction on mounting and use

ELICA

ELICA Stripe Inox 60 Instruction on mounting and use

Fagor LI3IQA Instruction on mounting and use

Fagor

Fagor LI3IQA Instruction on mounting and use

AEG DU 3150 Operating and installation instructions

AEG

AEG DU 3150 Operating and installation instructions

Wolf PW482418 installation instructions

Wolf

Wolf PW482418 installation instructions

manuals.online logo
manuals.online logoBrands
  • About & Mission
  • Contact us
  • Privacy Policy
  • Terms and Conditions

Copyright 2025 Manuals.Online. All Rights Reserved.