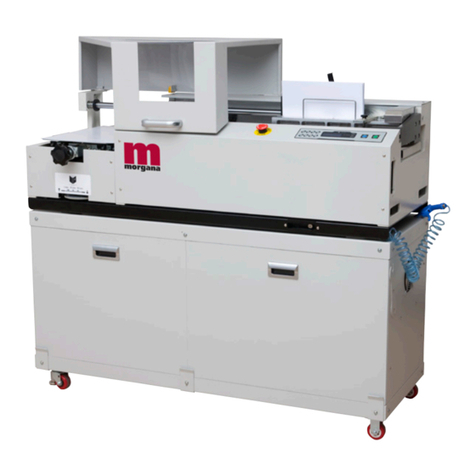
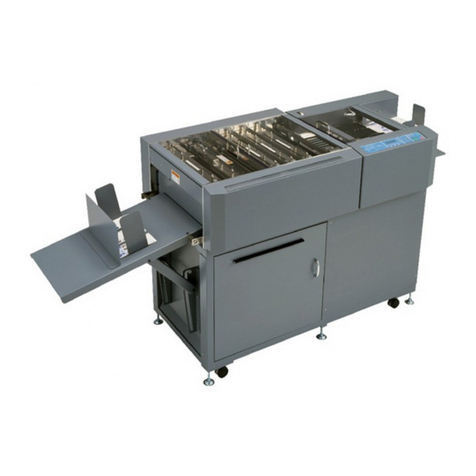
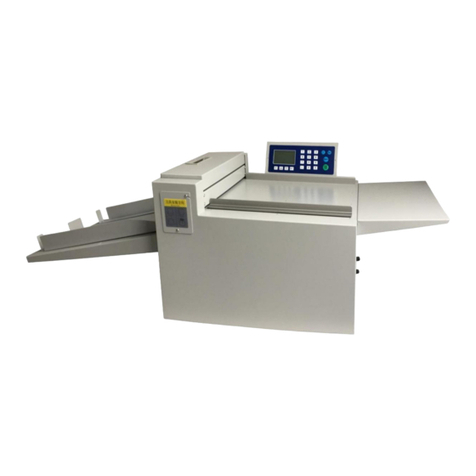
Morgana AutoCreaser 50 User manual

ISSUE 7 January
2008
70-069
DOCUMENT
CREASING MACHINE
Morgana Systems Limited United Kingdom
Website: www.morgana.co.uk
Telephone: ( 01908 ) 608888 Facsimile: ( 01908 ) 692399
OPERATORS MANUAL
AutoCreaser 50
SERIAL No. 710386LBAD ONWARDS

Page 2 CREASING
INTRODUCTION
The Morgana Autocreaser 50 PAGE 3
THE AUTOCREASER 50
Labelled Photograph 6
THE CONTROLS
The control panel 7
Features on the control panel 8
QUICK START GUIDE 9
OPERATING THE AUTOCREASER 50
Setting the machine
12
Programming the machine
16
Reading stored programmes 17
Paper jamming 17
THE STACKER ASSEMBLY
Setting the Stacker unit 18
PERFORATING
Equipment, spares 20
Setting the machine 21
THE BLADE ASSEMBLY
Setting the blade pressure 23
Setting the blade alignment 24
REPLACING CREASING BLADE SETS
Installing new blade sets 25
Spares 26
TROUBLE SHOOTING 27
INDEX
DISPATCH KIT 30
ACCESSORIES & OPTIONS 31
RECOMMENDED SPARES 32
SAFETY Do’s & Don’ts 4

Page 3
SYSTEM
AutoCreaser 50
INTRODUCTION
AutoCreaser 50
The Morgana Autocreaser 50 is a fully automatic suction feeding creasing
system designed for use with both conventional litho and digital printers.
The feed on the Autocreaser 50 can also be manually operated for use with
heavy stock, very small or very large sheets, embossed or even irregular
sheets.
The Autocreaser 50 is capable of creasing sheet sizes to a maximum of
700mm x 500mm (27.5” x 19.7”) and weights in excess of 350gsm.
The minimum sheet size when the machine is used in automatic mode is
140mm x 210mm (5½ “x 8½”).
Up to sixteen creases can be programmed to a single sheet.
The crease is programmed from the leading edge of the sheet using the
controls on the front panel.
A minimum distance between creases is 0.1mm
The Autocreaser 50 has up to nine available memory addresses for
programmed creasing operations.
The blade and anvil are mechanically controlled over their entire length
and can be adjusted to accommodate various weights of media.
IMPORTANT
16° C and 27° C Maximum
The operating environment should be controlled to a temperature between

Page 4 CREASING
Safety Do’s & Don’ts
Do - operate with the designated AC current only. Use an exclusive outlet, as
overloading may cause fire or an electric shock.
Do - install the power cord out of the way to avoid a tripping hazard.
Do - beware of finger traps when replacing roller cassette and fold plates.
Do not - install the machine in an unstable place such that it tilts or shakes.
Do not - unplug the plug or unplug the power cord from the outlet with a wet hand,
this can cause an electric shock.
Do not - unscrew and remove any covers from the machine, as it can cause an
electric shock or injury.
Do - read this operator manual fully before operating the machine.
Do not - place receptacles containing liquids on any surface.
Do not - adjust any part of the machine whilst rollers are running
Do not - operate the machine with loose or trailing clothing or loose hair.
Do not - under any circumstances adjust the paper gate when the machine is
switched on.

Page 5
SYSTEM
AutoCreaser 50
BLANK
PAGE

Page 6 CREASING
DOCUMENT CREASING MACHINE
Key to photograph below
AutoCreaser 50
AUTOCREASER 50
1Roller tilt handle
6 Air distribution knob 11 Paper Gate
2 Stacker assembly 7 Adjustable side lay
12 Exit Guard
3Suction slot knob 8BackStop 13
4 The display unit 9 Fixed side lay 14
5Air separation knob 10 Roller tilt knob
Fuses
Control Panel
15 Gap Set Knob and Lever
16 Vacuum Bleed Knob

Page 7
SYSTEM
AutoCreaser 50
THE CONTROLS
The Control Panel houses the Selection Switch, Compressor switch,
System switch, and an industry standard Emergency Stop switch which
will stop all power going to the machine when activated.
The Display Unit and the Switches on the Control Panel allow the
operator to read, edit, create and initiate numerous creasing programs
within the memory.
THE CONTROL PANEL
System Switch
Compressor Switch
Emergency Stop Switch
Selection Switch

Page 8 CREASING
Features on the Control Panel
Selection Switch
Allows the operator to scroll through stored addresses and programs, increase or
decrease the batch quantity and set a crease position.
System switch
When activated the system switch will operate the motors in order to begin the
creasing sequence.
Compressor switch
Allows the operator to switch off the compressor unit in order to utilise the machine
to manually feed sheets.
THE CONTROLS

Page 9
SYSTEM
AutoCreaser 50 Quick Start Guide
Setting the machine to operate in automatic mode
1. Set the gap between the paper gate and the vacuum roller to
approximately twice the thickness of the stock to be creased.
3.
Place the stock to be creased onto the loading table against the
fixed side lay.
4.
Release the clamps on the adjustable side lay and slide up to the
paper stack allowing a gap of approximately 0.5mm (1/64 inch)
between the paper and the side lay.
5.
Position the backstop and slide it up to the paper stack, also allowing a
gap (as stated in the above step).
Turn the Emergency Stop button clockwise to switch the power on.
The display unit is now illuminated, a typical start up display menu is
shown below.
The arrows on the display denote the direction in which the selection
switch must be moved in order to access the various sub-menus.
NOTE:-
2.
2 Creases Program 3
Total 20
Zero
Setup
Tools Feed
Batch Off

Page 10 CREASING
Quick Start Guide
7. Following the arrows on the display unit; move the selection switch down
to set the creases. The 1st Crease is now selected.
6. Following the arrows on the display unit; move the selection switch to
the right to select (i.e. Setting the crease positions), a typicalSetup
display is shown below.
2nd Crease 0.0
1st Crease 148.0Home
More
Set Creases
Back
Tens Decimals
2nd Crease 0.0
( 1st Crease 148.0 )
Move the Selection Switch to the left to select or to the right toTens
select . The or (whichever has been selected)Decimals Tens Decimals
can then be adjusted by rotating the Selection Switch, (clockwise to
increase or anti-clockwise to decrease).
8.
9. To set the 2nd Crease position move the selection switch down; the 2nd
Crease is selected and can be set as described in step 8. above.
10. Further creases can be set in this way, up to a maximum of sixteen
creases.
Set Creases
Back
Tens Decimals
3rd Crease 0.0
( 2nd Crease 000.0 )
Set Creases

AutoCreaser 50
Page 11
SYSTEM
2 Creases Program 3
Total 20
Zero
Setup
Tools Feed
Batch Off
11. When the required creases have been set, move the selection switch up
step by step until the display contains the word , see below.Feed
12. Press the Compressor Switch down.
13. Press the System Switch down, the display will momentarily read Please
14. Move the selection switch down to begin feeding the sheets.
In order to manually feed sheets see instructions on page 17.
Wait Initiating Feed.and then return to show
Quick Start Guide

Operating the Autocreaser 50
Setting the Machine
Adjusting the Paper Gate
The standard setting for horizontal adjustment of the paper gate is 6.5mm (1/4") away
from the mounting block. Turn disc J to make this adjustment. This setting is only intended
as a guide, for instance, sheets with an upward curl will require this setting to be in-
creased. Set the height of the Paper Gate to approximately two thicknesses of paper, by
turning knob K. An excessive gap is a most likely cause of double sheet feeding.
Setting the suction slot
The suction slot is located inside the vacuum roller and can be adjusted by releasing and
moving the suction knob horizontally in either direction to the required position.
For light stocks set the knob to the left and for heavier stocks set the knob to the right.
Adjustable
Side Lay
J
K
6.5mm(1/4")
TWOTHICKNESSES
OF PAPER
WARNING.
DO NOT ADJUST T HE
PAPER GATE WHILE THE
MACHINE IS RUNNING OR
THE SUCTIONDRUMMAY
BECOME DAMAGED.
Suction
Slot Knob
Page 12 CREASING
FIG 8.1
Vacuum
Bleed Knob

Operating the Autocreaser 50
Setting the Adjustable Side Lay
Place the paper stack on to the loading table and slide up to the fixed side lay and paper
gate. Release the clamps located at each end of the side lay and slide up towards the
paper stack as demonstrated in fig 8.1. Allow a gap of approximately 0.5mm (1/64 inch)
between the paper and the side lay.
Setting the BackStop
Position the backstop and slide up towards the paper stack allowing a gap (as specified
in the above step).
Setting the Air Distribution
Depending on the length of the sheet to be creased, the air distribution knob can be
rotated to various positions in order to supply air to different ports. Position 1 is
recommended for most sheet sizes. However, a better result may be obtained by using
the below settings or by experimentation.
Position 1 – For A5 sheets or 8 inches long, port 1 open.
2 – For A4 sheets or 11 inches long, front port and port 2 open.
3 – For A3 sheets or 17 inches long, front port and port 3 open.
0 – For longer sheets in order to supply air to the centre of the stack, port
2open
Setting the Air Separation Pressure
To control the amount of air supplied to the ports, the air separation knob can be adjusted
by first rotating the knob to unlock its position, then push the knob down to the required
position and rotate the knob to re-lock its position.
Setting the Roller Tilt Mechanism
The roller tilt mechanism has been designed to compensate for when the creasing
position on the sheet is not square. This could be due to an inaccuracy in the media or if
the roller tilt mechanism has been incorrectly set. The mechanism will be set to zero
(square) when the machine is supplied.
To set the mechanism, unlock the roller tilt knob located below the roller tilting handle by
turning anti-clockwise. Move the roller tilt handle left or right in order to compensate for
any inaccuracy. When the position is set, ensure to lock the roller tilt knob before
operating the machine. Repeat the above procedure until the creasing position is square.
Setting the positions of drive wheels and hubs
It is important that the drive wheels and drive hubs on the roller shafts are arranged evenly
across the width of the media being creased. This is done to ensure that the media is
accurately driven and supported through the rollers.
The drive wheels and hubs are fixed to the rollers by means of a grub screw. To locate
this grub screw the rollers can be rotated by operating the motor manually.
DO NOT ROTATE THE DRIVE ROLLERS BY HAND.
AutoCreaser 50
Page 13
SYSTEM
Setting the Vacuum Bleed
Situated on the front of the feed table, the Vacuum Bleed Knob is used to allow more
control of the suction on the vacuum drum.
When light weight paper of 90gsm and lower is being fed through the machine turn the knob
clockwise to reduce the possibility of marking, or damage to the leading edge of the paper

To operate the motors manually, switch the machine ‘on’ at the Emergency Stop switch.
Following the arrows on the display unit, move the selection switch to the left to select
Tools, the display will now show the Tools sub-menu. Press the system switch down and
then move the selection switch to the left or to the right, to rotate the rollers in short pulses.
This procedure should be repeated when installing perforating blades and anvils onto the
drive wheels and hubs.
FIG 10.1
Lift the exit guard to see if the grub screws in the drive wheels and hubs can be seen. If the
grub screws cannot be seen, lower the exit guard and rotate the rollers by moving the
selection switch to the left or to the right. Loosen the drive wheels and hubs with a 2mm
allen key. Arrange the drive wheels and hubs as shown in FIG 10.1. In order to avoid
marking on some types of media ensure a gap between the drive wheels and hubs.
Operating the Autocreaser 50
Set Feed
The length of suction on the sheet of paper being fed can be adjusted by setting the feed
type as follows:-
(i) From the start up menu, move the selection switch to the right to select .Setup
(ii) Move the selection switch to the right, one click at a time, until the display contains
the words .Set Feed
(iii) Move the selection switch down to select the required feed type ( ,Standard Pulse
Medium Pulse Short Pulse Stream Feed,,or )
Use for all standard size sheets, general purpose.Standard Pulse
Use for short non-standard sheets.Medium Pulse
Use for very short sheets.Short Pulse
Use for high throughput, see note below.Stream Feed
(iv) Move the selection switch to the right to select .Ok
NOTE.
Do not use stream feed for creases less than 32mm from the leading edge of the paper.
Page 14 CREASING

Operating the Autocreaser 50
Setting the infeed roller gap set
The gap between the infeed rollers must be adjusted to suit the stock being used. The gap
set can be adjusted as follows:-
2. From the start up menu, move the selection switch to the left to select .Tools
3. Press the system switch down.
4. Move the selection switch to the left, one click at a time, until the sheet is gripped in
the infeed rollers. Test the grip of the sheet in the rollers by trying to remove the
1. Place a sample sheet of the stock to be used onto the feed bed.
sheet by hand, the sheet should be lightly gripped by the rollers. If the grip on the
sheet is too light or too heavy it can be adjusted as follows:-
Gap Set
Locking
Knob
Gap Set
Lever
(i) Turn the gap set locking knob anti-clockwise to unlock.
(ii) Move the gap set lever up to increase the gap or down to decrease the gap.
(iii) Turn the gap set locking knob clockwise to lock.
AutoCreaser 50
Page 15
SYSTEM

Operating the Autocreaser 50
Programming the machine
1. Switch the power ‘on’ by turning the Emergency stop button clockwise
to release the safety latch. The display is now switched on.
2. (i) Move the selection switch to the right to select .Setup
(ii) Move the selection switch to the right to select .More
(iii) Move the selection switch to the right again to select .More
Setting the crease positions
3. Move the selection switch up, one click at a time, until the start up menu is displayed
Setting the batch quantity and Dwell Time
(iv) Move the selection switch down to select .Set Batching
(v) Rotate the selection switch clockwise or anti-clockwise to adjust the batch quantity
in increments of 5.
as shown below.
(i) Move the selection switch to the right to select .Setup
(ii) Move the selection switch down to select .Set Creases
(iii) Move the selection switch to the left to select Tens, or to the right to select
Decimals.
(iv) The Tens or Decimals (whichever has been selected) can then be adjusted by
Storing the crease positions
4. Once the crease positions are correctly entered, they can be stored as follows.
(i) Move the selection switch up, one click at a time, until the display contains the word
More.
(ii) Move the selection switch to the right, one click at a time, until the display contains
the word .Programs
rotating the Selection Switch, (clockwise to increase or anti-clockwise to decrease).
(v) Adjust all other digits for the 1st Crease position as described in steps (iii) and (iv),
(vi) Move the selection switch down to select the 2nd Crease. The second crease will
(vii) Set the 2nd Crease position as described in steps (iii) to (v) above.
Further creases can be set in this way, up to a maximum of sixteen creases.
(i.e. move the selection switch to the left to select the Tens or to the right to select
Decimals and then rotate the Selection Switch to adjust its value.
(vi) Move the selection switch down to select Dwell Time Secs.
(Vii) Rotate the selection switch clockwise or anti-clockwise to adjust the dwell time,
in seconds, this is the period of time between each successive batch quantity.
automatically start at 0000.0. Crease positions can be set in increments of 0.1mm.
2 Creases Program 3
Total 20
Zero
Setup
Tools Feed
Batch Off
(iii) Move the selection switch down to select Save Settings.
(iv) Rotate the Selection Switch to select the Program number (1 to 9).
Page 16 CREASING

Operating the Autocreaser 50
Running the machine
5. To run the job with the selected settings.
To stop feeding the media at anytime during the program, flick the selection switch up.
The machine will complete its creasing operation if a sheet has already been fed
through the paper gate.
(v) Move the selection switch to the right to select .Select
(i) Press the Compressor Switch down.
(ii) Press the System Switch down.
(iii) Move the selection switch down to begin feeding the sheets.
Reading stored programs
Any of the nine stored programs can be accessed and read as follows:-
(i) From the start up menu, move the selection switch to the right to select .Setup
(ii) Move the selection switch to the right, one click at a time, until the display contains
the word .Programs
(iii) Move the selection switch down to select, .Retrieve Program
( v) Move the selection switch to the right to select, .Selecti
(v) Rotate the selection switch clockwise or anti-clockwise to select, toProgram 1
Program 9 and view the program settings.
Paper jamming
In the event of a paper jam occurring whilst the machine is operating the display will
read Paper Jam. In order to remove the paper causing the jam, move the selection switch
to the left or to the right to drive the paper forwards or backwards in short pulses.
Setting the machine to operate in manual mode
In order to feed heavy stock, very small or very large sheets, embossed or even
irregular shaped sheets, it may be required to operate the machine manually.
The machine can be programmed and set up in exactly the same way as explained
when operating the machine automatically. However, when setting up the machine the
paper gate must be raised to its highest position for the sheets to be fed freely.
Operating the machine manually will also require the suction length to be continuous in
order to accommodate various types of stock. Therefore, the feed should be set to
Standard Pulse see page 14.
The machine can now be started by activating the System switch to ‘on’. Do not
activate the Compressor switch. Move the selection switch down to select andFeed
begin to slide the sheets individually through the paper gate until they are driven by the
drive belts. To stop feeding the sheets, move the selection switch up and then the System
Switch up.
(vi) Move the selection switch to the left to select or to the right to selectYes No.
AutoCreaser 50
Page 17
SYSTEM

The stacker unit on the Autocreaser 50 is used to catch the sheets once they have been
creased or perforated.
Setting the Stacker assembly
1. Assemble the stacker unit to the machine as shown in fig 13.1 below.
Important
Ensure that the stacker unit has been assembled to the machine properly. However,
if it has not, the connection on the magnetic switch will be broken and the machine
will not operate (see Trouble shooting pages for details).
There are two side guides on the stacker unit; a left handed (fixed) guide and a right
guide. The guides will control the way in which the paper is collated by setting their
positions on the stacker bed.
2.
3.
Place a single sheet (from the stack to be creased / perforated) on to the stacker bed
against the fixed ‘left hand’ guide.
Position the ‘right hand’ side guide on to the stacker bed leaving a minimum
clearance of approximately 1mm each side of the sheet.
handed (movable) guide held on by a magnetic strip. There is also a left hand extension
The Stacker Assembly
LEFTHAND
SIDE GUIDE
RIGHTHAND
SIDE GUIDE
LEFTHAND
BACK STOP
RIGHTHAND
BACK STOP
Page 18 CREASING

4.
5.
Whilst the sheet is between the two guides on the stacker bed, set the distance
between the top of the sheet and the backstop flanges to approximately 5mm.
For shorter sheets, the back stop can be used (as shown in FIG 13.1 to adjust the
TIPS
•One of the back stops supplied with the machine (on the
stacker assembly) can also be used as a tool holder as
demonstrated in the photograph (left).
•Thescaleonthebedcanbeusedtomeasurethedesired
creasing or perforating position on the sheet.
The Stacker Assembly
position of the paper stack.
AutoCreaser 50
Page 19
SYSTEM

Perforatin
g
Once the machine is set-up, the Autocreaser 50 can be used to perforate or crease.
Note
Perforating and creasing can be carried out simultaneously. However, if any
adjustment is made to the roller tilt mechanism in order to compensate for the
perforation line being ’out of square’, this may effect the accuracy of the crease. If
this occurs creasing and perforating must be carried out as separate operations.
The components and tools required to install the perforator are contained in the despatch
kit supplied with the machine, they are listed below.
1 off Set of standard perforation ‘56 tooth’ blades.
1 off Set of standard hardened anvils.
1 off Perforator stripper.
1 off Scoring wheel
1 off 3mm bondhus wrench / allen key
1 off 2mm bondhus wrench / allen key
The perforator blades are split into two matching halves
and are fitted to the drive wheels as shown in the pho-
tograph using the four screws supplied.
A hardened anvil is fitted to the drive hub as shown in the
photograph also using the four screws supplied. Again the
anvils are made from matching halves.
Important: The perforator blades are very sharp and
care must be taken whilst handling.
Do not mix the matching pairs of blades or anvils.
Perforating ‘Spares’ kits
For perforating and other types of paper, various spares kits are available which can be
assembled to the machine in the same fashion. They are listed below along with a range
of scoring wheels,
Perforating blades 56 teeth Part Number 1-99-41 – Standard stock /
fine perforations.
28 teeth Part Number 1-99-12 – Medium stock /
medium perforations.
20 teeth Part Number 1-99-10 – Heavy stock /
coarse perforations.
Anvils Standard Part Number 1-99-35 – For all blade types
Page 20 CREASING
Table of contents
Other Morgana Binding Machine manuals

Morgana
Morgana DigiBook 450 User manual

Morgana
Morgana KB2000 User manual

Morgana
Morgana DigiBook 150r1 User manual

Morgana
Morgana DigiCreaser User manual

Morgana
Morgana DigiBook 200 User manual

Morgana
Morgana DigiBook 450 User manual

Morgana
Morgana AutoCreaser Pro 50 User manual

Morgana
Morgana DigiBook 300r2 User manual