manuals.online logo
Brands
  1. Home
  2. •
  3. Brands
  4. •
  5. Morphy Richards
  6. •
  7. Kitchen Appliance
  8. •
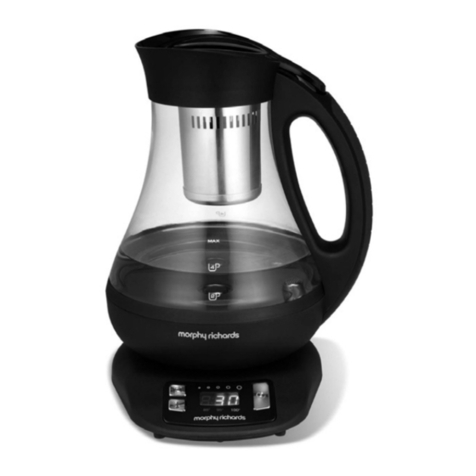
  9. Morphy Richards 43970 TEA MAKER User manual

Morphy Richards 43970 TEA MAKER User manual

For details of other Morphy Richards products, please see our website:
KT43970 MUK Rev 1
If you have a problem or complaint, please call our dedicated UK based helpline
before returning your product to the retailer from where it was purchased.
UK Helpline: 0844 871 0960
Replacement Parts: 0844 873 0726
Ireland Helpline: 1800 409 119
Upon registration with Morphy Richards
(UK & ROI only)
Register online for your 2 year
guarantee. See back of this
instruction book for details.
(UK and Ireland customers only)
www.morphyrichards.co.uk
www.homeofthehouseproud.com
www.facebook.com/LoveYourHome
www.twitter.com/LoveYourMorphy
For competitions, product hints and tips and much more,
join us online at our blog, Facebook or Twitter pages.
Please read and keep these instructions
Tea Maker
43970 rev1 8 _43910 08/11/2010 12:17 Page 1
2
UK
Helpline 0844 871 0960 Replacement Parts 0844 873 0726 Ireland Helpline 1800 409119
‚
⁄
¤
‹
›
fi
fl
·
‡
„
‰
‹
Â
Ê
FEATURES
⁄Jug
¤Base
‹Control Panel
›Cable Storage
(underneath)
fiLid
flTea Basket
‡Hopper
·Strength Button
‚Temperature Button
„Strength Gauge
‰Digital Display
ÂTemperature Gauge
ÊStart Button
43970 rev1 8 _43910 08/11/2010 12:17 Page 2
3
For details of other Morphy Richards products, please see our website:
Please also referto the main instructionbooklet,
whichcontains important safetyinformation
and more detail onhowto use the Tea Maker.
Fill the Jug ⁄ with the required amount
of water. Do not overfill.
1
Quick start guide
Fill the Tea Basket with loose tea and
place into the Hopper ‡.
OR
Place the teabags directly into the
Hopper.
2
Place the Hopper unit into the Jug
ensuring the Lid is locked fi and in the
correct position. Place the Jug onto the
Base ¤.
3
Plug the Tea Maker in. Use the Strength
Button · to select the desired strength
of tea. Press the button repeatedly to
cycle through the options.
See the table on page 5 for more
information.
4
Select the desired temperature using the
Temperature Button ‚. Press the button
repeatedly to cycle through the options.
See the chart on page 5 for the
recommended brewing temperatures of
different tea leaves.
5
Press the Start Button Ê, the
temperature of the water will appear on
the Digital Display ‰. When the water
has reached the correct temperature, a
timer will appear on the screen and
countdown until your tea has finished
brewing.
6
43970 rev1 8 _43910 08/11/2010 12:17 Page 3
4
UK
Helpline 0844 871 0960 Replacement Parts 0844 873 0726 Ireland Helpline 1800 409119
Before first
use
Fill the Jug ⁄ with water to
the MAX mark, and place
onto the Base ¤. The default
brewing settings will be
displayed (3 on the Strength
Gauge and 85º on the
Temperature Gauge.) Press
the Start/Stop button Ê and
wait for the water to boil and
flush through the tea basket.
When the brewing process
has been completed, dispose
of the water.
Operating the
appliance
The Tea Maker uses tea
leaves or teabags.
Tea Leaves
1Place the tea leaves into the
Tea Basket fl.
2Pour the desired amount of
water into the Jug ⁄.
• The amount of tea leaves and
water will affect the strength
of the tea brewed. The
strength of a cup of tea is
purely down to personal
taste. Use the supplied
strength chart on page 5 to
help you make tea to your
desired taste. Alternatively it
is suggested that you
experiment with the amount
of tea leaves and water in
order to create your preferred
taste.
3Insert the Tea Basket fl into
the Hopper ‡, place into the
Jug ⁄, and lock the lid into
place.
Tea Bags
Remove the Tea Basket and
place the tea bags into the
Hopper ‡.
Using the Hopper means
there is more room for the
tea to be submerged in the
water, creating a nicer taste.
It is suggested that 1 tea bag
per person is used, minimum
1 tea bag, maximum 6 tea
bags.
4Place the Jug on the Base
¤. The default brewing
settings will be displayed
(3 on the Strength Gauge
and 85º on the Temperature
Gauge.)
Inorderto reduce staining we
recommend that your Tea Makeris
cleaneddaily.
Taking care of your
Tea Maker
WARNING: Always disconnect the plug from the mains and allow the appliance to cool
before cleaning.
In order to reduce staining we recommend that your tea maker is cleaned daily.
• Thoroughly wash the jug and all of its brewing components with warm water. Do not immerse the jug
into the water.
To remove any stubborn stains from your tea maker we recommend that you use Milton Sterilising
Fluid, (found in the baby aisle of supermarkets and pharmacies.)
• Add 7ml of Milton sterilising fluid to the unit and fill to the top of glass body with cold water and leave
for 30 minutes, using a plastic kitchen brush to gently agitate the stained areas if required.
When using the plastic kitchen brush care must be taken around the vent dome on the element to
prevent dislodging/damage.
For stubborn stains it may be necessary to repeat this process 2 to 3 times.
For any queries relating to Milton fluid, please call 0800 097 5606
or visit www.milton-tim.com
• Once complete, rinse the unit thoroughly with warm water and then run the boil cycle with clean water
only & repeat 2-3 times. If there is any residual taste from the cleaning product repeat the rinsing
process again.
• For general cleaning wipe outer surfaces with a soft damp cloth, care must be taken when cleaning to
ensure no electrical connections make contact with water. Do not immerse in water.
43970 rev1 8 _43910 08/11/2010 12:17 Page 4
5
For details of other Morphy Richards products, please see our website:
5Select the tea strength by
pressing the strength selector
button ·. Press the button
repeatedly to rotate through
the strength options. Each
LED light corresponds to a
brewing time which
determines how strong your
tea will be.
6Select the water temperature
by pressing the Temperature
Button to scroll through the
options ‚. The desired
temperature will illuminate on
the Control Panel when
selected. The Tea Maker has
3 temperature settings 85º,
95º and 100º. The default
temperature is 85º. Use the
Tea Temperature chart below
as a guide.
7To begin the brewing process
press the Start Button Ê.
The button will illuminate.
8The Digital Display will show
the temperature of the water
as the heat rises to the
required temperature.
• The Tea Maker will then brew
your tea to the strength that
you have selected. A
countdown timer will begin
on the display, finishing at
0:00. When complete the Tea
Maker will beep 5 times.
Keep Warm
• The Tea Maker will only keep
warm until the jug is removed
from the base, for a
maximum of 20 minutes after
brewing.
• The keep warm setting will
switch off as soon as the jug
is removed from the base.
Stand By
• The Tea Maker will go into
standby mode if not used
within 20 minutes of
switching on at the mains. In
order to activate press any
button.
Descaling
IMPORTANT: As this
appliance is fitted with a
concealed element it must be
descaled regularly. The
frequency of descaling
depends on usage and the
hardness of the water in your
area.
Excessive scale can cause
the appliance to switch off
before boiling or reaching
temperature and may
damage the element
invalidating the warranty.
It is essential that regular
descaling takes place.
Remove hard scale using a
proprietary descaling product
suitable for stainless steel,
glass or plastic.
Alternatively use citric acid
crystals (available from most
pharmacies) as follows:
1Fill the appliance 3/4 full, boil,
then remove the Tea Maker
from the base unit and stand
it in an empty sink or bowl.
2Gradually add 50gm of citric
acid crystals to the water,
then leave the Tea Maker to
stand. Do not use a more
concentrated solution.
3As soon as the effervescence
subsides, empty the
appliance and rinse it
thoroughly with cold water.
4Wipe the outside of the
appliance thoroughly with a
damp cloth to remove all
traces of acid which may
damage the finish.
IMPORTANT: Ensure that the
electrical connections are
completely dry before using
the appliance.
5Fill the Tea Maker with water
and run a brewing cycle with
an empty Tea Hopper.
Discard the water after the
brewing process has
completed.
Tea Temperature Tea per person Tea Temperature Tea per person
Apple 95o1.5 tsp Herbal 95o1 tsp
Black Tea 100o1 tsp Indian Chai 100o1 tsp
Blackcurrant 95o1.5 tsp Jasmine 85o1 tsp
Ceylon 100o1 tsp Lapsang Souchong 100o1 tsp
China Rose 100o1 tsp Lemon 95o1.5 tsp
Cranberry 95o1.5 tsp Mango 95o1.5 tsp
Darjeeling 100o1 tsp Oolong (Blue) Tea 85o1 tsp
Earl Grey 10 0o1 tsp Orange Pekoe 100o1 tsp
Elderflower 95o1.5 tsp Red Tea 100o1 tsp
English Breakfast 100o0.5 tsp Sencha 85o1 tsp
Green Tea 85o1 tsp White Tea 85o1.5 tsp
TEA TEMPERATURE CHART
Number
Of LEDs Strength Brew
Time
1Weak 2 min
2Weak 3 min
3Medium 4 min
4Medium 5 min
5Strong 6 min
43970 rev1 8 _43910 08/11/2010 12:17 Page 5
6
UK
Helpline 0844 871 0960 Replacement Parts 0844 873 0726 Ireland Helpline 1800 409119
Helpline
If you have any difficulty with
your appliance, do not
hesitate to call us.
We are more likely to be able
to help than the store from
where you bought it.
Please have the following
information ready to enable
our staff to deal with your
query quickly.
• Name of the product.
• Model number as shown on
the underside of the
appliance.
• Serial number as shown on
underside of the appliance.
UK
Helpline 0844 871 0960
Replacement Parts 0844 873 0726
Ireland Helpline 1800 409 119
Website
You may also contact us
through our website, or visit
the site to browse and
purchase appliances, spare
parts and accessories from
the extensive Morphy
Richards range.
IMPORTANT
SAFETY
INSTRUCTIONS
The use of any electrical
appliance requires the
following common sense
safety rules.
Primarily there is danger of
injury or death and secondly
the danger of damage to the
appliance. These are
indicated in the text by the
following two conventions:
WARNING: Danger to the
person!
IMPORTANT: Damage to the
appliance!
In addition we offer the
following safety advice.
Location
• Always locate your appliance
away from the edge of the
worktop.
• This appliance is intended to
be used in household and
similar applications such as:
farm houses;
by clients in hotels, motels
and other residential type
environments;
bed and breakfast type
environments.
It is not suitable for use in
staff kitchen areas in shops,
offices and other working
environments.
• Ensure that the appliance is
used on a firm, flat surface.
• Do not use the appliance
outdoors or near water.
•WARNING: Do not place the
appliance onto a metal tray
or metal surface whilst in
use.
Mains cable
• Do not let the mains cable
hang over the edge of the
worktop where a child could
reach it.
• Do not let the cable run
across an open space e.g.
between a low socket and
table.
• Do not let the cable run
across a cooker or other hot
area which might damage the
cable.
• The mains cable should
reach from the socket to the
base unit without straining
the connections.
• If the mains cable is
damaged, it must be
replaced by the manufacturer,
its service agent or similarly
qualified persons in order to
avoid a hazard.
Personal safety
•WARNING: To protect
against fire, electric shock
and personal injury do not
immerse cord, plug and
appliance in water or any
other liquid.
• Always keep the top of the
cordless base dry, especially
around the connection area,
disconnect the power supply
before drying. Allow to dry
thoroughly before
reconnection to the power
supply.
• Always pour hot water or tea
slowly and carefully without
tipping the appliance too fast
to prevent splashing and
spillage.
• Extreme caution must be
used when moving a
appliance containing hot
liquid.
• Do not touch hot surfaces,
use handles or knobs.
• Always close the lid if
applicable and always have
the tea basket in place.
43970 rev1 8 _43910 08/11/2010 12:17 Page 6
7
For details of other Morphy Richards products, please see our website:
• Avoid contact with emitting
steam when the water or tea
is boiling or just after it has
switched off.
• Take care if opening the lid of
the appliance when hot.
• Do not open the lid whilst the
water is boiling.
• Do not fill above the MAX
mark, otherwise boiling water
may be ejected.
• Do not hold the switch in the
ON position or tamper with
the switch to fix it in the ON
position as this may cause
damage to the switch-off
mechanism.
• Unplug from the outlet before
cleaning.
• Allow to cool before putting
on or taking off parts and
before cleaning.
•CAUTION: Ensure that the
Tea Maker is switched off
before removing from its
stand.
• Do not move the Tea Maker
while switched on.
• This appliance is not
intended for use by persons
(including children) with
reduced physical, sensory or
mental capabilities, or lack of
experience and knowledge,
unless they have been given
supervision or instruction
concerning use of the
appliance by a person
responsible for their safety.
Children
• Never allow a child to operate
this appliance.
• Children are vulnerable in the
kitchen particularly when
unsupervised and if
appliances are being used or
cooking is being carried out.
• Teach children to be aware of
dangers in the kitchen, warn
them of the dangers of
reaching up to areas where
they cannot see properly or
should not be reaching.
• Children should be
supervised to ensure that
they do not play with the
appliance.
Treating scalds
• Run cold water over the
affected area immediately. Do
not stop to remove clothing,
get medical help quickly.
Other safety
considerations
• Do not leave appliance
unattended whilst in use.
• Do not operate any appliance
with a damaged cord or plug
or after the appliance
malfunctions or has been
damaged in any manner.
Contact Morphy Richards for
advice.
• The use of attachments or
tools not recommended or
sold by Morphy Richards,
may cause fire, electric shock
or injury.
• Do not attempt to connect
any other appliance to the
base unit or this appliance to
another base unit.
• Do not tamper with the
connector in any way.
• Do not use the appliance for
any use other than to boil
water or to make tea.
• Do not place the appliance
on or near a hot gas or
electric burner or in a heated
oven.
• The appliance must not be
on the base unit when being
filled with water.
• Morphy Richards
recommends that the mains
lead of the cordless base
cannot be repaired. If the
mains cable is damaged, the
cordless base should be
discarded and replaced
contact the helpline for
advice.
• Unplug from the outlet when
not in use.
• Use only with the cordless
base unit supplied.
CAUTION: To prevent
damage to the appliance,
do not use alkaline cleaning
agents when cleaning. Use
a soft cloth and detergent.
WARNING: The appliance
must not be immersed for
cleaning.
ELECTRICAL
REQUIREMENTS
Check that the voltage on the
rating plate of your appliance
corresponds with your house
electricity supply which must
be A.C. (Alternating Current).
If the sockets in your home
are not suitable for the plug
supplied with its appliance,
the plug supplied should be
removed and the appropriate
one fitted.
WARNING: The plug removed
from the mains lead, if
severed, must be destroyed
as a plug with a bared
flexible cord is hazardous if
engaged into a live plug
socket.
Should the fuse in the 13
amp plug require changing, a
13 amp BS1362 fuse must be
fitted.
WARNING: This appliance
must be earthed.
43970 rev1 8 _43910 08/11/2010 12:17 Page 7
UK
Helpline 0844 871 0960 Replacement Parts 0844 873 0726 Ireland Helpline 1800 409119
REGISTERING
YOUR TWO YEAR
GUARANTEE
Your standard one year guarantee is
extended for an additional 12
months when you register the
product within 28 days of purchase
with Morphy Richards. If you do not
register the product with Morphy
Richards within 28 days, your
product is guaranteed for 1 year. To
validate your 2 year guarantee
register with us online at
www.morphyrichards.co.uk
N.B. Each qualifying product needs
to be registered with Morphy
Richards individually.
Please note that the 2 year
guarantee is only available in the
UK andIreland. Please refer to the
one year guarantee for more
information.
YOUR ONE YEAR
GUARANTEE
It is important to retain the retailer’s
receipt as proof of purchase. Staple
your receipt to this back cover for
future reference.
Please quote the following
information if the product develops
a fault. These numbers can be
found on the base of the product.
Model no.
Serial no.
All Morphy Richards products are
individually tested before leaving the
factory. In the unlikely event of any
appliance proving to be faulty within
28 days of purchase, it should be
returned to the place of purchase
for it to be replaced.
If the fault develops after 28 days
and within 12 months of original
purchase, you should contact the
Helpline number quoting Model
number and Serial number on the
product, or write to Morphy
Richards at the address shown.
You may be asked to return a copy
of proof of purchase.
Subject to the exclusions set out
below (see Exclusions), the faulty
appliance will then be repaired or
replaced and dispatched usually
within 7 working days of receipt.
If, for any reason, this item is
replaced during the 1 year
guarantee period, the guarantee on
the new item will be calculated from
original purchase date. Therefore it
is vital to retain your original till
receipt or invoice to indicate the
date of initial purchase.
To qualify for the 1 year guarantee,
the appliance must have been used
according to the instructions
supplied. For example, crumb trays
should have been emptied regularly.
EXCLUSIONS
Morphy Richards shall not be liable
to replace or repair the goods under
the terms of the guarantee where:
1The fault has been caused or is
attributable to accidental use,
misuse, negligent use or used
contrary to the manufacturer’s
recommendations or where the fault
has been caused by power surges
or damage caused in transit.
2The appliance has been used on a
voltage supply other than that
stamped on the products.
3Repairs have been attempted by
persons other than our service staff
(or authorised dealer).
4The appliance has been used for
hire purposes or non domestic use.
5The appliance is second hand.
6Morphy Richards are not liable to
carry out any type of servicing
work, under the guarantee.
7Plastic filters for all Morphy
Richards kettles and coffee makers
are not covered by the guarantee.
8Batteries and damage from leakage
are not covered by the guarantee.
• This guarantee does not confer any
rights other than those expressly set
out above and does not cover any
claims for consequential loss or
damage. This guarantee is offered
as an additional benefit and does
not affect your statutory rights as a
consumer.
Morphy Richards products are intended for household use only.
See usage limitations within the location safety instructions.
Morphy Richards has a policy of continuous improvement in product quality and
design. The company, therefore reserves the right to change the specification of
it’s models at any time.
The After Sales Division
Morphy Richards Ltd
Mexborough, South Yorkshire,
England, S64 8AJ
Helplines (office hours)
UK 0844 871 0960
Spare Parts 0844 873 0726
Republic of Ireland 1800 409 119
KT43970 MUK Rev 1 11/10
For electrical products sold within the
European Community. At the end of the
electrical products useful life, it should not
be disposed of with household waste.
Please recycle where facilities exist. Check
with your Local Authority or retailer for
recycling advice in your country.
43970 rev1 8 _43910 08/11/2010 12:17 Page 8

This manual suits for next models

1

Other Morphy Richards Kitchen Appliance manuals

Morphy Richards Total Control User manual

Morphy Richards

Morphy Richards Total Control User manual

Morphy Richards Mico Multi-Pot User manual

Morphy Richards

Morphy Richards Mico Multi-Pot User manual

Morphy Richards Intellichef User manual

Morphy Richards

Morphy Richards Intellichef User manual

Morphy Richards JUICE User manual

Morphy Richards

Morphy Richards JUICE User manual

Morphy Richards TOTAL CONTROLS User manual

Morphy Richards

Morphy Richards TOTAL CONTROLS User manual

Morphy Richards HBCD SS User manual

Morphy Richards

Morphy Richards HBCD SS User manual

Morphy Richards 46718 User manual

Morphy Richards

Morphy Richards 46718 User manual

Morphy Richards 43970 User manual

Morphy Richards

Morphy Richards 43970 User manual

Morphy Richards Total Control User manual

Morphy Richards

Morphy Richards Total Control User manual

Morphy Richards IB48510 User manual

Morphy Richards

Morphy Richards IB48510 User manual

Morphy Richards 501000 User manual

Morphy Richards

Morphy Richards 501000 User manual

Morphy Richards KWS1523X-F2UB User manual

Morphy Richards

Morphy Richards KWS1523X-F2UB User manual

Morphy Richards Accents User manual

Morphy Richards

Morphy Richards Accents User manual

Morphy Richards MRGS14BLK User manual

Morphy Richards

Morphy Richards MRGS14BLK User manual

Morphy Richards clarity soupmaker User manual

Morphy Richards

Morphy Richards clarity soupmaker User manual

Morphy Richards FLAVOUR SAVOUR Assembly instructions

Morphy Richards

Morphy Richards FLAVOUR SAVOUR Assembly instructions

Morphy Richards IB48770 User manual

Morphy Richards

Morphy Richards IB48770 User manual

Morphy Richards Accents 402502 User manual

Morphy Richards

Morphy Richards Accents 402502 User manual

Morphy Richards KITCHEN MACHINE 48955 User manual

Morphy Richards

Morphy Richards KITCHEN MACHINE 48955 User manual

Morphy Richards Total control 402054 User manual

Morphy Richards

Morphy Richards Total control 402054 User manual

Morphy Richards 4897 User manual

Morphy Richards

Morphy Richards 4897 User manual

Morphy Richards FLAVOUR SAVOUR User manual

Morphy Richards

Morphy Richards FLAVOUR SAVOUR User manual

Morphy Richards TOTAL CONTROL 402052 User manual

Morphy Richards

Morphy Richards TOTAL CONTROL 402052 User manual

Morphy Richards Total Control User manual

Morphy Richards

Morphy Richards Total Control User manual

Popular Kitchen Appliance manuals by other brands

Mr. Coffee TM1 SERIES instructions

Mr. Coffee

Mr. Coffee TM1 SERIES instructions

Concept2 CE 3510 operating manual

Concept2

Concept2 CE 3510 operating manual

Goldmedal Discovery 2556EX instruction manual

Goldmedal

Goldmedal Discovery 2556EX instruction manual

Silvercrest SFS 150 B3 operating instructions

Silvercrest

Silvercrest SFS 150 B3 operating instructions

Greenlife SANDWICH PRO Instruction booklet

Greenlife

Greenlife SANDWICH PRO Instruction booklet

TriStar SA-1127 instruction manual

TriStar

TriStar SA-1127 instruction manual

TriStar CF-1602 manual

TriStar

TriStar CF-1602 manual

Goldmedal Steamin’ Demon manual

Goldmedal

Goldmedal Steamin’ Demon manual

Silvercrest SSME 250 A2 operating instructions

Silvercrest

Silvercrest SSME 250 A2 operating instructions

Maxi-matic Elite Gourmet EC-120 instruction manual

Maxi-matic

Maxi-matic Elite Gourmet EC-120 instruction manual

Swiss Pro+ SP-SW750.4 instruction manual

Swiss Pro+

Swiss Pro+ SP-SW750.4 instruction manual

Concept2 SV 3010RE manual

Concept2

Concept2 SV 3010RE manual

Concept2 RM 4410 manual

Concept2

Concept2 RM 4410 manual

Goldmedal P-60 instruction manual

Goldmedal

Goldmedal P-60 instruction manual

Silvercrest SBP 1960 A1 operating instructions

Silvercrest

Silvercrest SBP 1960 A1 operating instructions

Silvercrest SDA 350 A2 operating instructions

Silvercrest

Silvercrest SDA 350 A2 operating instructions

OneTouch SP17 user manual

OneTouch

OneTouch SP17 user manual

New World NW 50GSO Whi/444443993 Operating and installation instructions

New World

New World NW 50GSO Whi/444443993 Operating and installation instructions

manuals.online logo
manuals.online logoBrands
  • About & Mission
  • Contact us
  • Privacy Policy
  • Terms and Conditions

Copyright 2025 Manuals.Online. All Rights Reserved.