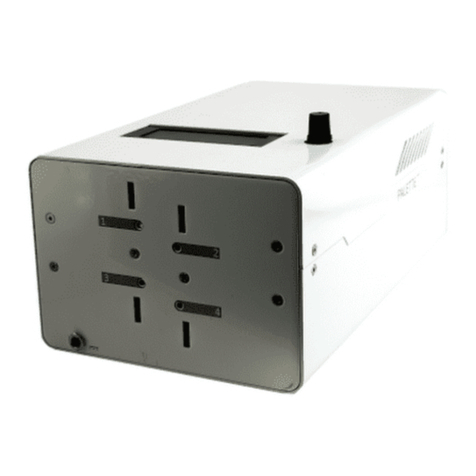
Mosaic Palette 3 User manual

Palette 3 (Pro) Manual
V1_0
3.29
.2022
Looking for help? Get in touch with our team.
📧
💻
support.mosaicmfg.com
1 of 74

Table of Contents
Canvas
Preliminary Steps for 3D Printing with Palette……………………………………………
4
Adding a Printer Profile……………………………………………………………………………….
9
Add a style profile……………………………………………………………………………………….
16
Connect Palette 3 to Internet and Canvas…………………………………………………..
22
Setup and Slicing for Palette 3 in Canvas…………………………………………………….
27
Initial Setup
Update Palette 3 Firmware………………………………………………………………………….
33
Printer Setup……………………………………………………………………………………………….
36
Splicing and Printing
Splice Tuning for Palette 3………………………………………………………………………….
41
Connected Mode with Palette 3…………………………………………………………………
52
Accessory Mode with Palette 3…………………………………………………………………
57
Calibration
What are "Pinging" and "Ponging"?……………………………………………………………..
63
Palette 3 LO and HM (Printer Profile Management)…………………………………….
67
When to Save Calibration Values (Tuning Printer Profile)................................
73
2 of 74

Quick Links
First Print Guides
(PDF Guides, Accessory Mode, Connected Mode)
mm3d.co/p3-firstprint
mm3d.co/p3-accessory
mm3d.co/p3-connected
Other Print Modes
(Gradient, Random, Pattern)
mm3d.co/p3-gradient
mm3d.co/p3-random
mm3d.co/p3-pattern
Splice Tuning Guide
mm3d.co/p3splice-tuning
Canvas Tutorials
(Setup, Painting, Stamping,
Variable Transitions)
mm3d.co/p3-internet-canvas
mm3d.co/p3-canvas
mm3d.co/paintingintro
mm3d.co/stamping-tutorial
mm3d.co/p2variable-transitions
Calibration and Printer Profiles
(Pings, Printer Profile Management, Profile
Tuning)
mm3d.co/ping-pong
mm3d.co/p3-lo-hm
mm3d.co/p3-save-ignore
Firmware
mm3d.co/p3-releases
mm3d.co/firmware
Models and Resources
mm3d.co/thingiverse
mm3d.co/thingiverse-resources
mm3d.co/youtube
3 of 74

Preliminary Steps for 3D Printing
with Palette
In this guide
are a few recommended tasks
before beginning to print with your
Palette,
to ensure your printer is well-tuned. Completing these steps will lead to
more consistent, successful prints and an overall improved experience.
Beginners in 3D Printing
If you are completely new to 3D printing, we recommend checking out
this video (mm3d.co/tt-beginners)! It is a complete beginner's guide to
how 3D printers operate, how to set it up and complete a
'frame check.' A frame check will ensure that your printer has no
underlying issues with the mechanical components or the frame. Once
you have an understanding of how they work,
this article (mm3d.co/all3dp-beginners) that outlines some of the best
3D printers on the market! You can ensure they are compatible with
Palette (mm3d.co/compatibility)
4 of 74

Extruder Calibration
After completing preliminary checks to ensure that there are no
mechanical issues with your printer, we recommend completing an
extruder calibration. Calibrating your extruder is very important for
perfecting your print quality.
This guide (mm3d.co/extruder-calibration) will take you through all
of the steps from start to finish.
If extruder multiplier calibration is also completed, you can enter
the extrusion and multiplier in the style or project settings, under
Extrusion.
Photo below: Extrusion width and multiplier
5 of 74

-If the printer has auto-bed leveling, in which case there is also
a probe offset.
-If the printer has a z-offset saved in its firmware.
-If the start sequence in the slicer has linear movements on the
z-axis without homing afterwards.
First Layer Calibration
If you are initially setting up your printer, you make any changes to your
printer setup (bed surface, nozzle, hot end), or want to conduct regular
maintenance, it is recommended to ensure the printer bed is both level
and an appropriate distance from the nozzle. This will ensure that the
first layer of your prints are correct as this is essential to perfecting
your prints. Here (mm3d.co/tt-firstlayer) is a guide on how to calibrate
the first layer.
After finding the first layer z-height, it can be entered into the style
profile or project settings under
First Layer.
The actual z-height that the printer will begin with for printing will be a
combination of both the first layer height in Layer Settings and the z-
offset in First Layer Settings.
Please also consider the following if it applies to the printer, as these
will also affect the z-height:
6 of 74

Photo below: Z-Offset
Photo below: First Layer Height
7 of 74

Baseline Print
Before printing with Palette, we recommend completing a simple print
in order to establish a baseline and determine if your printer is
operating correctly. Here (mm3d.co/thingiverse-cube) is a link to the
XYZ calibration cube, that can be printed quickly, and is a good
indication if there are any issues with your printer.
Here (mm3d.co/tt-baseline) is a guide on how to change the settings
of your printer as needed.
If once you complete the baseline print you are seeing issues such as
the print head missing the print bed or poor extrusion, please visit
this article (mm3d.co/all3dp-troubleshooting) that will provide you
with troubleshooting tips for common problems.
Thank you to All3DP, Teaching Tech and Matt's Hub
for making these resources.
8 of 74

Adding a Printer Profile
How to create a new printer profile in Canvas, focusing
on the core machine settings.
Printer profiles can be created by:
Using a printer preset
Starting with a printer preset will automatically create a standard printer
profile. Please review and adjust these settings based on your own
preferences. You may test the print quality in single color first before
printing in multicolor.
Importing profiles from Simplify3D, Slic3r/Prusaslicer or Kisslicer
If a profile is imported from another slicer, a style profile will be
automatically generated based on existing slicer settings. We suggest
reviewing these settings, testing the print quality in single color first
before printing in multicolor.
Starting from blank
Guidelines on starting a blank profile are below.
Canvas Note: Hover over printer and style settings to view tooltips.
9 of 74

Name of printer
Printer model - Commonly used printers can be tagged in the printer
profile. Printer tagging allows style profile data to be anonymously
aggregated from printer profiles, and shared with others who use the
same printer. When you tag a printer, you will be able to see common
parameters used for slicer settings.
General
10 of 74

Number of extruders - Most FFF printers should only have 1 extruder
by default.
Nozzle diameter - Most FFF printers will have a standard 0.4mm nozzle
Bowden tube length - Used only for Bowden-style printers. We
recommend measuring from the filament feed to the tip of the hot end.
It's better to overestimate than underestimate this length, so that there
will be sufficient filament at the end of the print.
Extruder
11 of 74

Printer’s bed size - The X, Y, and Z lengths of your printer's bed. For
delta printers, only the diameter and height are required.
Origin offset - Usually located in the middle or bottom-left corner of the
print bed. You can also set a custom origin by manually entering the
Origin Offset values
Bed
12 of 74

File type - Variations of G-Code files used by your printer. CANVAS
supports G-Code (.gco, .g), .X3G, and .makerbot.
Firmware type - Firmware used by your printer. For the majority of
printers, '5D Absolute' will be appropriate
Firmware Purge - Some printers include a hard-coded purge when
beginning a print. Because this purge is not in the print file, calculated
splice lengths will all be incorrectly short by this amount. If your printer
has a firmware purge, estimate the amount of filament it uses here
Use Firmware Retraction - Some firmware will have retractions hard-
coded and you can use these instead of retraction settings in your Style
Profile. If you're not sure about this feature, leave it unselected.
Firmware
13 of 74

Other
Sequences: Start and End G-Code sequences. You may copy your printer's
start and end sequence into here.
You can learn about advanced scripting in Canvas using PrinterScript
(canvas3d.io/printerscript).
Please note that if/else syntax is not supported at this time.
Layer change scripts and side transition scripts are also available here for
customization.
15 of 74

Add a style profile
How to create and manage slicer setting profiles in Canvas
.
Style profiles are preset slicer settings, which can be saved and
used in projects.
You can add a style profile when you're setting up a printer profile
for the first time, or after the printer profile has been created.
16 of 74

Step 1 — Import Styles from a Different Slicer
Importing a style profile will allow you to use settings from another slicer. It's one of the easiest
ways to get slicing if you already have some tried and tested settings!
Go to Printer Profiles and double click the printer you want to add a new a style profile to.
Click Add a New Style Profile.
Click Import from a Different Slicer.
Upload your printer profile file.
Once you’ve uploaded the file, confirm that the printer settings are correct, and click
Save.
Add a style profile
17 of 74

Step 2 — Start from a Blank Style Profile
A blank style profile will have no preset settings and will require you to enter and modify different
parameters.
Go to Printer Profiles and double click the printer you want to add a new style profile to.
Click New Style Profile.
Click Start from Blank Profile.
Enter your profile name and enter desired settings, click Save.
Add a style profile
18 of 74

Step 3 — Selecting a Style Profile in a Project
When creating a new project
(canvas3d.io/projects), go to
Project Settings to select a style
profile for the setup. This will
populate the project settings with
preset slicer settings based on the
style profile created in steps 1 and
2.
Step 4 — Managing Style Profiles in Project Settings
Slicer settings can be changed on a per project basis in Canvas.
When settings changed are made on a project, you can do the following to update or return to
standard settings:
Update: The selected style profile will be updated with the project's settings.
Save as new style profile: The originally selected style profile will be unaffected, the project
settings will create a new style profile for this printer.
Revert: Project setting changes will be discarded, the original style profile will be used.
Add a style profile
19 of 74

Step 5 — Settings for Print Quality
Layer Height: For printing with Palette, a layer height of 0.25 offers a good balance between detail
and tower size.
Extrusion Width and Multiplier: If extrusion lines are not adhering well, the extrusion width can
be increased to 0.42-0.45mm. The extrusion multiplier can be adjust 2% at a time to adjust for
over or under extrusion.
Gap Threshold for Holes in Print: Adding a gap fill can help generate toolpaths for areas that
appear missing in the slice preview. Enter a number value to represent the millimeter length of the
gap.
Retraction for Stringing: Increase retraction distance incrementally by 0.2mm, and retraction
speed by 5mm/s at a time. This can be paired with slightly increasing movement speed under
General settings.
Perimeters for Surface Finish: Adding another perimeter can help with print strength, reducing
the perimeter speed by 5mm/s at a time can help improve the surface quality.
Add a style profile
20 of 74
This manual suits for next models
1
Table of contents
Other Mosaic 3D Printer manuals