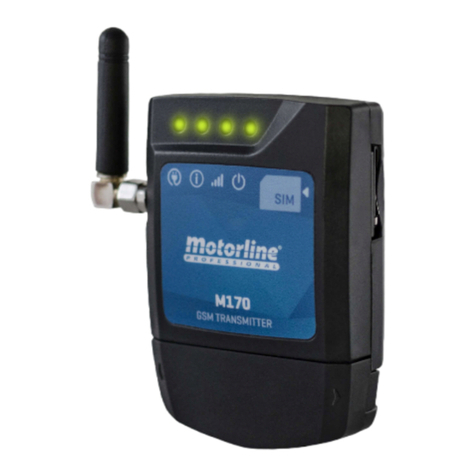
Motorline professional M170 Instruction Manual

V 1.1
REV. 11/2016
M170
EN
USER'S / INSTALLER'S MANUAL

A
EN
2A
2B
2B
4A
3
4B
4A
STANDARDS TO FOLLOW
DEVICE FUNCTIONS
TECHNICAL CHARACTERISTICS
CABLING
VISUAL APPEARANCE
CONNECTIONS
FIXATION
01. SAFETY INSTRUCTIONS
02. THE DEVICE
03. INSTALLATION
5A
5A
PARAMETERS DESCRIPTION
CHANGE ADMINISTRATOR PASSWORD
5A
5A
6A
CHANGE BLUETOOTH USER PASSWORD
ADD USER WITHOUT LIMIT TIME INDICATION
CHANGE RELAY'S IMPULSE TIME
5B
6A
5B
6A
6A
ADD USER WITH LIMIT TIME INDICATION
INDICATE THE PHONE NUMBER ASSOCIATED TO THE DEVICE'S CARD
ADD USER WITH AND WITHOUT LIMITED TIME
OUTPUT ACTIVATION THROUGH VOICE CALL
ENABLE OR DISABLE THE USER'S CONTROL BY TIME LIMIT
5B
REMOVE USER(S)
04. CONFIGURATION THROUGH SMS
00. CONTENT
INDEX
12
11
12
11
FINAL CONSUMERS INSTRUCTIONS
CREATE A LIST OF USERS THROUGH EXCEL
INSTRUCTIONS FOR SPECIALIZED TECHNICIANS
LOAD THE LIST AND SEND TO THE DEVICE
07. TROUBLESHOOTING
06. IMPORT USERS
6B
6B
INITIAL GRAPHIC INTERFACE
CONTROL BUTTON CONFIGURATION
7B
8A
8A
9B
ADD A USER
ADMINISTRATOR'S PASSWORD CONFIGURATION
USER'S PASSWORD CONFIGURATION
TIME LIMIT CONTROL CONFIGURATION
8B
9B
8B
9B
DEVICE'S NAME CONFIGURATION
VERIFY DEVICE'S SETTINGS
IMPULSE TIME CONFIGURATION
CHECK DEVICE'S GSM NETWORK STATUS
10A
10A
10B
10B
VIEW ALL USERS
ENABLE DEVICE OUTPUT
REMOVE USERS
SWITCH BETWEEN BLUETOOTH AND CALL/SMS
9A
9A
SYNCHRONIZING DEVICE'S WATCH WITH PHONE WATCH
DEVICE'S PHONE CONFIGURATION
05. CONFIGURATION THROUGH APP

A BA B
ENEN
01. SAFETY INSTRUCTIONS 02. THE DEVICE
STANDARDS TO FOLLOW DEVICE FUNCTIONS
• Output activation via bluetooth or voice call.
• Configuration via android application (bluetooth) or sms.
• Allows the configuration of numbers/users.
• Users control by time limit.
• Configuration by sms: Add and delete users, change administrator or user password,
change the relay's impulse time (Max sec), Enable and disable user control by time limit,
Synchronize the device's clock with the date and time of the GSM network.
•
Configuration
by Android application (Bluetooth): configure up to four devices, allows you
to activate the output, view, insert, delete, and change users, change and view administrator
and user password, view and
change the relay's impulse time (Max sec),
change the
Bluetooth device's name, synchronize the device's clock with the mobile phone's clock,
enable and disable control for time limit, check the GSM signal quality and allows you to
load a list of users previously prepared.
The M device was designed to operate equipment remotely (via GSM) via phone call or
Bluetooth command.
• Power supply -V DC / -V AC
• Switching max. Capacity . A to VAC; A to VDC
• Operating Temperature -C C
GSM
• Frequency Quad-band ///MHz
• Power transmission Compatible with GSM phase /
Class (W) to GSM & EGSM
Class (W) to DCS & PCS
BLUETOOTH
• Bluetooth Version . EDR
• Power Class .
• Frequency Range – MHz
• Output power .dBm (typical)
• Communication distance m
• Maximum number of simultaneous users
TECHNICAL CHARACTERISTICS
ATTENTION:
Importance of the Manual:
• It is important for your safety that these instructions are followed.
• Keep these instructions in a safe place for future reference.
Responsibility:
• The ELECTROCELOS S.A. is not responsible for the improper use of the product, or other use
than that for which it was designed.
• The ELECTROCELOS S.A. is not responsible if safety standards were not taken into account
when installing the equipment, or for any deformation that may occur.
• The ELECTROCELOS S.A. is not responsible for insecurity and malfunction of the product
when used with components that were not sold by the them.
Mechanism use:
• This product was designed and manufactured strictly for the use indicated in this manual.
This GSM is not appropriate for inflammable or explosive environments.
• Any other use not expressly indicated may damage the product and / or can cause physical
and property damages, and will void the warranty.
• Do not make any changes to the automation components and / or their accessories.
• Keep GSM away from children, to prevent the automated system from being activated
involuntarily.
• The customer shall not, under any circumstances, attempt to repair or tune the automatism.
Must call qualified technician only.
To Installer:
• The installer must have certified professional knowledge at the level of mechanical
assemblies in doors and gates and control board programmation. He should also be able to
perform electrical connections in compliance with all applicable regulations.
• The installer should inform the customer how to handle the product in an emergency and
provide him the manual.

A
mm
mm
mm
mm
EN
02. THE DEVICE
VISUAL APPEARANCE
LED POW
LED OFF Without power
LED ON With power
LED NET
Flashes every 1 sec. No GSM network
Flashes every 3 sec. With GSM network
LED STAT
LED OFF The module is inactive
LED ON The module is active and functioning
LED ACT
Flashes time Normal functioning
Flashes times User control by time limit is active
Flashes times There is a Bluetooth connection active
Flashes times User control by time limit and Bluetooth connection
active
It remains lit for sec. An operation was successfully performed
Blinks fast for sec. An operation was not successfully performed
Removable
cover
Antenna
LED ACT LED NET
LED STAT
LED POW
SIM card
slot

A BA B
12
3
567
4
8
A B C D
12
34
ENEN
03. INSTALLATION 03. INSTALLATION
CABLING CONNECTIONS
• Make the holes.
• Secure the equipment
used suitable dowels and
screws.
• Delete the SIM card PIN (Refer to the mobile phone manual you use for this purpose).
• Insert the SIM card into the M until you hear a click.
• Connect the device to the power supply.
The device will act as follows:
• LED POW and LED ACT turn on.
a • A second later, the STAT LED and the NET LED will start blinking with intervals of
second.
b • The LED NET captures GSM network and blinks with intervals of seconds.
c • Wait for the ACT LED to flash with intervals of seconds (approximately seconds after
turning on the power).
• You can start programming the device.
This process should last approximately 10 seconds.
The GSM card must have a minimum balance (at least the necessary to send 3
messages).
OPTION • Cable exits from behind,
into the wall. Use a screwdriver to
open one of the marked holes for
cable's back passage.
OPTION • Cable comes out from
underneath.
In thiscase, thecableis visiblefrom
the front, and you should open the
passage for the cable on the cover
as shown in the image.
Power Supply (A) /V
(B) COM
Contact (C) NO
(D) NO
•Remove the equipment
cover by pulling the side
hooks.
• Mark the two fixing holes.
WALL
WALL
WALL
FIXATION

A BA B
11
12
14
9
10
13
9
11
12
14
13
10
ENEN
04. CONFIGURATION THROUGH SMS
PARAMETERS DESCRIPTION
ADD USER WITHOUT TIME LIMIT INDICATION
The administrator can perform any operation on the device. The default administrator
password (SA) is . The ACT LED lights for sec to confirm the operation.
CHANGE ADMINISTRATOR PASSWORD
º Admin. Password ()
º Space
º Option Parameter (SA)
º Space
º New password
º Space
º Confirm password
º Send SMS
The user only uses the password to activate the output via bluetooth. You can not therefore
perform any configuration. The default user password is .
CHANGE BLUETOOTH USER PASSWORD
º Admin. Password ()
º Space
º Option Parameter (SU)
º Space
º New password
º Space
º Confirm password
º Send SMS
You can add up to users in a single message.
º Admin. Password ()
º Space
º Option Parameter (AU)
º Space
º After this, add the numbers
to be memorized,
separated by a space (see
example image).
º Send SMS
It is possible to add users with time limit, up to a maximum of users. Whenever a time limit
is used, the time must be preceded by a H.
ADD USER WITH TIME LIMIT INDICATION
º Admin. Password ()
º Space
º Option Parameter (AU)
º Space
º Cellphone Number
º Space
º Option Parameter (H)
º Entry Hour
º Admin. Password ()
º Space
º Option Parameter (DU)
º Space
º From here, add the numbers
you want to delete, separated
from each other by a space (see
example image).
º Send SMS
DU to delete
some numbers CL To delete all
the numbers
º Colon
º Entry Minute
º Dash
º Exit Hour
º Colon
º Exit Minute
º Send SMS
04. CONFIGURATION THROUGH SMS
ADD USER WITH AND WITHOUT TIME LIMIT
º Admin. Password ()
º Space
º Option Parameter (AU)
º Space
º From here, add the numbers you want (up to the
total of ). You can add numbers with and without
time indication (see example image).
º Send SMS
It is possible to add users with or without time limit, up to a maximum of users.
You can delete up to users in a single message, or delete them all at once.
REMOVE USER(S)
SA Change Administrator Password
SU Change User Password
AU Add User
DU Remove User
CL Remove All Users
ST Change Relay's Impulse Time
SO Configure The Phone Number Associated To The Device's Card
TE Activate Time Limit
TD Deactivate Time Limit
SC Force the clock's update with the GSM network
Before setting parameters where time is applied (24h
format), you must update the device's clock with the
network's clock. Send message with: 9999 SC.

A BA B
18
15
16
19 20
ENEN
20
18
17
CHANGE RELAY IMPULSE TIME
OUTPUT ACTIVATION THROUGH VOICE CALL
ENABLE OR DISABLE THE USER'S CONTROL BY TIME LIMIT
04. CONFIGURATION THROUGH SMS
The maximum impulse time is seconds.
The default time is second.
15
The configuration of this phone number is essential so that the device can synchronize the
internal date and time. It is also essential for the proper operation of "User's control by time
limit" mode.
INDICATE THE PHONE NUMBER ASSOCIATED TO THE DEVICE'S CARD
16
To activate the device output contact, you need to make a voice call device's card number. Only
users added to the device memory are allowed to activate relay output. NIn the case of users
with time limit (assuming synchronized the internal clock), you can only activate the output if
you call within this same limit set to that number. The same number with and without calling
code is understood by the device as a different number. Therefore, it is necessary to ensure that
the stored memory number is exactly the same as the voice call.
º Admin. Password ()
º Space
º Option Parameter (ST)
º Space
º Admin. Password ()
º Space
º Option Parameter (SO)
º Impulse Time (in sec.)
º Send SMS
º Space
º Card associated number
º Send SMS
INITIAL GRAPHIC INTERFACE
05. CONFIGURATION THROUGH APP
If you change SIM cards, you must reset the number
associated with the device and associate the new
number. To reset, use #.
Enable
time
limit
Disable
time
limit
REGISTRATION OF THE LAST CALL
GSM SIGNAL QUALITY
NAVIGATION SEPARATORS
CONTROL BUTTONS
•
Android 4.1 (Jelly Bean), is the minimum version to use the application.
•
After 60 seconds without pressing any buttons in the app, the phone is no longer
connected to the device.
APPLICATION STATUS INDICATOR
EXIT APPLICATION
• Press the control button
for 2 seconds. • The dialog box for configuring this control button
appears.
19
Search for bluetooth
devices that can be
associated with the
control button.
Enter the password
(administrator or user)
to have permission to
operate the device.
Indicate a user's phone
with permission to
operate the device.
Indicate the phone
associated with the
device card.
CONTROL BUTTON CONFIGURATION
Configure a background
image for the control
button.

A BA B
2221 23
24 25 26
27 28 29
31 32
30
ENEN
CONTROL BUTTON CONFIGURATION
05. CONFIGURATION THROUGH APP
ADD A USER
05. CONFIGURATION THROUGH APP
22
• Click the icon to change the
control button's identifying
image.
Short click - Enters the
camera;
Long click - Enter the image
gallery.
• Press search to associate
a bluetooth device with the
control button.
• Select one of the
detected devices.
• Press to complete.
• A description with the
name and number of the
connected device will appear
on the button area.
• Fill in the requested data.
21 23
24 25 26
• Short press the command
button for the device on
which you want to add the
new user.
• When you use the command
button for the first time, you
will receive a notification to
pair with the device.
Press PAR.
27 28
3 • The command button's
image frame turns blue,
confirming the success of the
operation.
29
5 • Press in the indicated area.4 • Select the Users tab.
31
6 • Enter the phone number
of the user to add and the
daily time limit. Press to
confirm.
32
30

A BA B
34 35
33 40 41
39
37 38
36 43 44
42
ENEN
05. CONFIGURATION THROUGH APP
ADMINISTRATOR'S PASSWORD CONFIGURATION DEVICE'S NAME CONFIGURATION
05. CONFIGURATION THROUGH APP
USER'S PASSWORD CONFIGURATION
34
2 • Continuously click the
button associated with the
administrator password.
1 • Select the Settings tab.
3 • Enter the new password 2
times and press to confirm.
3 • Enter the new password 2
times and press to confirm.
35
33
1 • Select the Settings tab. 2 • Continuously click the
button associated with the
user password.
37 38
36
IMPULSE TIME CONFIGURATION
1 • Select the Settings tab. 2 • Click and hold the button
associated with the device
name.
40
3 • Enter a new name and
press to confirm.
41
39
1 • Select the Settings tab.
2 • Press and hold the button
associated with the impulse
time.
3 • Select the desired pulse
time and press to confirm.
43 44
42

A BA B
46 47
45
49 50
48
52 53
51
55
54
ENEN
3 • Press to synchronize the
device clock.
05. CONFIGURATION THROUGH APP
TIME LIMIT CONTROL CONFIGURATION
CHECK DEVICE'S GSM NETWORK STATUS
SYNCHRONIZING DEVICE'S WATCH WITH PHONE WATCH
05. CONFIGURATION THROUGH APP
DEVICE'S PHONE CONFIGURATION
2 • Continuously press the
button associated clock.
46 47
If the clock synchronization is not successful try again until it is correct. This is
the only way to ensure correct operation when there is a scheduled time limit.
1 • Select the Settings tab.
45
2 • Continuously click the
device's phone button.
2 • Continuously click the
time limit control button.
2 • Select the GSM signal
quality button.
3 • Enter the new phone and
press to confirm.
3 • Select the desired option
and press to confirm.
3 • It is presented with a
warning on the signal quality
GSM device.
49
52
55
50
53
1 • Select the Settings tab.
48
51
54
VERIFY DEVICE'S SETTINGS
Press (short) one of the indicated options to see
the current device configuration. The administrator
password and device name can not be queried.

A BA B
62 63
57 58
56
60 61
59 64 65
ENEN
05. CONFIGURATION THROUGH APP
VIEW ALL USERS
2 • The image of the command
buttongetsa blueframe around
it, confirming the success of the
operation.
• Press, with a short-click,
the control button for the
device you want to activate
the exit.
60
3 •
With a new click, the device
output will be activated.
After 60 seconds without
performing any operation the
connection will be terminated.
61
59
ENABLE DEVICE OUTPUT
REMOVE USERS
1 • On the Users tab, go to the
list of all users.
62
2 • Click (short) the user you
want to delete. Press to
delete.
63
Press the indicated
icon if you want to
delete all users.
05. CONFIGURATION THROUGH APP
SWITCH BETWEEN BLUETOOTH AND CALL / SMS
• When this function is enabled, a telephone call
will be used (clicking on the button) to activate
the relay output and for any configuration
operation, an SMS will be sent.
• When you activate this function, bluetooth
connection will be used to perform any
operation.
64 65
It is recommended to activate the output via a telephone call because
communication is less susceptible to environmental interference. Bluetooth
communication, under adverse environmental conditions, may have a reduced
range (GSM behind walls, inside boxes or in a high electromagnetic noise
environment).
When you give an order in the set button, the device ACT LED will light up for
seconds.
57
2 • Click on the indicated area.1 • Select the User's tab. 3 • The following dialog box
will appear. Wait until the
operation is complete.
58
56

A
66 68
67
71
72
7069
EN
06. IMPORT USERS
1 • Create a list in the Excel program taking (exactly) into account the template shown in the
image.
2 • In the first line, place (obligatorily) the headers.
3 • Format all cells for text and fill in the data.
4 • Save the file in the "CSV (Comma Separated)" format.
5 • Transfer this file to your phone and place it where you have the application installed.
CREATE A LIST OF USERS THROUGH EXCEL
71
1 • Select the Import tab. 2 • Click on the indicated
area.
3 • Go to the Excel folder.
LOAD THE LIST AND SEND TO THE DEVICE
4 • Press the indicated area
and wait until the operation
is complete.
72
7069
66
Phone Entry hour Entry minutes Exit hour Exit minutes
68
67
Loading the list of users through excel can take up to minutes.

A
EN
Anomaly Procedure Behavior Discovering the origin of the problem
I added a number
but I can not activate
the GSM output via
phone call.
Connect through the bluetooth
application to the device and list the
users.
Check if the number is listed and appears
exactly as you entered.
It does not
appear in the
list.
Try to add the number again. Check if:
• The number consists only of digits (without any space or other character).
• The phone number does not exceed 15 digits.
• The password is correct.
• The option parameter symbol is the correct one.
• You did not enter two spaces instead of one.
The number
appears in the
list and is as
entered.
• You did not enter two spaces instead of one.
• Check the number that made the last call.
• Compare this number with that added to the device.
I can not connect
through the
bluetooth
application.
• Check how often the ACT LED flashes.
Blinks or
times.
• There is an active Bluetooth connection on the device.
• Ensure that no other user is performing operations on the device.
• If no one else is connected, wait seconds for it to be automatically turned off.
Blinks or
times.
• Make sure you can find the device by searching for devices in the bluetooth application.
• Check the strength of the bluetooth signal from where you are trying to connect through in-app search.
• Check if the distance to the device is within range and that there are no environmental barriers (eg walls) that could
degrade communication with the device.
The control by time
limit is not as defined
schedule.
• Connect via bluetooth and check the
date and time set on the device.
• Set the time and date in case of an
error.
• Turn off the power.
• Turn the power back on.
• Test the limit control.
If you restart the
device (power
off and on again)
the time limit
control stops
working.
• Check your SIM card balance.
07. TROUBLESHOOTING
FINAL CONSUMERS INSTRUCTIONS INSTRUCTIONS FOR SPECIALIZED TECHNICIANS
Other manuals for M170
1
Table of contents
Other Motorline professional Transmitter manuals
Popular Transmitter manuals by other brands

RC4 Wireless
RC4 Wireless LumenDimM4micro quick start guide

Seasafe
Seasafe SSTX/01 user manual

Dwyer Instruments
Dwyer Instruments 604D-0 Specifications-installation and operating instructions

Episode
Episode ES-SUB-WIRELESS-KIT installation manual

Novus
Novus NP400 instruction manual

Black Box
Black Box AC560A manual