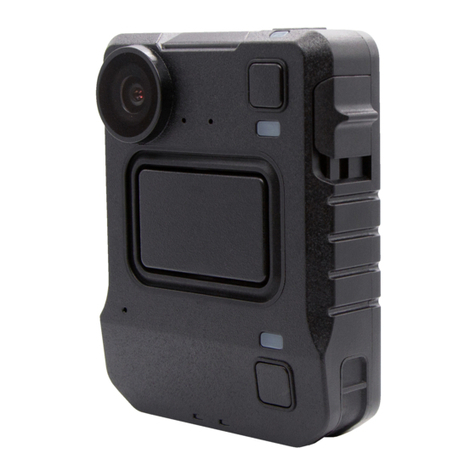
Motorola solutions V300 User manual

V300 Body-Worn
Camera User Guide
October 2020
© 2020 Motorola Solutions, Inc. All rights reserved. Revision B

Copyrights
Copyright © 2020 Motorola Solutions. All rights reserved. MOTOROLA, MOTO,
MOTOROLA SOLUTIONS, and the stylized M logo are trademarks or registered
trademarks of Motorola Trademark Holdings, LLC and are used under license. This
document and supporting data are the exclusive property of Motorola Solutions, Inc. and
may not be copied and/or reproduced without permission.
Firmware updates
Motorola Solutions is committed to the continual testing and improvement of our firmware.
As new revisions become available, these updates will be made available to your agency;
fees may apply depending on your licensing agreement.
Manufacturer contact information
Motorola Solutions, Inc.
415 E. Exchange, Allen, TX 75002-2616
Customer Service: 1-800-605-6734
Customer Service web portal: https://support.watchguardvideo.com/
Send us your suggestions
We want to hear from you. Tell us about your experience and how you are using the V300.
We will do our best to accommodate any suggestions you may have in future revisions.
International customers, please contact your local distributor.
Trademark notices
Bluetooth® is a registered trademark of Bluetooth SIG, Inc.
Wi-Fi® is a trademark of the non-profit Wi-Fi Alliance
All other marks, names, and logos mentioned herein are the property of their respective
owners.
ii V300 Body-Worn Camera User Guide
WGD00169, Revision B

FCC and ICnotices
This equipment complies with Part 15 of the FCC rules and Industry Canada license-exempt RSS standard(s).
This equipment should only be used with the antenna supplied by Motorola Solutions Video. Any changes or
modifications not expressly approved by the manufacturer could void the user's authority to operate the
equipment.
Motorola SolutionsV300 contains the following IDs:
FCC ID YJV-VST400
IC ID 9073A-VST400
Motorola SolutionsWiFi base contains the following IDs:
FCC ID YJV-VST500
IC ID 9073A-VST500
Cet appareil est conforme à la Partie 15 des règlements de la FCC et Industrie Canada exempts de licence
standard RSS. Cet appareil doit être utilisé uniquement avec l'antenne fournie par Motorola Solutions. Tout
changement ou modification non expressément approuvée par le fabricant pourrait annuler l'autorité de
l'utilisateur de faire fonctionner l'appareil.
Motorola SolutionsV300 contient les identifiants suivants:
FCC ID: YJV-VST400
IC: 9073A-VST400
Motorola SolutionsWiFi base contient les identifiants suivants:
FCC ID YJV-VST500
IC ID 9073A-VST500
The device complies with Part 15 of the FCC rules and Industry Canada license-exempt RSS standard(s) subject
to the following two conditions:
1. The device may not cause harmful interference.
2. The device must accept all interference received, including interference that may cause undesired operation.
Cet appareil est conforme à la Partie 15 des règlements de la FCC et Industrie Canada exempts de licence
standard RSS soumis aux deux conditions suivantes:
1. Cet appareil ne peut causer des interférences nuisibles.
2. Cet appareil doit accepter toutes les interférences reçues, y compris les interférences qui peuvent perturber le
fonctionnement.
Under Industry Canada regulations, this radio transmitter may only operate using an antenna of a type and
maximum (or lesser) gain approved for the transmitter by Industry Canada. To reduce potential radio
interference to other users, the antenna type and its gain should be so chosen that the equivalent isotropically
radiated power (e.i.r.p.) is not more than that necessary for successful communication.
Conformément à la réglementation d'Industrie Canada, cet émetteur radio ne peut fonctionner à l'aide d'une
antenne d'un type et maximum (ou moins) Gain approuvé pour l'émetteur par Industrie Canada. Pour réduire le
risque d'interférence avec d'autres utilisateurs, le type d'antenne et son gain doivent être choisis afin que la
puissance isotrope rayonnée équivalente (PIRE) ne dépasse pas ce qui est nécessaire pour une communication
réussie.
The radio transmitters IC: 9073A-5 have been approved by Industry Canada to operate with the antenna types
listed below with the maximum permissible gain and required antenna impedance for each antenna type
indicated. Antenna types not included in this list, having a gain greater than the maximum gain indicated for that
type, are strictly prohibited for use with this device.
Antenna type (radio transmitter): Motorola Solutions part number WGP02541, 4.6 dbi gain, 50 Ohm impedance.
iii V300 Body-Worn Camera User Guide
WGD00169, Revision B

Ces émetteurs radios IC: 9073A-VST500 ont été approuvés par “Industry Canada” pour fonctionner avec les
types d'antennes énumérés ci-dessous avec le gain maximal admissible et l'impédance d'antenne requise pour
chaque type d'antenne indiqué. Les types d'antennes ne figurant pas dans cette liste, ayant un gain supérieur au
gain maximum indiqué pour ce type, sont strictement interdits pour une utilisation avec cet appareil.
Type d'antenne (émetteur radio): Motorola Solutions part number WGP02451, 4.6 dBi gain, 50 Ohm impedance.
The antennas used for this transmitter must not be co-located or operating in conjunction with any other antenna
or transmitter.
Les antennes utilisées pour cet émetteur ne doivent pas être co- Les antennes utilisées pour cet émetteur ne
doivent pas être co-localisées ou fonctionner conjointement avec une autre antenne ou un autre émetteur.
CE Declaration of Conformity
In accordance with the requirements of Radio Equipment Directive 2014/53/EU, Annex III, Module B, section 3
(c), Motorola Solutions declares that the radio equipment has been designed in accordance with harmonized
standards and a full review of the equipment against the requirements of the following standards has been
conducted. We confirm that the equipment is fully within the scope of these standards.
ETSI EN 301 489-17, V3.1.1: 2017
ETSI EN 300 328, V2.1.1: 2016
EN 55024:2010
EN 55032:2012/AC:2013
EN 62311:2008
IEC 62368-1:2018
iv V300 Body-Worn Camera User Guide
WGD00169, Revision B
Contents
Contents
Introduction to the V300 Body-Worn Camera 11
About this document 11
What's New with the V300 Body-Worn Camera 12
Related documents and information 12
Transfer Station II and WiFi base 12
Getting Started 15
Using V300 Body-Worn Camera Overview 16
First Steps 16
Removing V300 Camera Battery 17
V300 Buttons 18
V300 LCD Display 19
Error messages 19
Wearing the V300 Camera 20
Center chest mount 20
MOLLE vest mount 21
V300 Camera Field of View 22
Power On and Off 22
Power on 22
Power off 23
Forcing power off 23
Starting and Stopping a Recorded Event 24
Starting a recorded event manually 24
V300 Body-Worn Camera User Guide
WGD00169, Revision B v

Contents
vi V300 Body-Worn Camera User Guide
WGD00169, Revision B
Stopping a recorded event manually 25
Covert mode 25
Enter Covert mode 25
Exit Covert mode: 25
Momentary Muting of the Audio 26
Muting audio 26
Categorizing a Recorded Event 27
Categorizing an event on the camera in a recording group 27
PreEvent and Record-After-the-Fact ® (RATF) Overview 27
Docking the V300 Body-Worn Camera 28
Docking the V300 Camera Overview 29
Docking the V300 Camera in a Transfer Station II 30
Docking the V300 in a WiFi base 31
Charging the Battery 31
Camera charging display 32
Low battery, camera shutdown 32
Associating V300 Camera with a Recording Group 32
Assigning a Configuration and Officer and Checking Out 33
Transfer Station II configuration 33
Upload Events 34
Monitor event uploading 34
Record-After-the-Factt® events 34
Clearing video out of camera storage 34
Understanding Tricolor LEDs on Each Transfer Station II Slot 34
Upgrading V300 Body-Worn Camera Firmware 35
Upgrading WiFi base Firmware 36
WiFi base upgrade 36
Using PreEvent and Record-After-the-Fact (RATF) 37
PreEvent Capture 38
Audio 38
Record-After-the-Fact® (RATF) 39
Generating a RATF event 39
Storage 39

Contents
Audio 39
Force Microphone On 39
Using V300 in a recording group 40
Recording Group Overview 41
Recording group members 41
V300 Camera functions 41
Smart Power Switch (SPS) 42
4RE 43
Group Events 44
V300 Camera Behavior 44
About the Features of the V300 Camera 45
V300 Camera Features Overview 46
V300 Body-Worn Camera Components 46
Microphone 47
Buttons 47
Power button 47
Record Start/Stop button 47
Function button 47
Display Backlight button 47
V300 display 48
Display in different modes 49
Feedback Indicators 49
V300 User-Removable Battery 50
V300 Camera Battery Maintenance 51
Random rebooting or random power off 51
Battery percentage reports at 0% battery life remaining 51
V300 will not power on or off 51
Causes for these problems 51
Corrective actions 52
Resolutions and repair procedures 52
Video, Audio, and Subtitle Evidence 53
Video 53
Image distortion correction 53
V300 Body-Worn Camera User Guide
WGD00169, Revision B vii
Contents
viii V300 Body-Worn Camera User Guide
WGD00169, Revision B
Audio 53
Subtitles 53
Recording Reminder Alert 54
Data and video encryption 54
Storage 55
Low storage and full storage messages 55
GPS 55
WiFi base 56
LEDs for WiFi base 57
Left LED 57
Right LED 57
Connections 58
Setting up the WiFi base 58
Remote upgrade Wi-Fi base 58
V300 Camera display 58
V300 LCD Flow 59
V300 LCD Flow (cont.) 60
Disk full 60
Upload events 60
Charge the battery 61
Discharge the battery 61
Charge temperature 61
Associate with a group 61
Error code 62
Transfer Station II and WiFi base LEDs 63
Power LED indicators 63
Activity LED indicators 63
Transfer Station II front LED indicators 64
SmartControl 65
Supported versions 65
SmartControl Overview 66
Get the SmartControl app 66
Enabling SmartControl 67

Contents
Connecting to SmartControl 68
Categorizing an event 69
Starting a state capture 70
Appendix: Transfer Station II 71
Transfer Station II Setup Overview 72
About the Transfer Station II 73
LEDs 73
Connections 73
Transfer Station II Configuration Settings 74
Admin Evidence LibraryTransfer Station II Settings 74
Transfer Station II Configuration 74
V300 Settings 76
DHCP IP Config 76
Upgrade Transfer Station II 77
Administrative functions 78
Change Username and Password 78
Disable Transfer Station II 78
Restart Transfer Station II 79
Get Transfer Station II Logs 79
V300 Body-Worn Camera User Guide
WGD00169, Revision B ix
Contents
This page intentionally left blank.
xV300 Body-Worn Camera User Guide
WGD00169, Revision B

Introduction to the V300 Body-Worn Camera
Welcome to the V300 Body-Worn Camera User Guide. This guide walks you through the basics of using
your V300 to collect video and audio evidence.
About this document
This guide covers the basic components and operation, including:
lFirst Steps to using V300
lDocking, charging, provisioning, and uploading
lRemoving the V300 battery
lThe Function button
lAssociating a recording group with a V300 Body-Worn Camera
lWearing the V300 Body-Worn Camera
lPowering on and off
lLCD display
lRecording evidence
lSecurity
lCategorizing events
lPre-event and Record-After-the-Fact® (RATF)
The guide also includes a section on recording groups and how V300 Camera and the WiFi base work
within a local recording group network.
Note: This user guide covers the basic use of the V300. If you have a question that is not
covered in the user guide, contact Customer Service at
https://support.watchguardvideo.com/V300.
V300 Body-Worn Camera User Guide
WGD00169, Revision B 11
Introduction to the V300 Body-Worn Camera
What's New with the V300 Body-
Worn Camera
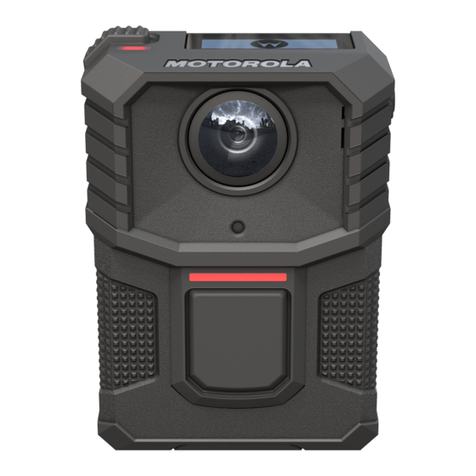
The V300 Body-Worn Camera is the next generation of the body camera. Features include:
lUser-replaceable, stand-alone battery that allows 24 hr
shifts with same camera
lElectronic turret that allows +15/-20 degrees adjustment
lMomentary mute
lWi-Fi and Bluetooth enabled
lWiFi base
lTransfer Station II
l120 dB Wide Dynamic Range (WDR) that better
resolves details in bright versus dark lighting situations
lReduced fisheye effect
l8 MP back-illuminated HDR, WDR image sensor that
realizes high picture quality in the visible light regions
lDual microphones
lStores 24 - 36 hours of events with maximum resolution and 30 frames per second with 128 GB of
storage
lWorks with other V300 Body-Worn Cameras and the 4RE to form a recording group
lTo prevent unauthorized access to your data, V300 Body-Worn Camera elevates your data security with
encryption at rest and in transit
lA rating of IP67 from the International Electrical Commission that means the camera can survive a drop
into fresh water up to 1 meter (3 feet 3 inches) deep and for up to 30 minutes.
lSmartControl smart phone app
Related documents and information
For subjects related to your Motorola Solutions system that are not covered by the V300 Body-Worn
Camera User Guide, see the following documents:
l4RE® In-Car Video User Guide
lEvidence Library ( EL)
lEvidence Library 4 Web (EL4 Web)
Transfer Station II and WiFi base
The V300 Camera needs a second generation transfer station and WiFi base. You can dock either the
stand-alone battery in the Transfer Station II or WiFi base or dock the camera and battery together.
12 V300 Body-Worn Camera User Guide
WGD00169, Revision B
Transfer Station II and WiFi base
Docking both lets you charge and upload at the same time. Docking a spare battery in a WiFi base lets
you have a second battery available when needed. The camera and battery only dock in one direction.
V300 Body-Worn Camera User Guide
WGD00169, Revision B 13
14
(Undefined variable: Variables.ProductShortName)
V300 Body-Worn Camera User Guide WGD00169,
Revision B
Introduction to the V300 Body-Worn Camera
This page intentionally left blank.

Getting Started
Getting Started
In this section...
lUsing the V300 Body-Worn Camera Overview (page 16)
lFirst steps
lRemoving the battery (page 17)
lV300 Body-Worn Camera buttons (page 18)
lWearing V300 Body-Worn Camera (page 20)
lPowering the camera on and off (page 22)
lStarting and stopping a recorded event (page 24)
lMomentary muting of the audio (page 26)
lCovert mode (Covert mode) (page 25)
lCategorizing a recorded event (page 27)
lDocking the V300 Body-Worn Camera(page 29)
oDocking in the Transfer Station II (page 30)
oDocking in the WiFi base (page 31)
oCharging the battery (page 31)
oConfiguring the camera (page 33)
oAssociating with a recording group (page 32)
oUploading recorded events from storage (page 34)
oUnderstanding tricolor LEDs on each Transfer Station II slot (page 34)
oUpgrading the V300 Body-Worn Camera (page 35)
oUpgrading WiFi base firmware (page 36)
V300 Body-Worn Camera User Guide
WGD00169, Revision B 15

Getting Started
Using V300 Body-Worn Camera
Overview
The Motorola Solutions V300 Body-Worn Camera serves as a Digital Video Recorder (DVR) to capture,
process, and store video and audio evidence. Connect the camera to Evidence Library (EL) to configure
it and upload video for evidence management.
The V300 Body-Worn Camera works with other V300 Body-Worn Cameras and the in-car 4RE DVR to
form a recording group (page 41).
Note: The [[[Undefined variable Variables.Product1ShortName]]] cannot pair as part of a
group with the VISTA cameras in the same car. You can combine the videos of V300,
VISTA WiFi and VISTA XLT video captures for the same event in EL.
First Steps
For best results, before using your V300 Camera for the first time:
1. Fully charge the camera and removable battery.
2. Ensure the camera software is current using Evidence Library (EL).
To charge the camera:
nDock the camera in a Transfer Station II (Transfer Station 2).
Note: The camera battery charges any time it is docked. A blinking LED means camera
is charging. A solid green LED on any of the bases means the battery is fully charged.
To configure the camera:
1. Dock the camera in a Transfer Station II.
2. Using EL, create and/or assign a configuration and an officer to the docked V300 Camera.
When the configuration is applied, the screen displays Checked out to on the first line and the officers
name on the second line. The camera reboots to apply the configuration and displays the same
information then transitions to an idle screen.
See the Evidence Library Online Help for more information.
16 V300 Body-Worn Camera User Guide
WGD00169, Revision B

Removing V300 Camera Battery
You can remove the V300 battery and charge it separately from the camera. If you use a spare battery this
ensures you never run out of power.
Note: No events can be uploaded if the camera is not docked.
To remove the battery:
1. Power off the camera.
2. Slide the silver bar on the back of the camera to the left.
3. Pull straight down on the battery. Do not lift out.
To replace the battery, slide it into the tracks and push it in until it clicks.
V300 Body-Worn Camera User Guide
WGD00169, Revision B 17

Getting Started
V300 Buttons
V300 has four buttons:
lFunction (top)
Press and Hold (1) the Function button for Covert mode or to tag an event
lDisplay Backlight
Press the Display Backlight (2) button to:
nTurn on the backlight for the LCD Display
nSee the camera status or review categories for an event
recording
nPress and hold to start momentary mute
lRecord Start/Stop
Press the Record Start/Stop (3) button to start or stop a recorded
event
lPower
Press and release the Power (4) button on the bottom of the
camera to power V300 on or off
At the beginning of your first shift, V300 automatically calibrates the
horizon, once a day, and notifies you when it finishes.
18 V300 Body-Worn Camera User Guide
WGD00169, Revision B

V300 LCD Display
V300 LCD Display
The LCD display shows:
lBattery status backlight
The V300 battery charge lasts up to 12 hours, depending on
your configuration. The camera display shows the icon and
the percentage of battery remaining.
lStorage status and number of recordings in storage (1, 6)
When recording in HD format, V300 can store about 36
hours of maximum-resolution events or up to about 200
hours at low resolution. As the storage on the camera fills,
the storage icon fills (1) and the percentage increases (2)
until storage is full.
lRecording status and Recording length (3, 4)
The icon (3) shows whether the V300 is recording (3).
The time shows the recording length (4).
lAssigned officer name (5)
Officer with the camera checked out.
lCurrent date and time (7)
V300 sets its internal date and time from the Evidence
Library computer.
lCamera ID (8)
Device ID or serial number. (8)
lAvailable event categories (page 69)
Categories are set by your agency.
Error messages
If an error appears on the V300 display screen the top LED flashes red to show an error condition.
Press the Backlight button to acknowledge the error. The LED may then turn solid amber until the error
is cleared by the camera. If it does not clear on it's own, reboot the camera.
V300 Body-Worn Camera User Guide
WGD00169, Revision B 19

Getting Started
Wearing the V300 Camera
The V300 Camera uses magnets to secure the mounts to your clothing.
Warning! Do not wear the Magnetic Chest Mount (Universal Chest Mount) near
sensitive medical equipment or implants such as pacemakers or other magnetically
programmable medical devices.
Wear the V300 on your clothing and vest where it is most comfortable, convenient, and secure. Ensure
that the lens is not obstructed and that it is aimed at the horizon (page 22).
Center chest mount
The mount is made to fit ideally over the buttons or zipper in the center of your chest. You can also wear
it over your pocket or on the protective vest or jacket.
The magnets are strong with 65 pounds of pressure when snapped together.
To use the chest mount:
1. Separate the under-shirt bracket (2) from the over-shirt bracket (1):
a. Hold the under-shirt bracket in one hand with the thumb on top and the
two middle fingers on the bottom.
b. Raise the levers (3) on both sides.
c. While holding the levers (3) up, pull the brackets (1, 2) apart.
2. Match the anchor tabs (3) and camera slots (5) on the over-shirt bracket
with the back of the camera—keeping the magnets apart. You can attach
the V300 Camera before or after the mount is in place.
3. Place the under-shirt bracket (2) under your shirt where you want to wear
your camera.
4. Line up the anchor slots (3) and place the over-shirt (1) against the under-
shirt bracket (2), with your shirt between them. (These will snap together
forcefully.)
The magnets on both brackets line up automatically, securing the mount to your shirt.
20 V300 Body-Worn Camera User Guide
WGD00169, Revision B
Other manuals for V300
2
Table of contents
Other Motorola solutions Digital Camera manuals

Motorola solutions
Motorola solutions VT-100 User manual

Motorola solutions
Motorola solutions L6Q User manual

Motorola solutions
Motorola solutions edesix VIDEOBADGE VB-400 User manual

Motorola solutions
Motorola solutions Avigilon 8.0C-H5A-FE-DO1 User manual

Motorola solutions
Motorola solutions L5Q Operator's manual

Motorola solutions
Motorola solutions V300 User manual

Motorola solutions
Motorola solutions edesix VIDEOBADGE VB-400 User manual

Motorola solutions
Motorola solutions PELCO IDL302-FXI User manual

Motorola solutions
Motorola solutions L6Q User manual

Motorola solutions
Motorola solutions edesix VIDEOBADGE VB-400 User manual