Warranty Exclusion
Motorola Solutions does not warrant the
installation, maintenance or service of the
Product, accessories, batteries or parts. Motorola
Solutions will not be responsible in any way for
problems or damage caused by any ancillary
equipment or peripherals (specific examples
include, but are not limited to: batteries, chargers,
adapters, and power supplies) not furnished or
manufactured by Motorola Solutions which is
attached to or used in connection with the
Product. When the Product is used in conjunction
with ancillary or peripheral equipment not
supplied by Motorola Solutions, Motorola
Solutions does not warrant the operation of the
Product/peripheral combination and Motorola
Solutions will not honor any warranty claim where
the Product is used in such a combination and it
is determined by Motorola Solutions that there is
no fault with the Product. Upon open or dismantle
the Product, warranty is immediately voided.
Motorola Solutions specifically disclaim any
responsibility for any damage in any way caused
by improper installation by un-authorized
personnel.
Open Source Software Legal Notices
This product contains Open Source Software. For
information regarding licenses,
acknowledgments, required copyright notices,
and other usage terms, visit http://
businessonline.motorolasolutions.com.
Go to Resource Center > Product Information >
Manual > Accessories > Remote Speaker
Microphones
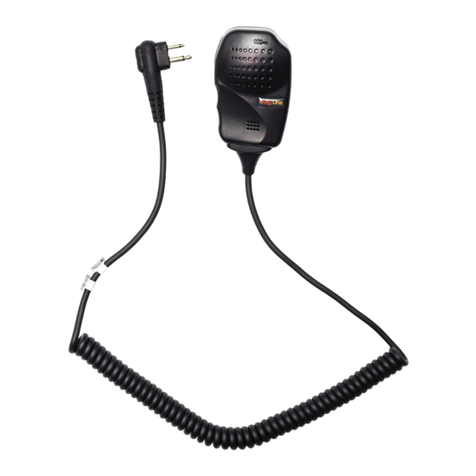
Recommended Wearing Position
Note: For better performance, wear the RSM
and the device on the same side.
FCC ID: AZ489FT6023
IC: 109U-89FT6023
For other WM500 manuals, refer to our Learning
eXperience Portal: https://
learning.motorolasolutions.com
• MN006039A01 - User Manual, English
(Printed)
• MN006538A01 - User Manual, Multilingual
(Online)
• MN006126A01 - Installation Guide, English
(Online)
Table 7: WM500 RSM Button Operations
Button State Short Press Long Press (>1.5 s) Very Long Press (>3s)
Power Off N/A Power On Enter pairing
On RSM turns on N/A Power off
PTT Connected PTT for Kodiak Group Call
Not connected Kodiak pairing N/A N/A
Power+PTT Off N/A N/A Power on and clear
PDL
Power+Call
button On N/A N/A Enter/Exit Dark Mode
Call Button
Not connected Switches language N/A N/A
Incoming call Answer call Reject call N/A
On call Mic Mute End call N/A
Volume+
Connected Volume increase by
one step Volume ramp up
At maximum
volume Volume max tone
Volume-
Connected Decrease volume by
one step Volume ramp down
At minimum
volume Volume min tone
Getting Started
Before you start, fully charge the RSM. To
charge, connect the USB charging cable to
the RSM and plug it to the USB power source.
When RSM is not charging, read the following
table to understand the indication.
Read the following table to understand the
audio and Bluetooth status indication.
Short press the Power button to determine the
details status of the RSM.
Table 3: Charging Indicator Behavior
Power Indicator Description
Blinking reda
a. Charge the RSM immediately to prevent flat-
battery condition.
Battery is low
Solid red Battery is charging
Solid green Battery is fully charged
Blinking green More than 90 % charged
Rapid blinking
red Charging error
Table 4: Battery Indication
Power
Indication Description
Rapid blinking
red
Battery level is critically
low
Blinking red Battery level is low
Offa
a. Press the Power button to get the status.
Battery is medium or high
Table 5: Audio and Bluetooth Status
Audio/
Bluetooth
Indication
Description
Blinking in blue Enter pairing
Solid blue Disconnected
Double blinking
blue (Once) Connected
Solid red Mic muted
Blinking in red Voice prompt/Tone mute
Blinking in green Receiving incoming call
Table 6: Status Indication
Indicator Status Description
Audio/
Bluetooth
Double-blinking
blue Connected
Power
Double blinking
green
Battery level
is high
Double-blinking
amber
Battery level
is medium
RSM Overview
Note:
* Operational Status Messaging (OSM) require
pre-configuration in the WAVE Application.
* Answer/reject/end call and microphone mute
functionalities are not applicable for the radios.
* More programmable functions may be added on the
WAVE application in the future. Refer to Kodiak User
Guide for details.
Radio/Device Compatibility
Refer to WM500 online manual for the list of
compatible radios.
To support new radios and functionalities, always
upgrade to the latest WM500 firmware.
• These accessories can be paired with a Kodiak
Broadband PTT enabled device. Currently, the
supported Kodiak feature is Operational Status
Messaging (the additional features will be
added in the future), refer to your Kodiak User
Guide for setup instructions.
• The MAC Address is located on top of the indi-
vidual box and within the QR code behind the
belt clip.
• Additional MAC Address labels are provided in
the individual box.
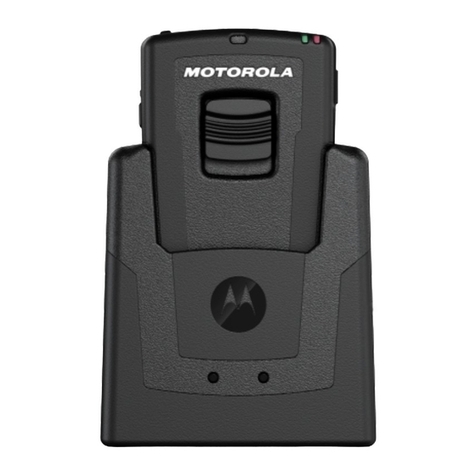
Table 1: RSM Overview and Description
No. Description
1 Volume toggle
2 Power Indicator
3 Power button
4
Push-To-Talk (PTT) button
PTT call can be either transmitted to a
talkgroup or individual user
5
Multifunction (MFB) Button
Available multiple functions:
To change language/tone in disconnected state
To answer calls upon incoming call
To reject calls upon incoming call
To end calls while call is active
To mute/unmute microphone while call is active
6
P1 button
Function configured on the host or the WAVE
application.
WAVE default function: WAVE OSM
7
P2 button
Function configured on the host or the WAVE
application.
WAVE default function: Channel Down
8
P3 button
Function configured on the host or the WAVE
application.
WAVE default function: Channel Up
9
P4 button
Function is set by the host:
WFunction configured on the host or the WAVE
application.
WAVE default function: WAVE OSM
10 Audio/Bluetooth Indicator
11 Emergency button
12 Microphone
13 Speaker
14 Charging port
15 NFC Location
16 Audio jack
Table 1: RSM Overview and Description
No. Description
Table 2: Compatible Parts and Accessories
Part Number Description
PMLN7560_ Receive-only earpiece with
translucent tube
42009312001 Belt Clip
4205823V01
CB000756A01 USB-C Cable (1 m)
Pairing the RSM through Bluetooth
1. While RSM is power off, press and hold the
Power button until you hear “Power On”
followed by “Searching for Host”, and the blue
LED blinks.
2. From the compatible device, search and
select “WM500” from the Bluetooth list.
3. Once the devices are paired successfully, a
tone is played.
4. A voice prompt from the RSM indicates that
the device is “Connected”.
5. For iPhone, choose RSM from the Bluetooth
list and pair again for second time.
Pairing the RSM through NFC
1. While RSM is power off, press and hold the
Power button until you hear “Power On”
followed by “Searching for Host”, and the blue
LED blinks.
2. Align the NFC locations on both the RSM and
the compatibles devices.
3. Check the compatible device for indication of
successful pairing.
Unpairing the RSM
1. While RSM is power off, press and hold the
Power button and PTT buttons.
The blue LED blinks and a voice prompt from the
RSM indicates that the paired device is “Cleared”.
Note: Always unpair the WM500 from the
Bluetooth host and ensure that the paired device
is “Cleared” before starting another pairing
process.
Service and Warranty
Other than the clip, the RSM is not repairable. The
RSM is covered under the standard Motorola
Solutions one-year limited warranty.
