
3 4
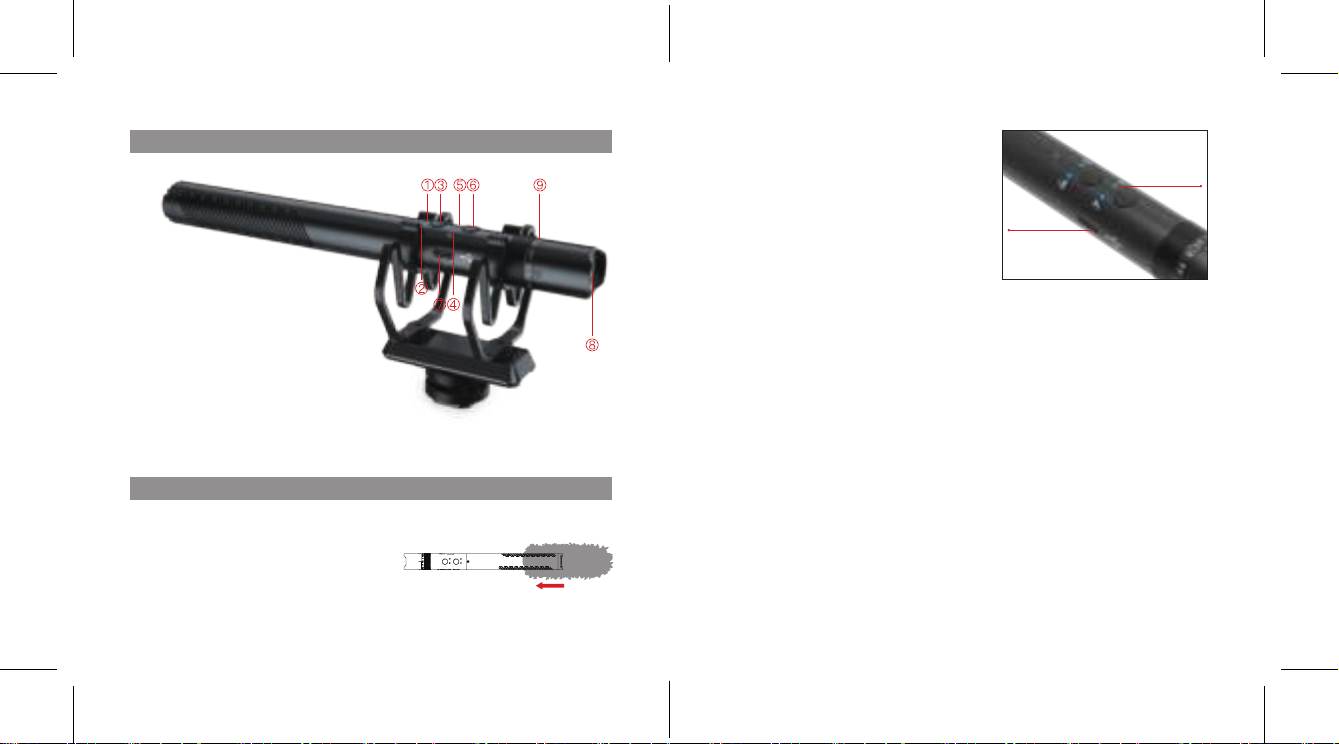
① 75Hz Low Cut Indicator
② 150Hz Low Cut Indicator
③ Low Cut Button
④ Overdrive Protection Indicator
⑤ ON-OFF & Battery Indicator
⑥ ON-OFF/ Overdrive Protection
⑦ Type-C Charging & Output Port
⑧ Headphone Output
⑨ Gain Adjustment Dial
1. The Use of Furry Windscreen
Mic-D30 comes with a furry windscreen to
eliminate the noise caused by wind while
recording. Please install the windscreen to
the microphone as shown below.
2. Charging the Mic-D30 Microphone
The Mic-D30 has a built-in battery. Please
fully charge the microphone with the
Type-C Charging Port and Type-C to USB
Charging Cable before use.
(Note: The ON-OFF & Battery Indicator
will fast ash when the mic is running out
of power. When the mic is charging, the
indicator will flash slowly then stay green
when it is fully charged.)
3. Using with Your Device
The package includes a shock mount, which has a cold shoe on the bottom.
It helps to mount the microphone on recording devices like DSLR, camera,
camcorder.
① Securely place the microphone into the shock mount.
② Install the shock mount to your recording devices via the cold shoe and tighten
the screw.
③ Connect the microphone with your device via the Type-C to 3.5mm Cable. (Note:
Some smart phone devices may require a adapter like Lightning to connect with
the microphone. Adapter is not included in the package.)
④ Long press the ON-OFF button to turn on the microphone. (Note: Short press
for Overdrive Protection function.)
Operations
Components Introduction
4. Real-time Audio Monitoring
It is suggested to use the headphone whose impedance under 55 Ohm to monitor
the audio. Plug your headphone into the Headphone Output, then you can real-
time monitor your recording.
Type-C
Charging Port
ON-OFF & Battery
Indicator


 User manual")


 User manual")


