manuals.online logo
Brands
  1. Home
  2. •
  3. Brands
  4. •
  5. Motorola
  6. •
  7. Radio
  8. •
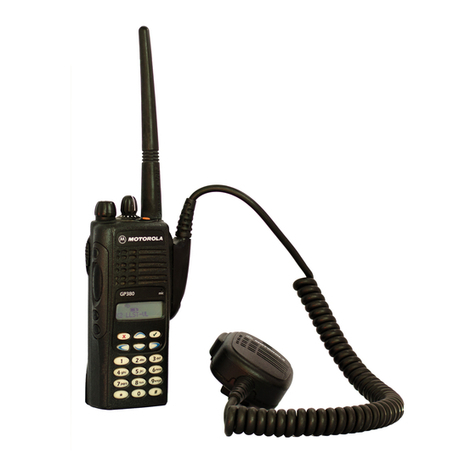
  9. Motorola GP68 User manual

Motorola GP68 User manual

Other manuals for GP68

5

Other Motorola Radio manuals

Motorola ST7500 User manual

Motorola

Motorola ST7500 User manual

Motorola GP series User manual

Motorola

Motorola GP series User manual

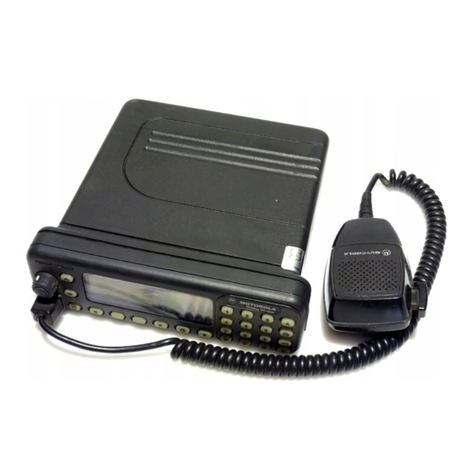
Motorola GM350 User manual

Motorola

Motorola GM350 User manual

Motorola TETRA MTM800 Operating and maintenance manual

Motorola

Motorola TETRA MTM800 Operating and maintenance manual

Motorola GP series Operating and installation instructions

Motorola

Motorola GP series Operating and installation instructions

Motorola GM1200E User manual

Motorola

Motorola GM1200E User manual

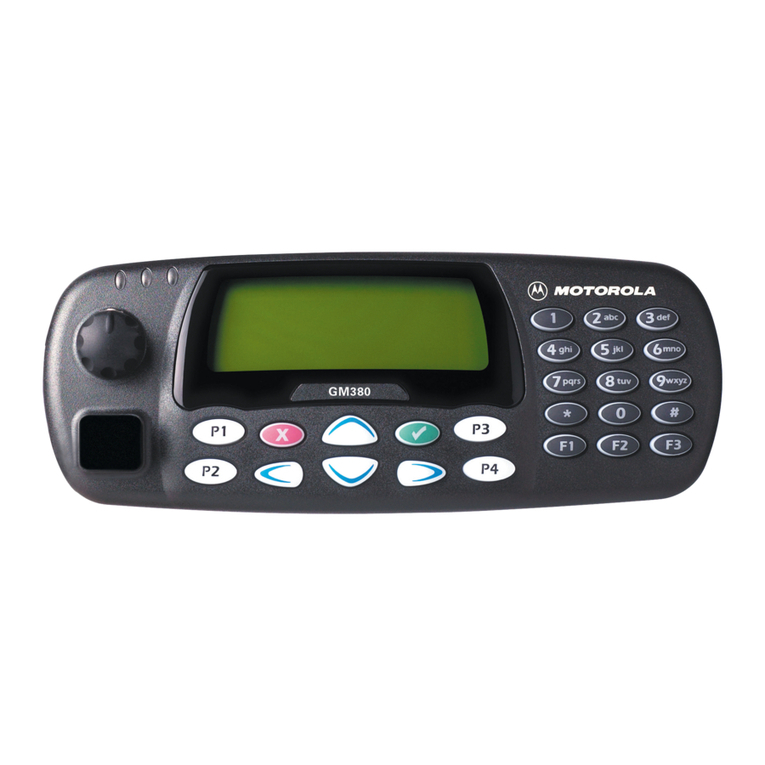
Motorola GM380 User manual

Motorola

Motorola GM380 User manual

Motorola GM360 User manual

Motorola

Motorola GM360 User manual

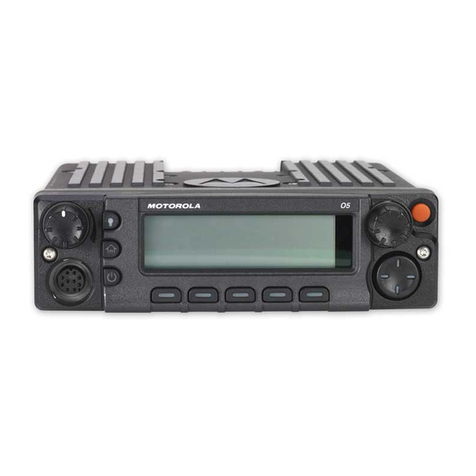
Motorola APX 7500 O5 User manual

Motorola

Motorola APX 7500 O5 User manual

Motorola MR 11 User manual

Motorola

Motorola MR 11 User manual

Motorola Spectra A3 Configuration guide

Motorola

Motorola Spectra A3 Configuration guide

Motorola APX Mobile User manual

Motorola

Motorola APX Mobile User manual

Motorola MWR815 User manual

Motorola

Motorola MWR815 User manual

Motorola MAX638 User manual

Motorola

Motorola MAX638 User manual

Motorola XTL 5000 Installation guide

Motorola

Motorola XTL 5000 Installation guide

Motorola PM1200 User manual

Motorola

Motorola PM1200 User manual

Motorola GM1200E User manual

Motorola

Motorola GM1200E User manual

Motorola ASTRO APX 7000 Reference guide

Motorola

Motorola ASTRO APX 7000 Reference guide

Motorola PTX600 User manual

Motorola

Motorola PTX600 User manual

Motorola XTL 1500 Operating and maintenance manual

Motorola

Motorola XTL 1500 Operating and maintenance manual

Motorola MICOR Owner's manual

Motorola

Motorola MICOR Owner's manual

Motorola CLP series User manual

Motorola

Motorola CLP series User manual

Motorola TLKR T8 User manual

Motorola

Motorola TLKR T8 User manual

Motorola CM140 Operating and installation instructions

Motorola

Motorola CM140 Operating and installation instructions

Popular Radio manuals by other brands

Grundig G6 AVIATOR owner's manual

Grundig

Grundig G6 AVIATOR owner's manual

Makita DMR114 instruction manual

Makita

Makita DMR114 instruction manual

PURE Move R3 manual

PURE

PURE Move R3 manual

Bosch GPB18V-5C Operating/safety instructions

Bosch

Bosch GPB18V-5C Operating/safety instructions

Ocean Digital WR-230 user manual

Ocean Digital

Ocean Digital WR-230 user manual

Realistic TRC-457 owner's manual

Realistic

Realistic TRC-457 owner's manual

Uniden AX 144 owner's manual

Uniden

Uniden AX 144 owner's manual

SIGNIFY EA2173 instruction manual

SIGNIFY

SIGNIFY EA2173 instruction manual

auna multimedia 10026443 user manual

auna multimedia

auna multimedia 10026443 user manual

GME TX680 instruction manual

GME

GME TX680 instruction manual

Tivoli Audio ONE+ owner's manual

Tivoli Audio

Tivoli Audio ONE+ owner's manual

Sirius Satellite Radio SDVK1 installation guide

Sirius Satellite Radio

Sirius Satellite Radio SDVK1 installation guide

Sirius XM RAdio EDGE user guide

Sirius XM RAdio

Sirius XM RAdio EDGE user guide

Trevi XF 100 user guide

Trevi

Trevi XF 100 user guide

EisSound KBSound iSelect user manual

EisSound

EisSound KBSound iSelect user manual

Kirisun DM588-02 user manual

Kirisun

Kirisun DM588-02 user manual

VDigi DD3.0 Operation manual

VDigi

VDigi DD3.0 Operation manual

Midland 1001LWX owner's manual

Midland

Midland 1001LWX owner's manual

manuals.online logo
manuals.online logoBrands
  • About & Mission
  • Contact us
  • Privacy Policy
  • Terms and Conditions

Copyright 2025 Manuals.Online. All Rights Reserved.

A High Performance Radio
In A Class Of Its Own
Key Features:
Wide Frequency Bands
Adaptive Power Control™
PL/DPL Coded Squelch Operation
SmarTrunk II Upgrade
Radius Port™ Expendability
Passed MIL STD 810E
Voice Selective Call (option)
Basic Features:
Front Panel Programming
Telephone Interconnect
Radio-To-Radio Cloning
Repeater Operation
Selectable High/Low Power
Selectable Time-Out Timer
Low Battery Alert Indicator
Battery Saver
DTMF Dialing, 9 Number Memory
Keypad Lock
Receive signal strength indicator
Passed Motorola's Accelerated Life Testing
Frequency Range:
VHF 136-174MHz
UHF 430-470MHz
RF Output:
VHF 5W or 1W
UHF 4W or 1W
Turn Radio On
1. Rotate rotary knob clockwise to turn
radio on.
Turn Radio Off
1. Rotate rotary knob counter-
clockwise until a click is heard to turn
radio off.
Adjust Volume
1. If there is no receive audio, press end hold the Monitor
Button until you hear background noise.
2. Continue to hold the Monitor Button and adjust rotary Knob
for desired volume level.
3. Release the Monitor Button to squelch radio again.
To Select a Channel
1. Rotate the selector switch clockwise to increase or counter-
clockwise to decrease, the channel number.
The channel number increments, or decrements according to the
available programmed memory channels (i.e. empty channels are NOT displayed).
Locking/Unlocking the Keypad
1. Press and hold (Lock) to lock (or unlock) the
keypad and selector switch (takes about 2 seconds).
2. If you attempt to press a key other than (Lock) or
rotate the selector switch while the keypad is locked, the
LCD displays and no action is taken.
High/Low Power Output
1. Press (LOW/C) to toggle between High and Low power output levels.
The LOW Indicator is on when the radio is set for Low
power output mode and off when the radio is set for High
power output mode.
Low Battery Alert
The “BATT” indicator in the LCD continuously flashes
whenever the radio has a low battery condition (in receive
or transmit mode).
A low battery condition is also indicated by three low-
pitched beeps, repeated every two minutes.
Display Backlight
The LCD has a backlight which is activated when the Toggle Light/Enter Button is
pressed. The LCD backlight turns off 5 seconds after the last user activity or, if
Toggle Light/Enter Button is pressed, the backlight turns off immediately (pressing
Toggle Light/ Enter Button will always toggle the status of the backlight).
PTT ID
If programmed, the radio transmits a DTMF identification code (unit ID), indicating
which portable is in operation.
During a conversation, the code is normally sent only on the initial PTT press
(unless PTT ID has been disabled). The 'TX' indicator lights for the duration of the
PTT ID. If there is no PTT or receive activity for 7 seconds, or if you change the
channel (or scan resumes), the PTT ID is once again transmitted on the next PTT
press.
NOTE: PTT ID can be enabled/disabled by pressing and holding (#). Upon
pressing the button you will hear a beep; hold the button down until you hear a
second beep, indicating that the PTT ID status has been changed, then release the
button. When PTT ID is disabled the 'dot' indicator flashes on the display.
To Transmit
1. Depending on the mode of operation, select the
desired channel (refer to the next section for details on
selecting a channel).
2. Do not interrupt another user. If the selected Channel
is programmed to receive PL, press and hold the
Monitor Button to enter monitor mode and listen for
channel activity. The channel must be clear before
transmitting.
3. Press PTT.
The "Tx" indicator lights up whenever radio transmits,
and goes off when PTT is released.
4. Hold radio upright while speaking clearly into the microphone.
To Receive
1. Release PTT to hear voice activity on selected channel.
To Change Squelch Modes
Carrier squelch (CSQ). Tone Private-Line (PL) and Digital
Private-Line (DPL) operations are available on a per channel basis. As an option,
Signaling squelch (SelCall) operation is available on a per
channel basis.
You can override the default receive squelch mode for the
channel temporarily.
To override squelch mode:
1. Press to change between CSQ, Coded (PL/DPL) and Signaling squelch modes.
To Set Squelch Level
1. Press (SQL/B) to enter the squelch edit mode.
The squelch is displayed in the range '00' (open squelch) to
'15' (tight squelch). In the following example, the squelch
level is '02':
2. Rotate the selector switch clockwise to increase, or counter
clockwise to decrease the displayed squelch level.
3. Press the Toggle Light/ Enter Button momentarily (or any other
button) to adopt the selected squelch level and return to normal
operating mode (the radio automatically does this after 5 seconds
of inactivity).
The new squelch level is adopted.
When ' CTCSS' is off, the radio operates in CSQ mode.
When ''CTCSS' is on continuously, the radio operates in Coded
(PL/DPL) squelch mode.
When ''CTCSS' is flashing (which requires an optional Selective
Call board), the radio operates in Signaling squelch mode, and unmutes only after a
valid Voice Selective Call (SelCall) has been decoded.
When programmed to do so, your GP-68 will quickly SCAN the channels you want it
to.
To Scan Channels
1. Press (SCAN/D) momentarily to begin channel
scanning.
When the 'SCAN' indicator flashes. channel scanning is in
progress and the 'Home' channel is displayed (until activity is
received on another channel).
2. Initially, the channels are scanned in an increasing order
(from lowest to highest). To scan in a decreasing order, rotate
the selector switch counter-clockwise To change the direction
back to an increasing order rotate the selector switch clockwise.
The radio scans through all channels that are in the scan list If
receive activity is detected on a channel, the 'SCAN' indicator
remains on, the channel number is displayed and the
conversation can be heard, provided the PL/DPL code (if
required) is correct for that channel.
The display reverts to the 'Home' channel and scanning resumes when activity is
over and a 7 second 'hang time' has expired.
3. To stop scan operation, press (SCAN/D) momentarily.
The 'SCAN' indicator turns off to indicate scanning is terminated and the radio
displays the 'Home' channel.
To Transmit During Scanning
1. When keying the radio corresponding to a received message during channel
press PTT as you normally would.
Talk Back Scan
The Talk Back Scan feature is used when PTT is pressed while the radio has
stopped on a channel. When transmit or receive activity ceases on a scanned
channel, a "hang time" of approximately 7 seconds occurs prior to the radio
resuming scan. This hang time gives the radio time to receive again or gives you
time to respond to a call on the locked channel before scanning resumes.
Home Revert Scan
If you press PTT while the he radio is scanning (i.e. the scanner is not locked on any
channel), transmission occurs on the "Home" channel (i.e. the channel that was
active when the scan operation was initiated). After Home transmit and receive
activity ceases the radio resumes channel scanning after the hang time has expired.
Nuisance Channel Delete in Scan
When the radio scans to a channel that you do not wish to hear, you can temporarily
remove the channel from the scan list using the Nuisance Channel Delete feature.
1. With the scanner locked on the unwanted signal, press and hold (SCAN/D)
for about 2 seconds.
2. To add a deleted channel back into the scan list, you must exit and reenter the
scan function or turn the radio off and on.
Special Scan Mode -Search Mode
There is a Frequency Search Function that is not mentioned in any Motorola manual
printings.
By using the normal style of programming mentioned below you may search through
a range of frequencies between a start and stop frequency like a scanner.
1. Program a start frequency (normally the lower limit) into channel 19.
2. Program a stop frequency (normally the upper limit) into channel 20.
3. By remaining in the Frequency Display Mode at either the start or stop frequency
you have chosen, press the scan button. The GP68 will search between those two
limits until a signal is received.
As with the other 18 channels the Frequency Step Size can be set, i.e. 5, 10, 12.5,
20, or 25KHz. This should be based on the channel spacing Band Plan for the
service and segment of frequencies you wish to search.
You will only be able to do one of these functions at a time.
Note: By going into the SPM Mode (Discussed elsewhere in this document) It would
be wise to delete these 2 channels from the normal channel scan list -by doing this
you will speed up your normal channel scan mode.
Temporary Keyboard Lock Procedure
With your radio in the on position one may temporarily lock the keyboard.
1. Press and hold the star/lock icon key until ”F.Loc”shows on your LCD display.
By doing this you will be able to lock the keyboard only -thus preventing normal
handling from inadvertently changing key/critical parameters. None of the critical
functions such as changing channels, scan function, and hi/low power switching are
affect by the keyboard lock and are still enabled. Once you turn the radio off the
above keypad lock is defeated.
Dealer Program Mode (DPM) -To Enter Dealer Programming Mode
1. Switch Radio Off.
2. Hold Down the PTT Monitor and Scan Buttons While Turning the Radio On.
3. Proceed to Program Radio. When programming is complete...
To Exit Dealer Programming Mode
1. Switch Radio Off.
2. Hold Down the PTT, Monitor and Enter Buttons While Turning the Radio On.
(Secure Keyboard Lock Procedure) This will protect all of your critical programmed
parameters from being tampered with.
Note: When the GP68 is in programming mode it will not transmit or receive until
you exit from dealer programming mode.
Overview of the Programming Process
The following procedures assume that you have read and understood the basic
operation of the GP68 from the GP68 User's Manual. A Dealer's radio is the radio
where all the necessary options are programmed into. A User's radio is the radio
whose options are cloned from the Dealer's radio; it is this radio that is given to the
customer. To enable the programming function in the Dealer's radio, remove jumper
R417. If the "dot" between the CH & channel number is flashing, the jumper has
already been removed and the radio can be field programmed.
IMPORTANT
If the Dealer's radio is to be given to the customer, remember to place
R417 with a 51K resistor to disable the programming function.
If you are unable to program the GP-68, either jumper R417 has not been
removed, or your dealer has replaced it with a 51K ohm resistor to prevent
end-user programming.
Programming Controls
"Figure A"
Note that the ENTER key is on the side of the GP-68, very near the top.
"Figure B"
Along the top/front of the GP-68 there are four buttons labeled: SIG/A, SQL/B,
LOW/C, and SCAN/D -N-DEL. The three buttons along the left side: X, LEFT
ARROW, and the MEM/RIGHT ARROW key. Some keys have multiple functions,
depending upon whether they are quickly pressed and released or if they are
pressed for a few seconds, or if using DTMF tones:
Key Quick Press Long Press DTMF Dialing
SQL B Programs Squelch Program PL/DPL "B"
LOW C Toggles Hi/Low
Power Frequency Step
Size "C"
XToggles MHz and
Ch. Display modes When editing phone
#'s, BACKSPACE.
LEFT TX offset freq. When editing phone
numbers, scrolls left.
Programming Your Channels
All programming is performed while the GP-68 is in Frequency Display Mode. When
you first turn the radio on, the display will show a Channel Number (e.g., "Ch.01").
To enter Frequency Display Mode, press the Xkey.
The GP68 contains 20 memory channels and each channel can store a receive
(RX)/Transmit (TX) frequency, the type of offset (plus/minus), offset frequency,
RX/TX PL/DPL tone codes, and the default squelch mode. Choose the channel to
program with the Channel Selector BEFORE starting to program. This way, there is
less chance of accidentally erasing the information in a memory location you do not
wish to reprogram. Select the channel you want to program, THEN press the Xkey
and program.
1. While in Channel Display Mode, select the channel to program.
2. Press the Xkey to enter Frequency Display Mode.
3. ENTER FREQUENCY using the DTMF keypad. The LCD display will reflect your
keystrokes.
NOTE: You only have about five seconds between keypresses, or the unit
will revert to the previously-stored information.
If your frequency won't "take," you might need to change the Frequency
Step Size. You may choose between 5, 10, 12.5, 20, or 25KHz. To change
the default step size, press and hold the LOW/C key for about three
seconds -until the current step size is displayed. Use the Channel Selector
knob to choose your desired step size. Then press the ENTER button to
store it.
4. SET TX OFFSET by pressing the LEFT ARROW key to toggle between duplex +,
-, or NONE (simplex) TX offset.
5. SET TX and RX PL/DPL TONES: There are 42 PL (CTCSS) tones and 84 DPL
(DCS) tones available. Please see the Motorola's conversion chart to locate the
desired tone code, for example, CTCSS "141.3" is "023" in the GP-68.
NOTE: Use the accompanying Motorola Tone Conversion Chart to
determine any required PL or DPL tones that may need to be programmed.
While still in Frequency Display Mode, press and hold the SQL/B key for about
three seconds, until the display shows the "rPL" information (e.g., "rPL.023"). Use
the Channel Selector know to choose your PL/DPL tone for RECEIVE. Of course, if
you desire to receive OPEN TONE, leave the "rPL" setting at "000."
Pressing the SQL/B key once more gets you to the -the TRANSMIT tone setting
("tPL.xxx"). Use the Channel Selector knob to choose the tone.
Either press any key to "set" these changes, or wait three seconds, and the GP-68
will revert to Frequency Display Mode automatically.
6. Now that you've entered your frequency, set the offset, and entered your tones,
SAVE all this information by pressing the ENTER button for three seconds, until the
display prompts you with a "P" before your channel number (e.g., "PCh.01"). If that
is, indeed, the channel number in which you want this new information stored,
simply press the ENTER key once more -momentarily. The new frequency will
show in the display, and the radio will remain in Frequency Display mode.
Press the Xkey to return to Channel Mode display.
To verify the frequencies programmed, from the Channel Display mode, press the X
key to toggle between Channel Display and Frequency Display modes. Rotate the
Channel Selector knob to the channel you want to verify, then press and hold the
ENTER button for three seconds.
You can check out all the settings...then, if NO changes were made, simply press
the Xkey momentarily to go back to Channel Mode display. If you DID make a
change or two, you will need to press the ENTER key for three seconds again -then
again momentarily -as in Step 6 above -to save the changes.
To Select the Receive PL/DPL Code
1.Press and hold (SQL/B) until the LCD displays
“rPL" followed by the active Receive PL
code number (takes about 3 seconds). In
the following example (Figure C), the
Receive PL/DPL code is 014 (103.5/1A).
"Figure C"
2.Rotate the selector switch clockwise to increase, or counter
clockwise to decrease, the active Receive PL/DPL code.
3. Momentarily press any key to immediately adopt the selected
Receive PL/DPL code and return to normal operating mode (the
radio automatically does this after 3 seconds of inactivity).
The new Receive PL/DPL code is adopted.
To Select the Transmit PL/DPL Code
1.Press and hold (SQL/B) until the LCD displays “rPL." followed by the active
Receive PL code number (takes about 3 seconds). Press (SQL/B)
momentarily to toggle the display to 'tPL." followed by the active Transmit PL code
number You can toggle between editing of the Receive and Transmit PL/DPL by
pressing (SQL/B) momentarily. In the following example (Figure D), the
Transmit PL/DPL code is 020 (127.3/3A).