manuals.online logo
Brands
  1. Home
  2. •
  3. Brands
  4. •
  5. Motorola
  6. •
  7. Radio
  8. •
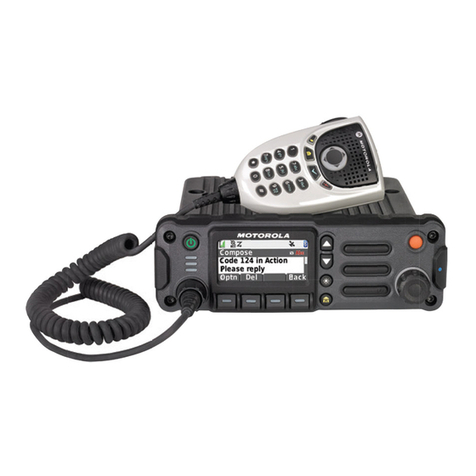
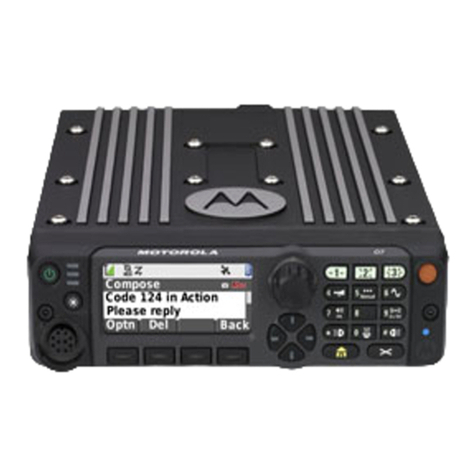
  9. Motorola XPR Series Reference guide

Motorola XPR Series Reference guide

Other Motorola Radio manuals

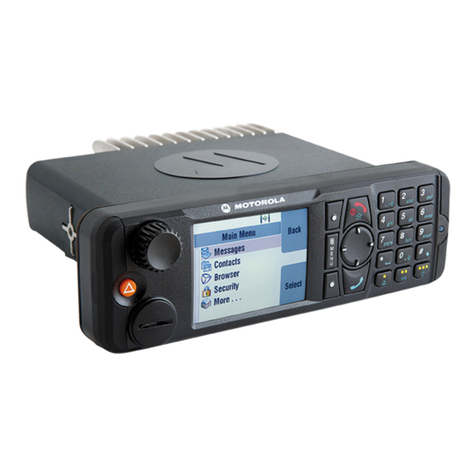
Motorola GTX User manual

Motorola

Motorola GTX User manual

Motorola PRO5100 User manual

Motorola

Motorola PRO5100 User manual

Motorola MTM800 FuG ET User manual

Motorola

Motorola MTM800 FuG ET User manual

Motorola APX 7500 Use and care manual

Motorola

Motorola APX 7500 Use and care manual

Motorola MTM700 Operating and maintenance manual

Motorola

Motorola MTM700 Operating and maintenance manual

Motorola GM Series User manual

Motorola

Motorola GM Series User manual

Motorola MR 11 User manual

Motorola

Motorola MR 11 User manual

Motorola GP340 ATEX Operating and installation instructions

Motorola

Motorola GP340 ATEX Operating and installation instructions

Motorola XPR 3000 Series User manual

Motorola

Motorola XPR 3000 Series User manual

Motorola Canopy AP User manual

Motorola

Motorola Canopy AP User manual

Motorola SABER Handie-Talkie User manual

Motorola

Motorola SABER Handie-Talkie User manual

Motorola MICOR Owner's manual

Motorola

Motorola MICOR Owner's manual

Motorola Commercial CM Series User manual

Motorola

Motorola Commercial CM Series User manual

Motorola GP series Operating and installation instructions

Motorola

Motorola GP series Operating and installation instructions

Motorola GP series Operating and installation instructions

Motorola

Motorola GP series Operating and installation instructions

Motorola GP338 User manual

Motorola

Motorola GP338 User manual

Motorola CM340 User manual

Motorola

Motorola CM340 User manual

Motorola GP series User manual

Motorola

Motorola GP series User manual

Motorola ASTRO 25 GTR 8000 User manual

Motorola

Motorola ASTRO 25 GTR 8000 User manual

Motorola GM600 User manual

Motorola

Motorola GM600 User manual

Motorola GTR 8000 User manual

Motorola

Motorola GTR 8000 User manual

Motorola ASTRO APX 7000 Reference guide

Motorola

Motorola ASTRO APX 7000 Reference guide

Motorola GP360 Series Operating and installation instructions

Motorola

Motorola GP360 Series Operating and installation instructions

Motorola MTP830 S User manual

Motorola

Motorola MTP830 S User manual

Popular Radio manuals by other brands

Grundig G6 AVIATOR owner's manual

Grundig

Grundig G6 AVIATOR owner's manual

Makita DMR114 instruction manual

Makita

Makita DMR114 instruction manual

PURE Move R3 manual

PURE

PURE Move R3 manual

Bosch GPB18V-5C Operating/safety instructions

Bosch

Bosch GPB18V-5C Operating/safety instructions

Ocean Digital WR-230 user manual

Ocean Digital

Ocean Digital WR-230 user manual

Realistic TRC-457 owner's manual

Realistic

Realistic TRC-457 owner's manual

Uniden AX 144 owner's manual

Uniden

Uniden AX 144 owner's manual

SIGNIFY EA2173 instruction manual

SIGNIFY

SIGNIFY EA2173 instruction manual

auna multimedia 10026443 user manual

auna multimedia

auna multimedia 10026443 user manual

GME TX680 instruction manual

GME

GME TX680 instruction manual

Tivoli Audio ONE+ owner's manual

Tivoli Audio

Tivoli Audio ONE+ owner's manual

Sirius Satellite Radio SDVK1 installation guide

Sirius Satellite Radio

Sirius Satellite Radio SDVK1 installation guide

Sirius XM RAdio EDGE user guide

Sirius XM RAdio

Sirius XM RAdio EDGE user guide

Trevi XF 100 user guide

Trevi

Trevi XF 100 user guide

EisSound KBSound iSelect user manual

EisSound

EisSound KBSound iSelect user manual

Kirisun DM588-02 user manual

Kirisun

Kirisun DM588-02 user manual

VDigi DD3.0 Operation manual

VDigi

VDigi DD3.0 Operation manual

Midland 1001LWX owner's manual

Midland

Midland 1001LWX owner's manual

manuals.online logo
manuals.online logoBrands
  • About & Mission
  • Contact us
  • Privacy Policy
  • Terms and Conditions

Copyright 2025 Manuals.Online. All Rights Reserved.

English
m
XPR Series Digital Mobile
Radios
Quick Reference Card
Radio Controls
Record your radio’s programmable button
functions in the blanks provided. SP represents
Short Press, LP represents Long Press.
Menu Navigation Buttons
Display Icons
The following are the icons that appear on the
radio’s display.
On/Off Button
Volume Knob
Front Button P1 (Programmable)
SP: _____________ LP: _____________
P 1
O K
P 2
P 3
P 4
CH+
BACK
MENU
CH -
125
4
8
7
3
6
12 11 9
10
1
2
3
Display
Channel Rocker
Speaker
Front Button P3 (Programmable)
SP: _____________ LP: _____________
Front Button P4 (Programmable)
SP: _____________ LP: _____________
Menu Navigation Buttons
Front Button P2 (Programmable)
SP: _____________ LP: _____________
Accessory Connector
LED Indicators
4
5
6
7
8
9
10
11
12
BCD
A
Left/Right Navigation Buttons
Menu Button
OK Button
Back/Home Button
The number of bars displayed
represents the radio signal strength.
Four bars indicates the strongest signal.
This icon is only displayed while
receiving.
Radio is currently set at Low Power (L)
or High Power (H).
Radio is in Emergency mode.
Selected channel is being monitored.
Scan feature is activated.
Radio recognizes activity on the
channel/group designated as Priority 1
(if •is blinking) or as Priority 2 (if •is
steady).
A
B
C
D
or
© 2006, 2007 by Motorola, Inc. All Rights Reserved. 04/07
1301 E. Algonquin Rd., Schaumburg, IL 60196-1078, U.S.A.
Printed in the U.S.A.
*6880309T08*
6880309T08-B
English
Call Icons
The following icons appear on the radio’s display
during a call. These icons also appear in the
Contacts list to indicate ID type.
LED Indicators
Blinking red – Radio is receiving an Emergency
transmission or has failed the self-test upon
powering up.
Solid yellow – Radio is receiving a request for a
Private Call, or monitoring a channel.
Blinking yellow – Radio is scanning for activity
or receiving a Call Alert.
Solid green – Radio is transmitting.
Blinking green – Radio is powering up or
receiving a call.
Powering the Radio On or Off
Press the On/Off Button briefly to turn on the
radio, and press and hold the On/Off Button to
turn it off.
Adjusting the Volume
Turn the Volume Knob clockwise to increase
volume or counterclockwise to decrease volume.
Selecting a Zone
Press the preprogrammed Zone button and
proceed to step 3.
OR
Follow the procedure below.
1to access the menu.
2or to Zone and press to select.
3The current zone is displayed and indicated
by a 9.
4or to the required zone and press
to select.
5The display shows <Zone> Selected
momentarily and returns to the selected zone
screen.
Selecting a Radio Channel,
Subscriber ID, or Group ID
1Press the On/Off Button.
2Press the Channel Rocker to select the
required channel, subscriber ID, or group ID.
Making a Group Call
Press the preprogrammed One Touch Call
button and proceed to step 2.
OR
Follow the procedure below.
1Press the Channel Rocker to select the
channel with the active group alias or ID.
OR
to access the menu.
or to Contacts and press to
select.
or to the ID you want to call and
press to select.
2Press the PTT button to make the call. The
green LED lights up. The display shows the
group alias or ID, and the Group Call icon.
3Wait for the Talk Permit Tone to finish (if
enabled) and speak clearly into the
microphone.
In the absence of a repeater, radio is
currently configured for direct radio to
radio communication.
Unread message in the Inbox.
User’s Inbox is full.
Tones are set off.
The GPS feature is enabled. The icon
stays lit when a position fix is available.
The GPS feature is enabled but is not
receiving data from the satellite.
Indicates a Private Call in progress. In
Contacts list, it indicates a subscriber
alias or ID.
Indicates a Group Call or All Call in
progress. In Contacts list, it indicates a
group alias or ID.
NAG-LACR-EMEA.book Page 62 Friday, April 27, 2007 6:58 PM
English
4Release the PTT button to listen.
5When the target radio responds, the green
LED blinks. You see the Group Call icon, the
group ID, and target radio ID on your display.
6If there is no voice activity for a
preprogrammed period of time, the call ends.
To make a call to a group of users, your radio
must be configured as part of that group.
Making a Private Call
Press the preprogrammed One Touch Call
button and proceed to step 2.
OR
Follow the procedure below.
1Press the Channel Rocker to select the
channel with the active subscriber alias or ID.
OR
to access the menu.
or to Contacts and press to
select.
or to the ID you want to call and
press to select.
2Press the PTT button to make the call. The
green LED lights up. The first line displays the
target radio’s ID. The second line displays
Private Call and the Private Call icon.
3Wait for the Talk Permit Tone to finish (if
enabled) and speak clearly into the
microphone.
4Release the PTT button to listen.
5If there is no voice activity for a
preprogrammed period of time, the call ends.
6You hear a short tone. The display shows
Call Ended.
Making an All Call
Your radio must be programmed to allow you to
use this feature. Users on the channel cannot
respond to an All Call.
1Press the Channel Rocker to select the
channel with the active All Call group alias or
ID.
2Press the PTT button to make the call. The
green LED lights up. The display shows the
All Call group alias or ID, and the All Call icon
3Wait for the Talk Permit Tone to finish (if
enabled) and speak clearly into the
microphone.
4If there is no voice activity for a
preprogrammed period of time, the call ends.
When you receive an All Call, a message
appears and remains on your radio’s display until
the call ends. You will not be able to continue
with any menu navigation or editing until the call
ends.
Once the All Call ends, the radio returns to the
menu prior to receiving the call.
Scanning Channels
Press the preprogrammed Scan button to turn
scan on or off.
OR
Follow the procedure below.
1to access the menu.
2or to Scan and press to select.
3You see Scan On or Scan Off depending on
previous selection.
During scan, the yellow LED blinks and the scan
icon is displayed.
Sending a Call Alert
Press the preprogrammed One Touch Call
button and proceed to step 5.
OR
Follow the procedure below.
1to access the menu.
2or to Contacts. Press to select.
3or to the required subscriber alias or
ID and press to select.
4or to Call Alert and press to
select.
5The display shows Call Alert:
<Subscriber Alias or ID>. The green
LED lights up.
NAG-LACR-EMEA.book Page 63 Friday, April 27, 2007 6:58 PM
English
6If the Call Alert acknowledgement is received,
a tone sounds and the display shows Call
Alert Successful.
OR
If the Call Alert acknowledgement is not
received, a tone sounds and the display
shows Call Alert Failed.
Sending a Quick Text Message
Press the preprogrammed Text Messaging
button and proceed to step 3.
OR
Press the preprogrammed One Touch Call
button to send a predefined Quick Text message
to a predefined alias or ID and proceed to step 6.
OR
Follow the procedure below.
1to access the menu.
2or to Messages and press to
select.
3or to Quick Text and press to
select.
4or to the required Quick Text and
press to select.
5or to the required alias or ID and
press to select.
6The display shows Text Message: <Group/
Subscriber Alias or ID>.
7If the message is sent successfully, a tone
sounds and the display shows Message
Sent.
OR
If the message cannot be sent, the display
shows Message Sent Failed.
Replying to a Text Message with
Quick Text from the Inbox
Press the preprogrammed Text Messaging
button and proceed to step 3.
OR
Follow the procedure below.
1to access the menu.
2or to Messages and press to
select.
3or to Inbox. Press to select.
4or to the required message and
press to select.
5Press once more to access the sub-
menu.
6or to Reply and press to select.
7or to Quick Text and press to
select.
8Press once more to send the reply.
9The display shows Text Message: <Group/
Subscriber Alias or ID>.
10 If the message is sent successfully, a tone
sounds. The display shows Message Sent.
OR
If the message cannot be sent, the display
shows Message Sent Failed.
Sending an Emergency Alarm
1Press the preprogrammed Emergency
button or the Emergency footswitch.
2The display shows Sending Alarm, which
alternates with your radio ID. The green LED
lights up and the Emergency icon appears on
the Home screen display.
3When an Emergency Alarm acknowledgment
is received, the Emergency tone sounds and
the green LED blinks. The display shows
Emergency Alarm Successful.
OR
If your radio does not receive an Emergency
Alarm acknowledgement, and after all retries
have been exhausted, a tone sounds and the
display shows Emergency Alarm Failed.
4Radio exits the Emergency Alarm mode and
returns to the Home screen.
NAG-LACR-EMEA.book Page 64 Friday, April 27, 2007 6:58 PM