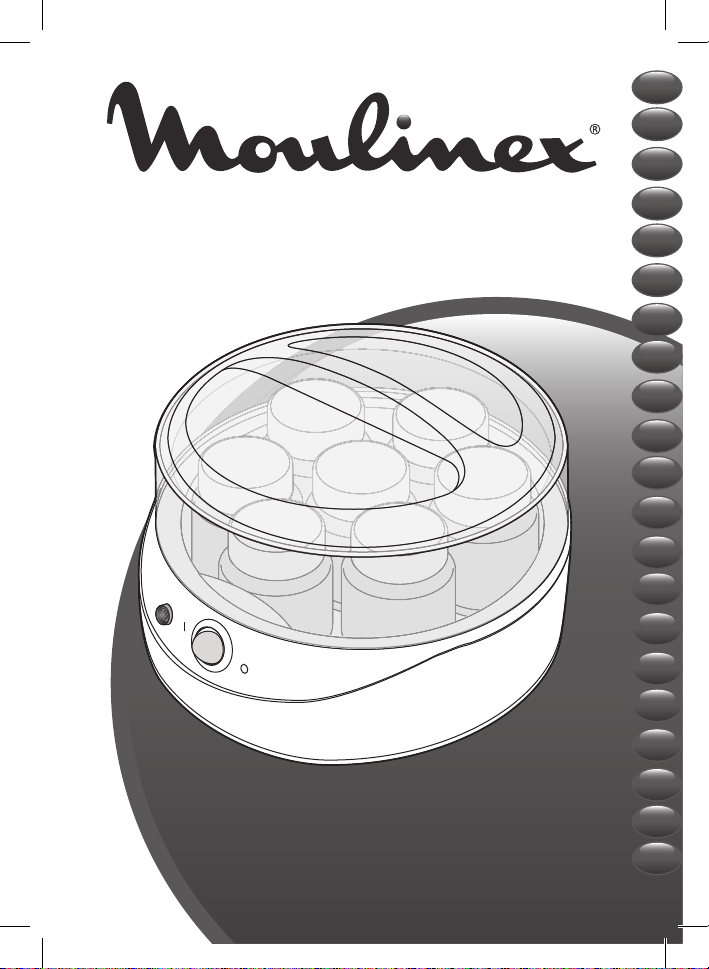
Moulinex YOGURTEO YG229 User manual

www.moulinex.com
FR
EN
DE
NL
IT
ES
PT
TR
EL
DA
SV
NO
FI
RU
UK
PL
LT
LV
ET
AR
FA

A
A2
A1
E2
E1
C
B
C2
C1

3
FR
A
A2
A1
E2
E1
C
B
C2
C1
CONSEILS DE SECURITE
• N’utilisez pas l’appareil, s’il est tombé, s’il
présente des détériorations visibles ou anomalies
de fonctionnement. Dans ce cas l’appareil doit être
envoyé à un Centre Service Agréé.
• Si le câble d’alimentation est endommagé, il doit
être remplacé par le fabricant, son Centre Service
Agréé ou une personne de qualification similaire
afin d’éviter tout danger.
• Cet appareil peut être utilisé par des enfants âgés
d’au moins 3 ans, à condition qu’ils bénéficient
d’une surveillance ou qu’ils aient reçu des
instructions quant à l’utilisation de l’appareil
en toute sécurité et qu’ils comprennent bien les
dangers encourus. Le nettoyage et l’entretien de
l’utilisateur ne doivent pas être effectués par des
enfants, à moins qu’ils ne soient âgés d’au moins
8 ans et qu’ils soient sous la surveillance d’un
adulte. Conserver l’appareil et son câble hors de
portée des enfants âgés de moins de 3 ans.
• Cet appareil n’est pas prévu pour être utilisé par
des personnes (y compris les enfants) dont les
capacités physiques, sensorielles ou mentales sont
réduites, ou des personnes dénuées d’expérience
ou de connaissance, sauf si elles ont pu bénéficier,

4
par l’intermédiaire d’une personne responsable de
leur sécurité, d’une surveillance ou d’instructions
préalables concernant l’utilisation de l’appareil.
• Il convient de surveiller les enfants pour s’assurer
qu’ils ne jouent pas avec l’appareil et ils ne doivent
pas l’utiliser comme un jouet.
• La surface de l’élément chauffant peut être soumise
à de la chaleur résiduelle après utilisation.
• Votre appareil est destiné uniquement à un usage
domestique culinaire, à l’intérieur de la maison.
Il n’a pas été conçu pour être utilisé dans les
cas suivants qui ne sont pas couverts par la
garantie : dans des coins de cuisines réservés au
personnel dans des magasins, bureaux et autres
environnements professionnels, dans des fermes,
par les clients des hôtels, motels et autres
environnements à caractère résidentiel, dans des
environnements de type chambres d’hôtes.
• Attention : une mauvaise utilisation peut entrainer
des blessures potentielles.
• Attention : ne pas immerger le produit dans l’eau.
PRODUIT ÉLECTRIQUE OU ÉLECTRONIQUE EN FIN DE VIE
Participons à la protection de l’environnement !
Votre appareil contient de nombreux matériaux valorisables ou recyclables.
Confiez celui-ci dans un point de collecte ou à défaut dans un centre service
agrée pour que son traitement soit effectué.

5
FR
DESCRIPTION
A Couvercle composé de 2 parties :
A1 Couvercle A1 : Couvercle principal
A2 Couvercle A2 : Couvercle secondaire
B Corps
C Pots de yaourt composés de 2 parties
C1 Pot en verre
C2 Couvercle
D Ecran électronique avec retro éclairage
E Boutons de commande :
E1 Indicateur lumineux
E2 Bouton marche/arrêt
RECOMMANDATIONS
• Avant la première utilisation : Nettoyez les pots (C1) et les couvercles (C2, A1 et A2) à l’eau
chaude savonneuse ou au lave-vaisselle. Pour nettoyer l’intérieur de la cuve (B), un simple
coup d’éponge suffit. Ne trempez jamais le corps de l’appareil dans l’eau.
• En cours d’utilisation : Ne déplacez pas la yaourtière pendant son fonctionnement, n’ouvrez
surtout pas le couvercle (A1).
Ne placez pas la yaourtière dans des endroits soumis à des vibrations (par exemple au dessus
d’un réfrigérateur), ou exposés à des courants d’air.
Pour préparer les yaourts, vous aurez besoin d’un litre de lait et d’un ferment.
CONSEILS PRATIQUES POUR LE CHOIX DU
LAIT ET DU FERMENT
1. CHOIX DU LAIT
– Pour des raisons pratiques, choisissez un lait de préférence entier ne nécessitant pas d’ébullition
(lait UHT de longue conservation ou lait en poudre). Les laits crus (frais) ou pasteurisés
doivent être portés à ébullition puis refroidis et passés au tamis pour éliminer les peaux.
Remarques :
– Le lait entier donne plus de fermeté et plus d’arôme.
– Les laits frais ou pasteurisés contiennent plus de vitamines et d’oligo-éléments.
– Pour obtenir des yaourts plus consistants, vous pouvez ajouter au litre de lait 2 ou 3 cuillères
à soupe de lait en poudre en mélangeant soigneusement.
– Utiliser le lait à température ambiante ou légèrment tiède (chauffer à 37°C ou 40°C). Ne pas
utiliser de lait sortant directement du réfrigérateur.
2. CHOIX DU FERMENT
Il se fait soit :
– à partir d’un yaourt nature du commerce (à base de lait entier de préférence) avec une date
limite de consommation la plus éloignée possible.
– à partir d’un ferment sec lyophilisé (acheté en grandes surfaces, dans les pharmacies, dans
certains magasins de produits diététiques). Dans ce cas, respectez le temps d’activation
préconisé sur la notice du ferment.
– à partir d’un yaourt de votre fabrication.

6
RÉALISATION DES YAOURTS
1. PRÉPARATION DU MÉLANGE :
– Mélangez très soigneusement un litre de lait avec le ferment de votre choix (yaourt ou ferment
sec lyophilisé) dans un récipient muni d’un bec verseur. Evitez de faire mousser la préparation.
– Pour obtenir un bon mélange, battez le yaourt à l’aide d’une fourchette pour le transformer en
une pâte bien lisse et ajoutez ensuite le lait, tout en continuant de mélanger. Si vous utilisez
un ferment lyophilisé, incorporez le ferment au lait et mélangez très soigneusement.
– Répartissez le mélange dans les pots (C1).
– Placez les pots (C1), sans leur couvercle (C2), dans la yaourtière.
– Posez le couvercle (A1) sur la yaourtière.
Conseil pratique : rangez les couvercles des pots (C2) sur le couvercle A1 puis recouvrez avec le
couvercle A2 (voir schéma).
2. MISE EN MARCHE DE LA YAOURTIÈRE :
– Appuyez sur le bouton marche / arrêt (E2).
– Lorsque la yaourtière est en marche, l’indicateur s’allume.
– Lorsque vous voulez arrêter le produit, appuyez de nouveau sur le bouton marche / arrêt.
– Débranchez l’appareil.
3. RANGEMENT DES YAOURTS :
– Soulevez les couvercles (A1 et A2), en prenant soin d’éviter l’écoulement de la condensation
dans les pots (C1).
– Vissez les couvercles (C2) sur les pots en verre (C1) et placez-les au réfrigérateur au moins 6
heures avant de les savourer. Si vous attendez 24 heures, ils seront plus fermes.
Remarques :
– La durée de conservation des yaourts nature au réfrigérateur est de 7 jours maximum. Les
autres types de yaourts sont à consommer plus rapidement. La date limite de consommation à
indiquer sur les couvercles sera par conséquent J+7 pour un yaourt nature, J étant le jour de
fabrication des yaourts.
– Ne mettez jamais l’appareil au réfrigérateur.
Important : quand on a fait une première fournée, il suffit de garder l’un des yaourts de celle-ci
pour ensemencer les suivants. Au bout de 5 fournées, il convient de renouveler le ferment, qui
s’appauvrit légèrement à la longue et donne alors un résultat de consistance moins solide.

7
FR
NETTOYAGE
– Débranchez toujours l’appareil avant de le nettoyer.
– Ne trempez jamais le corps de l’appareil dans l’eau. Nettoyez-le avec un chiffon humide et de
l’eau chaude savonneuse. Rincez et séchez.
– Les pots de yaourt (C1) et les couvercles (C2, A1 et A2) passent au lave-vaisselle.
PROBLEMES CAUSES SOLUTIONS
Yaourts trop
liquides.
Utilisation de lait
demi-écrémé ou
écrémé sans ajout de
poudre de lait (le lait
utilisé seul n’est alors
pas assez riche en
protéines).
Ajouter 1 pot de yaourt de lait en poudre
(2 avec du lait écrémé) ou utiliser du lait
entier et ½ pot de lait entier en poudre.
Déplacements, chocs
ou vibrations de la
yaourtière pendant la
fermentation.
Ne pas bouger la yaourtière pendant son
fonctionnement (ne pas la poser sur un
réfrigérateur).
Le ferment n’est plus
actif.
Changer de ferment ou de marque de yaourt.
Vérifier la date de péremption de votre
ferment ou de votre yaourt.
La yaourtière a été
ouverte pendant le
cycle.
Ne pas sortir les pots ni ouvrir la yaourtière
avant la fin du cycle (environ 8 heures).
Maintenir la yaourtière à l’abri des courants
d’air pendant son fonctionnement.
Temps de fermentation
trop court.
Lancer un deuxième cycle à la fin du premier.
Les pots n’ont pas été
bien nettoyés/rincés.
Avant de verser votre préparation dans les
pots, vérifier qu’il n’y a aucune trace de
liquide vaisselle, de produit nettoyant ou de
saletés sur la partie intérieure des
pots.
Fruits ajoutés au
yaourt.
Penser à faire cuire les fruits, ou préférer
l’utilisation de compotes ou confitures (à
température ambiante).
Les fruits crus libèrent des éléments acides
qui empêchent le yaourt de bien se former.
QUELLES SOLUTIONS A VOS PROBLÈMES FRÉQUENTS ?

8
SI VOTRE APPAREIL NE FONCTIONNE PAS, QUE FAIRE ?
- Vérifiez tout d’abord le branchement.
Vous avez suivi toutes les instructions et votre appareil ne fonctionne toujours pas ?
Contacter votre service après-vente ou l’adresse internet : groupeseb.com.
RECETTES
YAOURTS AROMATISÉS
YAOURTS AUX SIROPS
– 1 litre de lait, 1 yaourt nature ou 1 sachet de ferment.
• Sirops de fruits (grenadine, orange, cassis, citron, mandarine, fraise, groseille, orgeat,
framboise, fraise des bois, banane, myrtille, cerise...): 5 cuillérées à soupe.
• Sirops de fleurs (rose, violette, jasmin, santal) : 4 cuillérées à soupe.
• Sirop de menthe : 4 cuillérées à soupe.
Versez le yaourt ou le contenu du sachet de ferment dans un récipient. Ajoutez-y le sirop et
versez-y peu à peu le lait en ne cessant de mélanger la préparation avec une fourchette. Versez
le mélange dans les pots et placez-les dans la yaourtière (8 heures).
YAOURTS AUX FRUITS CUITS
YAOURT À LA CONFITURE
• 1 litre de lait, 1 yaourt nature ou 1 sachet de ferment, 4 cuillérées à soupe d’une confiture pas
trop épaisse et contenant des petites baies ou des petits morceaux de fruits: airelles, myrtilles,
rhubarbe, gingembre, fraise, marmelade d’oranges.
• Fouettez la confiture avec un peu de lait. Ajoutez le yaourt ou le ferment. Mélangez bien, puis
versez le reste du lait.
• Versez le mélange dans les pots et placez-les dans la yaourtière (8 heures).
PROBLEMES CAUSES SOLUTIONS
Yaourts trop
acides.
Temps de fermentation
trop long.
Veiller à réduire le temps de fermentation lors
de la prochaine fournée.
Un liquide
visqueux
(appelé serum)
s’est formé à
la surface du
yaourt en fin de
fermentation.
Fermentation trop
importante.
Diminuer le temps de fermentation et/ou
rajouter du lait en poudre.

9
FR
Variante : si vous souhaitez faire un yaourt bicouche, il vous suffit de mettre dans le fond des
pots de la confiture. Versez ensuite très soigneusement le mélange lait/yaourt ou lait/ferment
dans les pots. Placez-les ensuite dans la yaourtière (8 heures).
YAOURTS A LA VANILLE
• 70 cl de lait entier, 20 g de lait en poudre demi-écrémé, 1 yaourt nature ou 1 sachet de
ferment, 80 g de sucre, 30cl de crème liquide, 1 gousse de vanille.
Chauffez la crème puis ajoutez la vanille et le sucre. Mélangez bien pour que le sucre fonde et pour
bien répartir les graines de vanille. Réservez. Détendez le yaourt (ou le ferment) avec le lait que vous
ajouterezpetitàpetit.Versezlacrèmesurlemélangelait/yaourtoulait/ferment touten mélangeant,
et incorporez la poudre de lait. Versez cette préparation dans les pots et placez-les dans la yaourtière
(8 heures).

10
SAFETY INSTRUCTIONS
• Do not use your appliance if it has fallen and
has visible damage or appears to be working
abnormally. To maintain safety, these parts must
be replaced by an approved Service Centre.
• If the power cord is damaged, it must be replaced
by the manufacturer, an approved After-Sales
Service or a similarly qualified person, in order to
avoid any danger.
• This appliance can be used by children aged from 3
years and above if they have been given supervision
or instruction concerning use of the appliance in
a safe way and understand the hazards involved.
Cleaning and user maintenance shall not be made
by children unless they are aged from 8 years and
above and supervised. Keep the appliance and
its cord out of reach of children aged less than 3
years.
• This appliance is not intented for use by persons
(including children) with reduced physical, sensory
or mental capabilities, or lack of experience
and knowledge, unless they have been given
supervision or instruction concerning use of the
appliance by a person reponsible for their safety.

11
EN
• Children must be supervised to ensure that they do
not play with the appliance.
• The heating element surface is subject to residual
heat after use.
• This appliance is intended to be used only in the
household, for domestic purposes. It is not intended
to be used in the following applications, and the
guarantee will not apply for staff kitchen areas in
shops, offices and other working environments,
farm houses, by clients in hotels, motels and other
residential type environments, bed and breakfast
type environments
• Warning: Any misuse could lead to potential injury.
• Warning: The appliance must not be immersed in
water or any other liquid..
DESCRIPTION
A Lid made up of 2 parts:
A1 Lid A1: Main lid
A2 Lid A2: Secondary lid
B Body
C Yoghurt jars made up of 2 parts:
C1 Glass jar
C2 Lid
D Backlit electronic display
E Control buttons:
E1 Indicator light
E2 On/off switch
END-OF-LIFE ELECTRONIC PRODUCT
Environmental protection first!
Your appliance contains valuable materials which can be recovered or recycled.
Leave it at a local civic waste collection point.

12
RECOMMENDATIONS
• Before using for the first time: clean the jars (C1) and the lids (C2, A1 and A2) using warm
soapy water or in the dishwasher. To clean inside the body (B), simply use a damp cloth. Never
immerse the appliance in water or any other liquid.
• While in use: do not move the appliance during use, in particular, do not open the lid (A1).
Do not place the yoghurt maker in any place where there may be vibrations (for example above
a refrigerator) or which is exposed to draughts.
To make your yoghurt, you will need one litre of milk and a ferment.
TIPS FOR CHOOSING YOUR MILK AND FERMENT
1. CHOOSING YOUR MILK
– For good results and ease of preparation, use whole or semi-skimmed UHT milk or reconstituted
milk powder. Fresh milk (untreated) or pasteurised milk needs to be boiled and then cooled and
sieved in order to remove the skin.
Notes:
– Whole milk makes for a firmer and more flavoursome yoghurt.
– Raw untreated or pasteurised milk contains more vitamins and trace elements.
– To make yoghurts with a better consistency, you can add one or two jars of skimmed milk
powder to your litre of milk, stirring carefully.
– Use the milk at room temperature or slightly warm (heat to 37°C or 40°C and measure using a
thermometer). Do not use milk straight out of the refrigerator.
2. CHOOSING YOUR FERMENT (CULTURE)
Your ferment can be made either:
– using one individual pot (150 g size) natural unflavoured fresh yoghurt found in the shops
(preferably made from whole milk), with the longest best before date possible.
– using lyophilised dry ferment or dried yoghurt culture (bought in super-markets, pharmacies
and certain health food shops) (Note: in the UK only available in certain health food shops
or online). Use the activation time and quantity of ferment/starter recommended in the
manufacturers instructions.
– use one pot of plain yoghurt you have already made in your yoghurt maker.
Important: when you have made your first set of yoghurts, you simply need to keep one jar
by in order to serve as the ferment for the others. After 5 sets, the ferment should be renewed
because after a while it becomes weaker and provides for a less solid consistency. Only use plain
unflavoured yoghurts as a ferment.

13
EN
MAKING THE YOGHURTS
1. MAKING THE MIXTURE
– Mix the litre of milk very carefully with the ferment you have chosen (yoghurt or lyophilised dry
ferment/ yoghurt culture) in a container with a spout. Be careful not to froth this mixture up.
– For the best results, if using a pot of yoghurt mix it using a fork in order to make it into a
smooth paste and then add the milk, stirring all the time. If you are using a dry ferment/
culture, fold it into the milk gently and mix very carefully.
– Divide your mixture into the jars (C1).
– Place the jars (C1), without their lid (C2), into the yoghurt maker.
– Put the lids (A1) on the yoghurt maker.
Practical tip: you can also place the lids of the jars (C2) on the lid A1 and then cover with the
lid A2 (see illustration).
Notes: You can sweeten your yoghurts either when you eat them or when you make them. To do
this add sugar to the milk (no more than 80 g sugar for 1 Litre of milk) at the same time as you
add the ferment/culture and beat with a whisk until the sugar dissolves or dissolve the sugar
when heating the milk. Honey or artificial sweeteners may also be used. If sweetening yoghurts
when you eat them, add sugar or honey to your taste, generally one or two teaspoons per pot
is sufficient.
2. SWITCHING THE YOGHURT MAKER ON
– Plug the yoghurt maker in.
– Press the on/off button (E2). When the yogurt maker is on, the indicator light will be on.
– When you want to stop the appliance, press the on/off button again.
– Unplug the appliance.
3. STORING YOUR YOGHURTS:
– Lift the lids (A1 and A2), taking care to prevent any condensation from dripping into the jars
(C1).
– Tighten the lids (C2) onto the glass jars (C1) and place them in the refrigerator for at least 6
hours before enjoying them. If you wait 24 hours, they will be even firmer.
Notes:
– Plain yoghurts can be kept in the refrigerator for a maximum of 7 days days, depending on the
freshness of the milk. The best before date for natural yoghurts will be the date the yoghurts
were made plus 7 days.
– Never put the appliance in the refrigerator.
– Other types of flavoured yoghurts, must be eaten more quickly. Consume within 5 days.
CLEANING
– Always unplug the appliance before cleaning it.
– Never plunge the body of the appliance into water. Clean it with a damp cloth and warm water
and washing-up liquid. Dry thoroughly.
– The yoghurt jars (C1) and the lids (C2, A1 and A2) are all dishwasher safe.

14
CARE & HYGIENE WHEN MAKING YOGHURT
– All the equipment used in the yoghurt making process - jars, jar lids and if used saucepan, jug,
sieve, and spoons - should be sterilized either by using Milton sterilizing solution or cleaning
in a dishwasher.
– Sterilising the jars and lids is important to prevent the introduction of any undesirable airborne
organisms which could interfere with the incubation of the fement/ culture, and result in runny
yoghurt which will not set.
PROBLEMS CAUSES SOLUTIONS
Yoghurts are too
runny.
Use of semi-skimmed or
skimmed milk without
adding milk powder (the
milk used on its own
is not rich enough in
proteins).
Add 1 yoghurt jar of milk powder (2
with skimmed milk) or use whole milk
and a half a jar of whole milk powder.
The yoghurt maker
was moved, bumped
or vibrated during
fermentation.
Do not move the yoghurt maker while
it is working (do not place it on a
refrigerator).
The ferment is no longer
active.
Change ferment or brand of yoghurt.
Check the use-by-date of your ferment
or your yoghurt.
The yoghurt maker
was opened during its
fermentation cycle.
Do not remove the jars or open the
yoghurt maker before the program is
finished (around 8 hours).
Keep the yoghurt maker out of draughts
while it is operating.
Fermentation time too
short.
Start a second cycle at the end of the
first.
The pots haven’t been
properly cleaned/rinsed.
Before pouring your preparation into the
pots, check that there are no traces of
washing-up liquid, household cleaner or
dirt on the inside of the pots.
Fruit added to the
yoghurt.
Try cooking fruits, or preferably use
commercial stewed fruits or jams (at
room temperature). Raw fruits will
release acidic substances which prevent
the yoghurt from forming correctly.
SOLUTIONS TO FREQUENT PROBLEMS

15
EN
WHAT DO I DO IF MY APPLIANCE DOESN’T WORK?
– Start by checking the power cord and plug.
You have carefully followed all these instructions, and yet your appliance still does not
work? In this case, contact your retailer.
If you have any problems or queries please call our Customer Relations Team first for expert help
and advice:
Helpline:
0845 602 1454 - UK
(01) 677 4003 - ROI or contact us via our website
RECIPES
FLAVOURED YOGHURTS
YOGHURTS WITH Flavoured Syrups
– The syrups used are the type used in cocktails.
– 1 litre of milk, 1 jar plain yoghurt or 1 sachet of ferment.
• Fruit syrups (grenadine, orange, blackcurrant, lemon, mandarin, strawberry, redcurrant, barley
water, raspberry, wild strawberry, banana, blueberry, cherry, etc): 5 tablespoons
• Flower syrups (rose, violet, jasmine, sandalwood): 4 tablespoons.
• Mint syrup: 4 tablespoons.
Pour the yoghurt or the ferment into a container. Add the cordial and gradually pour the milk in,
mixing all of the time with a fork. Pour the mixture into the jars and place them in the yoghurt
maker (8 hours) without the lids.
PROBLEMS CAUSES SOLUTIONS
Yoghurts too acidic. Fermentation time too
long.
Reduce the fermentation time next time
you use the yoghurt maker.
A viscous liquid
(called serum)
has formed on the
yoghurt’s surface
at the end of
fermentation.
Too much fermentation. Reduce the fermentation time and/or
add some powdered milk.

16
YOGHURT WITH COOKED FRUIT
JAM YOGHURT
• 1 litre of milk, 1 jar plain yoghurt or 1 sachet of ferment, 4 tablespoons of jam which is not
too thick and which contains small berries or small pieces of fruit: cranberries, blueberries,
rhubarb, ginger, strawberry, orange marmalade.
• Whip the jam with a little bit of milk. Add the yoghurt or ferment. Mix well, then pour in the
rest of the milk.
• Pour the mixture into the jars and place them in the yoghurt maker
• (8 hours) without the lids.
Variation: if you want to make a two-layer yoghurt, simply put the jam at the bottom of the jars.
Then pour the milk/yoghurt or milk /ferment mixture very carefully into the jars. Then place them
in the yoghurt maker (8 hours) without the lids.
VANILLA YOGHURTS
• 700 ml of whole milk, 20 g of semi-skimmed milk powder, 1 jar plain yoghurt or 1 sachet of
ferment, 80 g of caster sugar, 300 ml of single cream, 1 vanilla pod (cut lengthways to expose
seeds).
Warm the cream up and then add the vanilla pod and sugar. Mix well so that the sugar melts and
the vanilla seeds are well distributed. Put to one side. Dilute the yoghurt (or the ferment) with
the milk, which you add little by little. Pour the cream into the milk/yoghurt or milk/ ferment
mixture, and then mix in the milk powder. Pour the mixture into the jars and place them in the
yoghurt maker (8 hours) without the lids.

17
DE
SICHERHEITSHINWEISE
• Gerät nicht benutzen, wenn es zu Boden gefallen
ist und sichtbare Schäden davon trägt oder
nicht mehr ordnungsgemäß funktioniert. Aus
Sicherheitsgründen müssen die betreffenden Teile
von einem Vertragskundendienst ausgetauscht
werden.
• Um Gefahren zu vermeiden, muss ein
schadhaftes Netzkabel vom Hersteller, einem
Vertragskundendienst oder einer ähnlich
qualifizierten Person ausgetauscht werden.
• Dieses Gerät darf von Kindern ab 3 Jahren benutzt
werden, sofern diese beaufsichtigt werden oder
eine Einweisung in den sicheren Gebrauch des
Geräts erhalten haben und die damit verbundenen
Risiken verstehen.
• Kinder dürfen das Gerät nur reinigen oder warten,
wenn sie unter Aufsicht stehen und mindestens
8 Jahre alt sind. Das Gerät und das zugehörige
Netzkabel für Kinder unter 3 Jahren unzugänglich
aufbewahren.
• Dieses Gerät ist nicht für die Benutzung
durch Personen (einschließlich Kinder) mit
eingeschränkten körperlichen, sensorischen oder
geistigen Fähigkeiten bzw. mit einem Mangel an

18
entsprechenden Erfahrungen und Kenntnissen
bestimmt, sofern diese nicht beaufsichtigt werden
oder eine Einweisung in den sicheren Gebrauch des
Geräts durch eine für ihre Sicherheit verantwortliche
Person erhalten haben.
• Kinder müssen beaufsichtigt werden, um
sicherzustellen, dass sie nicht mit dem Gerät
spielen.
• Die Oberfläche des Heizelements kann nach
Benutzung Restwärme enthalten.
• Dieses Gerät dient ausschließlich dem
haushaltsüblichen Gebrauch. Es ist keinesfalls
geeignet, in folgenden Fällen verwendet zu werden
und der Anspruch auf Garantieleistung entfällt
bei Verwendung in Teeküchen von Geschäften,
Büros und anderen Arbeitsumgebungen sowie
Landhäusern und durch Kunden in Hotels, Motels,
Pensionen und anderen Wohnumgebungen.
• Achtung: Fehlgebrauch kann Verletzungen nach
sich ziehen.
• Achtung: Das Gerät darf nicht unter Wasser
getaucht werden.

19
DE
EMPFEHLUNGEN
• Vor der ersten Inbetriebnahme: Reinigen Sie die Gläschen (C 1) und die Deckel (C 2, A1 und
A2) mit heißem Seifenwasser oder in der Spülmaschine. Die Heizplatte des Behälters (B) sollte
nur mit einem Schwamm gereinigt werden.
• Während des Betriebs: Transportieren Sie das Gerät nicht, wenn sie in Betrieb ist und öffnen
Sie auf keinen Fall den Deckel (A1). Stellen Sie das Gerät nicht an Orten mit starken Vibrationen
(zum Beispiel einen Kühlschrank) und achten es darauf, dass sie keinem Luftzug ausgesetzt ist.
Zur Zubereitung von Joghurt benötigen Sie einen Liter Milch und ein Ferment.
PRAKTISCHE TIPPS ZUR AUSWAHL VON MILCH UND
FERMENT
1. WAHL DER MILCH
– Wählen Sie aus praktischen Gründen bevorzugt Vollmilch, die nicht gekocht werden muss (lang
haltbare UHT-Milch oder Milchpulver). Rohmilch (Frischmilch) und pasteurisierte Milch müssen
abgekocht werden; danach abkühlen lassen und durch ein Sieb laufen lassen, um die Milchhaut
auszufiltern.
BESCHREIBUNG
A Aus zwei Teilen bestehender Deckel:
A1 Deckel A1: Hauptdeckel
A2 Deckel A2: Nebendeckel
B Gehäuse
C Aus zwei Teilen bestehende
Joghurtgläschen:
C1 Gläschen
C2 Couvercle
D Elektronisches Display mit
Hintergrundbeleuchtung
E Bedienungsknöpfe:
E1 Kontrollleuchte
E2 An/Aus Knopf
ENTSORGUNG VON ELEKTRISCHEN UND ELEKTRONISCHEN
GERÄTEN
Denken Sie an den Schutz der Umwelt!
Ihr Gerät enthält zahlreiche Rohstoffe, die wieder verwertet oder recycelt werden
können.
Bringen Sie das Gerät zur Entsorgung zu einer Sammelstelle Ihrer Stadt oder
Gemeinde.

20
ZUBEREITUNG VON JOGHURT
1. ZUBEREITUNG DER MISCHUNG:
– Vermischen Sie in einer Schüssel mit Ausgießtülle sehr sorgfältig einen Liter Milch mit dem
Ferment Ihrer Wahl (Joghurt oder lyophilisiertes Trockenferment). Die Zubereitung darf nicht
schäumen.
– Schlagen Sie den Joghurt mit einer Gabel, um ihn gut durchzumischen, zu einer glatten
Masse und geben Sie danach unter ständigem Rühren die Milch hinzu. Bei Verwendung von
lyophilisiertem Trockenferment muss das Ferment in die Milch gegeben und gut untergemischt
werden.
– Geben Sie die Mischung in die Gläschen (C1).
– Geben Sie die Gläschen (C1) ohne ihren Deckel (C2) in die Joghurtmaschine.
– Setzen Sie den Deckel (A1) auf das Gerät.
Ein praktischer Tipp: Legen Sie die Deckel der Gläschen (C2) auf den Deckel A1 und legen Sie
den Deckel A2 darauf (siehe Abbildung).
2. INBETRIEBNAHME DES GERÄTES:
– Schließen Sie das Gerät an.
– Drücken Sie die Ein-/Aus-Taste (E2). Wenn der Joghurtbereiter eingeschaltet ist, leuchtet die
Kontrollleuchte.
– Wenn Sie das Produkt ausschalten möchten, drücken Sie die Ein-/Aus-Taste erneut. Ziehen Sie
den Stecker des Gerätes aus der Steckdose.
– Ziehen Sie den Netzstecker aus der Steckdose.
Bitte beachten:
– Bei Verwendung von Vollmilch wird der Joghurt fester und hat mehr Aroma.
– Frischmilch und pasteurisierte Milch enthalten mehr Vitamine und Oligoelemente.
– Wenn Sie besonders festen Joghurt zubereiten wollen: Geben Sie dem Liter Milch 2 oder 3
Esslöffel Milchpulver bei und mischen Sie dieses gründlich unter.
– Verwenden Sie Milch mit Zimmertemperatur oder leicht angewärmte Milch (37°C bis 40°C).
Verwenden Sie keine Milch, die direkt aus dem Kühlschrank kommt.
2. WAHL DES FERMENTS
Das Ferment gewinnt man entweder:
– Aus einem möglichst frischen handelsüblichen Naturjoghurt (bevorzugt auf Basis von
Vollmilch).
– Aus einem lyophilisierten Trockenferment (erhältlich in Supermärkten, Apotheken und vielen
auf gesunde Ernährung spezialisierten Geschäften). Halten Sie sich in diesem Fall an die in der
Gebrauchsanweisung des Ferments angeführte Aktivierungszeit.
– Oder aus einem hausgemachten Joghurt.
Wichtig: Nach der Zubereitung der ersten Joghurts brauchen Sie nur einen dieser
Joghurts aufzuheben, um die folgenden Joghurts mit Ferment zu versorgen. Nach
5 Zubereitungen sollte ein neues Ferment verwendet werden, da dessen Wirkung mit der Zeit
nachlässt, was negative Auswirkungen auf die Konsistenz der Joghurts hat.
This manual suits for next models
1
Table of contents
Languages:
Other Moulinex Yogurt Maker manuals