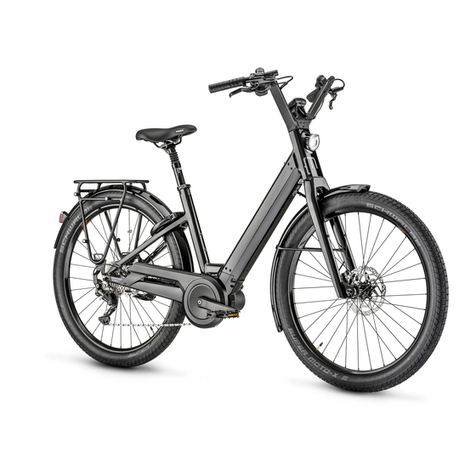
Moustache TRAIL 3 User manual

1
Good reasons for setting your mountain
bike : to ride like a champ
suspension has to be set to a tee, a cor-
rectly adjusted derailleur will prevent many
unpleasant surprises, securely tightened
levers will allow you to ride with peace of
mind, because a good bike set-up is a gua-
rantee to bring a smile along the trails!
Quick Start
TRAIL & GAME
3, 5, 7, 9, 11 & LTD
ENGLISH

2Instructions TRAIL & GAME 2022
INTRODUCTION
Ride your Moustache correctly and learn everything about its settings!
If you are reading this Quick Start, you have just made a great choice to purchase a
Saturday TRAIL or GAME. Thank you very much!
Obviously, you will really be looking forward to hit the trails, but before you do, you
should check a few things to ensure the full pleasure of riding on your new bike.
This booklet explains how to check and, if necessary, adjust your Moustache before
rst use. It also explains how to change your settings later and maintain your bike
properly. These instructions are available on-line in several languages: just visit our
website, moustachebikes.com/documents/manuels-utilisation/.
For further information, please refer to the user manual provided together with your
bike. You can nd it also on our website, under the “Support” tab.

3Instructions TRAIL & GAME 2022
TABLE OF
Fitting the handlebars....................................................................................................................................................................... 4
Head tube routing......................................................................................................................................................................................... 5
Mounting the Kiox/Intuvia display.................................................................................................................. 6
First steps with the Smart System................................................................................................................ 8
Removing the battery......................................................................................................................................................................... 9
Fitting the battery.....................................................................................................................................................................................10
Adjusting the battery lock................................................................................................................................................11
Mounting the battery clip...................................................................................................................................................12
Setting the rear suspension........................................................................................................................................13
Introduction to the rear suspension......................................................................................................................................... 13
Rear shock air pressure setting...................................................................................................................................................... 14
Setting shock rebound................................................................................................................................................................................... 15
Setting the fork...............................................................................................................................................................................................16
Marzocchi........................................................................................................................................................................................................................... 16
Rockshox............................................................................................................................................................................................................................. 17
Fox 36........................................................................................................................................................................................................................................ 18
Fox 38........................................................................................................................................................................................................................................ 19
Setting the tyre pressure.....................................................................................................................................................20
Removing the front wheel.................................................................................................................................................21
Removing the rear wheel....................................................................................................................................................21
Using the derailleur SHADOW RD+ system................................................................................................................ 21
Good practices before first use.......................................................................................................................22
Adjusting the dropper seatpost height................................................................................................................................ 22
Setting the saddle angle and height........................................................................................................................................ 24
Setting the brake lever/shifter angle and stroke.................................................................................................. 25
Good practices before each use...................................................................................................................26
Good practices after each use............................................................................................................................27
Glossary..............................................................................................................................................................................................................................28
My settings.................................................................................................................................................................................................................29
My maintenance and repairs....................................................................................................................................30

4
2
1
3
2
3
3
1
Instructions TRAIL & GAME 2022
FITTING THE HANDLEBARS
Centre the handlebars. Gently tighten the headset
cap bolt. Check whether
there is still any play in the
headset. If necessary, repeat
the operation until the play
disappears, ensuring that the
headset moves freely.
Max. torque 2.5 Nm
Tighten the stem bolts.
Max. torque 5-6 Nm

5
A
B
C
B
C
4mm5mm 3mm4mm
A
Instructions TRAIL & GAME 2022
HEAD TUBE ROUTING
5/4mm Connection Clip
(brake/derailleur hose)
4/3 mm Connection Clip
(derailleur/Bosch cable) Rilsan

6
2
1
B
A
Instructions TRAIL & GAME 2022
Straighten the display mount
by unscrewing A.
Position the display mount in the extension of the
stem as in the picture below.
If necessary, unscrew the support screw Bto move
it easily.
MOUNTING THE KIOX/INTUVIA DISPLAY

7
3
4
5
B
A
Kiox
Intuvia
Instructions TRAIL & GAME 2022
Clip the display.
Clip the display
Unclip the display
1. Push
1. Insert
Centre the display with the
stem.
Tighten screws A and B.
Max. torque 1Nm
2. Lift
2. Clip

8Instructions TRAIL & GAME 2022
FIRST STEPS WITH THE SMART SYSTEM
Switching on
Press the On/Off button briey.
App
To enhance your user experience,
download the “eBike Flow” app at
where you can track your activities,
integrate your favourite apps and
personalise your own assistance
modes (Eco, Tour, Sport and Turbo),
etc.
You need a Bosch ID account to log in.
Bluetooth pairing
Launch the app on your smartphone
and pair it following the instructions in
“eBike Flow”.
For further details:
https://www.bosch-ebike.com/en/
products/ebike-flow-app
On/Off

9
1
2
3
4
Instructions TRAIL & GAME 2022
REMOVING THE BATTERY
Pivot the battery holder on the bottom of the
battery cover. Remove the battery cover as illustrated below.
Press the battery latch to release it from its
compartment, guiding it out as illustrated below.
Remove the knob by unscrewing it.

10
1
2
4
3
Instructions TRAIL & GAME 2022
FITTING THE BATTERY
Insert the bottom of the battery into the connectors
inside the frame before clipping the top as illustrated
below.
Insert the knob by screwing it in (check that the
small seal is on the screw).
Position the cover by firstly inserting the top as
illustrated below.
Pivot the battery holder on the bottom of the
battery cover.

11
1
2
B
A
Instructions TRAIL & GAME 2022
ADJUSTING THE BATTERY LOCK
Beforehand, ensure that
the bike is on flat terrain.
Unscrew the screws
A.
Position the plate
Bin
contact with the frame.
Tighten the screws A.
Max. torque 1Nm

12
1
2
1
2
Instructions TRAIL & GAME 2022
MOUNTING THE BATTERY CLIP
Position the clip on the top of
the battery as in the picture
below.
Tighten the 3 M3x8 TX screws.
Max. torque 1.2Nm
Side with the
On/Off button
Important
Check that the battery clip is centred.

13Instructions TRAIL & GAME 2022
SETTING THE REAR SUSPENSION
Introduction to the rear suspension
Rebound knob (red)
Adjusts the rebound speed at which
the suspension returns to its initial
position after absorbing a hit.
2-position lever (blue)
Comfort mode
When the lever is in the “open” position,
the suspension works normally and
shocks are fully absorbed.
Platform mode
When the lever is in the“locked” position,
the suspension is more rigid and less
sensitive, limiting the pumping effect for
optimum pedalling.
Air valve
For adjusting air pressure according
to the rider’s weight.
Dust seal
For stopping impurities from
entering and conserving the
lubricating film on the shock body.
SAG adjuster
O-ring and indicator for checking
that the shock is set correctly in the
static position.

14 Instructions TRAIL & GAME 2022
SETTING THE REAR SUSPENSION
Rear shock air pressure setting
TOTAL WEIGHT OF RIDER
+ EQUIPMENT (kg) PRESSURE (psi)
50-55 80-90
55-60 90-100
60-65 100-110
65-70 110-115
70-75 115-120
75-80 120-140
80-85 140-145
85-90 145-150
90-95 150-155
95-100 155-160
100-105 160-170
105-110 170-180
110-115 180-190
115-120 190-195
Before positioning yourself on the bike, you should inate the shock using a
high-pressure pump according to the presumed indications provided in the table
below.
Stand on the bike with the pedals in the horizontal position and your hands on the
handlebars in the attacking position. You can lean your elbow against the wall to
support the position or ask someone to stabilize your bike.
Slide the O-ring up to the shock dust seal, then get off the bike ensuring that you do
not compress the suspension while doing so. If necessary, repeat the operation by
adjusting the air pressure until the O-ring is aligned with the SAG adjuster.
For further information on the procedure, please refer to the user manual.

15Instructions TRAIL & GAME 2022
SETTING THE REAR SUSPENSION
Setting shock rebound
Having set your SAG, it is time to set the rebound!
Rebound controls the speed at which your suspension returns to the initial position.
It is set according to the number of clicks with the knob (red) from the open position
(knob completely unscrewed).
Please refer to the table containing the theoretical values.
The settings recommended by Moustache are indicated as the number of clicks from
the open position.
Note
This principle is valid for suspension forks, too.
sensation of
being catapulted
progressive
flattening
Case no. 1
If the shock rebound is set too fast,
it will return to its initial position too quickly, which will cause
a loss of grip. This will feel like riding on a trampoline or being
catapulted from the bike.
Case no. 2
If the shock rebound is set too slow, it will remain compressed
after repeated hits, which will give a sense of heaviness,
reduce travel and increase rmness on small bumps.
TOTAL WEIGHT OF RIDER
+ EQUIPMENT (kg)
REBOUND CLICKS
(open position*)
50-55 0-1
55-60 1-2
60-65 2-3
65-70 3-4
70-75 4-5
75-80 5-6
80-85 6-7
85-90 7-8
90-95 8-9
95-100 9-10
100-105 10-11
105-110 11-12
110-115 12-13
115-120 13-14
* turn the knob anticlockwise until full stop.

16
20%
Instructions TRAIL & GAME 2022
SETTING THE FORK
Marzocchi
Marzocchi Z2 Marzocchi Z1
TOTAL WEIGHT OF RIDER
+ EQUIPMENT (kg) PRESSURE (psi)
REBOUND CLICKS
(clicks from closed
position*)
PRESSURE (psi)
REBOUND CLICKS
(clicks from closed
position*)
54-59 64-74 12 70 12
59-64 64-74 11 74 11
64-68 78-83 10 78 10
68-73 78-83 9 82 9
73-77 78-83 8 86 8
77-82 92-102 7 89 7
82-86 92-102 6 94 6
86-91 92-102 5 99 5
91-95 106-120 4 105 4
95-100 106-120 3 109 3
100-104 106-120 2 113 2
104-109 106-120 1 117 1
109-113 106-120 0 117 0
MAX. PSI 120 MAX. PSI 120
Suggested SAG setting for Marzocchi forks is 20% (or about 30 mm for Z1/Z2 with 150 mm travel and about 35 mm for Z1 with
170 mm travel).
* turn the knob clockwise until it comes to a stop.
Z1 fork setting guide
Z2 fork setting guide
30mm for 150mm
35mm for 170mm
Recommended settings for Moustache, may be fine-tuned to suit the rider.

17
20%
Instructions TRAIL & GAME 2022
SETTING THE FORK
Rockshox
RS 35 Gold RL RS Domain R
TOTAL WEIGHT OF RIDER
+ EQUIPMENT (kg) PRESSURE (psi)
REBOUND CLICKS
(clicks from closed
position*)
PRESSION (en psi)
REBOUND CLICKS
(clicks from closed
position*)
54-59 68 13 49 14
59-64 73 12 53 12
64-68 78 12 57 11
68-73 83 12 62 10
73-77 88 11 66 9
77-82 93 11 70 8
82-86 98 10 74 6
86-91 103 9 78 5
91-95 108 8 82 4
95-100 113 7 86 3
100-104 118 6 90 2
104-109 120 6 95 2
109-113 120 6 99 1
MAX. PSI 163 148
Suggested settings for RockShox forks for a SAG of 20% (or about 30 mm for RS35 and 35 mm for Domain).
* turn the knob clockwise until it comes to a stop.
RS 35 setting guide
Domain setting guide
30mm for RS35
35mm for Domain
Recommended settings for Moustache, may be fine-tuned to suit the rider.

18
20%
30mm
54-59 55 13 10 10 6 15
59-64 60 12 9 9 6 15
64-68 64 11 8 9 6 15
68-73 68 10 9 8 6 15
73-77 73 9 8 7 6 15
77-82 77 8 8 7 6 15
82-86 82 7 8 7 6 15
86-91 86 6 7 6 6 15
91-95 90 5 7 6 6 15
95-100 95 4 6 6 6 15
100-104 100 3 6 5 6 15
104-109 103 2 6 5 6 15
109-113 108 1 6 5 6 15
MAX. PSI 120
Instructions TRAIL & GAME 2022
SETTING THE FORK
Fox 36
Suggested SAG setting for the Fox 36 fork is 20% (or about 30 mm).
Fox 36 fork setting guide
* turn the knob clockwise until it comes to a stop.
Recommended settings for Moustache, may be fine-tuned to suit the rider.
TOTAL WEIGHT
OF RIDER
+ EQUIPMENT
(kg)
PRESSURE
FLOAT (psi)
GRIP-REBOUND
CLICKS
(clicks from
closed position*)
GRIP 2 - LSR
(clicks from
closed position*)
GRIP 2 - HSR
(clicks from
closed position*)
GRIP 2 - HSC
(clicks from
closed position*)
GRIP 2 - LSC
(clicks from
closed position*)

19
20%
35mm
54-59 64 13 15 5 6 5
59-64 69 12 14 5 6 5
64-68 74 11 13 4 6 5
68-73 80 10 12 4 6 5
73-77 85 9 11 4 6 5
77-82 90 8 11 4 6 5
82-86 95 7 10 3 6 5
86-91 100 6 9 3 6 5
91-95 105 5 9 3 6 5
95-100 110 4 9 3 6 5
100-104 115 3 8 3 6 5
104-109 120 2 8 3 6 5
109-113 125 1 8 3 6 5
MAX. PSI 140
Instructions TRAIL & GAME 2022
SETTING THE FORK
Fox 38
Suggested SAG setting for the Fox 38 fork is 20% (or about 35 mm).
Fox 38 setting guide
Recommended settings for Moustache, may be fine-tuned to suit the rider.
* turn the knob clockwise until it comes to a stop.
TOTAL WEIGHT
OF RIDER
+ EQUIPMENT
(kg)
PRESSURE
FLOAT (psi)
GRIP-REBOUND
CLICKS
(clicks from
closed position*)
GRIP 2 - LSR
(clicks from
closed position*)
GRIP 2 - HSR
(clicks from
closed position*)
GRIP 2 - HSC
(clicks from
closed position*)
GRIP 2 - LSC
(clicks from
closed position*)

20 Instructions TRAIL & GAME 2022
SETTING THE TYRE PRESSURE
TOTAL WEIGHT
OF RIDER
+ EQUIPMENT (kg)
TYRE PRESSURE
(bar)
TYRE PRESSURE
(psi)
55-60 1 14,5
60-65 1,1 16
65-70 1,15 16,7
70-75 1,2 17,4
75-80 1,3 18,9
80-85 1,35 19,6
85-90 1,4 20,3
90-95 1,5 21,8
95-100 1,55 22,5
100-105 1,6 23,2
105-110 1,7 24,7
110-115 1,8 26,1
Tyre pressure depends on the total weight of the rider with their equip-
ment, the type of terrain and the style of riding.
With a tubeless system, you can ride at low pressure to increase grip and
comfort. The pressures recommended in the table are the result of terrain
tests conducted by our test riders to optimise bike behaviour.
They do not replace tyre manufacturer’s recommendations.
This manual suits for next models
13
Table of contents
Other Moustache Bicycle manuals
Popular Bicycle manuals by other brands
Invacare
Invacare Excelerator XLT Owner's operator and maintenance manual

Gio Electric
Gio Electric Peak owner's manual
Sportplus
Sportplus SP-DB-1100-B-i Instructions for use

Cannondale
Cannondale SYNAPSE HI-MOD CARBON 2013 Owner's manual supplement
Worksman
Worksman WTC4X4 Assembly manual and parts list

Costway
Costway TY328026 user manual


