Worksman WTC4X4 User manual

Worksman WTC4X4 Quadricycle - Assembly Manual and Parts List
Worksman Cycles –PO Box 170732 –Ozone Park, NY 11417 (888) 3-WHEELER –www.worksmancycles.com
Manual # 4X419
Model WTC4X4
Thank you for choosing your Worksman 4X4 Quadricycle. Your new
Worksman business cycle is an American-made work vehicle with over
120 years of heavy duty, cargo-lugging experience in hundreds of
industries around the world! Worksman Industrial Cycles are incredibly
durable and, with proper maintenance, will lead to decades of reliable
service.
Since we use heavy-duty components, and not standard bicycle parts, it is
important that only Worksman factory replacement parts be used when
repairing your cycle. Ride safely, and follow the rules of the road.
This manual will assist you in assembling the cycle and identifying proper parts when they need repair or
replacement. Assembly should always be performed by a qualified mechanic. If you have any further
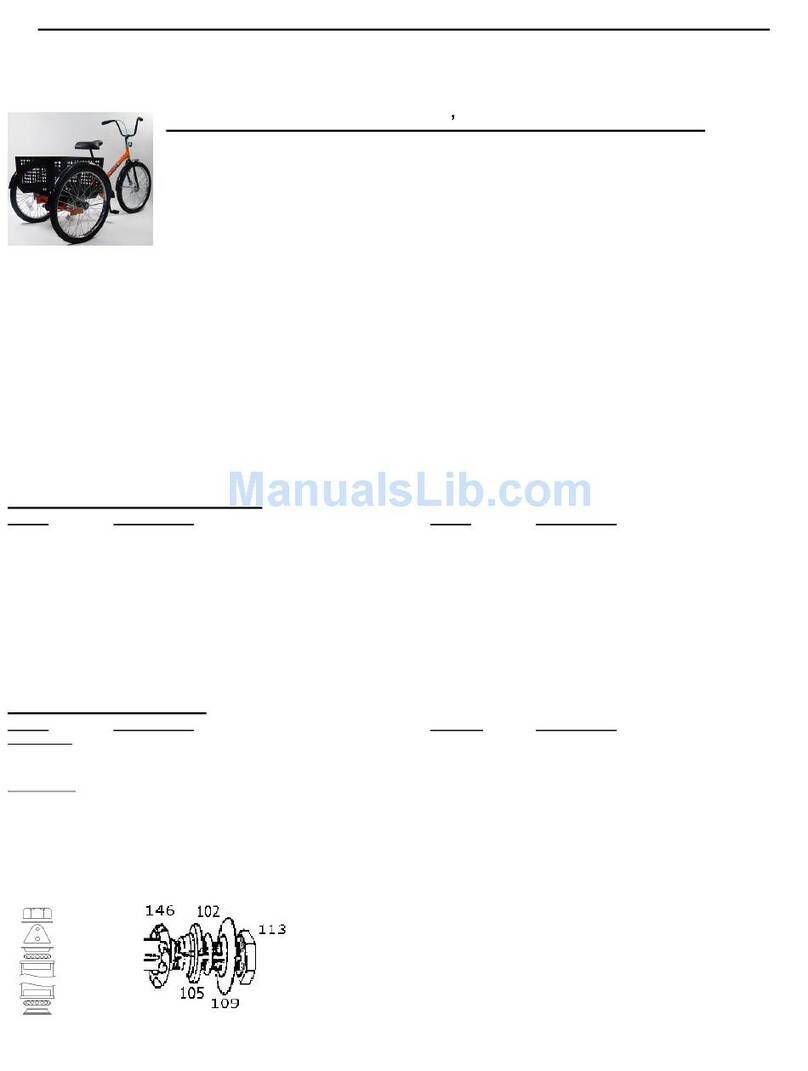
questions, feel free to call our customer service department. (Shown here w/ custom side rails, fenders, and 3 speed upgrade.)
ASSEMBLY INSTRUCTIONS: These instructions are predominately for the front end of the cycle. Read them
fully prior to assembly. The rear chassis is mostly assembled already with the exception of the seat and the
pedals. You will need a socket set, a flat-head screwdriver, Phillips screwdriver, pliers, an adjustable wrench,
and grease.
Attaching Front Wheels to Axle: (See illustration.)
1) Grease the wheel hub cups (103) using bicycle bearing
grease. (Vasoline consistency.)
2) Insert one bearing (146) onto axle so that the balls of the
bearings are facing the wheel hub cup. Place wheel onto the axle.
Place second bearing onto the axle so that the balls face the cup
of the wheel.
3) Thread on the outside adjusting cone (105). (Note: Left-hand thread!) Hand-tighten using a punch, ice pick,
or small Phillips head screwdriver. After hand tightening back off a ¼ turn.
4) Install key washer (102) and dust washer (109).
5) Install left hand lock nut (113). Thread down and tighten fully. Wheels should spin freely without any wobble
left to right or up and down. If too tight or too loose, readjust adjusting cone.
Attaching Axle to the Frame: (See illustration.)
1) Remove the top nut (113), adjusting cone (105), and washer (102) from the head
spindle assembly, which is shipped in the head lug of the frame. The spindle will drop
out through the bottom of the head lug.
2) Position the center of the axle into the front portion of the frame with the spring-
mounting plates facing up and spindle set-screws (already installed) facing forward.
3) Re-insert the spindle with the two flat spots on the spindle facing the set-screws.
4) Tighten the set-screws against the flat spots on the spindle, thus holding the axle
firmly in place.
5) Re-install bearing (146), adjusting cone (105), keywasher (102), and locknut (113)
as shown.
Fender Installation: (Fenders are optional. See illustration.)
If your cycle is equipped with fenders (4902A) for the front wheels, the axle will have a three
pronged “wing”on each side upon which the individual “J”shaped steel fender braces (4904)
are to be attached.
1) Using ¼”x ¾”HEX head bolts, lockwashers (shown), and serrated nuts (4906), attach
brace to wing.
2) Place fenders over the top of the braces, align holes, and use ¼”x ½”ROUND head
slotted screws on top of fender and the lockwashers and nuts (4905) on bottom.

Mounting Leaf Springs to Axle:
1) Position one short 4”spring spacer (4921LS) on the axle plate.
2) Place the 4921LL (9”) and 4921L (17”) spring spacers on top of the short 4”spacer.
3) Place the leaf spring with the curve facing UP on top of the spacers, centering it on the axle.
4) Using both of the “U”bolts provided, clamp the spring and spacers through the axle plate and tighten. Be
sure to put a lockwasher between the flat washer and the serrated hex nut.
5) Repeat for other side of axle.
Attaching Platform or Cabinet to Leaf Springs:
NOTE: Make sure handlebar mount holes on platform or cabinet are facing the rear of the cycle.
Platform
1) Place platform onto springs, lining up the holes in the platform with the holes in the open
springs.
2) Insert FLATHEAD elevator bolts through the platform and tighten using the flat washer,
lockwasher, and serrated hex nut –in that order.
3) Tighten to pull bolt square through hole in platform to lock in place.
Cabinet
For front cabinets, elevator bolts are already mounted through the undercarriage. The 2x4 wood strips, which
protect these bolts, must be removed BEFORE positioning the cabinet onto the springs.
Mounting the Handlebars: Position handlebar, lining up the holes in handlebar with the holes in the platform
or cabinet. Insert 5/16”X ¾”ROUND-HEAD bolts and hardware provided.
Install Pedals: Pedals are marked “R”or “L”on the threaded end of the
pedal. Attempts to install the pedals on the wrong side or tighten in the
wrong direction will damage the threads and will NOT be warrantied.
1) Slightly grease pedal threads prior to attaching to crankarms.
2) Install “R”pedal on right side and tighten CLOCKWISE.
3) Install “L”pedal on left side and tighten COUNTER-CLOCKWISE.
Install Seat and Seatpost:
1) Insert seatpost into seat clamp on bottom of seat. Do not tighten yet.
2) Install seatpost info frame. Do not tighten yet.
3) Adjust angle of seat with nose raised slightly. Tighten seat clamp bolt securely. (240 IN. LBS.)
4) Adjust the seat height to your desired level. Make sure a minimum of 3 1/2”of the post remains in the frame
tube. Never adjust post above this level, which is marked on the seat post.
5) Tighten seat tube clamp at top of seat tube.
MAINTENANCE TIPS:
Always inspect your Worksman Cycle to ensure that all nuts, bolts, screws and hardware are tight and that no parts are
worn or damaged. Do not attempt to straighten bent frames.
Chain:
Lubricate chains once a month or as needed with bicycle chain
lubricant. Replace sprockets when teeth become worn, bent or
broken. Keep chains adjusted so there is no more than 3/8”slack.
Note that we leave the chains tight at the factory, as we do know
they will stretch during the break-in period. Lubricate crank parts
every six months. Replace pedals when the surface is worn or if
axle becomes “tight”or frozen.

Coaster Brake (if applicable):
FRONT LOAD CYCLES ARE INTENDED FOR FLAT AREAS. BECAUSE FRONT LOADERS HAVE ONLY A REAR
BRAKE, USE CAUTION WHEN GOING DOWN SLIGHT GRADES, AND KEEP LIGHT PRESSURE ON THE BRAKE TO
AVOID BUILDING UP TOO MUCH SPEED.
Foot-activated coaster brakes are reliable and easy to use. To activate the brake, reverse the pedaling motion until the
brake engages. To avoid skidding and maintain control, apply care when braking. This is especially true on wet surfaces.
Apply brakes gently, gradually increasing pressure. Replace coaster brakes when they become worn. Check chain
tension regularly. Coaster brake hubs may make a vibrating noise under braking when new until they are broken in. For
three-speed units, pause pedaling to help mesh gears. (Let the cycle coast.) This will make shifts smoother and will
reduce wear and tear on the hub. Do not shift when pedals are not moving as damage could occur.
Tires:
Always check for worn or damaged tires. We recommend 40 PSI as proper level of inflation. Replace or repair tubes that
show leaks.
LIMITED WARRANTY:
This cycle is warranteed against faulty parts under the following conditions: this warranty does not cover any failure due to accident,
abuse, misuse, neglect or as the result of normal wear and tear, or improper assembly. The entire frame, including all welded joints, is
warranted to be free from defects and material for one year while in possession of the original purchaser. All other parts on this cycle,
except tires and tubes, are warrantied for ninety days from the date of purchase. Repair and replacement of these parts is to be
according the Worksman cycles parts and service procedures and must be handled directly through the source where the cycle was
purchased. If upon examination of the parts in question, the Worksman Cycle dealer determines that it is defective, either repair or
replacement will be made at no cost except the cost of transportation and labor charges (if any). Unauthorized repairs or replacement
automatically voids warranty. Proper maintenance is required for warranty to be valid. In the event that it was determined that the
warranty claim is the result of misuse, abuse, improper maintenance or simply not defective or beyond the warranty period, Worksman
Cycles or the dealer will advise you as to the cost of repair, replacement or labor prior to performing any work or replacing any parts. If
you choose not to have the dealer or Worksman Cycles perform the work, the parts will be returned to you at your expense or
discarded if no reply is received within two weeks of notification. The sole responsibility of the manufacturer to the terms of this
warranty, if any, shall be the repair and/or replacement of the parts as indicated above. The liability of the manufacturer shall in no
event exceed the original purchase price of the product, and the manufacturer shall not be responsible for any consequential damages
of any nature, including, but not by way of limitation, damages for personal injury or property. This statement constitutes the exclusive
expression of warranties by the manufacturer and is in lieu of any or all other warranties such as expressed warranties, implied
warranties, including but not limited to warranties of merchantability, and fitness or purpose, are limited in duration for one year from the
date of purchase of the frame only and 90 days for all other parts, except tires and tubes which are not warranted. Worksman Trading
Corporation is the manufacturer. Misuse of the cycles including off road riding, installation of motors or power assists, alterations,
repairs using parts other than genuine Worksman Cycle parts voids warranty. Worksman Trading Corporation is not responsible for
maintaining records of serial numbers. Void where prohibited by state law.
WORKSMAN CYCLES ACCESSORIES: Worksman offers a complete line or accessories for added safety and customization. If your Worksman
Front-Load Business Cycle is to be used outdoors, reflectors are recommended and may be required by law.
PART #
DESCRIPTION
WHY SHOULD YOU GET IT?
P2
Ding
-
Dong Warning Bell
Alerts others to yo
ur presence with a loud, crisp sound.
P3
Squeeze Bulb Horn
Alerts others to your presence with a loud honking noise.
P4
Vinyl Covered Cable w/ Padlock
Prevents / deters cycle theft. Secures cycle components.
P5
Chrome Rear View Mirror
Allows riders to see behind themselves for better safety.
P6
Reflector Kit for Tricycles
Lets others see cycle from all directions. Increases safety.
P7
Headlight (Battery Operated)
Lights area ahead and allows others to see cycle coming.
P8
Safety Flag on Pole (Bright Orange)
Increases height of visibility. Allows others to see cycle.
P18
LED Light Pedals
-
Glowspeck
Flashing pedals
–
w/o batteries! Very bright & safe!
P19
Bicycle Helmet (Adult)
Provides added safet
y. (May be required by law.)
101710
Flashing Strobe Light (Clear)
Increases cycle visibility.
101714
Flashing Strobe Light (Red)
Increases cycle visibility. (May be required by law.)
3973
Mega Horn (Super
-
Loud Battery Operated)
Alerts others with a 105
-
dB electronic sound.
1000
Tool
-
Spoke Tightening Wrench
Adjust spokes as needed.
1001
Tool
-
Pedal Wrench
Makes Pedal Installation and removal convenient.
1006
Air Pump (for tire inflation)
Keep tires properly
inflated for best ride characteristics.
1265TW
Tool
-
Crank Cone Wrench
Makes crank cone adjustment more convenient.
2000
Tool
-
Chain Rivet Remover
Makes chain removal and repairs convenient.
3961
Cup Holder (Tube or basket mounted)
Ho
lds cans, bottles, and mugs with handles!
PLEASE CALL OR EMAIL FOR PRICING FOR ALL PARTS AND ACCESSORIES!
888-3-WHEELER / 718-322-2000 / EMAIL: CYCLES@WORKSMAN.COM

WORKSMAN 4X4 QUADRICYCLE - REPLACEMENT PARTS LIST: (WTC4X4)
FRONT AXLE
& FREE
-
WHEEL
PARTS
CRANK PARTS
4918A Axle: STPT: 37½”(w/ opt fender wings) 7217 Pedals (pair)
4927A Bolt –Square head for axle spindle 1265 Crank parts set
131 Front wheel parts set to attach wheels (1266,1268,1269,1271,1272,1273,1274)
(2-105,2-102,2-109,2-113,2-146) 1266 Crank bearings (pair)
4937 Head lug spindle 1267D Crank assembly –COMPLETE
4937A Head lug spindle w/ attachment parts (1265,1275,1380D)
(1-4937,2-105,2-102,2-113,2-146) 1268 Ball cups
102 Key washer (for free wheels, spindle) 1269 Inside stationary washer
103 Wheel cups (pressed into hub) 1271 Key washer (for cranks)
105 Adjusting cone 1272 Adjusting cone –Outside
106 Stationary cone (pressed on axle) 1273 Stationary cone –Inside
109 Dust washer 1274 Outside locknut
113 Axle locknut (left-hand thread) 1275 Crank (6 ½”)
146 Wheel bearings (pair) 1380D 36 tooth front sprocket
1380F 32 tooth front sprocket
COASTER BRAKE HUB AND PA
RTS
1380H 28 tooth front sprocket
301 Coaster brake hub –Shimano E110
404N Coaster brake hub - 3 speed w/ shifter & cable
FENDERS AND BRACES
SS721 Coaster brake (Shimano E110) internal parts 4902A Fender (Chrome)
SS148 Coaster brake sprocket (22T–Shimano) 4904 Front Braces for front fender (set of 3)
SS12N-DEL Shifter Trigger and Cable for Nexus 92 Rear Fender “Wing”Mounting Bracket
SS-5R Shimano Non-Turn Washer (Yellow) 4905 Bolt/nut/washer (to mount fender to brace)
4915 Chain Adjuster w/ hardware (each)
4906 Bolt/nut/washer (to mount brace to wing)
FSFL Front fender set w/ hardware (complete)
WHEELS AND RELATED PARTS
AD20 Rear fender set w/ hardware (complete)
1008A Wheel: Front/Free-Side w/o tire & tube
1008 Wheel: Front/Free-Side w/ tire & tube
FRAME
& FRONT
-
E
ND PARTS
1008S Wheel: Front/Free-Side w/ solid tire 49004X4 Frame
1008KVPR Wheel: Front/Free-Side w/ Kevlar tire/PR tube 4921 Leaf Springs (each)
8132SA Wheel: Mag Front/Free-Side w/o tire & tube 4926 U-bolt w /nut, washers for 4921
8132 Wheel: Mag Front/Free-Side w/ tire & tube 4125 Elevator bolt, nut, washers
8132S Wheel: Mag Front/Free-Side w/ solid tire 4921LS Spacer leafs springs (4”- STPT)
8132KVPR Wheel: Mag Front/Free-Side w/ Kevlar/PR 4921LL Spacer leafs springs (9”- STPT)
1009A Wheel: Drive-Side w/o tire & tube 4921L Spacer leafs springs (17”- STPT)
1009 Wheel: Drive-Side w/ tire & tube 4929 Handlebar for cabinet models
1009S Wheel: Drive-Side w/ solid tire 4931 Handlebar for platform models
1009KVPR Wheel: Drive-Side w/ Kevlar tire/PR tube 4935 Handlebar bolt/nut/washer set
8133SA Wheel: Mag Drive-Side w/o tire & tube 3927STPT Platform –STPT –38”x 26”x 3”
8133 Wheel: Mag Drive-Side w/ tire & tube 3927T Cabinet –(42”Lx23”Wx25”H - Call for Ice Cream boxes.)
8133KVPR Wheel: Mag Drive-Side w/ KV tire & PR tube 4910P-BLK Chainguard (Black resin)
8133S Wheel: Mag Drive-Side w/ solid tire 5030Q Reflector Kit (Front, rear, 4 wheels) (Optional)
101 Hub (Hub only –front/free side)
3980 Hub for Drive Side Wheel
REAR AXLE &
DRIVE WHEEL
PARTS
1015 Rim ONLY: 20”x2.125”Clincher –Chrome 58A Rear Axle (31 ½”, Square Drive)
1014E Spokes (7 3/16”, 11 Gauge, .120”) 91 Pillow Block Bearings (each)
1017A Rim Strip 91A Bolt, Nut, Washer for 91 Bearing
69 Fixed Drive Sprocket (7/8”)
TUBES ARE TIRES
62B Set screw for 69
4922 Tire –20”front 62C Keyway for Rear Sprocket
4922KV Tire –20”front –Kevlar 130 Axle Parts Set (102,105,109,113,146,59A,93D)
4923 Tube –20”front 59A Locknut - Drive Side
6023 Tube –20”front –Puncture Resistant 93 Spacer Washer - Inside for Drive Wheel
4938A Tire –20”front - SOLID
CHAINS
SEAT, SEATPOST, AND RELATED PARTS
4914A Chain Connecting Link (1/2”x3/16”)
4912V Seat (10”wide w/ springs –standard) 4914C Chain (Long for 32T)
6911V Seat (13”wide w/ springs –optional) 4914F Chain (Long for 36T)
4908B Seatpost (7/8”x .984" x 15") 4914EE Chain (Short)
7913A-V Seat clamp (under seat)
REAR CABINETS & BASKETS
3927 Rear Cabinet (22”x15”x16”)
7227-P Rear Flat Steel Basket (24”x17”x12”)
5927BLK-C Rear Wire Basket (21”x15”x9”, Black Vinyl)
Worksman Cycles / 94-15 100th Street / Ozone Park, NY 11416 / 888-3-WHEELER / www.worksmancycles.com
Other Worksman Bicycle manuals

Worksman
Worksman WTX Datasheet

Worksman
Worksman Eagle Lite User manual

Worksman
Worksman Port-o-trike PT User manual

Worksman
Worksman TT User manual

Worksman
Worksman INB User manual

Worksman
Worksman WTX WideTracker User manual

Worksman
Worksman MG User manual

Worksman
Worksman ADP-CB User manual

Worksman
Worksman M2626 Datasheet

Worksman
Worksman PORTOTRIKE PT, PORTOTRIKE PT2F, PORTOTRIKE PTCB, PORTOTRIKE PT2CB, PORTOTRIKE... User manual