moyes Conar HG16 User manual


Conar
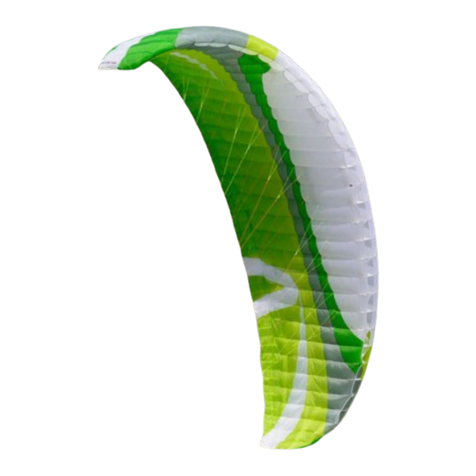
HANGGLIDING EMERGENCY PARACHUTE
Model Gores [n°] Weight [kg] Area [m2]
Conar HG16 16 1,68 22,36
Conar HG18 18 2,02 28,38
Conar HG20 20 2.58 35,11
Conar HG22 22 3.12 42,54
Congratulations for choosing an outstanding
product. The name ‘Conar’ comes from ‘Cono
ApicaleRientrante’ the Italian for ‘Reverse Apex
Cone’; this patented design gives extraordinary
performance to this rescue parachute.
IDENTIFICATION
The hangglider Conar has a black
eye at the end of the bridle, next to the
manufacturing information (date, model, size).
INTRODUCTION
The hangglider Conar rescue parachute is only suitable for
hanggliding; its design makes it unsuitable for any other purpose including Para
Gliding, Free Fall and Base Jumping.
In our opinion hangglider reserves need to be designed to open very quickly, even
at low descent speed, for two main reasons: pilots often fly close to the ground
and ridge rotor turbulence is a major cause of tumbling. Moreover, even if the
accident happens with some altitude, hangglider pilots may lose time trying to
throw the rescue with a broken hangglider.
FAST OPENING: to obtain fast opening times at low speeds while maintaining a
low sink rate, we used these design criteria:
a - Reduced Surface:under the same conditions a smaller parachute has a faster
opening time.
b - Low Weight:the throw is easier and the lines unfold faster; the reduced
inertia also helps the canopy to open quickly even at very low airspeeds.
c - Pulled Down Apex: increases the lift coefficient to compensate the reduced
surface and reduces the opening time.
2

d - Reverse Apex Cone: -
Conar patent – it increases
stability, further reduces
sink-rate by 20%, impact
energy by 40% and, on
average, opening time by
almost 10%.
The fabric cone inside the
Conar Apex forces airflow
alongside the cone and
then through a narrow slot.
The airflow is accelerated
over the upper surface
creating a “Venturi Effect”
which makes lift.
e - Packing system:the Conar has a very fast and reliable deployment. The
opening sequence is controlled by the packing (which is why the Conar must be
packed according to this owner manual). To avoid malfunctions the canopy
deploys in a strict order: first the central wind channel opens quickly and the folded
canopy corners open next. This is so efficient that once the lines are extended, the
canopy opens completely in just a few meters travel.
RELIABILITY: the fast and reliable opening of the Conar relies on the correct
opening sequence of “bridle-lines-canopy”. To reduce the risk of lines tangling or
releasing prematurely they are contained in a separate compartments of the
deployment bag with a light nylon sock holding the lower lines (which slides down
or splits on deployment). To reduce the chance of a line getting tangled there
needs to be a long bridle while to get a better sink-rate and stability there needs to
be long line, but to have a fast opening the sum of line plus bridle should be short.
The “line-bridle” resolves this problem by increasing the length of the bridle only
when is needed both reducing the chance of a line getting tangled and allowing a
faster opening time. The Conar bridle is made of braided Nylon®HT to better
withstand opening shock and possible damages due to the glider wreckages
during opening.
STRUCTURAL RESISTANCE: the Conar is a very strong, light parachute
system designed specifically for hanggliders. The Conar uses many sophisticated
materials including High Tenacity, low porosity parachute grade fabric, Kevlar®29
seam reinforcements and Nylon®HT lines and bridle for better energy absorption.
However, the Conar emergency parachute is not suitable for free fall terminal
speed(an unlikely situation while hanggliding if using proper hang straps). Free
fall parachutes operate at very high vertical speeds so the opening sequence is
delayed to reduce the opening shock. If the Conar were optimised for free fall use
it would not operate satisfactorily in hanggliding emergencies.
EXTRACTION: The Conar emergency parachute will fit a standard harness container.
3

AGEING: synthetic materials deteriorate with age, particularly after exposure to
sun and moisture. The Conar has been designed with UV protection by making
the protective bridle sheath and the optional outer containers from black-coated
fabric; also, the parachute is covered with an aluminium UV protection sheet.
However total UV protection is impossible and we recommend that the
parachute be inspected by the manufacturer periodically for premature ageing.
- - CAUTION - -
A parachute has a maximum lifespan even if it is carefully
maintained. The materials age invisibly and after 10 years it will not
be completely reliable and should be replaced.
A – Canopy E – Pull down apex lines
B – Leading Edge F – Suspension lines sock
C – Reverse Apex Cone G – Bridle
D – Suspension Lines H – Sheath bridle
4

OPERATING INSTRUCTIONS
Mount your Conarparachute into your harness according to the instructions of the
harness manufacturer. If possible use the original Conar handle. If you
have to use the handle that comes with the harness, attach it to the small loop in
the deployment bag. Remember that a long handle makes throwing difficult and
the risk of tangling increases.
The handle must not have Velcro hookssewn on because they could stick to the
lines and prevent the deployment bag from opening.
It is important to ensure the handle can be seen during flight, and be very easy to
grasp,with your thumb, in any situation.
After each repack it is mandatory to check the extraction while hanging in
yourharness:itis no use having agood parachute if you cannotget it out!
SINK RATE CALCULATION
Use this formula to calculate the height of a jump equivalent to your sink rate
under canopy.
- valid for Conar parachutes only -
meters = 4 x weight / gores2
Example: 80 kg hook in weight (if using a rigid wing add half of the wing weight)
and using a Conar PG16
Eq. height = 4 x 80 / (16x16) = 1.25 m
For this pilot, landing under a Conar HG16 parachute will be the same as jumping
down from 1.25 m (approximately 5 m/s).
It’s important to choose the correct compromise between opening time and sink
rate:
-a smaller parachute will open faster but its sink rate may be too high and
you may hurt yourself.
-if your parachute is too big the landing will be smoother but, if you are too
low, the parachute might not open in time
With the Conar there is no need to trade sink rate for opening time: the best
compromise is equivalent to a jump from 1.30 m, a sink rate that is perfectly
acceptable for the average pilot. The maximum “equivalent height” for a fit athletic
pilot is about 1.80 m and, excluding special cases, we suggest not to go below
1.00 m.
Choose the equivalent height which is acceptable for you considering your age
and fitness conditions.
5

DEPLOYMENT PROCEDURE
The decision to deploy your rescue parachute depends on the height you are
flying. If you are high and the glider is not badly broken perhaps you can try to
regain control of your wing, or you can wait a few seconds for a more favourable
moment with the bag in your hand. However, if you are low, every second is
precious! Beware of a severe spin: the centrifugal force could make you faint.
When you decide to go for the parachute, keep a cool head and execute quickly.
The way to achieve this is to practice regularly so all actions are instinctive.
The sequence is the following:
- Look at the handle.
- Grab the handle with your thumb and then grasp firmly.
- Force open the container by pushing the handle to open the container
and pull out the inner bag.
- Throw the parachute forcefully towards clear space.
- Get your feet out of your harness
- Stabilise your wing by controlling eventual oscillations
- Firmly hang onto the wing and prepare for touch down
1) - Look at the handle to be sure to grasp it first time, a second attempt
could cost very precious altitude.
2) - Grab the handle with your thumb because this is the only sure way,
particularly when flying with gloves. During each flight train by rehearsing these
two first operations, being extremely careful to avoid accidental deployments!
3) - Force open the container by pushing the handle,this enables you to
open the container progressively and completely with little effort.
4) - Throw the deployment bag forcefully into clear space extending the
lines quickly and minimising the chance of tangles. If, for any reason, the
parachute doesn’t open immediately shake hard the bridle to help it out. In case
the glider is still flying predominantly straight, it is better to throw backwards. If a
wing is broken you will probably go into a spin: throw the reserve in the direction of
the spin and towards the outside; the centrifugal force will help your throw. If you
get tangled in the glider, it is essential to look for clear space before throwing. If
tumbling throw forcefully laterally outwards, along the axis of rotation.
5) - Get your feet out of your harness to better absorb the landing impact.
6) - Stabilise the wing if you have time. After deployment of your parachute
you might end up in the rear of your wing and you will likely encounter a violent
spin you must stop by getting your weight closer to the nose of the hang glider.
7) - Hang on tight to your wing. If possible climb on the control bar, or the
keel if inverted. Prepare yourself for landing but do not shield yourself from the
impact with your hands. If your wing is not too badly broken up, try reducing your
sink rate by pushing the control bar forward with your feet. Be leery of harnesses
with dorsal plates that reduce the ability of your spine to flex absorbing the impact:
land with your body slightly sideway. Remember that you will not be able to control
your direction and you cannot choose where to touch down.
rescue parachutes are a possible chance of safety, not a guarantee…
FLY SAFELY!
6

PACKING DIRECTIONS
The hanggliding Conar parachute has a very easy
packing technique, which is slightly different from traditional methods.
As a quick and correct opening sequence depends on careful packing,
you are recommended to get an experienced rigger to pack it as described in
this manual, using the original Conar deployment bag
Incorrect packing would probably cause malfunctions.
If you have to pack your Conar yourself, follow these directions
VERY CAREFULLY
Theparachute shouldbe packed everythree months.
As rough surfaces or jewellery could damage the lines or canopy, take off
all rings, watches and bracelets. You will need two people, a long length of string
and an area that is clean, dry and smooth such as a floor, large table or sheet.
<< 1
The stretched line in the photo is attached to the
pull down apex (it is made up of three or four
parallel lines depending on parachute size). It
keeps the apex down and holds down the vertex of
the reverse apex cone.
Be careful:the apex lines must be inside the
canopy, as shown in the picture on the left.
2 >>
Thread the “long
string” through all the
loops that are
approximately at the
middle of
the Kevlar seam
reinforcements at the
top of the canopy.
Take care to do it
consecutively
counting gore by gore
to avoid missing one.
<<3
Make a knot to hold all
the loops together.
7

4 >>
Position the apex inside the canopy by gently
pulling the apex line while your assistant is
helping from the top.
<< 5
Pull the
light sock
right down towards
the bridle knot to
free the lines.
<< 6
Take two consecutive
lines on the canopy and
be sure they are free for
the entire length.
- If two consecutive lines
are free, all the others
will be too.
- If they are not free the
bridle went through the
suspension lines and
you will have to untangle
them: pull two
consecutive lines
sideways to guess
where the bridle is
tangled.
7 >>
Stretch back the nylon
sock; lay the canopy out
and keep the two ends
(bridle knot and string)
under light tension.
8

8 >>
Grasp all the suspension lines with one
hand and check if all the knots are at
the same height.
<< 9
Open the canopy by flaking the gores
consecutively while counting them one by
one. At the same time your assistant
should place one hand well inside each
gore and neatly lay out the upper part of
the canopy from the inside.
10 >>
Repeat number 9 to get it perfect.
After flaking all the gores, the canopy should
be as shown.
Count the number of gores.
<< 11
Flake half of the gores to the
other side as shown.
Check that the number of
gores per side are the same.
9

12 >>
Take one of the top gores (left or right
doesn’t matter) and open it to make the
wind channel, as shown in the picture.
<< 13
After this operation the canopy looks
like the picture.
14 >>
To increase reliability fold the
sides at 45°.
This will slightly delay the
opening of the corners, thus
forcing the inflation through
the wind channel.
The leading edge fold should
be in line with the wind
channel but not overlapped.
<< 15
Fold the outside edges onto
the wind channel as shown,
but do not overlap them
otherwise you will increase
the bulk.
10

<< 16
Fold the canopy in half
along the central axis and
open the mouth of the wind
channel.
To do this properly you
have to fold the canopy and
open the mouth at the same
time.
17 >>
After this operation the canopy looks as in
this picture.
Note the leading edge of the wind channel
is in line with the side of the canopy.
<< 18
Get the air out by pushing it towards
the leading edge (on the other end
there is no way out).
19 >>
Undo the knot and
remove the string
from the loops.
It's very important to
use a long string so
it’s never forgotten.
11

<< 20
Fold over the top 20 cm (8") of
the canopy as shown in the
picture.
21 >>
Carefully fold it again so
that the fabric remains
evenly arranged inside the
fold as shown in the picture.
<< 22
Make the first "S" fold
(make another one for the Conar 20
and 22)
23 >>
Make another "S" fold getting the forward
edges in line with the leading edge and
all the back edges aligned to make a
rectangle.
If it is not perfect, repeat the operation
from number 20 by unfolding and
beginning again at the top of the canopy.
12

24 >>
Lay the five flap inner bag on the floor with
the handle on the opposite side of the lines.
Check the condition of the four rubber
bands attached to the deployment bag and
replace if necessary.
Do not connect the bag to the canopy
with a string: it could get tangled during a
deployment!
<< 25
Place the canopy onto the bag and
thread the elastic string through the
eyelet on the opposite fifth flap - like the
picture.
26 >>
Pull the elastic string through the two
side flap eyelets.
<< 27
Pass the suspension lines
through the elastic string
making a loop of about 3 cm
(1 1/4 inches) as shown in the
picture.
(a small finger should be able
to go inside the loop).
To avoid any chance of the
lines getting tangled, the loop
should face you as shown in
the picture.
13

28 >>
For the 16 and 18 gore Conarparachutes,
take half the length of the lines from the
edge of the deployment bag to the nylon
tube (for the 20 and 22 gore models take
one third of the length) and fold the lines in
a figure of eight.
Take care not to twist the lines.
<< 29
Secure the first half (first 1/3 for the
Conar 20 and 22) of the suspension
lines with the two lower rubber bands
through the figure of eight loops as
shown in the picture.
30 >>
Repeat the operation with the rest
of the suspension lines up to and
including the lines sock. Secure the
loops with the next two rubber
bands.
As the Conar 20 and 22 have
longer lines there are three pairs of
rubber bands so you have to repeat
the operation once more to get to
the sock.
<< 31
Take the elastic string again
from the first loop on the
suspension lines and pull it
through the fourth flap eyelet.
14

32 >>
Secure the elastic string with a 3cm (1
1/4inches) loop of bridle, after folding it
as shown in the picture (one finger test
again).
To avoid possible tangling, place the
new loop away from you (in the opposite
direction of the first loop).
<< 33
Arrange the package so that the
canopy is completely protected by the
deployment bag.
34 >>
Fold the bridle a figure 8 and secure one
end using the side rubber band. (replace
it, if necessary).
The deployment bag is now ready to be
fitted into the harness, according to the
manufacturer directions.
MANDATORY WARNINGS
1
Once you have the parachute into the harness it’s mandatory to check you can
easily extract the deployment bag from the harness.
Hang in your harness and check the extraction!
2
The deployment bag is extremely important for parachute reliability:
use the original Conar deployment bag
3
Beware: if your Conar has a maillon rapide fixed at the end of the
bridle it is a paragliding rescue parachute, not a hanggliding one.
15

MAINTENANCE
To keep your parachute in optimal condition, a minimum level of attention and
maintenance is necessary by carefully unpacking, checking and repacking the
parachute every 90 days.
Repack your parachute immediately if damp!
Regular repacking every 90 days is the best way to become familiar with the
packing procedure and keep the parachute fully operational. In this manual we
tried to give you as much information as possible but cannot replace experience:
we still recommend that the manufacturer or an approved rigger pack the
parachute.
During normal use it's important to follow some rules:
•Nylon is very sensitive to UV rays, so it's very important not to expose the
parachute unnecessarily to sunlight. Be careful: a one week exposure to
strong sunlight may reduce the fabric strength by approximately 25%.
•Keep the parachute in a dry and cool place to avoid mould developing.
•When packing the canopy take particular care not to enclose any leaves,
twigs, insects or any kind of object that could damage the materials.
•Cleaning could be more harmful than the stain! Always handle the fabric
carefully and treat the smallest area possible. Most stains can be avoided
by immediately wiping the area with an absorbent cloth. Use clean
lukewarm water and sponge gently. If necessary, you can use a mild
neutral detergent; let it sit on the stain 3-5 minutes, sponge gently and
then firmer if needed. Never use full strength detergent. Rinse carefully
to remove any remains of detergent. Do NOT use bleachor any
products containing bleach, as it will affect the fabric strength! Do NOT
use any solvent, such as gasoline, acetone, trichloroethylene, mineral
spirits, paint thinner, petrol, etc... as they may damage the parachute.
•If the parachute gets wet or damp it must be repacked. Hang it up in a
dark room and let it drip dry and air completely before repacking.
•WARNING: if the parachute shows any sign of wear, fraying, or a cut,
scratch or tear, do not use the parachute and get it checked by an expert.
•Any repair must be made by the Manufacturer.
•Do not replace any parts with non-factory ones (especially the
deployment bag) because the correct working of the parachute system
depends upon the balance between strength, dimensions, elasticity and
aerodynamic characteristics of all of its parts.
•Should any problem arise, please write or call us: we are at your service.
1144 Botany Road Botany
NSW 2019
Australia
Telephone: +61 (0)2 9316-4644
Facsimile: +61 (0)2 9316-8488
Email: [email protected]

DISCLAIMER OF WARRANTY
It must be understood that the use of this emergency parachute is a
possiblechance of safety, not a guarantee of safety.
Taking into consideration the inherent risk in flying hanggliders, it must be
expressly understood that the Manufacturer and the Seller do not assume any
responsibility for accidents, losses, direct or indirect damages following the use or
misuse of the product. This parachute is provided “as is” without a warranty of any
kind. All express or implied representations and warranties are hereby excluded.
It must be clearly understood that this is an emergency system designed
exclusively to be used as a last chance to reduce the hangglider and pilot's sink-
rate after an accident during flight. It is not suitable for any other purpose and, in
particular, it is not suitable for paragliding, free fall or base jumping. It must only be
used by pilots who completely understand the characteristics and the limits of the
hangglider, harness and the emergency parachute in a hanggliding system.
Read this manual carefully but do not consider it exhaustive: it can’t be!
We do notguarantee results and assumes no obligation or liability
whatsoever in connection with the information given in this manual.
The Conar parachute is delicate and can be easily damaged or rendered
ineffective by accidents, alterations, modifications, mistakes, shocks, corrosion,
improper or excessive use, insufficient or improper maintenance and ageing, all of
which potentially cause malfunctions for which the Manufacturer and the Seller
cannot be considered responsible.
Any parachute may have a malfunction, fail to open in time or rupture at
excessive speeds. Even if it opens correctly the emergency parachute may cause
death or serious injuries to the pilot and other people as well as damage to
property. Remember that once the parachute deploys, you will not be able to steer
to control your direction.
To get a fast and reliable deployment it is extremely important to repack the
parachute every 90 days, according to this manual and using the original
Conar deployment bag.
Because of normal ageing any emergency parachute has to be periodically
checked by the manufacturer or an authorized rigger and, although carefully
maintained, it has to be replaced every ten years.
The liability of the Seller is limited to replacement of parts found upon
examination by the Manufacturer to be defective in material or workmanship,
within two years from the date of manufacture and which have not been caused by
accidents, tampering, ageing, alterations or misuse.
In any case, possible damages suffered by the Buyer and User shall be settled by
the cost of the above mentioned replacement.
The Manufacturer and the Seller cannot in any way be considered responsible for
deaths, injuries, material damage, or any kind of consequent damage.
With the purchase and/or use of the product, the Buyer and the User subscribe to
the above mentioned without recourse.
17

Packing List
date signature date signature date signature
18
man_Conar_HG_en 1.01
1144 Botany Road Botany
NSW 2019
Australia
Telephone: +61 (0)2 9316-4644
Facsimile: +61 (0)2 9316-8488
Email: [email protected]
This manual suits for next models
3
Table of contents
Other moyes Aircraft manuals

Popular Aircraft manuals by other brands

Quickie
Quickie Q2 Lite Construction manual

Roko Aero
Roko Aero NG 4 ML operating instructions

Value Hobby
Value Hobby EliteModels Proglide manual

ICARO paragliders
ICARO paragliders ICE user manual

Advance acoustic
Advance acoustic PI 2 user manual

Jonker Sailplanes
Jonker Sailplanes JS3 Airplane Flight Manual